game development! The art front of visual novels
Hello, we are i-BOOM.
With the progress of the times, personal game production has become easier than before.
The fun part of the game is the interaction. For games with plots, every choice may affect the development of the story. Visual novels are a very good example.
In this way, what i-BOOM wants to tell in the form of a visual novel is the wandering story of a thousand-year-old vampire picking up soul fragments for himself.
- This TIPS contains three themes: sharing the production process, using file objects to improve efficiency, and photo utilization skills;
It records the pre-production process of i-BOOM's production of a visual novel, as well as the techniques used in it. There will be three videos with more detailed explanations for comparison and reference.
【WIP】Story, copywriting and planning
What software can I use if I want to make a visual novel? The following are the choices of i-BOOM:
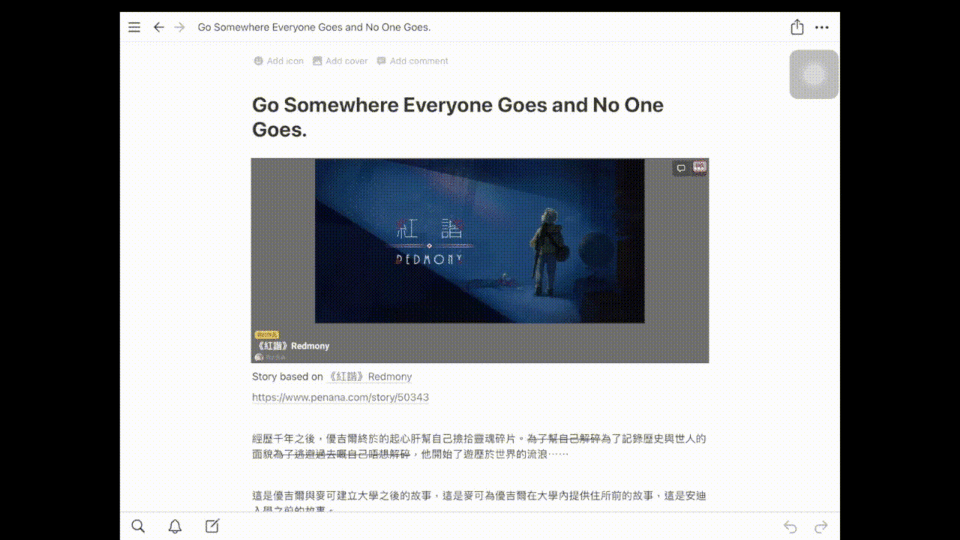
The first is Notion, which is used for data collection, project planning, and story design;
The second is Clip Studio Paint, which is used for concept art, character painting, and CG background;
The third is Unity, which assembles the elements that make up the game.
Notion is very useful for data collection, project planning, story design, and even collaborative work.
It is like a table of contents of a book, and each button in it will be linked to their separate page.
It can support uploading all kinds of files such as pictures, documents, videos, sound effects and so on. With the addition of different built-in data sorting modules, relevant detailed information can be unified and sorted on the same page, making this pre-work very interesting.
At the same time, drawing sketches and handwritten drafts with Clip Studio Paint also makes people very happy.
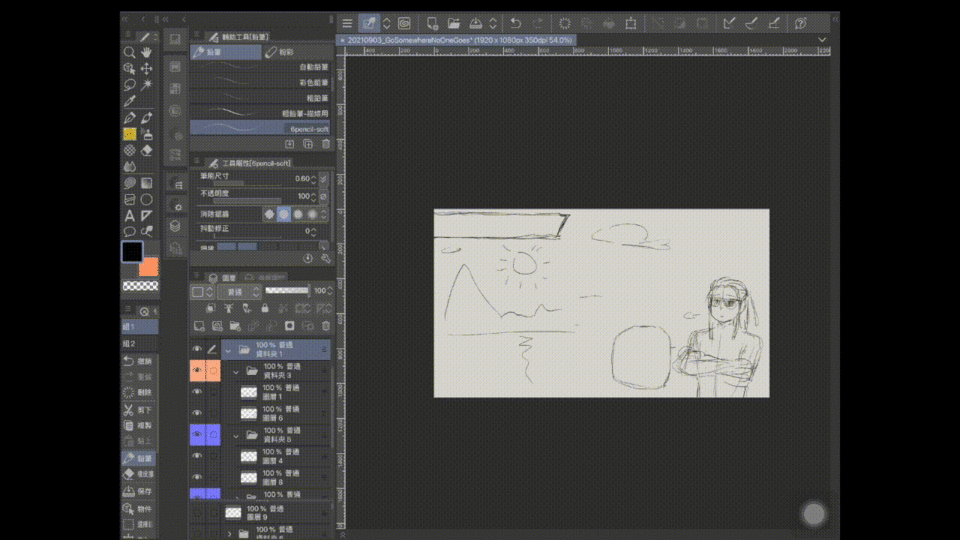
According to the size of the game screen you want, or open a canvas at will, according to the drawing habits. But if you are used to fine sketches, it is better to set the dpi above 200dpi.
After the picture is output, it can be uploaded to Notion in the form of adding pictures for the team members to discuss.
The temporary planning page now looks like this:
[WIP, file objects] Draw a character stand-up drawing
"Li-e" is a picture of a standing or sitting character.
According to demand, in addition to the common full-body pictures, there are also vertical pictures of the half-length or above the chest.
No matter what kind of vertical drawing you want, it is very important to complete a complete set of character drawing in the same file format.
If the game screen is 1080x1920px, the height of the vertical drawing must be at least 1080px, with a resolution of 300dpi or above. The width is set according to the needs, generally it will be about half of the height. If the vertical painting will be used for printing, it is better to take the canvas size three times the required size.
Litu needs to be output with a transparent background color, so choose PNG when outputting, and if it contains animation, output it as APNG!
APNG also outputs with low distortion and transparent background color, but it supports animation, and the output will not have much distortion like GIF.
Here, i-BOOM completed the main character drawing.
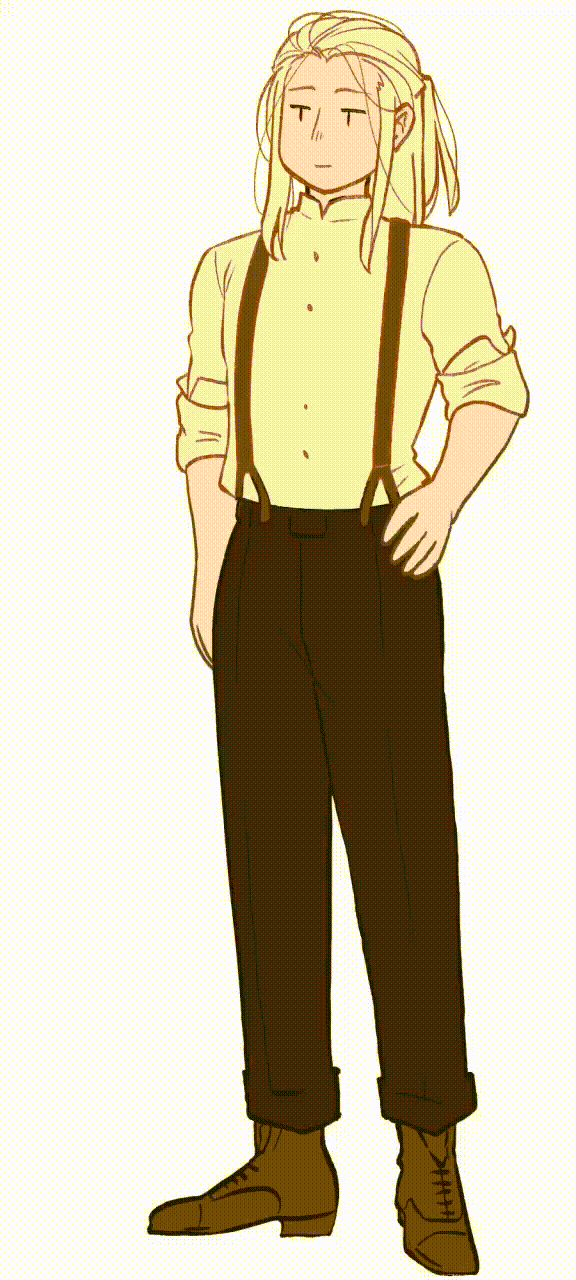
Generally, Li-e will have a set of actions[s], but because it is fun, he has four sets of actions[/s]. At the same time, because of curiosity, he has added animation elements to Li-e, so his mouth will move when he blinks his eyes and speaks. CSP can support animated illustrations, making dynamic expression production more convenient. Very fun and worth a try.
Litu will be equipped with different expressions. Separate the processing of "body layer" and "expression layer", so that the expression parts are placed in the appropriate folder, such as "eyebrows", "eyes", "mouths"...
Sometimes, a character has more than one set of actions, and the position of the head is also different. But in different actions, the face direction is similar, you can use the file object to save the time of drawing the expression again, and when you need to modify it, you only need to modify it once.
Copy the parts you want to reuse—they can be single/plural layers, or folders (here abbreviated as A)—and then select "Paste as File Objects" in Layer>File Objects (here Abbreviated as B).
Later, when layer A or folder is updated, object B will also be updated.
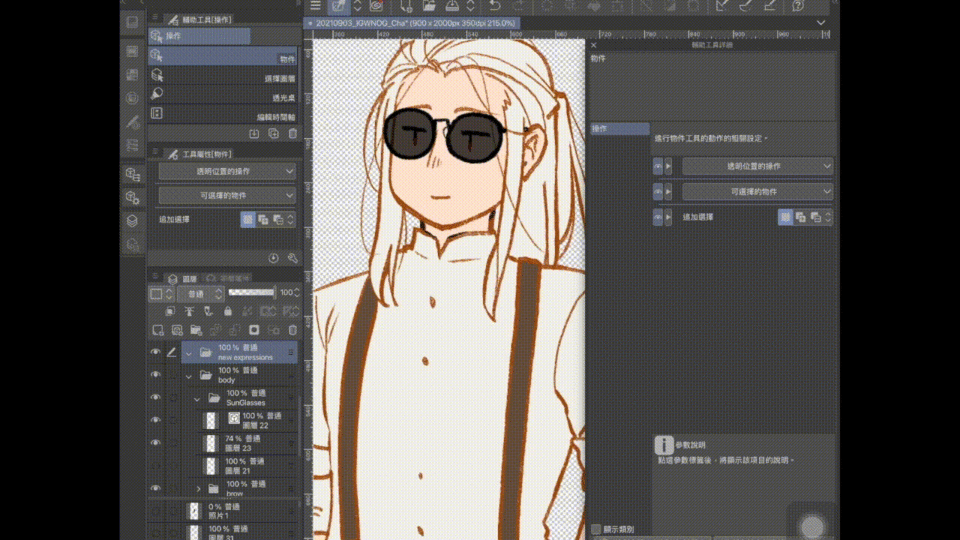
Archival objects can also be densely laid out like material objects, which can be used more when you need to make patterns for clothing or the like.
However, it should be noted that the edge range of the file object is the canvas size of the original file/layer, that is, when it exceeds the canvas range, the image will not appear in the file object; or when the canvas of the original file is larger than required, the file object’s size The edge size is likely to exceed expectations.
When there is more than one character in the story, it is necessary to make more than one stand-up pictures. hikaku-sitatter.com This website can provide a reference for height ratio. If the computer is running slowly and cannot use the built-in 3D model of CSP, you can try this method, and remember to turn off the reference layer after using it.
When making the second vertical painting, what needs to be considered is the difference between the two characters:
For example, the two characters are both adult males, but according to his personality and behavior habits, how will he stand? What is his profession, and is he good at disguising?
While considering these and even longer and careful points, I write down the sketch of the character and revise it quickly, try to color the character in a way that best expresses the character and the atmosphere of the story, and continue to revise it until you see it. The character fits the image in my mind. But remember not to overdo everything.
Let the characters move happily!
[Usage of Archive Objects and Photos] According to the background, it is processed for vertical drawing (1)
After completing the character drawing, it will be processed according to the state of the scene.
Open a new canvas and read the picture you want to use as the background picture.
This time I used a sunset photo taken in Hong Kong.
Different environmental colors will be presented under different situational lights, and processing can make the character more integrated into the time and environment he is in.
File>Read>Create File Object
Put the character's vertical drawing on the picture in the form of a file object.
In this way, you can make changes directly in the Lihua file (original file). After the original file is updated, the original object (original file) in the photo file (application file) will also be updated, and the effect can be seen immediately. Remember to save every time you make changes to the original file.
When the setting sun is close to sunset, the amount of sunlight and the scattering of light make the object look blue and orange. Using the blue on the photo as the shade will look good.
But if you directly absorb the color on the photo, when you return to the image file, the selected color will change back.
There are three solutions to this problem:
Use swatches to record colors, write down color codes, and absorb colors from photos
Here we will talk about the processing methods of "absorbing color from photos" and "using photos".
First copy the photo and then bitmap the layer, use the circle selection tool to select the desired color range, and copy it to the vertical drawing file
At this time, you can use the straw to choose the color you want.
Open a new layer on the vertical drawing folder, set it to "Crop with the next layer" and add colors, and find the appropriate option in the blending mode. This time I used "soft light".
The side backlight will make the characters appear edge light, add a mask to the layer, remember to select the mask and paint, otherwise it will erase the photo.
Use the transparent brush to draw the edge light according to the three-dimensional, and change back to the selected color when you want to paint it back. Use a spray gun to brush out the halo.
[Usage of file objects and photos] According to the background, it is processed for vertical drawing (2)
Adding the color of the sunset should be better, but choosing the color of the light according to memory may not necessarily be good.
It's a good time to send out the photos.
Select the appropriate part from the photo and paste it into the vertical drawing file. This time, we will directly use photo processing instead of color absorption.
Use the transformation tool to enlarge the photo to cover the vertical painting, reduce the transparency to adjust the position.
Set the photo layer to "Crop with the next layer" and change the blending mode.
The photo texture of the processed layer is a bit too clear, and the blur filter makes the texture softer.
Change the size and position again to the position where you feel "right!"
[Photo application, file objects] Turn photos into CG background
What I want to make this time is line-like, simple, and it feels like the background of returning to the memory from now.
Lines, fading, and the coexistence of the present and the past are relatively the most desired feelings.
Sometimes it is not always possible to know what kind of feeling you can use with what filter combination. Perhaps it is like drawing a brain map, simply expressing a single atmosphere with new tonal compensation layers one by one, and processing and combining them without affecting the original photos, and sometimes discovering new scenes.
In order to unify the style, first use the gradient correspondence to pave the photo with brown tones to create an old feeling, and then use a soft-edged eraser on the mask to wipe the sunset out to bring the photo back to reality.
This layer will be used to stabilize the style color.
Today's black and white photos always convey an "old" feeling. Pay attention to the black and white ratio and the resulting shape, pay attention to the relationship between the photo and the person, and binarize the photo.
Stack the above new tone compensation layers in different blending modes, and try to recombine their order until you get the desired result. After that, after the previous test, you probably know what kind of layer can make the desired effect, and you can make the effect you want more easily.
After a round of testing, I finally completed the desired background. If you want to apply the style directly to other photos, if the photo is created with a file object, you only need to update the photo (original file).
Create a new folder and put the original photos into the folder. Check the folder and click "Copy", "Paste as file object", and you will get a file object photo.
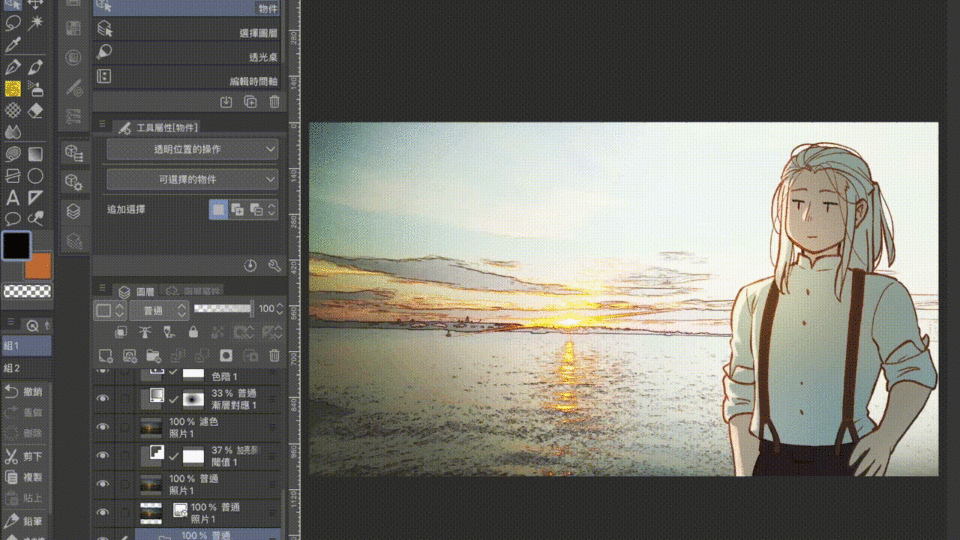
Use this file object photo to replace all the photos previously used for copying and pasting. You only need to check the file object and photo you have created to copy and paste. It is not necessary to "paste as file object" every time.
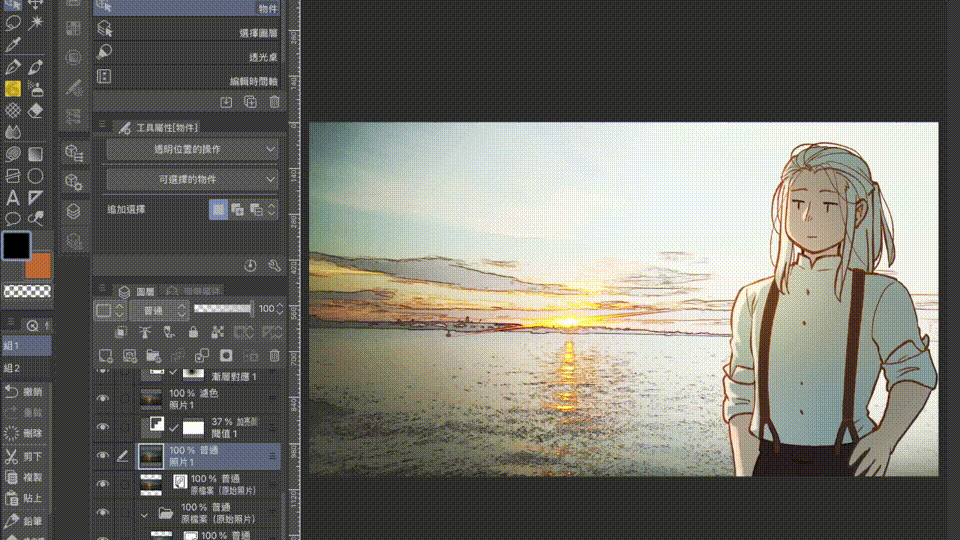
After the replacement is complete, go back to the folder used to put the photos, read and place the new photos, adjust the size and position of the new photos, and update all the file objects...
The new photo is processed according to the processing method of the first photo!

[WIP] I-BOOM's creation and development notes
In the process of creation, it sometimes becomes very important to record your own creative process, ideas, and skills.
Especially in the period of plateau and low tide, looking back and seeing my past efforts and original intentions, my strength seems to come back bit by bit, and I can continue to move forward.
It is also very happy to share your creation with the people around you. And when you look at other people's creations on SNS, you will often gain something.
When it comes to sharing the production process, what kind of way do you think of first? The methods are nothing more than the following:
(1) Take photos and screenshots
(2) Screen recording, time-lapse photography
(3) Live broadcast
Looking at these types of sharing methods from the perspective of "Sharing Purpose", there may be another view.
① In the process, simply share your production with others and maintain the interaction rate:
To share for this purpose, the most important thing is speed. Even if the work is not completed, it can be shared in large quantities, so "taking photos and screenshots" will be the most convenient method.
Taking photos and screenshots is the most traditional and easiest way to share. The screenshots can also be combined into a single-frame animated GIF or APNG to enrich the changes.
② After completing the work, simply share your production with others:
To share with this purpose, speed may be one of the important points, but for those who work slowly and produce fine goods, the greater focus is "the entire production process." So "screen recording, time-lapse photography" would be a relatively advantageous choice.
Screen recording and time-lapse photography seem to be similar things, but the results of recording in two forms are very different:
The results obtained by "time-lapse photography" are very neat, because it does not include work areas and pauses that may occur due to breaks;
The result of "Screen Recording" includes the work area. You can see how the software user uses the software, but it requires additional software tools and the file size is very large due to real-time recording.
Each has its pros and cons. For example, when making this TIPS, there will be more time to use the screen to record videos; but at the same time, time-lapse photography can be used to make up for the position where you want to quickly display the results. At the same time, if there is a limit on the length of the uploaded video on SNS, time-lapse photography will have an advantage.
③For the purpose of sharing the complete production process, with teaching or large-scale interaction:
To share with this purpose, "explanation" will become more important. Generally, videos made for this purpose will be screen-recorded videos that have been edited and accompanied by a large number of photos and screenshots, or in the form of live broadcast. Therefore, sharing for this purpose will be divided into two categories: video production and real-time live broadcast.
Video production emphasizes pre-preparation. The relationship with subtitles is more comfortable for people who are afraid of speaking. The interactive form is usually "message>message" or "message>next video";
The real-time live broadcast has a relatively large interaction with friends and fans, and requires immediate response. Most of them will cooperate with voice input, so those who like to talk can speak freely!
In the process of record creation and development, i-BOOM chose its own website as a base, supplemented by other platforms for secondary promotion, and also opened a sponsored coin slot for itself.
Have you ever tried to run around on SNS and saw a very good work-whether it is handwriting, painting, music or other forms of creation-but you can't find the coin slot sponsored by the author of the work? This incident is very painful, so in order to avoid the pain of others, let's open a coin slot for yourself!
If you are a more casual creator, you can choose a small amount of sponsorship to subscribe to support such as Ko-Fi in Europe and the United States, Likecoin in Hong Kong, etc.;
Creators who are confident that they can produce works on a regular basis can choose to subscribe to support such as Patreon in Europe and the United States, FanBox in Japan, etc.;
If you are a creator who wants to develop a project, you can choose to raise funds such as Kickstarter in the U.S. or Tsk in Taiwan...
Regardless of the purpose and method of sharing, the most important thing is your heart and happiness.
Although you want to get readers’ attention quickly when you share, don’t forget that “share with others” only occupies a small part of the creative process. I started to create my original intention.
Find a platform that you like and upload your own creations, and share your work!
Even if it is a relatively large production, such as game production, you will continue to publish your own work and creative experience on a fixed platform, and you will get not only new good ideas and communication partners, but also sponsoring others and being Possibility of sponsorship.





Comment