
Hello! I'm oodi and today I would like to share some simple tricks I use to color with crayon/pastel brushes and blend with CSP's default blender.
This trick is very quick and satisfying yet you can see the beautiful result immediately. All you need to prepare are just crayon/pastel/charcoal brush, and blend/blur tool.
Let's begin!
Workspace/Canvas
You can start with a canvas of 1000px or more so the texture of this brush doesn't spread too much and ruins the effect we want.
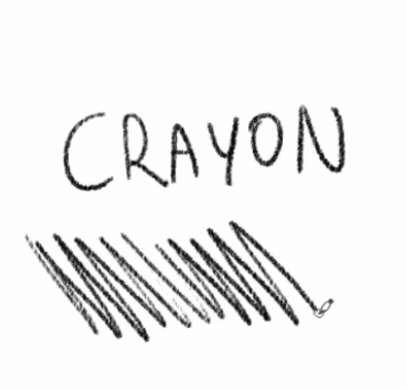
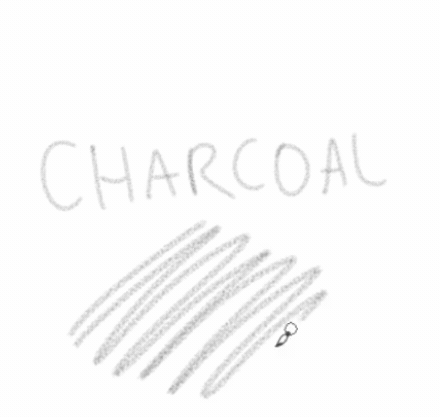
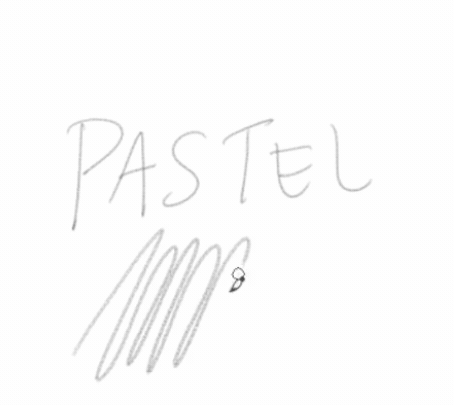
Differences Between Crayon/Pastel/Charcoal Brush
The difference between a default pastel brush, crayon brush, and charcoal brush is presented below. You can choose which works best for you to achieve the theme that you want. For me, CRAYON works best because it is perfect for colour blocking and shading at the same time.
Techniques
There are two main techniques I will use from start to finish. Yes, you heard that right. We only need two methods to complete a single beautiful artwork. Moreover, you can use these tricks everywhere and in projecting many textures too.
1. Line Hatch
The first technique is "Line Hatch." This technique is beneficial for drawing hairlines, shadowy texture, mid-tone colour, and floral patterns.
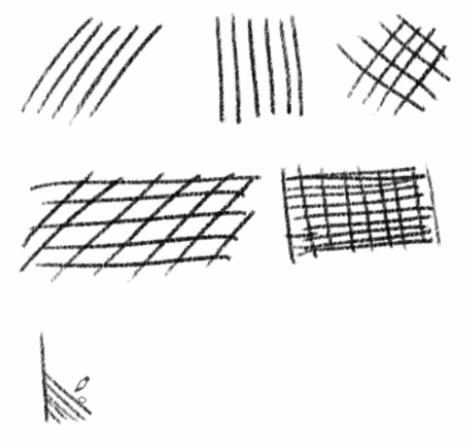

All you need to do is repeatedly draw the same line over and over with a crayon/pastel/charcoal brush. You can do it vertically or horizontally, according to your needs. Just make sure not to overdo it till the shape of the line is no longer exist.
2. Edge Blend
This technique emphasizes the use of a blending tool and a crayon/pastel/charcoal brush. To do this technique, you only need to have enough understanding of the basics of colour contrast. Here is an example.
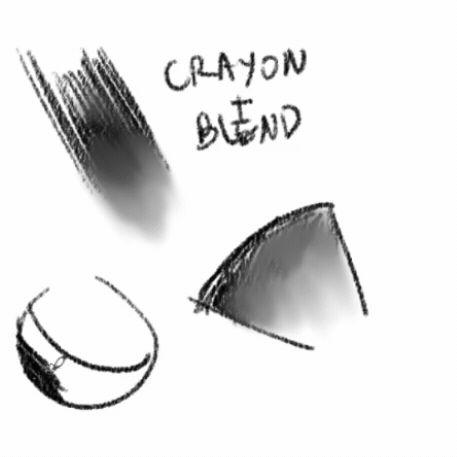

The application is easy and similar to a common painting technique. First, you need to create a shape using a crayon/pastel/charcoal brush.
Then get your blending tool ready, and smoothen the form until it spreads out nicely. You don't have to smooth the shape until it altogether removes the hard edge.
This technique aims to leave some hard edge as it is and create a new soft shade using a blending tool.
By using this technique, your artwork will look unique and unusually done. You can use this technique to strengthen your artwork's uniqueness and save your time lots more.
Example of applying the technique 'Line Hatch' for creating hairlines
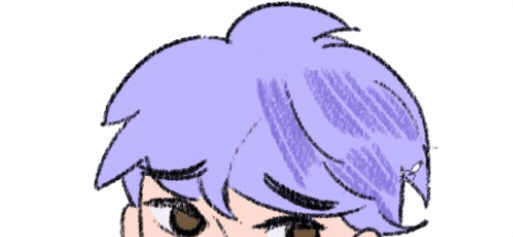
Example of using the technique 'Edge Blend' for creating the volume of the hair

Example of combining both techniques, 'Line Hatch' and 'Edge Blend' to create a detailed human hair

Progress Recap
A. Sketching
I am sketching
with ‘PASTEL’ brush
Size 30.0
B. Base Color
I am using 'CRAYON' brush for color blocking and shading. Try to use some color that has good contrast to detect the 'color holes' easily. The base color can be changed later, so don’t worry about the looks in the beginning!
C. Shading
The application of 'Line Hatch' and 'Edge Blend' techniques was done here! You can see how I did it in the video
D. Finishing + Paint over
I need to fill up all the necessary details in this section and do a little paint over the image! Paint over is done using 'Line Hatch' and 'Edge Blend' Technique!
More Useful Tricks
Are you not getting the result you want? Well, let me tell you more tricks:
1. Line Weight
For example, perhaps you're not getting the satisfying result with the "line hatch" technique. Maybe all you need to change is the line weight. So that you know, the width of the line DOES AFFECT the QUALITY of your linework.
Every line weight has different functions you know.
For shadow, use a relatively THICK line weight.
For a face line, use a relatively THIN line weight.
And many more combinations that I might have never thought of before!
2. Gradient Map
The second trick is to use a gradient map tool. If you ever found the result is dull, maybe all you have to do is a simple color correction from the gradient map! Here are the steps of how to apply it in your drawing.
Layer > New Correction Layer > Gradient Map
Select any gradient map you want, then apply to your drawing
You can also change the layer blending mode, reduce the opacity, etc.
Ending
Thank you for reaching this end!
The techniques are very flexible and can be applied to your artwork anytime you want! This is just my personal technique and some will be a hit and miss to you!
Thanks very much for reading, I hope the techniques and tricks can help you out ;)
If you have questions please do ask in the comment below and I will try my best to answer all of them!
Users who liked this post


Comment