
At the time of painting our drawings it can be a very relaxing task but also a long one if we patiently use the brush tool, and if we use the “fill” tool it can be confusing due to the sub-tools it contains. I will explain a quick way to color using the “Reference Layer” option that is used hand in hand with “Fill”, “Selection”, even with the “brushes”, those are the ones I use and I would like to show you.
When we see subconfigurations like those we get overwhelmed with not knowing how to use them or where to start. For this reason, I have made this tutorial based on examples of a drawing to apply everything possible and that you are understood and can love these configurations as I did.
In addition, I will teach you how to remove the white backgrounds from the "brush", such as roses, and in the end you can color and shade it quickly and easily.
REFERENCE LAYER
The reference layer is ideal if we work both with lineart and in "flat" (I will explain them in the course of the tutorial), it is ideal for works with several layers and designs.
-I must clarify that the "reference layer" must be placed in the lineart or in "plane".
To refer a layer we select the small lantern that is above the layers.
You can select multiple layers, even folders by holding down the "Ctrl" key and clicking anywhere on the layer to be referenced.
You can also select multiple layers by simply selecting the small box to the right of each layer.
You can also find it by right clicking on the layer you are going to reference and select: “Layer adjustment” and “set as reference layer”.
SHORTCUT - Reference layer
We go to “File” (it is located in the upper right), → “shortcut settings”. A new screen is displayed: “main menu” → “Layer” → “layer settings” → ”set as reference layer”
From our keyboard we crush the letter or character to configure. In this case I set it to the letter “N”.
Shortcuts a few more allies to make the job easier! Try it.
FILLING AND REFERENCE LAYER TOOL
I should mention:
1. For the settings to work, you must select the “lantern” (reference layer) in the fill sub tools.
2. The coloring must be in a "new raster layer" and it must be located below the layer we reference. Then you can change the order.
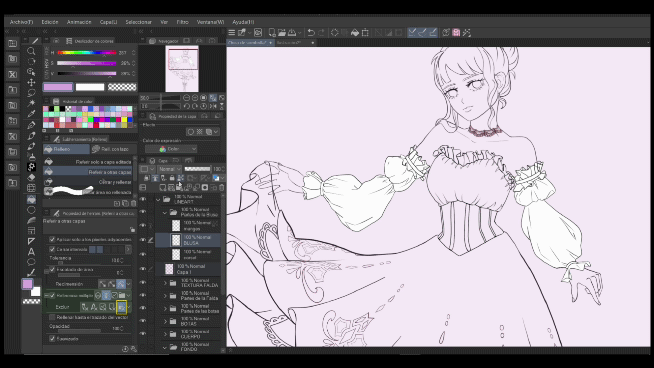
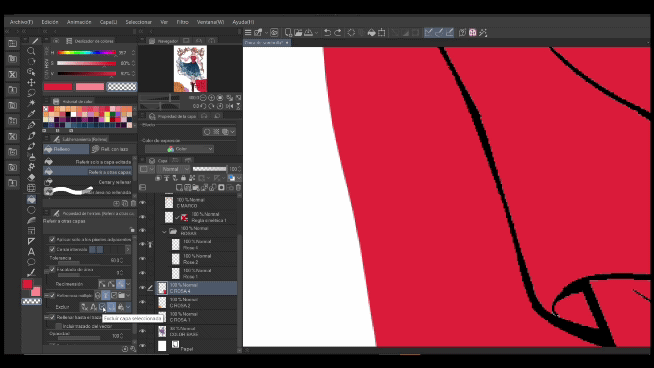
First what I do and recommend to do is create a background in our drawing. In this case the lineart is divided into several layers so I select all of them and refer them. Then on the "background" layer below it I'm going to use the "Close and Fill" sub tool.
All the spaces that are delimited by black lines will make the top place of the padding. And as you can see, between the blouse and the skirt, the space was filled in as it is a totally closed space. Don't worry! You can remove it quickly and easily. Using the fill tool “refer to other layers”. Yes! This tool can also become an eraser when we select the transparency. See how to set it up:
FILLING TOOL PROPERTY
1. Multiple reference
Let's start with:
“Multiple reference”: We found a subgroup called “exclude”.
If you cannot see them, you have to go to the key (sub-tool detail), → “Reference”. We can activate or hide it by selecting above the eye.
a. Exclude:
• Sketch layers.
• Text layers.
• Selected layer.
• Paper layer.
• Layers locked.
We can select more than one option or even not. It will depend on what we are looking to do to our drawing and I will explain it to you in an easy way so that you can apply it.
EXCLUDE SKETCH LAYER
This option hides the layer when we save the file, that is, it will not be shown in the final result. It is used to hide the strokes of your drawing. I should mention that it is only used in raster or vector layer.
I don't usually use this option with the “reference layer” option, as it will be hidden. I wanted you to take it into account!
DELETE TEXT
It must be established as a reference layer where we have the text, we can identify it with an “A” icon. Then we create a raster layer at the bottom and paint.
When we do not have “Exclude Text” activated:
All space surrounding the text is filled. We can notice it by lowering the opacity of the text layer.
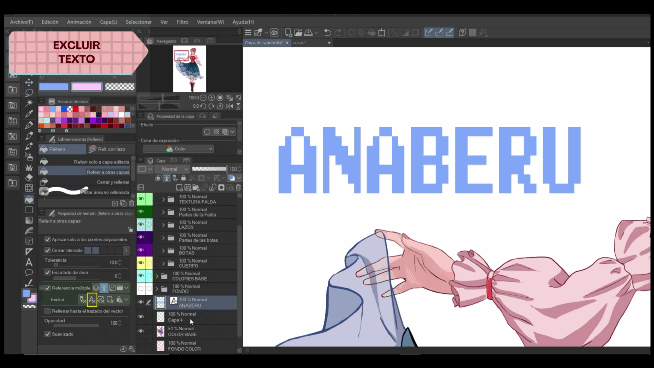
When if “Exclude Text” is activated:
The entire layer is filled, excluding the text as it says. If we lower the opacity we will see that it filled the area below the text. It is as if the text did not exist!
Quick note: we can't use “fill” on the vector layer.
EXCLUDE SELECTED LAYER
Quick note: we can't use “fill” on the vector layer.
If this option excludes the selected layer, will I be able to paint? Actually yes. We can fill normally. Moreover, what it means is that it will ignore what is painted inside the layer that we are going to edit.
Example:
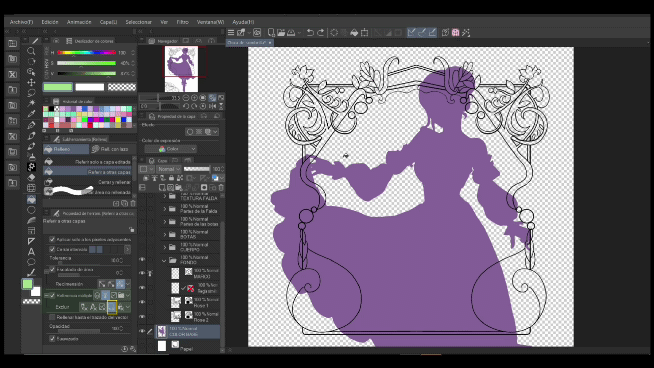
-Referred layer: “FRAME”.
-The layer that I am going to edit is “BACK COLOR”, where I have the figure of my character.
When “exclude selected layer” is NOT activated: fills up to an outline: the frame and the color.
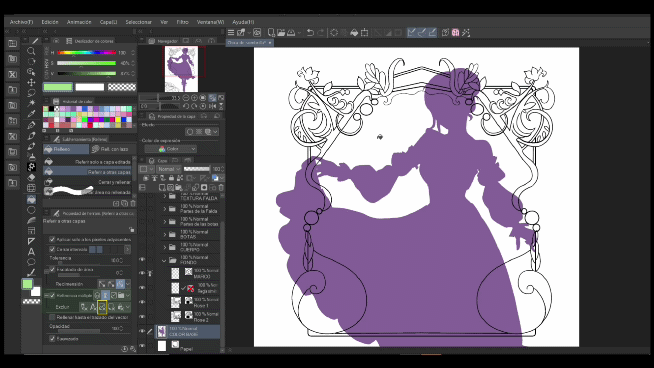
When “exclude selected layer” is activated: all the space delimited by the frame is filled and the purple color is ignored, it is as if we were painting over it.

EXCLUDE PAPER LAYER
When starting a new project or illustration in Clip Studio Pait, a totally blank layer called “Paper” is added by default. Therefore, when the "exclude paper layer" option is ON, it is as if you were painting without the blank layer, and only what is delimited by lines, figures or color is filled; that is, only the empty spaces.
EXCLUDE LOCKED LAYERS
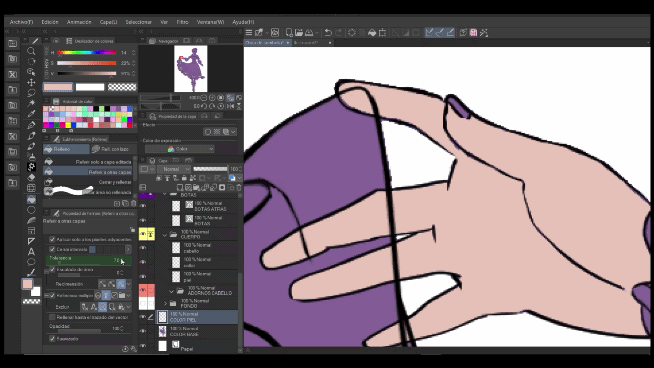
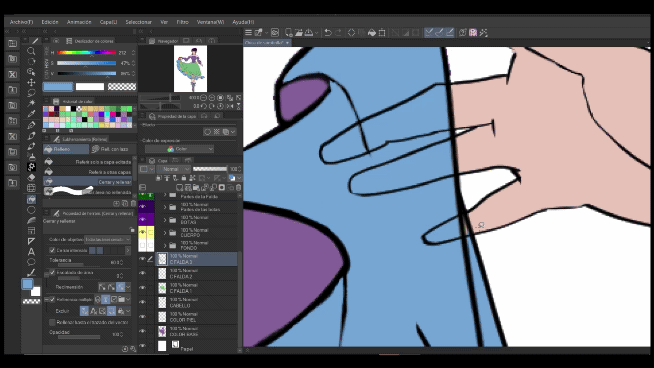
The layers that we select with a padlock (“Lock layer”) will not have any change if we paint on a different layer. Example:
-Lock layer: “BLOUSE”,
-In another rasterized layer I color. As we can see, everything is painted except the sleeves of my drawing. That easy!
If we lower the opacity of the referenced and locked layer, we can see that it did not affect the lineart (arrow), and the rest of the non-locked layers were filled below the lineart (circle).
How does the Reference layer work?
Now let's understand a little more about how the “Set as reference layer” option works.
When establishing a lienart layer as "Reference Layer" we must take into account that the spaces of our drawing are closed as best as possible.
Go for it!
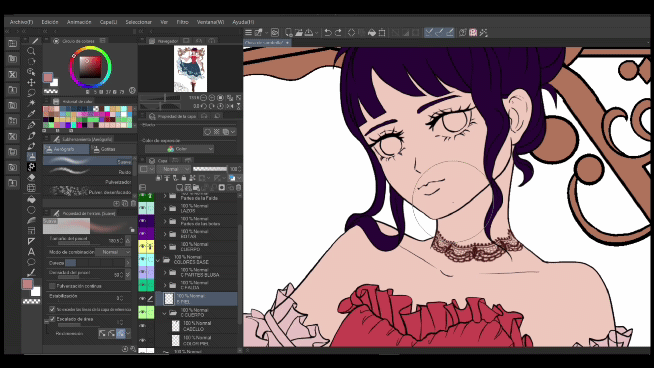
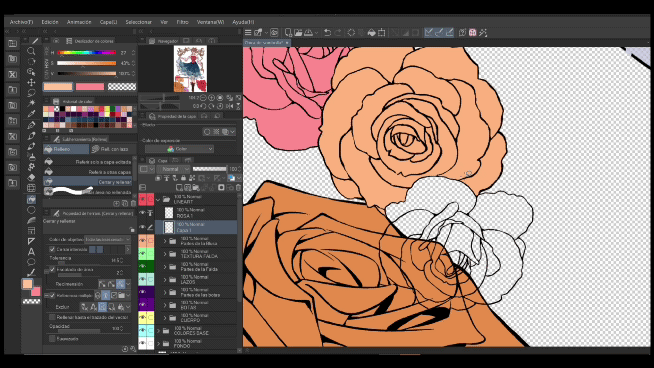
In this case, the lineart that I used is grouped in different layers by sections of my drawing, that is, “the skin” is in one layer, the blouse, portions of the same dress, boots, hair, frame, flowers; they are on separate lineart layers. I like to work like this so I can color. And if you use the lineart in 1 or 2 layers, however you like, perfect! There is no problem in the explanation that I will give below.
When we establish a layer as a reference, it means that it is the layer that we are going to take into account to work with.
Example:
• I set the reference layer to “SKIN” where the lineart is.
• If I hide the other layers we can get a general idea of what the “reference layer” option will look like.
• Then at the time of painting, since there is no totally or partially closed space, the entire layer will be filled.
• What we must do is establish as reference layers the areas that delimit the “Body: hair, necklace, skin” layer. This will depend on how you use your lineart.
• In my case, the “BODY” layer is limited to the blouse and its sleeves, and to the hair. Then I will also set the “Blouse” and “HAIR” layers as the reference layer, to be able to paint because it will be established as a closed place.
IN SUMMARY: before referencing a layer make sure there are no long spaces between lines
2. Close interval
We can use this option when there are spaces between the lines to prevent the fill from being interrupted or spread throughout the layer when painting.
These spaces between the lines are called gaps, and the larger the gap, the greater the value that we must put in the interval so that it is filled. By increasing the value it is as if we were drawing a line that would close the gap.
if it is a very large value we can determine a number by clicking on “>”.
2. Tolerance
Formerly known as “color margin”.
I'll explain it this way: Tolerance refers to the amount of color that will spread. A small value will fill a smaller space, a much larger value will stretch much further. As simple as that!
Small values are used in small areas, and the opposite in large areas. It's useful for filling in those white pixels at the edges of the drawing.
3. Area escalation
This option may be hidden. We can show activate it in “sub tool detail”, → “fill”, we select the eye in the two options:
-Area scaling
-Resize.
Area Scaling: Can go from -20 to 20.
Resize: is the shape it will have when enlarging or reducing the colored area.
a. Square expansion: the edges are going to be pointed.

b. Round expansion: the edges are rounded.

c. To Darkest Pixel: Fills the entire dark line of the lineart.
You can set a value from -1, 0, 1, up to 3, depending on the width of our line, and if we want it to fill below the line. I recommend using "To darkest pixel" if the lines are jagged because even if you have "area scaling": 10, the color will stay outside the black line and won't spread like a. and b.
CLOSE AND FILL on Reference Layer
The options and use of “tool properties” are similar. I will clarify some points and how you can use this tool that is the same as the “lasso” option, which as its name says: closes and fills the delimited space.
We must select the entire shape that we want to fill, because if a small piece is missing it will not be filled.

We can use it to close small areas. Even those that have very small areas.
It may happen that closing and filling the entire figure does not paint some areas. We can play again with tolerance. As you can see the figure is very small, so I lowered the tolerance level from 60 to 30.
PAINT UNFILLED AREA
If you want to avoid painting blank spaces that were not filled, this function is ideal. It works as a brush to fill in places that are usually close to the lineart and were not painted, this can be due to the "softness" of the brush or fill.
REFER TO A VERTOR LAYER
We can also use the "reference layer" in the Vector layer which is great for drawing and modifying the line, shape, even the brush; this roughly. (You can find many tutorials here at Clip studio Paint).
Within the properties of the “Fill” tool we find the option “Fill up to vector path”.
Let's see the following first:
To know what the "vector path" is about, we are going to select "Operation" → "object", and select on the vector line of the drawing and a line with small points will appear, this is referred to as the vector path, and when we fill it only fills up to here.
Notes: Vector tracing is used to modify its shape.
The coloring only fills up to the inner edge of the vector skeleton.
4. Antiderrame
“Do not exceed the lines of the reference layer”, we can activate it in “anti-spill”.
This setting is included for brushes. What this option will do is not paint beyond the line as long as the brush tip is within the area we want to paint.
We can activate it in “anti-spill”.
If we go over the line, the color will too.
Note that if there are open spaces between the lines, the color will spread to the other side, this could be a small disadvantage.
If we want to visualize the tip of the brush. Let's go to→ File.→ Preferences.→ Cursor.→ Brush Size and → Tip.
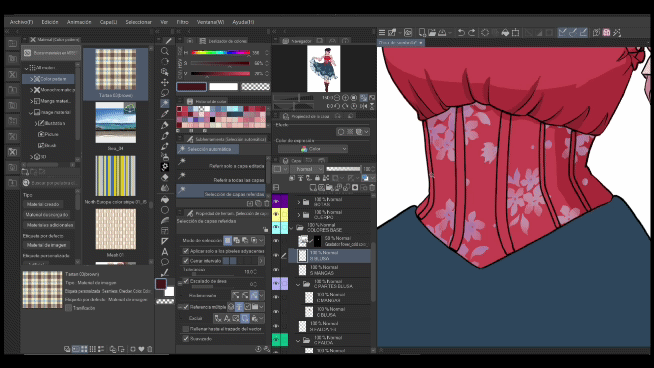
5. Object Color
I will indicate this option that can be useful to mark the shadows of the drawing.
• We are going to use the “Close and Fill” tool.
• Object Color – All closed areas, including transparent ones.
You must fill inside the color layer, in my case BLOUSE, to make the shadows and be able to paint freely. Remember to reference the lineart layer.
6. Smoothing
There is an option within the tool properties called “smoothing”. When it's off the lines will be more pixelated or harsh, and when it's on the lines will be smoother.
When it is a smooth line, it is more likely that at the time of filling there will be pixelated spaces or an opaque color around the line.
You can use this option for shading without fear of going off the line.
Note: Keep in mind that “exclude layer from paper” must be activated in order to fill.
Things that can happen to us when filling out a drawing.
If we forget or mistakenly select more than we should. Here's the quick fix:
• We establish the lineart as the reference layer.
• We select “Refer to other layers”.
• We place the filling in transparent mode
• We select the layer where we color, in this case: “C PINK 4”, and fill in the outside.
• We must select “exclude selected layer”.
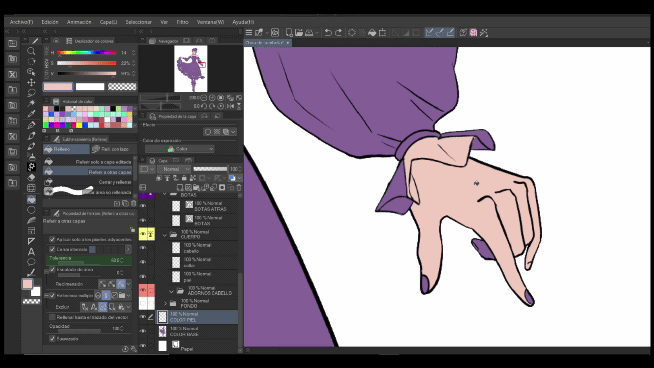
If for some reason you are left with small lines like the ones below, you already have the solution.
These little lines left are:
• Due to the use of smoothing.
• "Exclude paper layer" was selected
SELECTION OF REFERRED LAYERS
Reference Layer Selection is a sub-tool of “automatic selection (magic wand)”.
If we use the “refer to all layers” tool with a “multi-reference” of “all layers”, the selection takes into account coloring and lineart, making the selection cut off even when there is a color change or even a stroke
"Selection of referred layers": when selecting an area, the top limit will be the line ignoring the color above it
If we want to select more than one zone, we press the “SHIFT” key. If you want to delete an area marked with the magic wand, press "ALT".
It is useful for placing textures or backgrounds, or any other detail.
Another way to use the magic wand or “selection” sub-tool, and in the event that our drawing has several lines that divide the drawing, is to click on the outside of the drawing. Then we select "invert selected area" and that's it.

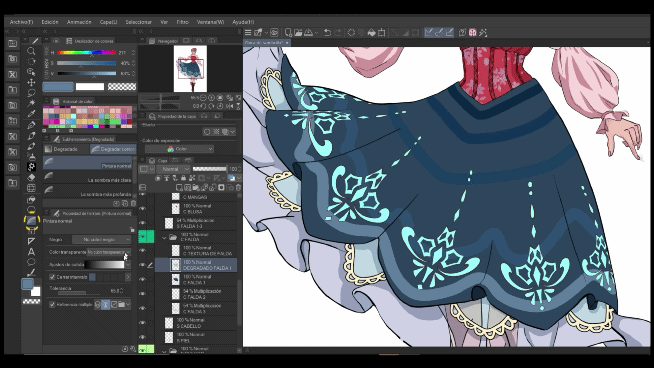
DEGRADED
You are going to love this tool.
• First make sure you set the lineart of whatever you want to color as the reference layer.
• Second, on another layer you are going to use a “brush” (I recommend “G pen”) and you are going to set it with a “soft” of: nothing; that is, the most pixelated.
• You paint inside your drawing. The directionality of the lines will depend on the style or shape of the drawing or the result you are looking for. I recommend you do it without leaving the lineart.
• Third, you select “gradient” from your toolbar. Then “outline gradient” and “normal paint”. You can handle these settings:
Fourth, click on the spaces between the colors that you set. The colors mix giving us a nice gradient. Clever! An incredible gradient is made.
Shading:
If you want to apply a shadow. You can use this option:
• “Close and fill”
• Settings: select “ink”. Here we have “opacity” that we can modify, and also “blending mode”. Set the blending mode to “multiply” and lower the opacity.
EXTRA POINT
As we already know we can use any brush, fill tool, and transform it into an eraser by pressing on "transparency". This will help you a lot.
I want to show you how to apply color and shading with the “reference layer” option in Clip Studio Paint's own “brush” material.
Material → Images Material → Brush.
To add a brush, we select and drag to the canvas
Important note: WE CANNOT PAINT OR FILL with or without reference layer.
The material comes default with a transparent background and black on the edges. I want to show you a quick and easy way to remove the background.
I want to show you a quick and easy way to remove the background.
1. We right click and select "rasterize"
2. The “expression color” setting appears. We choose “color”.
3. It becomes a fully rasterized layer.
4. We choose “fill” and “refer to other layers”.
5. We switch to transparency.
6. We select “Exclude paper layer”.
7. We must be careful with the scaling of the area, it can be from 0 to 1. Recommend these configurations.
8. We have pressed the paint pot and we drag our stylus or mouse so as not to erase one by one.
Another faster option is to deactivate “apply only to adjacent pixels”, what will happen is that the filling process will be applied to the entire layer that has the same color.
We can paint normally with the steps and tips mentioned above.
I like to use this option because when I shade the drawing I can use the “do not extend reference layer lines” option to make the process quick and easy.
DECORATION BRUSH
We can also apply it to the “decoration” brush. Although we can choose the color and the border from our color palette, when doing a reference layer shader, it is not possible.
NOTE: The color goes to the edge of the drawing, it is like a large brush that has the entire figure as its border, including the background; something like this is how the reference layer sees it and that's why it only paints on the outer parts.
We are going to follow the steps of the previous point: EXTRA POINT.
If we want to prevent the color from altering the adjacent one, in the case of using different shapes on the same layer, “exclude selected layer” must be selected.
Because if we have “exclude paper layer”, the color will be shared with the adjacent color.
GENERAL COLORING
This option will help you to quickly color your drawings.
You just have to do the following:
• Refer the lineart layer.
• I recommend you to select with the wand the figure that you are going to fill so that the color is only established here.
• Go to “edit” in the toolbar at the top.
• Select “coloring” → “general coloring”. We wait a moment for the program to process the information.
• And a new colored layer is created.
COLOR: Apply selected colors
If we want to choose the colors, we can do the following.
1. We reference the lineart layer.
2. In a new layer below, we color quickly with the tones that we would like.
3. To make it only affect the color layer, select outside of the drawing and then invert the selection as seen above.
4. Select the layer where the coloring is.
5. Go to “edit” → “colorize (technology preview”), → “apply selected colors”. We accept and wait a bit.
The result is great! You can visit the video to see some color modifications.
REFER TO PLAN
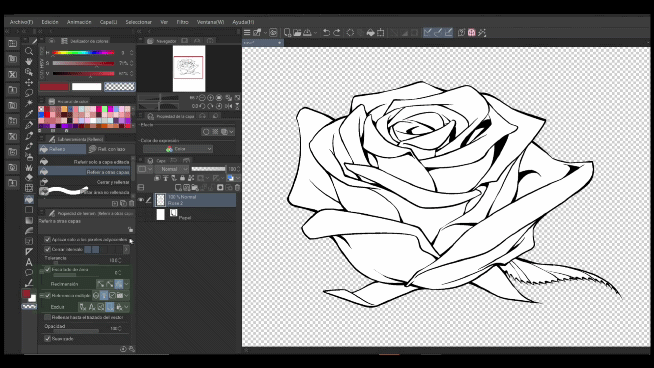
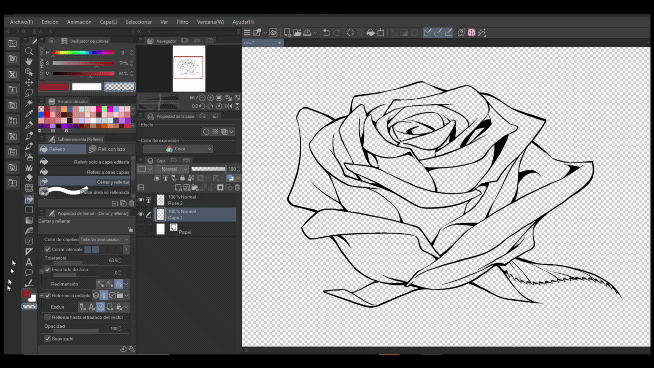
We can also color “flat” with the reference layer. That is, a drawing without lineart. Example: the layer called “rose”, “sunflower”.
1. We create a new raster layer and place it on top of the “PINK” layer.
2. We color with an airbrush, it does not matter if you go out of the drawing.
3. We set the reference layer to “PINK”.
4. We select “fill: refer to other layers” and place it in transparency mode.
5. Take into account the following settings: In “exclude”: “do not refer to selected layer”.
6. And we fill in the “PINK COLOR” layer
7. We can play with the “area scaling” with larger values, 1 to 3. It creates a nice effect.
6. And we fill in the “PINK COLOR” layer. And ready.
7. We can play with the “area scaling” with higher values, 1 to 3. It creates a nice effect.
FUND
To apply a background:
We use: refer to other layers.
We establish as reference layer: "BACKGROUND"
We fill in one layer below all of our strokes.
We deactivate: "apply only to adjacent pixels" this will paint the entire drawing.
Area Scaling: -20
Resize: to the darkest pixel
Exclude "Paper layer"

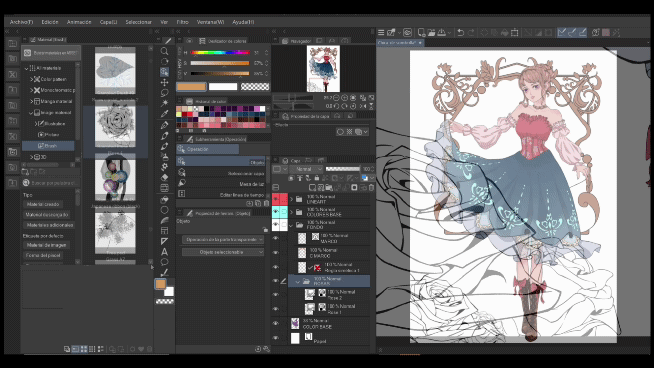
FINAL SKETCH
That would be all.
It was a tutorial based on a drawing. The theory is good to read and understand, but we must also apply it and what better way through a drawing with examples.
Thanks for getting here.
Users who liked this post


Comment