
Introduction
Hello everyone, welcome to this exciting video tutorial on handling 3D models in Clip Studio Paint in hierarchies. In this video, we'll explore step-by-step how to map 3D materials, establish object hierarchies, and make the most of the nexus and articulation point tools. If you've ever wondered how to make your 3D models move fluidly and have additional materials follow your model and integrate seamlessly into your illustrations, you've come to the right place! With a clear and detailed explanation of hierarchies, we will learn to organize the elements of these hierarchies, allowing us to control movement efficiently with additional recommendations, practical suggestions for working effectively with hierarchies and everything you need to know in this guide to Take your characters to another level with this powerful tool.
Note: The use of hierarchies in Clip Studio Paint is valid for version 2.2 onwards.
Video tutorial
Where to find the object hierarchy?
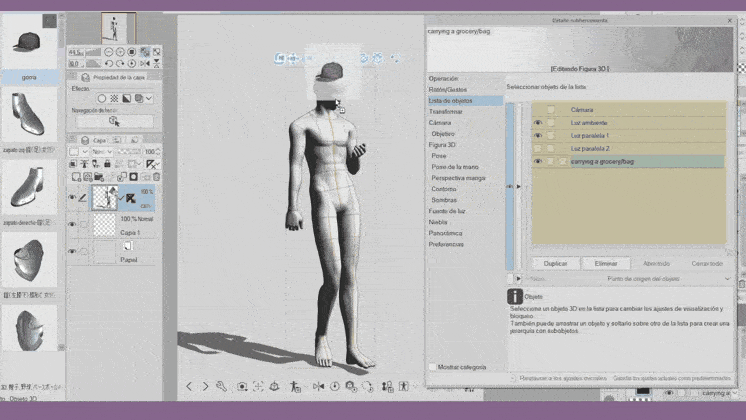
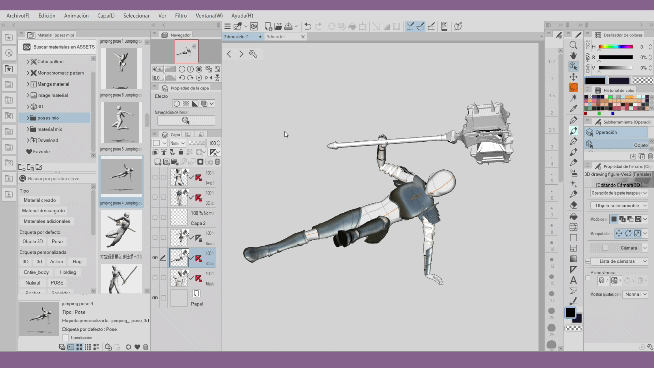
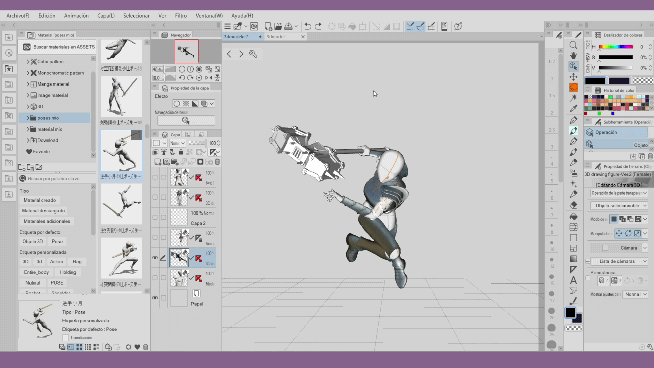
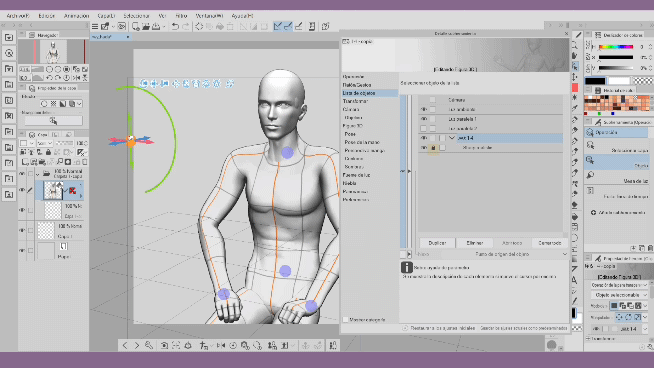
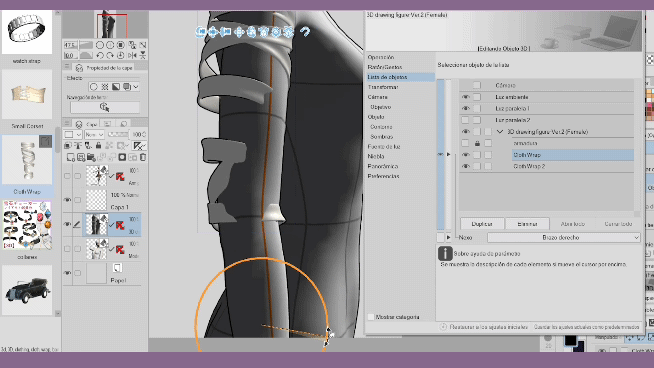
To begin, we assign our 3d model, in window → material → 3D material.
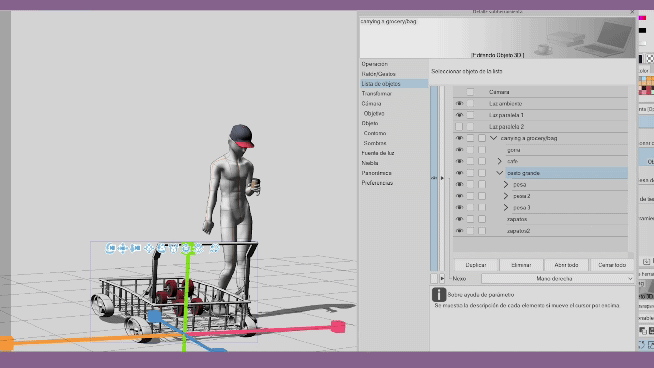
As a second step, we select the wrench and a pop-up screen immediately opens with the “object list” option, showing the 3D materials that the layer has.
When we add more materials the list increases in a chain, remember to be on the same layer.
Hierarchies of 3d objects.
Before starting, let's remember that in versions prior to 2.2, when the 3D model changes its position, it moves as is and the other elements remain in place. To establish a hierarchy, this will depend on what you want to achieve. As you can see the 3D model moves without the other elements.
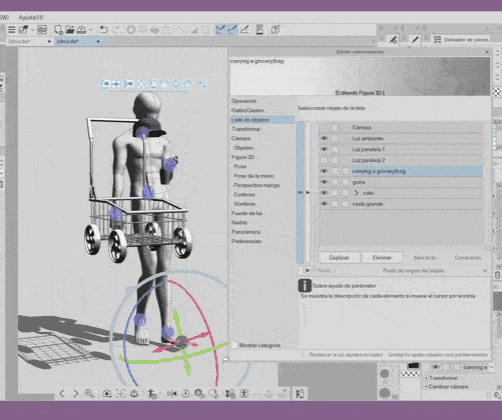
To add 3D objects to a hierarchy, we select the element and move it within our 3D model. Make sure you are on the same layer.
And if we want to remove that element from the hierarchy, we just select it and move it until a red box appears.
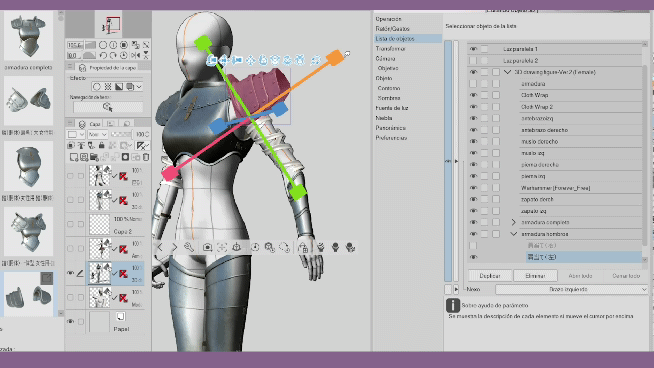
Hierarchies
Hierarchies are structures that have an order, the one with the highest rank will have priority over the previous one. We have a “father” (fuxia color): which corresponds to the central element, a “son” (blue color) and the “grandson” (green color): they are the sub-elements. Grandchildren can have more sub-items. And so on.
If I move the “parent”, all the other elements that follow it will continue their movement, like a chain.
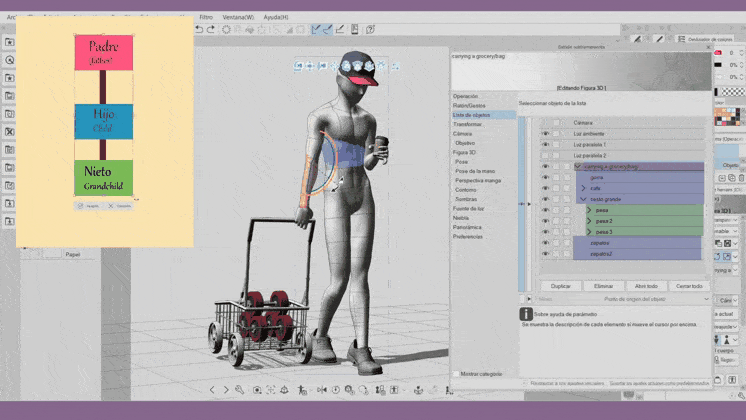
If I move it from a “child” anchor point, the grandchildren will follow the movement, but the previous one will remain static.
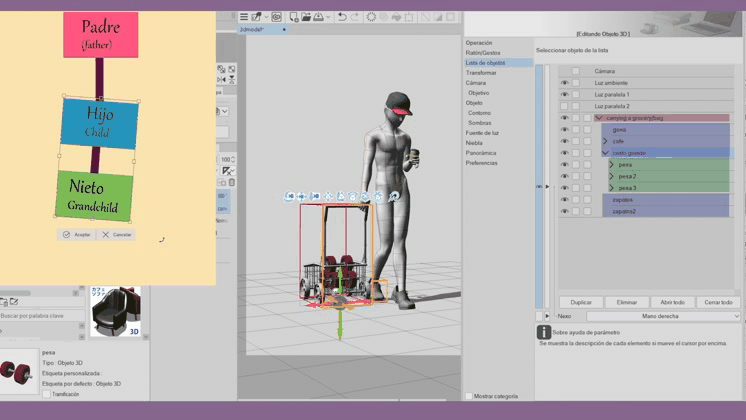
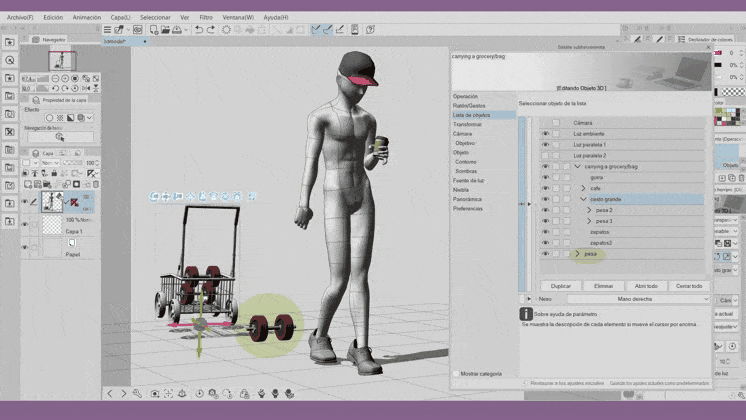
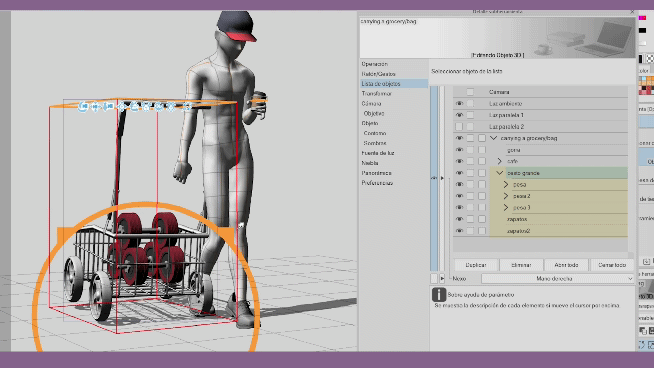
Note: elements that are not within the hierarchy will not have movement. Example: the case of the object “pesa” that is outside the hierarchy of the object “large basket”.
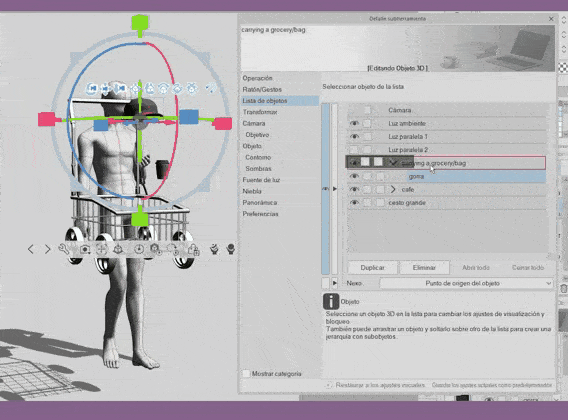
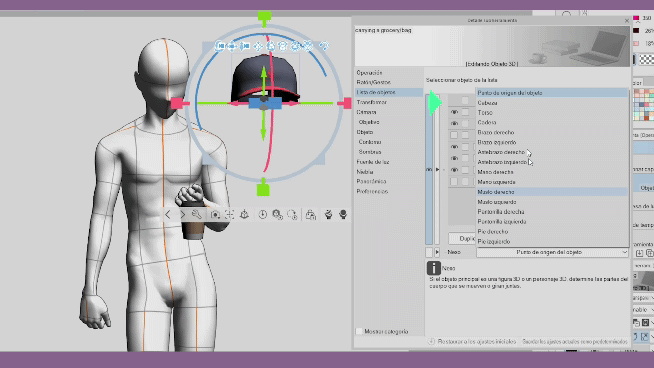
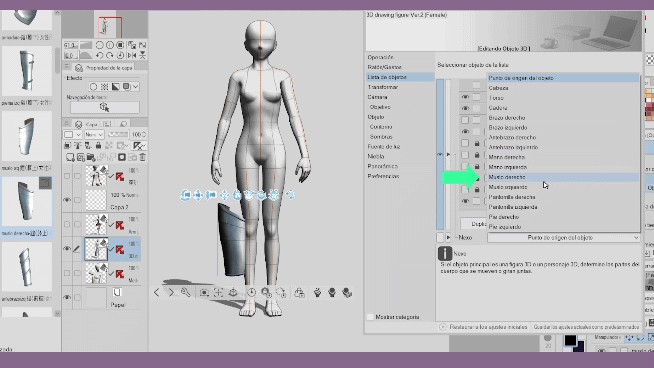
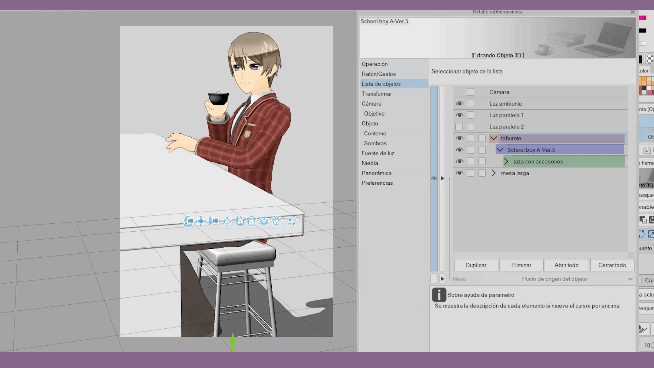
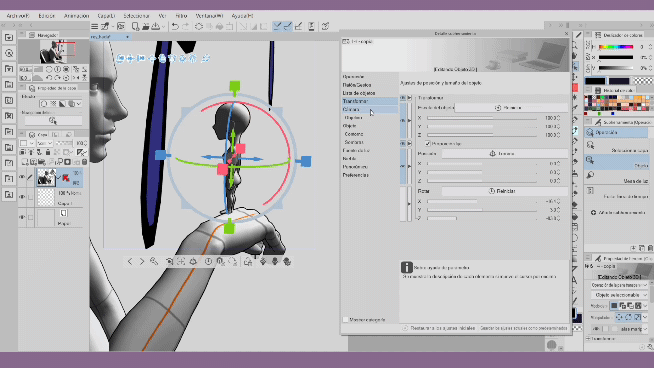
Append elements to the 3d figure
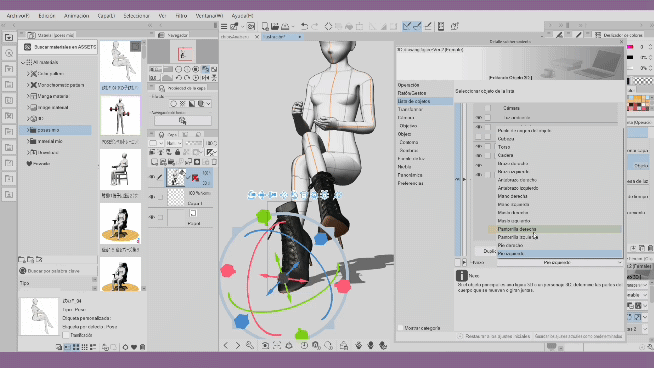
When the elements are within a hierarchy, the “link” option is enabled, which will display a list of articulation points to link to the 3D model.
Here the list:
1. Head
2. Torso
3. Hip
4. Left arm.
5. Right arm.
6. Left forearm.
7. Right forearm.
8. Left hand.
9. Right hand.
10. Left thigh.
eleven. Right thigh.
12. Left calf.
13. Right calf.
14. Left foot.
fifteen. Right foot.
Please note the right side and the side of the 3d models.
So:
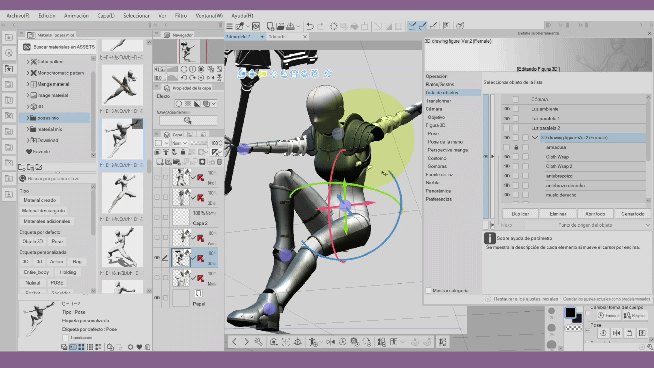
1. First we select the 3d object that is within our hierarchy and select the place in “nexuses” where we want:
2. You must keep in mind that each element will have to be adjusted in most cases.
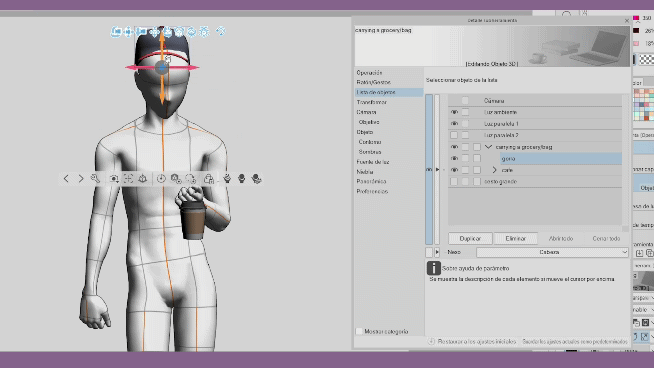
3. When you have it adjusted, try moving the figure.
Here are some examples of each articulation of how much you can do to your characters with this tool:
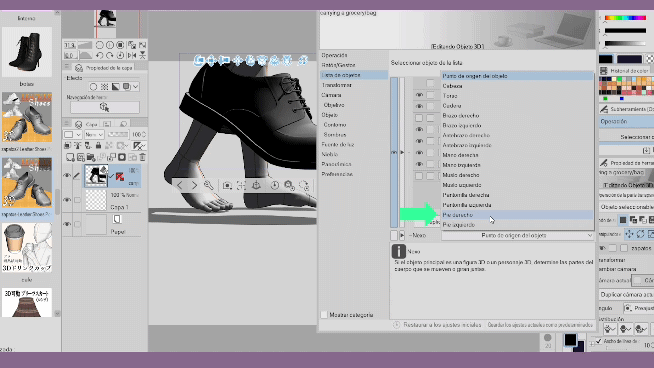
Some 3D materials are already predetermined for a specific size, and their application is very easy.
Let's not forget about shoes, it is advisable to use them on the foot joint.
Note: in the case of boots it is different, I will explain it later.
Then you can apply it to your favorite poses to take advantage of all the benefits that the program has:
Points to consider:
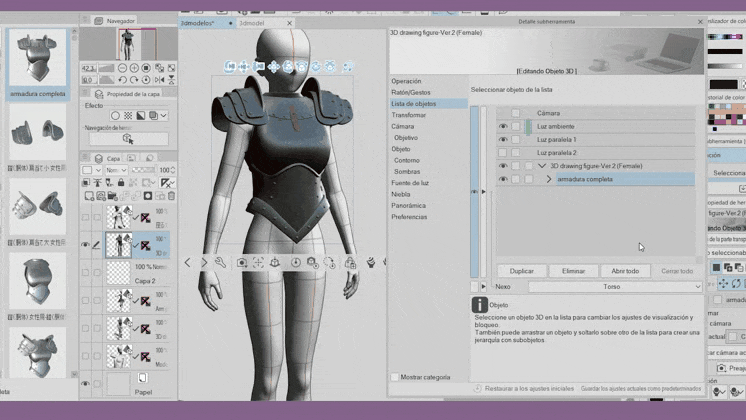
Sub-elements of 3d materials
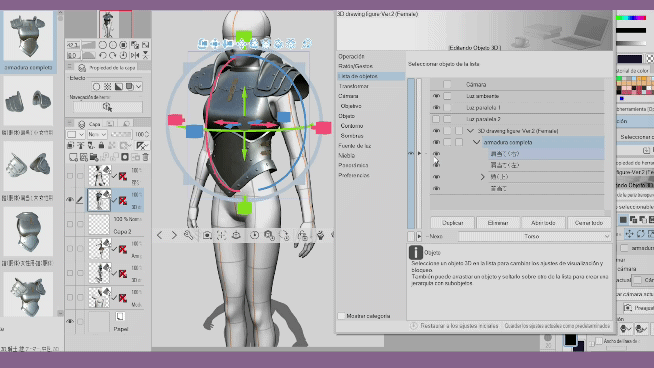
Within the 3D materials you can find other sub-elements of the corresponding element, they are displayed with the small arrow. We can visualize them by activating the eyes of each element. Although the materials that contain other sub-elements are useful to model our characters, in addition to the fact that they work together thanks to the hierarchy, when applying another pose, as you can see, the shoulder part of the armor is static and not follow the movement of the arms.
Note: Now, these Sub-Elements cannot be used or removed to assign them individually to the 3d model, because they belong to their own 3d material.
Recommendation:
My recommendation would be to work in parts. That is, if the 3d element you downloaded has the elements separately, you can use it at your convenience.
In the case of armor, the shoulder part is assigned to me as an element. So:
1. We simply hide the right side and keep the left side.
2. We assign it to the left shoulder.
3. And then we duplicate the element, and hide the left side and make the right side appear, and append to the right shoulder.
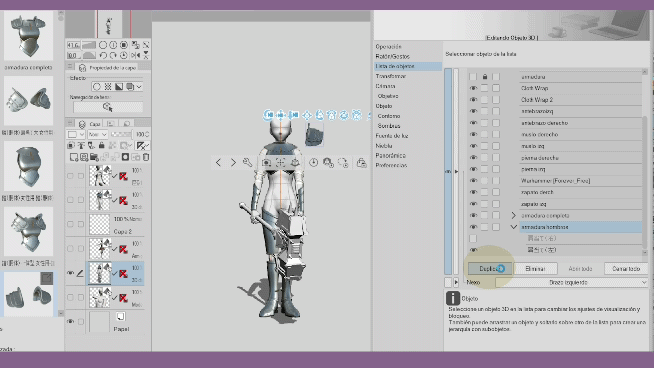
Finally we adapt it to the 3D model:

Now yes: as you can see, now the shoulder part of the armor follows the movement of the shoulders, the arm and so on. It is a wonder! Now you can apply it to your favorite poses, but don't worry, there's still more you can learn.
Modify the size
Each 3d element is independent when resized. It is a plus point to better adapt the shapes to our 3D model.
When you modify the height of the 3D model, the attached elements remain the same size.
The 3D materials that belong within a hierarchy, when enlarged with the lead circle, these are affected together. In this case, the basket is the “child” that contains the weights, which will be the “grandchildren.”
Otherwise, if the size is adjusted, the other attached elements will not be affected.
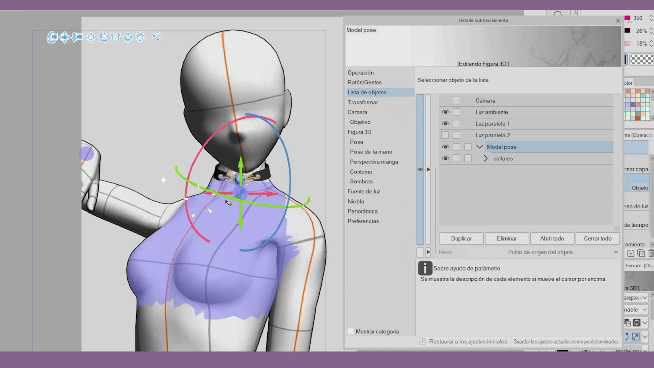
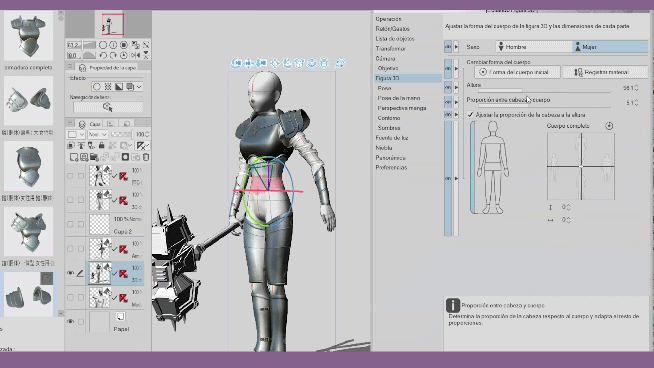
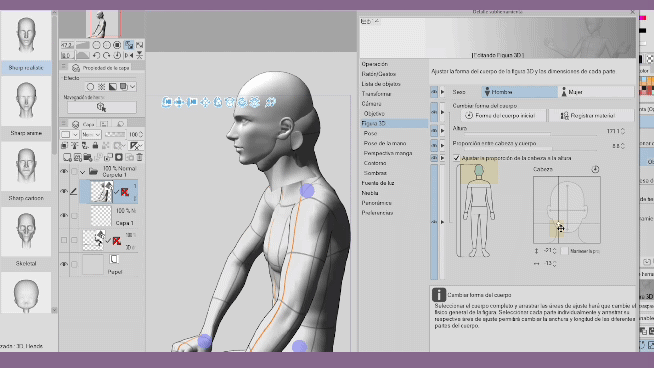
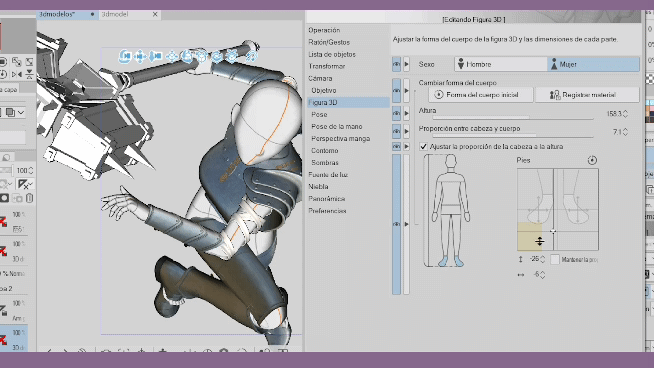
How to assign the 3d head to the model
Once the head has been adjusted using the hierarchies, we are going to select the 3D model and go to “3D figure” and adjust the head to the left and down. Then we lengthen the neck. And if necessary we adjust the head.
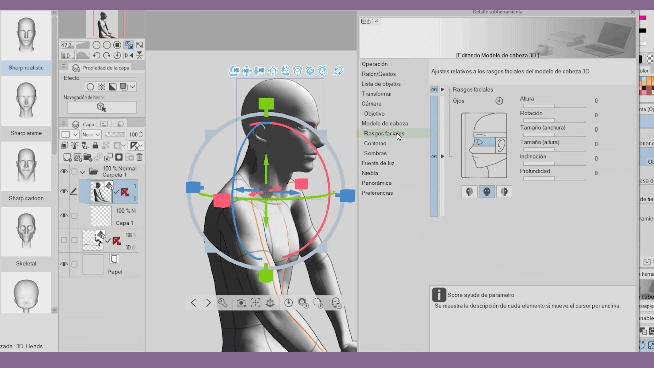
The next step is to select the 3d head, go to → “facial features”, select the neck part, you can modify the length, but the width is the most important, so you can decrease the thickness to your preference, in my case it I have left thickness at -75.
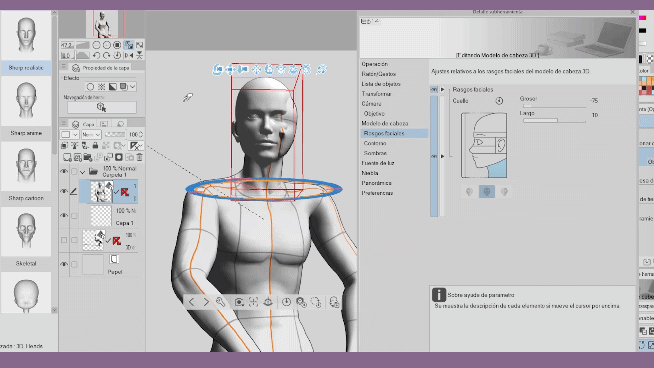
When trying to turn our head we can encounter this small problem, which is that the elements can collide and we can select another material that we did not want:
Recommendation:
I recommend blocking the 3D head material so that you can modify the direction without problem. You can execute this action in the “object list”.
Where to apply hierarchies
Hierarchies can be used, as you have seen, in all 3D material, figures, characters, heads, basic figures, and objects.
In this case, I have used the stool as an axis point or “father” to mobilize my character who would become the “son.” As you can see, objects can also be attached to 3D models, but they do not have articulation points. It can be useful to use them on furniture or chairs, cars, when our 3D model is required to remain fixed on that element.
Additional recommendations
First recommendation:
Working with 3D figures can be a bit confusing at first if you are a beginner, but everything is easy with a little practice. To use hierarchies, I recommend you check the clip studio Paint page, so you can learn more about its tools in 3D models.
So here's to the desire to learn more! 💃
Now, some general recommendations for using hierarchies:
When you go to adjust a 3D object to the model, to avoid going around and around, we are going to save ourselves a lot of work with the “specify camera angle from preset” tool, it will open several specific planes that will help you have better control and management of the 3D model to adjust your elements.
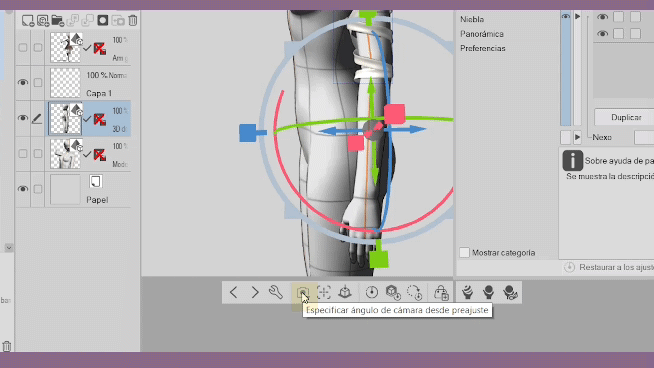
This will save you a lot of time adjusting, viewing and modifying 3D materials.
Second recommendation:
3D figures can come out fine, until the toes stick out of the shoes. This has a solution.
We return to the “3d figure” option and modify the size of the foot down and to the right. In this way the foot will remain as unnoticeable as possible when wearing shoes. You will get better results this way.
Third recommendation:
In the case of the boots, we can see that the boot on the left foot has not adjusted to the 3d model, this is because its attachment point is on the “left foot”.
In this case, I recommend attaching the boots to the “calves”, as is the case with the right foot, which is attached to the right calf.
And then simply adjust the foot or follow the above recommendations for shoes.
And you will have good results.
Application of what was learned and bonus
Since it has come this far, as additional information, you can also attach 3D models to another 3D model, in this case, I attached a little fairy to the hand of a noble king.
-I share with you the measurements that I used to create the fairy: the height is 15.1, and the proportion of the head and body is 3.
-Then I created a hierarchy towards the king model.
-And the next thing was to annex the fairy into the king's hand.
Note: If you want to know more, you can watch the video tutorial, I share a small timelapse of this creative process for this illustration, through the use of hierarchies.
Conclusions
The hierarchies that clip studio Paint offers us since its version 2.2 are very useful for attaching additional elements to our 3D model, through specific joints that allow us to organize and maintain coordination of movements. Hierarchies help us save time, for example, we no longer worry about adjusting each 3d object every time we add a pose. With hierarchies, we simply adjust a few small details of the objects and we will have poses by the thousands. This makes us work effectively to create our characters. As you can see, the possibilities are endless, I invite you to apply what you learned in this tutorial and watch the video, if necessary, thank you for your attention. See you next time.
Social networks
I share my social networks, where I share my art and much more. A hug.
Users who liked this post


Comment