
One of the benefits of working digitally is to optimize the time with which we create an illustration. With these 8 tips that I will share with you now, you will surely optimize your time when illustrating in Clip Studio Paint.
1. Personalize your workspace
This advice seems very basic, but having the windows that best suit our workflow open and being able to choose the language and color of the interface can help us a lot to feel more comfortable and confident when working.
The color of the interface is also important, some people find it more comfortable to have the color of the interface with dark colors and others with light colors. We can modify this from the File > preferences tab, here a window will open in which we can make various adjustments, but at this moment the important part is the interface section, here we find the color section and we can select between the options light color and dark color, we can also adjust the intensity of the selected color using this bar.
In the preferences window we can find a lot of options that can help us optimize the work area, you can learn more about these options by visiting the clip studio paint manual.
I think the most important thing to customize your workspace is to place the most useful palettes where it is most comfortable for you by simply dragging them. The palettes are these windows that we can activate from the "Window" tab. Each of these palettes has different tools that are very useful for drawing, but not all of us use all of these options, so it is best to select the tools that we use the most and close the rest. to have an optimized workspace.
2. Keyboard shortcuts
The best way to speed up our illustration process is by using keyboard shortcuts.
With these we can quickly activate a tool with just pressing a key instead of selecting it by clicking on its icon.
With these we can quickly activate a tool with just pressing a key instead of selecting it by clicking on its icon.
To find out which key is assigned to each tool, we must place our cursor over the icon of the tool we want and this will show us the name of the tool and its keyboard shortcut, if the tool has no shortcut assigned it will only show us its name.
We can customize the keyboard shortcuts from the File tab > Shortcut settings… Here we will find a menu with these categories:

Menu command: here we can assign the shortcut we want to any of the options on these tabs, such as save, which is activated with the CTRL + S key combination
Pop-up palette: Here we can assign a quick access to any of the available palettes. In this case I will assign this short cut to the color palette, when activated it will appear where the cursor is located and when pressing the key it will return to its place.
Options: Here we can modify various tool options, such as the key with which we intersperse the colors, the key to use the amazing transparent color, and the keys to increase or decrease the size of the brushes among many more options.
Tools: Here we can modify the shortcut to activate any of the tools that we have available in the tools palette, such as brushes and selection tools.
auto actions: Here we will assign the keyboard shortcut to the auto actions that we create, we will be seeing what auto actions are later in this video.
3. Modifier key
Modifier keys are similar to keyboard shortcuts, the difference between them is that the modifier key lets us activate another tool temporarily while we hold down the assigned key.
For example: when we are drawing with the brush and we want to select a color we can activate the eyedropper using the ALT key and it will be activated while we keep the key pressed. In this case, the modifier key is related to the tool and will only be activated when the brush is active.
Then we have the general modifiers, these will be activated no matter what tool we have active. For example: we can activate the hand option at any time by pressing the space bar and now we can move the canvas.
Another great option is to be able to select a layer while pressing CTRL + SHIFT and clicking on any area of the canvas, this will automatically place us on the layer that the selected pixels are on, very useful for moving between layers when working with a large number of pixels. of this.

To modify these keys we must go to the File > Modifier key settings tab… From here we can see the general shortcuts and the shortcuts for specific tools, take a look at all the options that come by default to see the available shortcuts.
4. Know the properties of tools
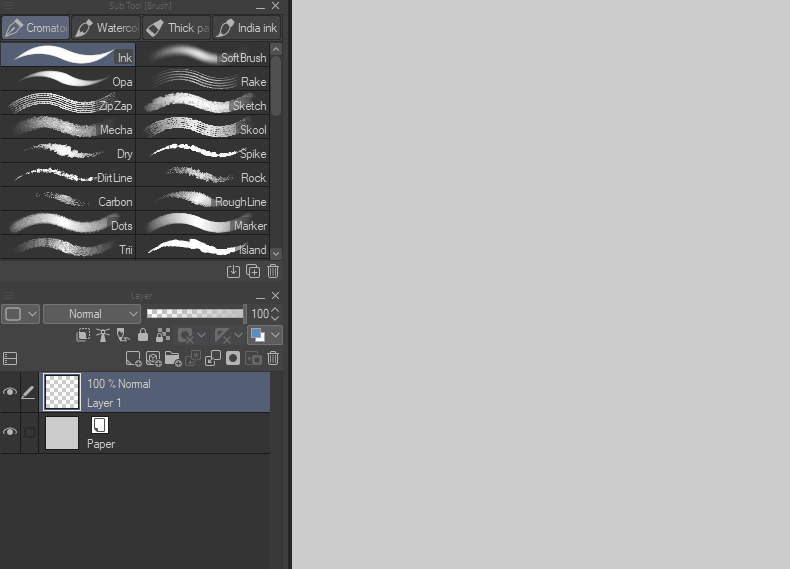
In clip studio paint we have a palette that allows us to see all the properties of each of the tools.
We activate this one like all the palettes from the Window tab, I highly recommend having this palette active since it can help us a lot by modifying our tools and thus avoiding a lot of headaches. From here we can modify all the available parameters of the selected tool.
let's see the brush properties, from here you can adjust parameters such as brush size, opacity and stabilizer. But these are not the only parameters that we can modify, if we click on the wrench icon we will open all the available options and by clicking on the selection box of the first column we will make the parameter visible in the properties palette of tools. Exploring these parameters helps us save time on certain tasks.
For example: when using the selection bar, it automatically selects the border, which can affect the moment of filling with color since there are unpainted spaces, to avoid this we have to expand the selection and in this way avoid leaving spaces without paint. We can make this task apply automatically by modifying the area scaling parameter, this will make the selection expand automatically without the need to do this task manually.
Explore the parameters of the tools you use the most, you may find a parameter that saves you a few steps in your drawing process.
5. Use the vector tools
Many times the strokes do not come out the first time and we have to do it over and over again until we have the desired stroke, but there is a way to correct a stroke after doing so.
All this is possible thanks to the vector layers. To start working with them, all you have to do is create a vector layer in the new vector layer icon, when you activate it, it will be identified with the icon of a cube. Now each stroke that we draw in this layer will be made up of nodes which will allow us to modify various aspects of the line, such as its thickness, its trajectory.
With the vector layer we can also use the vector eraser, which allows us to erase the intersecting lines in a simple way.
Using the vector tools helps us a lot when working with lineart.
6. Usa los file objects
Many times we need to use the same drawing several times, and when you want to make a change we would have to modify each drawing one by one so that they are all the same.
To avoid all these steps we can use file objects, which are basically a document within another document which is automatically updated when the document is saved.
There are two ways to implement smart objects, one is by importing an existing file from the File tab > import > create file object… which will create a new layer with the file object.
The other way is to take an existing layer with content, then right click on the layer name and select file object > convert layer to file object Then we will have a popup window where we will place the name and location of the file object.
Now we can duplicate the layer as many times as we want and these will also be updated when saving the changes to the original file.
Note that you can use the file objects menu to replace, update, and open file locations at any time.
7. Use automatic actions
The time has come to talk about automatic actions, with this tool we can automate tasks that are repetitive.
To start working with these actions we must open the quick actions palette, from here we can create and delete the tasks we need, we can also import and export them.
To create a new task we just need to click on the third icon that is in the lower right corner of the palette, this will create a new action in which we will create our series of steps, for this we will press the record button and from this moment clip studio will start recording all the steps that we do until we press the button again, now with the instructions given, all that remains is to press the play button and clip studio will recreate all the instructions that we gave it at the time of recording.
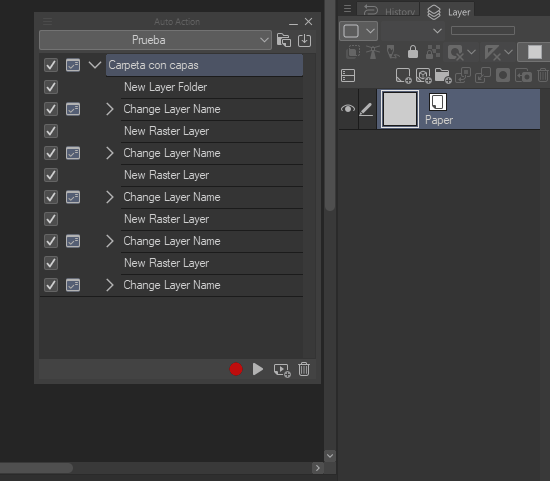
With automatic actions we can do all kinds of tasks from changing the name of the layers automatically to selecting all the content of a layer, cutting it and exporting it.
With this tool we can save a lot of time by automating repetitive tasks.
8. Use your smartphone for quick access.
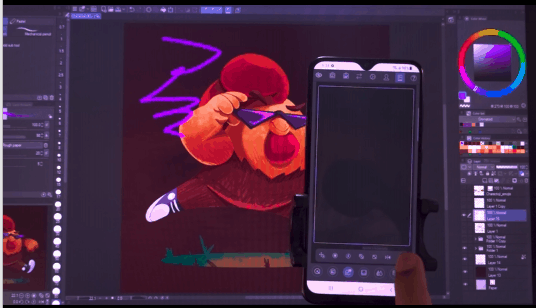
Many times the physical space in which we work is too small and we cannot work with a keyboard next to our tablet to use the shortcuts.
For this we can use our smartphone with the Clip studio paint application and link it with our desktop application to use our smartphone as an extension, thus having access to the shortcut palette along with other tools such as the color selector and the color mixer. color.
To achieve this we just have to download and install the Clip studio paint application on our smartphone or tablet. When opening the application it will show us 3 options to activate the mobile license, we can purchase a license and activate it or we can use the free version that gives us one hour free to use the app (If we have an active license in the desktop version we can use the application without the time limit).
Within the mobile application we select the companion mode icon and select the option to scan QR code, this will activate the camera and we must scan the code of our main device, which is opened by clicking on the companion mode icon.
Now with the linked devices we can access 8 sections in the app which are:
1. Quick Access: Here we will have access to all the commands that we have configured in the quick access palette.
2. Color Wheel: From here we can access the color selector in HSV and HLS format, we can also change the opacity and size of the brush that we have active.
3. Gesture pad: In this section we will be able to navigate the canvas using the most used gestures with touch screens, when using it for the first time it will show us a list with the list of gestures that we can use. At the bottom we will find a series of buttons that will allow us to reset the position of the canvas and flip it horizontally or vertically.
4. Sub view palette: This is an extension of the sub view palette, in which we can find and browse the reference images that we have open on our main device and add new ones from our smartphone by loading existing images or taking new ones with the help of the camera. .
5. Color Mixing: With this palette we can mix colors using the available tools and select the colors to create new palettes and use them in our illustrations.
6. Webtoon Preview: Useful for people who make comics for the webtoon platform, here you can preview how the cartoons would look on the smartphone.
7. Mode Switch: Here we will find access to three keys that allow us to activate the modifier keys and some keyboard shortcuts, these keys are SHIFT, CTRL and ALT.
8. Settings: And finally we have the settings in which we can adjust the alignment of the buttons when placing the smartphone horizontally, such as showing the quick access list, deactivating and activating vibration and enabling and disabling sleep mode.
These are 8 tips that I think can help you improve the way you work with Clip Studio Paint.
Share in the comments if you did not know some of these tips, and if you know of any way to improve the workflow using this wonderful program.
Users who liked this post


Comment