
Hello everyone!
Today's lesson will be (hopefully) somewhat fun, we will be learning to draw faces from different perspectives using a simple step-by-step exercise that includes making your character look like a Clown at first, I'm not joking!
We will separate the lesson in a few sections, starting with
・Basic head proportions + Setting up the perspective
・Starting out the face
・How it's used in the long run
Hope you have fun!
Basic Head Guide + Perspective
To start, we will approach some basic methods for head proportions. Starting with how our head is constructed and a few pointers will help us through the lesson.
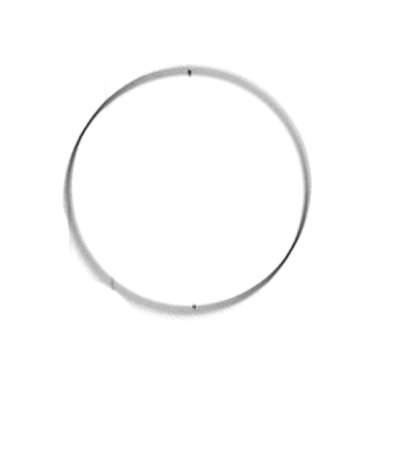
Our head is mostly flat on the sides, we do not exactly have a round head like most people make us seem. We will represent this with circles around the center of the head but towards the sides of it depending on the perspective, almost making it look like the head was carved out.
This also represents our MAIN GUIDE for everything else that can help us understand proportions in a better way.
You can notice that without these cuts, our heads look rather lost, almost like they are looking at nothing, with no perspective per se. The guide helps us determine where our character is looking as well as give us pointers for where each part of our face belongs to. Here's a few examples of this with simple circles in practice as well:
See how these simple circles give us a sense of perspective in two ways? That's the point of these, and we will be using them throughout this TIPS.
Starting out the face
For this example, I will build a 3/4 face but a bit more to the side, to show something out of the ordinary.
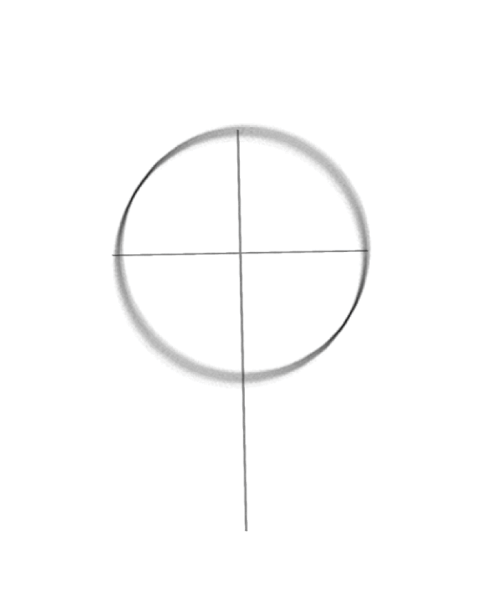
So, to start building our face, we will draw a normal circle and divide it by 4 parts (Horizontal and Vertical halves). This will be our starting guide.
Do not worry about making it perfect, at a certain point in the future, you will simply skip this step.
This can also sound scary, but you can follow along.
Afterwards, we will cut our left vertical line in 4 (Since our face is 3/4), and the left-most potion, cut it in half as well.
The red line at this point represents the center of our face and our "STARTING POINT".
We will now create our carved out head by placing the circle mentioned previously based on what the face will look like. I will also remove unnecessary lines that will only get in our way.
Since we want to create a rather proportional head, I will be dividing our face in 3 parts of the OVERALL same size, again, this doesn't need to be perfect, just be patient with yourself.
Our starting point for this is the top part of the circle we created earlier as a guide, then you go for the middle of our face, afterwards the bottom part of our circle and finally create a final line below our last one with the same size in consideration. This will mostly look messy and ugly, but we will sort it out, so do not worry!
All 4 of these green lines represent a part of our face, for example (from 1 to 4), the first line represents the HAIR LINE, the next line represents our EYES and the START OF OUR EARS, next line marks both the the START OF OUR NOSE and the END OF OUR EARS, and the final line guides our CHIN.
Now, it's the time to consider changing or keeping our wanted perspective.
What i mean is, do you want your heads to be tipped over a bit to the left side? Or maybe a face that's looking at us from below?
Firstly, there's the way the eyes are lined up depending on how your head is tilted. Feel free to refer to this:
And applying this to our current head:
You can see that shifting these lines already changes the way our face is, if it's tilted or not. We will continue working with the RIGHT one from here.
Next up we will start making the shape of our face, since I went with the right one from above, the head will be slightly tipped. Make only a simple shape of what you want your face to look like, once again, it doesn't need to be perfect.
I have marked the front of the face on a "yellow/green" color.
Now we will create our Brow line and our Ear structure.
We will need to take our previous green lines (head part separation) in mind. The Brow line is usually between our hairline and the beginning of our ear line, line 1 and 2 respectively. In our minds we will separate these two portions into 3 equal parts and use the last portions, as shown in the image below.
We move now to our Eyes. For this we will use both the Brow line (First purple line) and the line below it. This is rather easy, as it's separated thanks to the red line that acts as the middle of our front face, we will create small circles for this, making it almost look like a funny robot.
Same deal with the nose, we will also create a small circle to represent it, but in this case, the nose is between both of our Ear lines (Between our Eyes and the last purple line). In this case, you'll end up with more of a "clown" face.
Lastly, comes the Mouth.
For the Mouth to look rather "natural", both ends of it need to match the middle of our Eyes, and since I marked them before, we will use this as a guide.
The mouth goes just below the lower purple line (Which indicates the end of our Ears), and can be simply done with a rectangle.
Our head is mostly done at this point! Congratulations if you got to here!
Which means we will start drawing on top of it with our desired style and brushes. Here's an example of what I've done with it.
It's a simple head with no hair, that shows everything we touched today… So, first of all, how do we draw the hair for this, where do we start?
Simply follow the line we accommodated for the hair line!
With finishing touches, and the whole process, it should look something like this as well:
How we use this in the long run?
When you start getting the hang of it, you WILL stop using many of these guides and simply go with what your own brain says, accommodating to your own likings for faces as well as how they look to you.
Here's a small process of this same lesson but for a more classic perspective:
Here's also an example skipping a few of these steps, once you get used to them, to the point where you feel confident enough.
In retrospective, just be mindful of how each part of the face is separated depending on where it's pointing at, and you should be mostly fine. Don't worry about many details and perfectionism, after all Art is here for you to have fun, and not to be a chore.
Remember that you can ALWAYS use REFERENCES!
Have fun in your future adventures!
You can find me in these social media links:
Users who liked this post


Comment