
Hello! In this article I will show you an easy and fast Shading mode with Clip Studio PAINT 2.0 with its new option: Shading Assist. To add shadows to different scenes depending on the time of day and the environment.
What we will do:
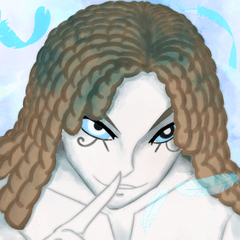
We will start with the base color of a character to integrate it with different backgrounds depending on the time of day, mainly day, evening and night.
Before I continue, I want to ask you the following:
Do you know the Shading Assist tool?
It is one of the most recent features that Clip Studio PAINT 2.0 has presented, which is its new version, in which we can add shadows to our scenes, whether they are illustrations, cartoons from our manga, for our Webtoons, even for our Animations. (As I will also show you)
A small example so that you can already imagine what it is about:
If you want to know this new tool in detail, you can see the official Clip Studio PAINT article:
For this reason, I invite you to watch the tutorial where I will teach you step by step how to easily add shadows to a day, evening and night scene. Up next in the next tutorial:
Tutorial: Shading in different environments with Clip Studio PAINT 2.0
The video is in Spanish, but remember to activate the subtitles in your language, you will surely find it.
What do you think about the video? Did you see how easy it is to add shadows to our scenes?
Process to easily add shadows in Clip Studio PAINT
Now I want us to go through the process so that it is even better understood.
1. Preparation of the scene
The first thing is to have the color of the character separate from the border line of the character. Also in a folder of layers I have the 3 backgrounds that we will use, day, afternoon and night.
The first thing we have to do is select the Line layer and activate the option: Set as reference layer.
Once activated you will see a lighthouse icon on the left side of the line layer. This will make the shadow that we are going to create take the line of our character as a reference.
2. Shading Assist
Now we select the color layer or the folder with the color, as is my case.
And we go to Edit - Shading Assist.
A window appears where we have different options.
Preset: where we can see all the options that we can use.
Shadow: where we have extra settings to edit the shadow.
Light source: We have Directional Light and Spherical Light to choose from.
Use the lines of the reference layer as a reference: When activating this option, the shadow will be generated based on the line of our character.
When activated: use as reference the lines of the reference layer. You can see the change in the shape of the shadow, now it takes our character's line as a reference. It's great!
While it's not perfect, it honestly surprises me.
When moving and playing with the manipulator I leave it in this position, in addition, I am going to choose Directional Light.
And in the preset we have different options depending on the scene we are working on, in my case, since I have a daytime sky, I can choose between: Standard and Day. In my case, I am going to choose Standard.
In Fuente de Luz we have 2 options, Directional Light and Spherical Light.
If we choose Spherical Light we achieve the following result, which I honestly love!
But if you give me a choice, I prefer the Directional Light. It's a matter of taste :)
We activate the Light Source again, Directional Light.
And let's go to: Shading.
And we can see different options, such as shadow type and shadow levels. Along with editing its Combination Mode. In my case to keep it simple, I will leave everything by default.
And in type of shadow we have 2 options: Soft Shading and Cel Shading.
Turning on Smooth Shading looks like this:
It's a cool soft shading, but in my case, I prefer the option: Cel Shading.
But maybe it's useful for you depending on the scene you're working on.
3. Day Scene
In Shading Assist, in Preset we choose the Standard option. Directional Light and activate use as reference the line of the reference layer. We move and expand the manipulator according to the position of the light that we want to project on our character, achieving the following result.
And as you can see, the Shading Assist creates 3 new layers of tone.
To work in order we are going to create a New Layers Folder above these new layers.
We change the name to: DAY
Then we select these 3 layers with the SHIFT key and incorporate them into the folder called day. Making it look this way, which is not ideal.
To make the colors created as before be seen again, we select the Day folder and go to the Combination modes and choose: Through.
And now if we can see the colors created. Which still amazes me how the auto shading creates the shadows, while not perfect, it comes very close to a great result.
Now we are going to edit the shadows, for this we select the layer called Tone 3. We select the Eyedropper tool.
In Subtool we select: Select from the layer. In order to take the original color.
And we select the color of the Tone 3 layer.
Having selected the color, we are going to paint. For this we choose the Pen tool.
In Sub Tool I chose Real G Pen, you can choose the one you want.
And we paint to correct some areas of the shadows, achieving the following result:
End of Day Scene:
4. Evening scene
Now we are going to make the sunset background visible and hide the day folder, because now we will be working with the evening scene.
Again we select the Color folder and go to Edit - Shading Assist.
And in preset we select: Afternoon.
And the color of the shadow changes adapting to the afternoon scene. I love it!
I must say that it is my favorite Preset :)
The only thing I don't like is the line that is created between the 2 main colors, for this I am going to deactivate it in Shading.
Below the Shading Type we have a bar with different numbers, I am going to leave the value in the center at 0% and I will increase the value of the number on the left to 70%
And we achieve the following result and we are going to do the same as we did with the daytime scene, for this, we create a new layer folder called: Afternoon.
We select the layers that were created and put them inside the folder called Afternoon.
Finally, to the layer folder in the combination modes we select: Through.
To manually correct the shadows we select the Tone layer, select the shadow color with the Eyedropper tool and paint with the Pen tool.
And we get the following result. I love it!
5. Night Scene
We activate the night sky layer without forgetting to hide the folder called Afternoon, where the colors of the afternoon scene were. And we go to Edit - Shading Assist.
And in Preset we choose: Night.
We click OK to apply the changes.
In this case we are also going to create a new layer folder called: Night.
We select the layers that the automatic shading has created and we put them inside the layers folder.
And for the combination modes to work, don't forget to select the layer folder and activate: Through.
The next thing is to select the Tone layer where the colors are and with the eyedropper tool we select the color of the layer, finally with the Pen tool we paint and correct some areas to our liking.
And we got the following result, which I find surprising.
Final Night Scene:
All Shading Assist Presets
Here you can see all the Presets that Shading Assist brings, it is up to you how you want to apply the shadows to your scenes. I encourage you to try them all!
conclusions
As you could see, Shading Assist is a great tool that saves us a lot of time when creating scenes at different times of the day or in different environments.
Although it is not a perfect tool, because if we want a precise result we need to manually correct the shadows, I certainly believe that this tool will improve over time until it becomes more precise.
See you in the next TIP!
My Instagram:
Users who liked this post


Comment