
Hello-hello everyone, I welcome you to another tutorial with me Daniel (art named Ado draw).
On today's tutorial article, I will be showing "how to usefully make use of the selection tools" with "the variety of selection tools which are available on clip studio paint (CSP)" and "how to effectively use those variety of selection tools effectively and easily" even if you are an old CSP user or a new user (beginners) with the help of today's tutorial, hopefully you will be able to know more on how to usefully use the selection tools to your advantage;
Now that we are done with pleasantry, let's jump right down into the course for the day (Title: The easy use of various selection tools in clip studio paint)
(Fig 0.1)
--—-----
Throughout today's tutorial, I will be making use of ‘smartphones’ to illustrate but if you are using either ‘tablet’ or ‘system’, you can still be able to practice the below following processes. So let's begin by learning,
(1.) How to locate the variety of selection sub tools on clip studio paint (CSP)
For one to be able to use CSP selection sub tools properly, we must first be able to locate this various selection sub tools, which now bring us to learning how to do the following;
A. Locating (Magic wand) selection sub tools which are in the [auto select] page,
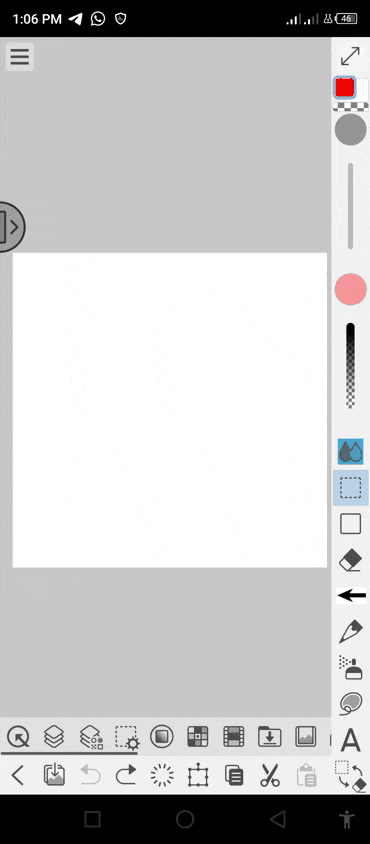
‘Magic wand’ a useful selection tools, which one can locate on Clip Studio Paint (which is also known as CSP) by firstly, opening a new canvas, looking to the left side of the canvas where the 'edit bar' is located, click on any Sub tool,
(Fig 0.2)
---------
A dashboard which is known as [ select sub tool ] with all different kinds of sub tools will appear as shown above,
In the image below, the upper part of the dashboard select the ‘auto select' by the left of the image, a page will appear after we have selected the ‘auto select’ their we can find the various [magic wand selection tools] on the page, and selection sub tools are of three different sets namely;
(A) Refer to editing layer only
(B) Refer to all layer
(C) Selection for referred layer
As shown below
(Fig 0.3)
---------
the above mentioned is one part of the selection tools. The next part which is how to;
B. Locating (Magic wand) selection sub tools which are in the [selection area] page,
The second place which we can locate another sets of selection sub tool is in the [selection area] and one can locate it by following the same process as mentioned In the above section, which by recap starts by,
click on any of the sub tool on the edit bar, a sub tools dashboard page will appear; at the upper part, select ‘selection area’ and the it's page will appear where we can then find the sets of geometrical and lasso selection sub tools which are named as follows;
(A) rectangle selection tools
(B) ellipse selection tools
(C) lasso selection tools
(D) polyline selection tools
(E) selection selection tools
(F) erase selection tools
(E) shrink selection tools
As shown below
(Fig 0.4)
---------
Those are the various places which we can locate any of the various selection sub tools on clip studio paint (CSP) which we will be looking at on the following parts of today's tutorial.
(2.) How do the various Selection sub tools settings work?
With the various ways to get to the different sets of CSP 'selection sub tools' explained, we can now learn 'how one can make use of selection sub tools different functional setting' which I will be dividing into two sections.
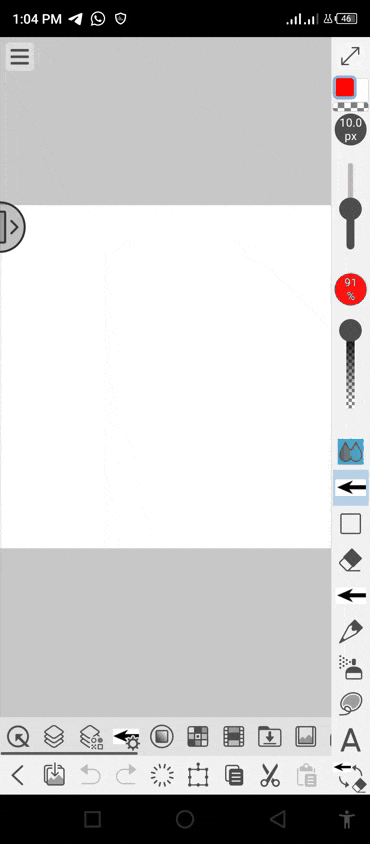
The first section (A): (which is the selection sub tools displaying 'mini bar')
For starter, we need to first select the 'selection sub tools' located on the edit bar, then select the 'portion of the layer' or 'image' which for now will just be an empty portion of a layer of the canvas as is below.
(Fig 0.5)
---------
Afterwards the selection indicator or identifier will then display which below the selected portion, a mini bar will also appear with the following options;
(A) delete or deselection icon
(B) crop icon
(C) invert selected area icon
(D) expand selected area icon
(E) shrink selected area icon
(F) selection launcher settings icon
(G) use different tools with fingers and pen icon.
(A) delete or deselection icon
The deselect icon is located on the mini bar by the left display below the selected portion. when enable, it delete or deselect any the part or portion of the layer of canvas one has selected using the selection sub tool.
(Fig 0.6)
---------

(B) crop
The crop icon follows beside that of the deselection icon and it can be used to crop on wanted selections of the canvas,
(Fig 0.7)
---------
By cut out or as the name goes crops out the portion which was not selected with the selection sub tools as shown below.
(Fig 0.8)
---------
Following that will be,
(C) invert selected area
The icon after that of crop icon which is know as the ‘invert selected area icon', which when used or selected,
(Fig 0.9)
---------
Tends to switch the area of Selection from the inside (the selected portion) to that outside (the unselected portion) of the border of the selected portion.
Take for example, we use the selection sub tools to select a portion of the layer which is indicated with the reddish colour and the white part or portion is the unselected portion, when one click on the ‘invert selected area icon',
(Fig 1.0)
---------
It will swap or switch the portion selected (which is the reddish part) as shown above to the portion which was unselected (which is the part white), which tend means that our inside which was our form selected part will then be white (which means it is unselected) and the form unselected portion will now be our selected portion (which tend make it the reddish part).
(Fig 1.1)
---------
(D) expand selected area
This set of selection sub tool option allows one to numerically or properly expand ones selected area, which we can do by clicking on expand selected area icon,
(Fig 1.2)
---------
A new page with where one can adjust the ‘expansion widths (px)’ and ‘expansion type' will be displayed, whereas one can adjust the expansion widths on the page,
(Fig 1.3)
-----—--
On the expansion page, double tap on the double arrow head pointer facing up will increase the selected portion by 10% for each tap which that of the double arrow head pointer facing downward reduces the selected portion by a well 10% for each tap.
(Fig 1.4)
---------
While for the one arrow head pointer facing both upward and downward only affect selected portion by 1% which means if click on one increase also one time.
(Fig 1.5)
---------
As we can see in the image below, the one on the left hand side show the inside portion of the layer Selected with the selection sub tools,
Whereas if we click on the ‘expand selected area icon' and expand the selected portion it will tend be like the image on the right hand side.
(Fig 1.6)
---------

(E) shrink selected area
This is simply the opposite to that of expand selected area, shrink selected area allows the user reduce the the size of the selected portion of layer.
(Fig 1.7)
---------
Same as the expansion widths, we can adjust the shrinking widths as well using this above mentioned process in expansion icon,
(Fig 1.8)
---------
After we one is done, we can also change the shape of the selected portion edges by changing the selected square edges icon to that of curved edge options located on the shrinking type as shown below.
(Fig 1.9)
---------
With done, It will affect the edges of the selected portion as shown above.
(Fig 2.0)
---------
(F) selection launcher settings
This icon allows one to enable (place) or display (remove) icon options.
When click upon,
(Fig 2.1)
---------
The selection launcher settings page will appear with different kinds of icon options which one can add on the mini bar with each of the icon place in the various folder namely;
(A) app settings
(B) file
(C) edit
(D) animation
(E) layer
(F) selection
(G) view
(H) filter
(I) help
(Fig 2.2)
---------
In this various file or setting options one can add icons onto the mini bar.
(G) use different tools with fingers and pen.
This aspect is not part of the default icon on the mini bar but I just added it using the process I mentioned above the ‘selection launcher settings’.
If one clicks on this icon,
(Fig 2.3)
---------
It allows us move the canvas anywhere without it drawing or affecting the layer.
(Fig 2.4)
---------
Which if one look closely above, notice how one can move the entire canvas with the selected not affected as one moves it from the ‘middle position' to the ‘left position' and the to the ‘right position'.
(Fig 2.5)
---------

(3.) How to use the various selection sub tools
When using clips studio paint (CSP), you will
frequently need to select parts of an image which can only be select with the various selection sub tools.
This guide below which covers the basics of using the various set of CSP different types of selection tools: the 'magic wand Sub tools', 'geometrical/Marquee selection sub tools' and more.
So learning how to use the various selection sub tools, we need start with that of,
i.) The Magic wand sub tools:
This set of selection sub tools comprise of three selection sub tool which are as follows:
a. The Refer to editing layer only (magic wand selection tools):
Which is Located in the [auto select] dashboard, can be use to select enclosed colours on the current or present operating editing layer as the name implies.
(Fig 2.6)
---------
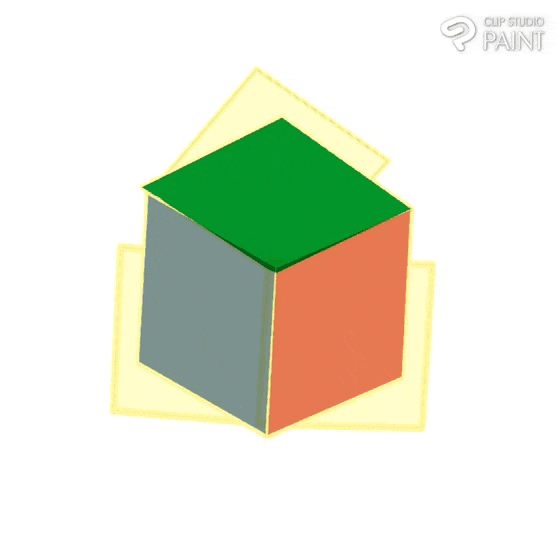
Take a look at the above image (Fig 2.6), where we tend to have a box with four sets of side with only three side of the box view to the viewers.
If we tend to have the three different side of the box on separate layer, we then select the layer of the left side of the box, use the [Refer to editing layer only] to select the box it will only be able to select the left side colour of the box leaving the other two side unselected.
(Fig 2.7)
---------
b. The Refer to all layer (magic wand selection tools):
Which is Located in the [auto select] dashboard, can also as the name go select enclosed colours in all layer.
(Fig 2.8)
---------
Using the same above box image (Fig 2.9), with this set of selection sub tool, we can be able select all of the enclosed colours no matter what layer we are, take for example, using this selection sub tools to tap one side of the image (primary coloured box) on the canvas while still on the one of the layer,
Then click on the Layer icon on the ‘palette bar' indicated (A) > enable refer a layer icon on the on ‘refer multiple’ options and on the ‘selection mode' switch that of ‘new selection' which is indicated as (C),
(Fig 3.0)
---------
Note: that the selection mode comprise of four part,
(1) new selection- which when an area is already and the selection sub tools is set to this option, using it again deselect the previous selected port and create a new selected portion as the name implies ‘new selection'.
(2) add to selection- allows users use the selection sub tools multiple times with it deselect any already selected portion.
(3) All layer- allows users when using the selection sub tool to be able to select enclosed colours in all layer no matter which layer that was selected.
(4) Folder- allows users when using the selection sub tools to select colour on layer place in a folder.
To that of ‘add to selection’ is also on the ‘selection mode’. The are some other sets of setting options which we can make some necessary adjustment to which can also affect how the selection sub tools select any portion of the layer.
(Fig 3.1)
---------
Note: After your initial click, the pointer changes to a magic wand with a plus (+) symbol. This indicates that more clicks will add to the selected area. Continue clicking until you have selected the entire area as shown above.
(Fig 3.2)
---------
c. The Selection for referred layer (magic wand selection tools):
Which is Located in the [auto select] dashboard, can be use to select enclosed colours on the current or present operating editing layer as the name implies .
(Fig 3.3)
---------
Take the image above (Fig 3.4), this set of selection sub tools can only affect areas mark with the [reference marker].
(Fig 3.4)
---------
The two marked layer will tend be set as the reference points,
(Fig 3.5)
---------
ii.) The Geometrical or Marquee tools: (also known as Single Row or Single Column)
Geometrical tool: Defines the border as a 1-pixel-wide row or column. They geometrical (Marquee) tools which Select areas base on the kind of structural geometrical shaped tool used, such as a rectangle, or circle (which is also known as Elliptical) and more as listed in the above mentioned which is also note A to H in the below images.
(Fig 3.6)
---------
The various geometrical selection tools can be use to add 'simple but useful details to our either background' or 'for crop of images' or 'for solely adjusting a portion of an image'.
a.) 'Rectangular' (Marquee) selection sub tools,
This set of selection sub tools when used by dragging it alone the layer of the canvas tends to select the portion inform of a square or rectangle shape.
To use the rectangle selection sub tools, one needs,
(Fig 3.7)
---------
Click on the Rectangular (geometrical) sub tool, Then place your pointer which will appear after selecting the rectangular sub tool which is indicated [2] on the edit bar located on the canvas,
Drag the pointer across the area you wish to select on the canvas (Fig 3.8), When you have completed your selection, release the your finger or pen it will then makes a rectangular selection (or a square, which is as the results of we draw and drag it across the canvas).
(Fig 3.8)
---------
We can use the 'rectangular shape (Marquee) selection sub tools' continuously if only the selection sub tools selection mode has been set to 'add selection area' then one can select as multiple or many areas as one wants as shown below.
(Fig 3.9)
---------
b.) The Elliptical (Marquee) or circle geometrical selection sub tool,
Makes an elliptical selection (or a circle, when draw and drag it across the canvas).
(Fig 4.0)
---------
[click on a sub tool] >[selection sub tools] > [selection area page], select the [Elliptical] selection sub tools,
Drag the pointer across the area you wish to select on the canvas , When you have completed your selection, release the your finger or pen, it will then makes a rectangular selection (or a square, which is as the results of we draw and drag it across the canvas).
(Fig 4.1)
---------
Similar to that of the rectangular Marquee, We can use the 'elliptical shape (Marquee) selection sub tools' continuously if only the selection sub tools selection mode has been set to 'add selection area' then one can select as multiple or many areas as one wants as shown below.
(Fig 4.2)
---------
c.) Lasso selection sub tools,
Define a selection area by hand. Located in the [selection area] dashboard,
(Fig 4.3)
---------
Using the lasso selection sub tools, one can select using free hand without any restrictions.
And we have previously mentioned above, if the selection mode is set to 'add selection area', one also select in different forms by lasso or draw.
(Fig 4.3)
---------
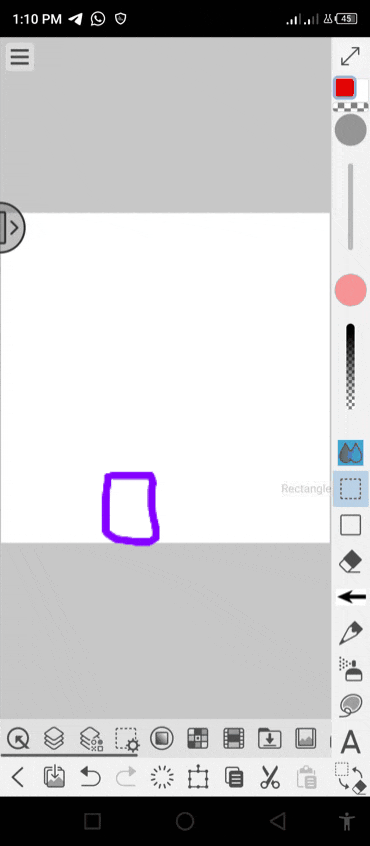
d.) Polyline selection sub tools,
‘Polylines selection sub tools’ draws a segmented line. They can be configured so that their start and end points touch or overlap, but they are still considered open lines;
(Fig 4.4)
---------
For closed shapes (such as square, rectangular and kite shape), use the Polygon Tool. Polylines can also utilize curves and arcs.
Let's say we want to create a square selected area, one need start placing the first pin (1) at the top and second pin (2) below the first, the third pin (3) at the bottom right side as that of (2) with another pin (4) above that of pin (3) and lastly place that of pin (5) where the first one (1) is and let them merge, with that done we will then have create a square selected portion of layer.
(Fig 4.5)
---------
We can use repeatedly the above mentioned process to create various kinds of shape but each of them will have different number of ‘pins'.
(Fig 4.6)
---------
e.) Selection pen sub tools,
The ‘selection pen sub tool’ uses pen sub tool expression to Selects areas just like one drawing or painting an area but instead of it adding colour it selects the portions stroked.
The ‘selection pen sub tool’ is located in the [selection area page],
(Fig 4.7)
---------
After Selecting the ‘selection pen sub tool’.
One can use brush size bar located on the edit bar to increase or reduce the size of the ‘selection pen sub tools’ which for this tutorial, I set the brush size to 143.7 pixels. Use the selection pen sub tool to select some areas of the layer of the canvas.
(Fig 4.8)
---------
Also we can select multiple portion of the selection mode is set to ‘add selection area'.
(Fig 4.9)
---------
f.) Erase selection sub tools,
The erase selection sub tools functions similar to the eraser sub tool but instead of erasing colours, the erase selection sub tools is used to erases areas or portions already selected.
To be able to us it firstly, select the the ‘erase selection sub tools’ located in the [selection area],
(Fig 4.9)
---------
With the erase selection sub tool, one can this set of selection sub tools to erase portions of the selection area,
(Fig 5.0)
---------
One can also use the erase selection sub tool to erase several portion already selected as shown below.
(Fig 5.1)
---------
g.) Shrink selection sub tools
The Shrink Selection tool allows us to quickly and easily isolate elements of a drawing without the tedium of having to be overly precise.
The shrink selection sub tools is located in the [Selection area],
(Fig 5.2)
---------
Afterwards one can see that this selection sub tools can select object freely just like the lasso tool but it doesn't behave like the lasso selection sub tools because when the ‘shrink selection sub tools' is used to the select area it takes on the form of the drawn shape, no that of shrinking selection sub tools tends to shape it's selected area as the the shape of the objects it's selected and if there is no object, it will select nothing.
(Fig 5.3)
---------
Notice in the image above, when shrink selection sub tools drawn on a particular portion of and image it selects only that portion alone as we can see in (fig 3.6) and (fig 3.7)
‘Selection tools’ are handy and useful sub tools which user can use to make quick changes only to those parts selected. As new users (beginners), it is advisable you practice using the selection tools. They can be tricky, but learning them is well worth the effort. The better you are at using them, the more flexibility you have with changing parts of images.
Moving on to the next part, we will be looking and pointing out various ways which one can use the [selection sub tools] mentioned above to our advantage,
(4.) Ways which 'selection sub tools' can easily and quickly improve or effect changes images
Selection Tools allow one select specific areas or portions of an objects in an image, which you can then modify or manipulate separately.
At this point, whereas we have learned how to locate our selection sub tools on Clip Studio Paint (CSP) and also learning how the various selection sub tools works, the question which by now must have been running through our heads are
“how do one as a Clip Studio Paint (CSP) use the various selection sub tools to our advantage by effecting changes like using the selection sub tools to draw, add mask selection, edit and further more to better improve our image or background?”
Which then bring us to learning the various ways which selection sub tools can be use to effect improvement in our digital artwork,
a.) Selection sub tool can help in add in figures or shapes on our characters or background
Selection sub tools are very useful setting of tools that which can simple determine digital artist accuracy and speed when drawing.
Now one can drawing in figures or add shades or gradient onto our image with the selection sub tools by firstly selecting the set of selection sub tools which is suited to give the kind of shape one wants to the character or background.
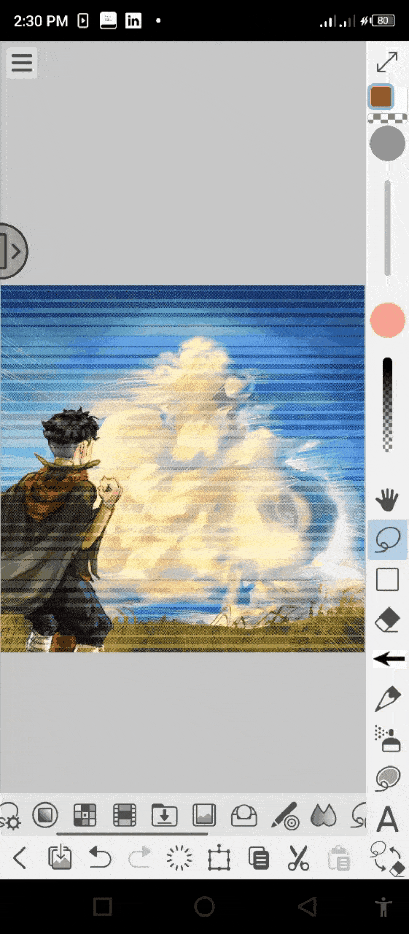
(i) drawing of simplify cloud with the selection sub tools
With the above mentioned noted, let's start by using the selection sub tool drawing a simplify form of cloud on our background,
Now using both the rectangular and elliptical selection sub tools one can block out the structure of the cloud which are differently hipped together on separate layer with different proportionality.
(Fig 5.4)
---------
After we are done blocking the structure, one can now add our base colour (flat colour) into the selected area of the simple cloud.
(Fig 5.5)
---------
One can also grade separately any portion of the cloud not by freehand, but with the help of the [shrink selection sub tools] we can easily select the base section of the cloud again and do our rendering with great precision and accuracy without affecting any of the others enclosed colour sections.
(Fig 5.6)
---------
With the portion of the cloud selected, one can now add some dark gradient colour shading to the cloud base,
(Fig 5.7)
-----—--
Lastly one can now select in between the gradient and base colour and add some Half-tone to the ‘simplify cloud' as shown below.
(Fig 5.8)
---------
Note: I will like to point out the way I use to create the round shape with the gradient blue colour around, I just use the round ( or elliptical) shape selection sub tools to create a round shape behind the clouds and I selected invert selected area which was mentioned above, I then used the airbrush to add soft light blue colour to the border and lastly I then blend the colour with that of the background.
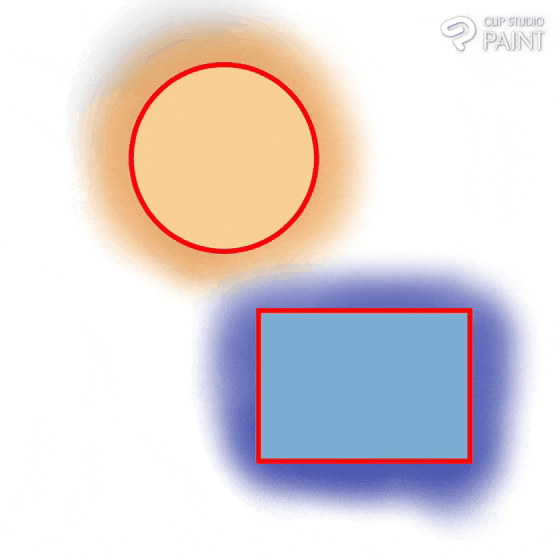
Which can also note in the above image for both the circle and square shape, the unselected portion (A and C) are the part which can not be affect when colouring while the selected portion (B and D) are the part which can be affected when colouring.
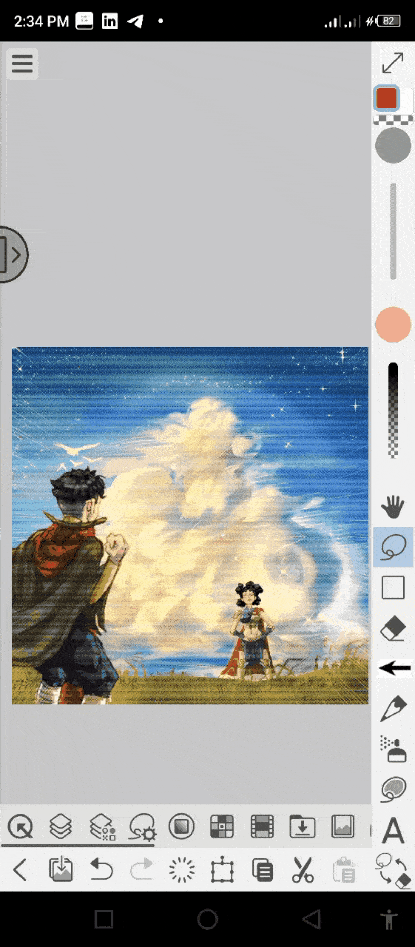
With our simplify cloud now done one can now add characters from our library storage onto the ‘simplify cloud' background scene, which the selection sub tools also plays an important role after importation of image.
Firstly, import the various ‘first character’, use the [ shrinking lasso selection sub tools ] to select the character, create a new layer above the character layer and merge them to quickly turn the layer from ‘Image layer' to ‘Raster layer', then select the transformation icon on the ‘palette bar' and use it to adjust the character on to the [foreground].
(Fig 5.9)
---------
Follow this same process as did above to the second character which is to be place on the mid-ground.
(Fig 6.0)
-----—--
In the selection sub tools settings, they are four sets of [ refer multiple ] which helps reference part of the enclosed colours section that are to be selected.
a. All layer
The first option on the [Refer multiple] allows users select enclosed colours in all created layers.
(Fig 6.1)
-----—--
b. Refer image,
The second option on the [Refer multiple] allows users select enclosed colours of the layer mark with reference icon and the mark process is don on the [Layer] setting located on the ‘palette bar’.
(Fig 6.2)
-----—--

c. Selected layer
The third Options on the [Refer multiple] which when enable allows users select enclosed colours which are in the layer the user is on.
(Fig 6.3)
-----—--
d. Layer in folder
The fourth option on the [Refer multiple] allows users select enclosed colours in layers which are place in folder.
(Fig 6.4)
-----—--
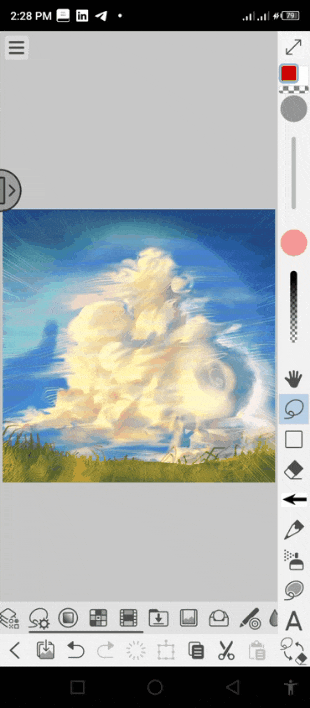
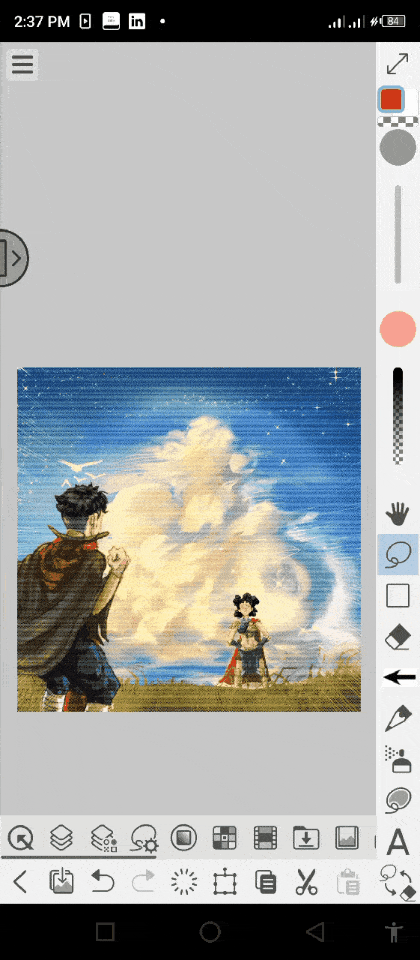
Here is the finish image of the ‘simplify cloud’.
(Fig 6.5)
-----—--
[Time-lapse for the above process]

And that is one way of using selection sub tools to our advantage.
2.) Masking set of selection layer
This aspect may seem not that important in this course to some but I will like to point out that it is important to understand this aspect.we can mask selections or entire layers, in order to hide parts of the layers, so as to avoid your drawing affecting some part of the canvas which do not want it to affect instead of creating and later deleting them entirely.
First, select the layer in the ‘Layer palette' and create a selection area of the part you want to keep and the part you want to hide.
(Fig 6.6)
---------
After we have select portion we want, we can then mask the selected part of the layer by using the [ menu ]> [ Layer ]>[ Layer Mask ]>[ Mask Selection or Mask Outside Selection]
(Fig 6.7)
---------
And when we have mask the portion of layer we want, sometimes the masks areas which is the hidden and none hidden part may not be distinguish, that doesn't mean that it has not been able.
(Fig 6.8)
---------
In the below image, we can use 'masks selection' to hide the outside portions of the selected layer and reveal the inside portions of the layers below.
(Fig 6.9)
---------
Note: in the above image, clicking on layer icon (A) displays it's mini dashboard where the object folder layer is located and the mask selection options (B) with it two settings (C)(enable mask and show mask area).
So to be able take it visible to see it, we must enable it first,
Start by clicking on the Layer icon on the palette bar, the layer dashboard will appear, at the top left side is the mask icon indicated (C), clicking on it will bring a set of the following;
(A) enable mask
and (B) show mask area,
Now when the show mask area is enable, the outer selection portion (D) of the layer that is to be hidden will be covered with blue colour and the inside selection portion indicated (E) of the layer will not be covered with the blue colour which means we what ever is done on any layer can now exceed the selected box image.
(Fig 7.0)
---------
Notices how the arrow drawn above can not exceed the selected mask box, that is what the set of [selection mask].
b.) The Selection sub tools can be used to create duplicate image
Take this two characters (the male and female) which I draw together, said I just want to just make use of only the female character both the two are joined together right, now the issues
“how can one achieve that ?”
you may ask!
We can easily separate the both of them by using the [selection sub tools] to a selected the entire body portion of the female character which owe can then either cut out with the cut icon on the ‘edit bar’ indicated (A) or copy with the copy icon which is also on the ‘edit bar' indicated (B),
(Fig 7.1)
---------
And when we are through cutting or copying, we can the click on the paste icon which is also located on the ‘edit bar', it will then create a new layer with the duplicate female character.
(Fig 7.2)
---------
With the character duplicated, one can then do the next below aspect,
c.) Selection sub tool are use to segregation portion an image for applying transformation
Now I would like the female character flip upside down, which if we are to achieve that, we need to reselect the character,
Then click on the [menu above ]> [ Edit ]>[ Transformation ]> which on the page, we will find the several selection options but three I mostly make use of are;
(A) scale/rotation transformation
(B) free transformation
(C) mesh transformation
(Fig 7.3)
---—----
Or we can just click on the transformation icon the ‘palette bar' below the canvas , a dashboard will appear with different options which flip vertically is one of them, click on the ‘flip vertically' icon.
(Fig 7.4)
---------
The female character will then flip vertically,
And we can also use the pointer (that looks like a square with dots around it's edge) to adjust the various portion of female character which we have selected with [selection sub tools].
(Fig 7.5)
-------—
d.) The selection sub tools can be use to add flat colour effects to the background
One can also create squares, rectangles and circle flat effects onto the background so as not to leave it blank and making it look boring,
(Fig 7.6)
---------
The kinds of regular shape selected with the selection sub tools,
After that, one can then grab the paint bucket or lasso fill sub tool and fill the background created Selection, On a new layer which will now be the base colour for the background,
(Fig 7.7)
---------
Ones the female character has been selected,
One can then grab the paint bucket or lasso fill sub tool and fill the character created Selection! On a new layer which will now be the base colour for the character, with the basecolour acting as the foundation of the character, giving the character flat structural dimensions.
(Fig 7.8)
---------
One can now make visible both the character and background,
(Fig 7.9)
---------
And further more we can use the selection sub tools to add more detailed render by adding shades, highlights and half tone which we the gives what is below.
(Fig 8.0)
---------

e.) Selection sub tool are use to segregation portion an image for applying colour balance
Using the our already created simplify cloud image , we can use the selection sub tools such as the rectangular and elliptical selection sub tools to select sections of the images,
(Fig 8.1)
---------
After we have our selected area, one can make changes to it, such as creating a Color Balance adjustment layer to alter the colour of the selected portion (choose menu > edit> Tonal correction, and then click on the hue/saturation/luminosity option )(B)
(Fig 7.2)
---------
Or ‘colour balance' (D) or ‘level correction’ (C) or ‘level correction’ (A) but for today's tutorial I will like ‘using colour balance’ to add some unique light ray to the simplify cloud image.
Let's just make the changes using (colour balance) to our selected portion, then we now do is the colour adjustment on the selected part. And after we are through adjusting click on [ OK ] which is at the bottom.
(Fig 8.4)
---------
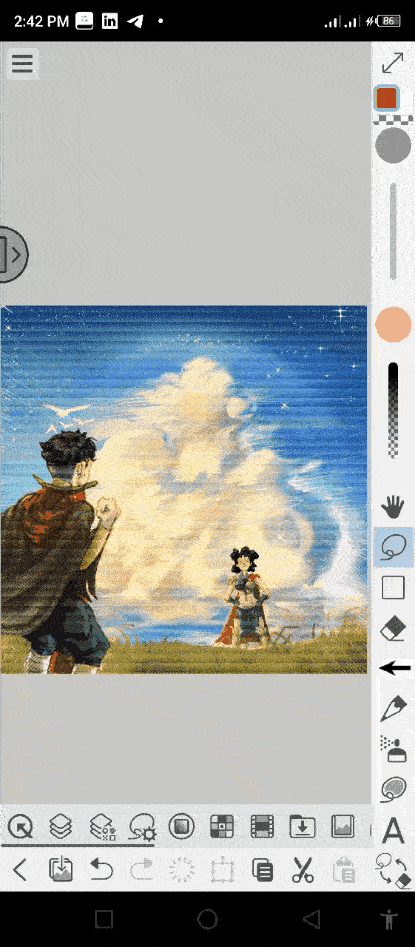
Noted: in the above image, (A) is the colour balance bar which are use to adjust the cyan, magenta and yellow hue, while (B) is the gradient balance which are used to balance balance between the shadows, half tone and highlights,
Now with the above done we now have some suits of strip light line on the image and that concludes this part. Below is our finished simplify cloud background images.
(Fig 8.5)
---------
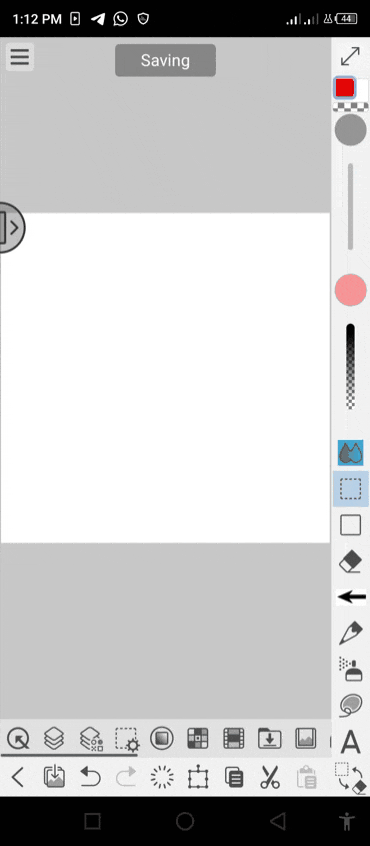
5.) Last thing we can do with the selection sub tools that is very use is Segregation Save
Say we want to save some different sections or elements of our above image (simplify clouds),
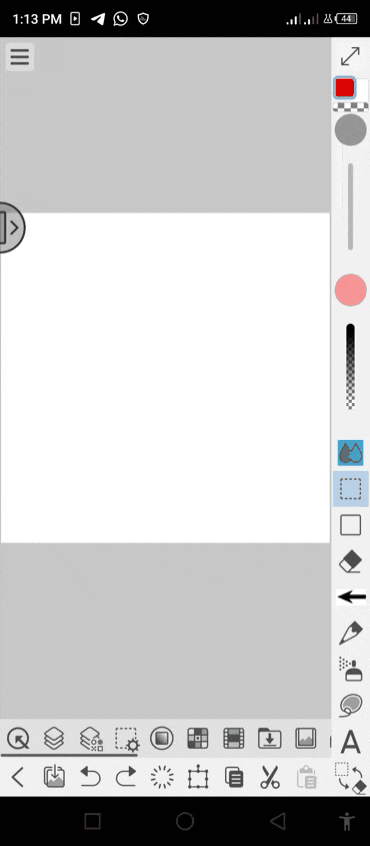
All we do not need to save to storage then crop the parts, all we just need to do is just use the ‘selection sub tools’ select the portion we want,
(Fig 8.6)
---------
And then Click on save, it will the save the particular portion of the image we selected with the selection sub tools.
(Fig 8.7)
---------
We can further repeat the same process for any other parts we want to save (which are indicated A, B and C as shown below ) .
(Fig 8.8)
---------
And those are the various ways which one can useful making use of the selection sub tools to our advantage.
Conclusion
Hope this was of help to someone especially beginners, the best was which you as a beginner or old user can get comfortable with using this tools the [selection sub tools] is to frequently practices using this sub tools.
Users who liked this post


Comment