
Are Bezier curves not used much?
It's convenient because you can draw beautiful lines with just a mouse!
Let's use Bezier curves
I can only draw squishy line drawings! ! !
I only have a mouse so it's impossible!
I bought a tablet, but it's completely different from hand-drawing...
In such a case, use the “Bezier curve”!
What to use
"Bezier curve" in "Direct drawing" in the shape palette.
Now draw the line drawing.
To correct the line drawing
"Control points" and their properties in the line correction palette
I'll fix it.
When moving the entire path
Use "Object" on the operation palette.
For now, just do the following settings.
Set the curve type in the Bezier curve tool properties to "Cubic Bezier".
There are four line types: straight line, spline, quadratic Bezier, and cubic Bezier.
Only "cubic Bezier" is used.
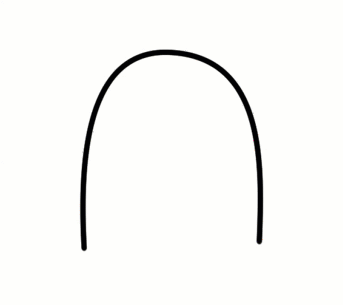
Let's practice right away.
The practice data can be downloaded here.
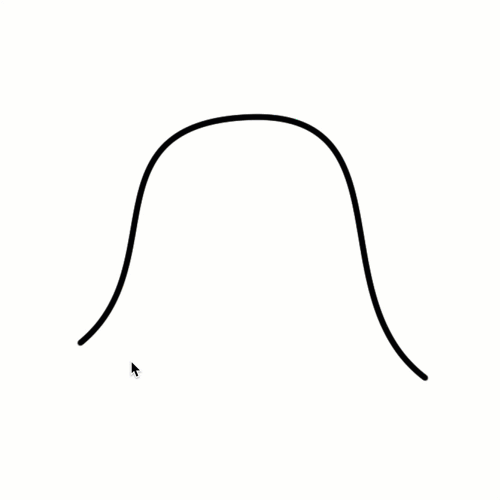
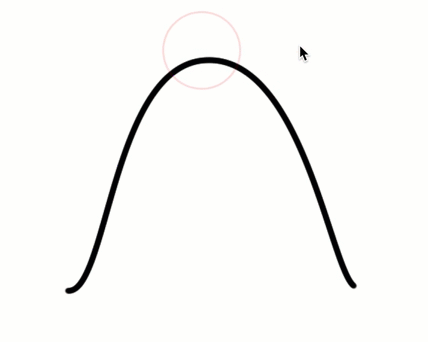
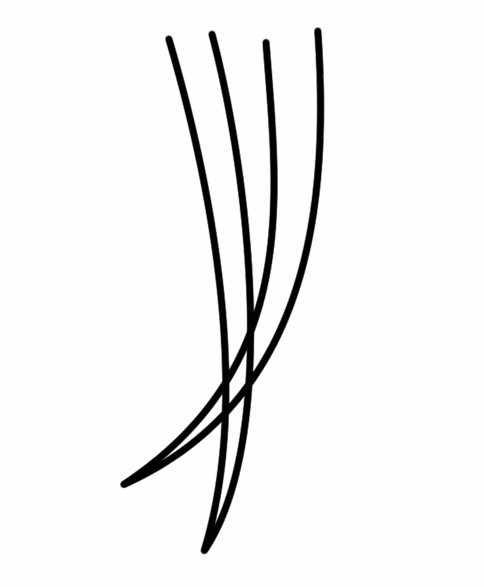
Load the image below and practice tracing.
Once loaded, create a vector layer and draw on it.
You can draw with a raster layer, but be sure to use a vector layer because you cannot modify it later.
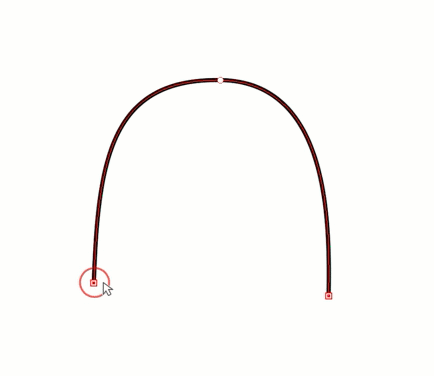
For straight lines, simply add control points by clicking.
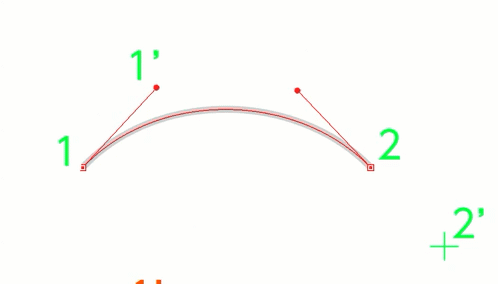
Click 1, then click 2.
Confirm by double-clicking.

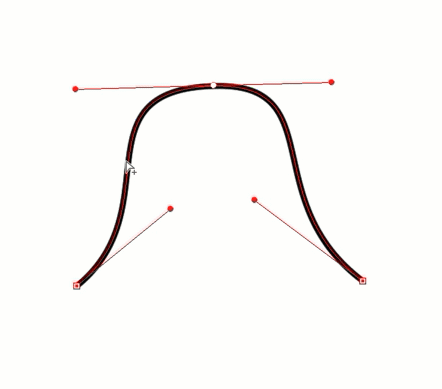
When you drag a curve, a handle will appear.
Drag from 1 to 1', drag from 2 to 2',
Confirm by double-clicking.
A guide for the handle is also shown, but you don't have to align it exactly.
It's okay if it's super rough because you'll adjust it later.
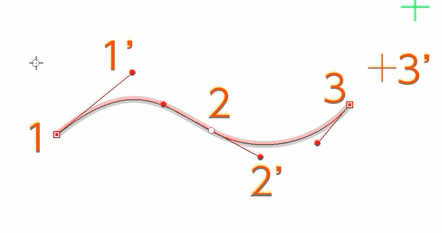
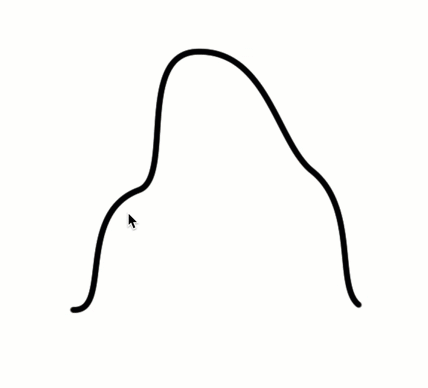
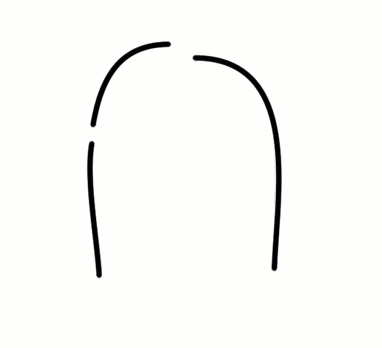
Add control points when turning in a different direction midway.
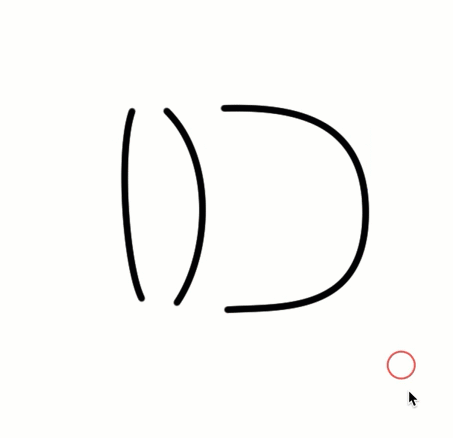
By the way, a curve of this size can be created with two control points.
This is an exercise to place a control point in the middle.
If you use the ellipse tool when drawing a circle, you will end up with a circle with many control points, so
It is better to draw it with a Bezier curve.
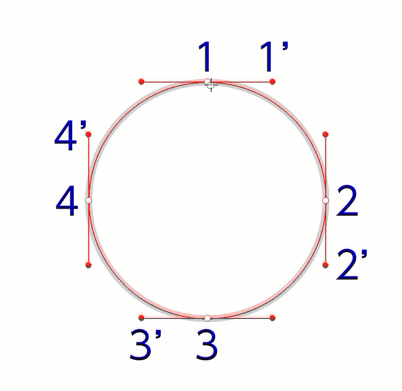
Circle drawn with the ellipse tool↓
It is difficult to modify because the control points are full.
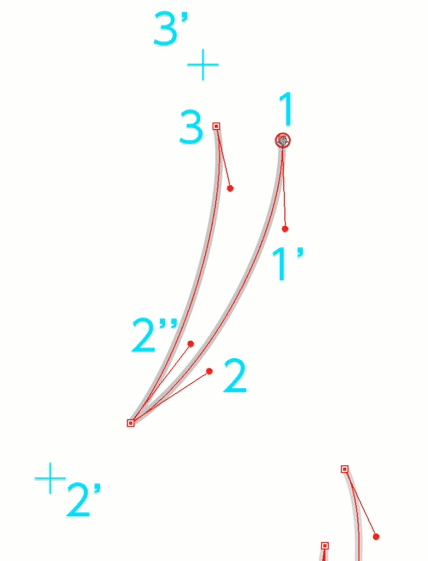
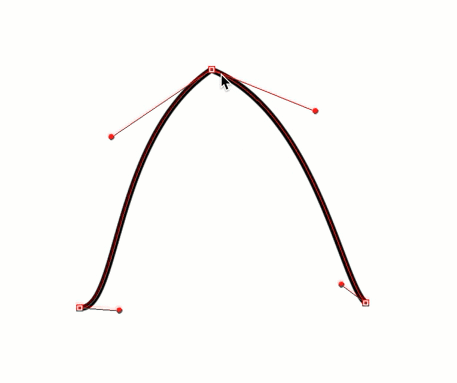
How to make an acute angle
Use this when drawing crisp areas such as hair.
After deciding the length of the handle in step 2, press the "ALT" key.
If you hold down "ALT", you will be able to operate the handle while drawing, so change the direction of the handle as shown in the example.
In practice, I had a sketch of the handle, so I was able to create a nice curve in one go, but when I put in the pen, I didn't have a sketch of the handle guide, so I could just use the approximate position.
It is impossible to draw the desired line in one shot.
The advantage of Bezier curves is that you can make as many corrections as you like later, so just draw the line without thinking too much about it.
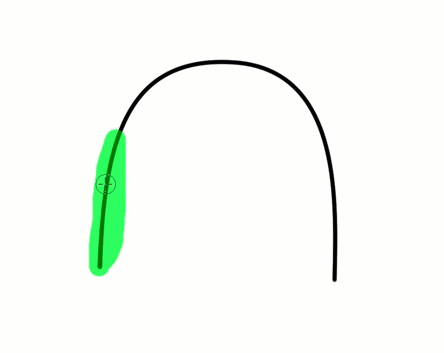
Correction method
To modify the line, use the "control points" of the "line modification tool".
I registered all the tool properties of the control points in the quick tool.
At first, you can use the mouse to select tools and switch between them, but it's faster to use key combinations, so learn the key combinations.
Icons for registration are also summarized in Practice data, so feel free to use them if you wish.
Key combinations when using the line correction tool
Adding control points __Shift-click to add control points in the middle of the curve.
Deleting a control point ___ Delete a control point by holding down Alt and clicking on the control point.
Changing corners __Hold Shift+Alt and click on the control point to convert between acute angles and curves.
One-sided handle operation __Press Alt while dragging the handle.
Move control points
You can move control points and manipulate handles using "Move control points" of the line correction tool.
Add control points
To add a control point, select "Add control point" in the tool property.
Add control points by clicking on the line.
Even if you don't switch it with the tool property, it will remain "move control points"
Control points can be added by Shift-clicking.
If you press Shift, a + mark will be added to the mouse cursor. You can add control points just by clicking.
Control point deletion
To delete control points, select "Delete control points" in the tool properties.
Click on the line to delete control points.
Even if control points are deleted, it will remain "move control points" even if you do not switch it with tool properties.
Control points can be deleted by Alt-clicking.
If you hold down Alt and hover the mouse cursor over the control point, a - mark will be added. You can delete control points by simply clicking on them.
corner switching
Clicking the control point in "Switch Corner" allows you to switch between a corner (acute corner) and a curve.
"Toggle corner" can also be used temporarily with a key combination without selecting the property panel.
You can switch corners in the same way by holding down Shift+Alt and clicking while "Moving control points".
Also, if you press Alt while moving the handle, you can move only one side of the handle.
You can get the same effect as "Toggle corners", but you cannot go back to having no corners, so if you want to go back, use "Toggle corners".
Move path
The line itself can be moved using the `Object'' of the `Operation'' tool.
Click to select an entire line.
You can select multiple lines by holding down Shift while selecting.
In addition to moving, you can also perform operations such as enlarging/reducing and rotating.
Also, you can select and edit multiple control points/handles only while using the "Operation" tool.
cutting the line
Although it is not often used, "Line Cut" allows you to cut a line at any point on the line.
wire connection
When connecting lines, do not use "vector line connections"
It is easier to use the "vector line knob".
Check “Connect lines” in the tool property of “Vector line knob”
Grab the control point you want to connect and place it on the other control point to connect the lines.
Erase line
Erasing lines is not often used while tracing.
Used to erase overlapping parts after completion.
I draw the hair and other parts in a connected manner, and after making the final decision I erase the overlapped parts.
Eraser tool "vector"
Check "Vector Erase" in tool properties
Select "Up to intersection".
And when I put in the ink using Bezier...
I worked with a mouse,
I was able to ink beautifully with a constant line thickness! ! ! ! ! !
It would be impossible for me to draw the long strokes of the hair by hand, and drawing with a mouse would be out of the question. But if you use Bezier curves, you can draw lines so beautifully even with a mouse.
I think this is fine, but the lines are a bit monotonous, so let's add some expression to them.
Line width correction
The line width can be modified using the tool property of the "control point" for line modification.
There are two types of line correction: line width correction.
Control points are literally tools that can only be applied to control points.
The "line width correction tool" can be applied anywhere on the line.
Since control points are created where the width is changed, it will be difficult to correct it later with a Bezier curve.
Let's correct the line width when the line drawing is completed.
Correcting the line width of “control points”
You can modify the line width of "control points" from the tool properties.
You can make it thicker by dragging it to the left on the control point, and thinner by dragging it to the right.
Line width correction using the "Line width correction" tool
"Line width correction" is in the tool property.
You can choose to make it thicker or thinner.
Please try each one.
Using this tool increases the number of control points, so it is best to use it for the final finishing touches.
After adjusting the lines, it looks like this.
It is not necessary to draw all line drawings with Bezier curves.
I think you can just use Bezier curves for difficult long strokes.
Users who liked this post


Comment