
Hi! My name is CJ and here is a quick tutorial with time-saving tips, on Clip Studio Paint.
Quick side-note, all of these tips can also be technically applied to other art software such as Photoshop, or SAI, or whichever that you like. I've personally just fallen in love with Clip Studio Paint ever since I bought it on sale last year, and I highly encourage everyone to get it when you can.
Tip #1. Open a new window of your canvas, but flipped.
It's a common struggle for digital artists to work on something for a long time, to then flip it horizontally and realize how many proportional mistakes have been made. So here's how to open a new window with your canvas flipped, so you can catch your mistakes preemptively.
While your canvas window is selected, go to the top Menu bar and click Window, scroll down to Canvas and select New Window.
This will open a new window of your canvas, which you can then drag and resize to put to a little corner of your screen. Then by simply pressing H on your keyboard, you'll see a flipped version of your canvas.
This smaller flipped window will also help to make sure you don't lose sight of what your piece looks like overall, and to not get you too lost in the details.
2. Use Color sliders when color-picking
This is more of a personal preference, but I've always found it hard to color-pick using the color wheel. The color sliders give a more controlled approach to finding the exact colors you want.
I personally like sticking to the HSV slider. The H stands for Hue, which gives you the base spectrum of colors.
The S is for Saturation, which refers to the strength of the color. The further left it goes, the more into the dull gray tones it becomes. Further to the right will make it "purer", so to speak.
Lastly V is for value, which is the overall intensity to how light or dark a color is.
3. Rearrange your Workspace
While the default arrangement of the tools is already pretty good enough, don't be afraid to rearrange them in a way that makes art more efficient for you. Simply drag the top end of the sections you'd like to move, and let the red lines that show where your section can snap next to be your guide.
Once you're satisfied with your new setup, you can go to Window again on the Menu bar, scroll to Workspace, then click on Register Workspace. Simply rename your Workspace anyway you want and then bam. Much much better.
4. Use the Asset Library
One thing that truly made me fall in love with Clip Studio Paint was the vast library of brushes, patterns, and most of all 3D assets readily available to use. And a lot of them are free!
In order to start using them, first make sure you're logged in with your account. Then head on over to the Clip Studio Assets library over at the left hand side. Type in the search bar what assets you'd like to use. Make sure to use an underscore instead of space, to denote space between words.
Try to keep your search term as simple possible, then use the filter tags to narrow down what's available. Click on the ones you like and then download.
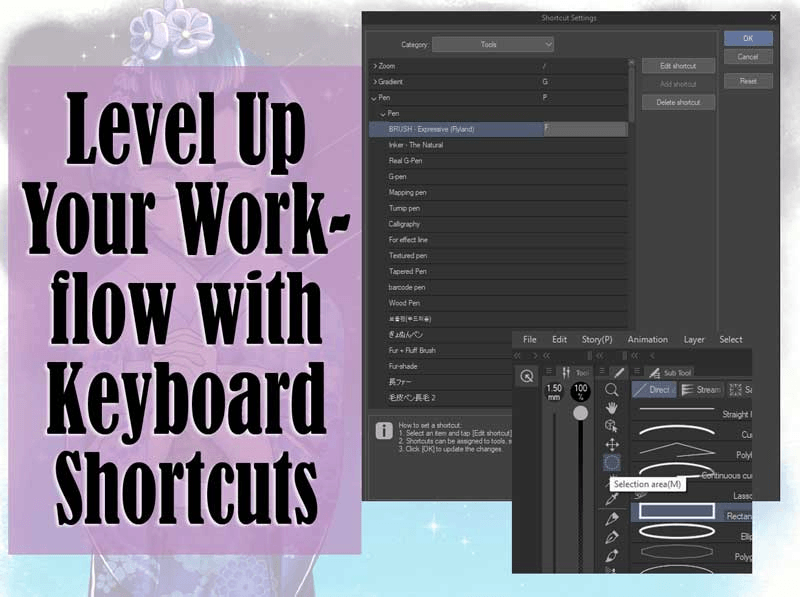
5. Lastly, learn the Keyboard Shortcuts
I know it's the most obvious thing, but in my opinion it's what's actively saving me the most time from having to stop working, go on a hunt for the tool I need visually, and then coming back again to the canvas, only to repeat that same process for the next tool needed.
We have two hands, with multiple fingers each. So I suggest taking the time to learn the keyboard shortcuts to save you those sweet sweet seconds of art time.
There you have. Those are my quick tips. Thank you so much for watching!
Les utilisateurs qui ont aimé cette publication


Commentaire