How to 𝗪𝗲𝗮𝘁𝗵𝗲𝗿 🌧️ 𝗕𝗮𝗰𝗸𝗴𝗿𝗼𝘂𝗻𝗱 & 𝕍𝕀𝔹𝔼𝕊
Hi, my name is N, pronounced as "Ann Zero One" I am an Art Vtuber, aka V-artist! I do tutorials, fun entertainment videos, and also story-drawing sessions!
This time around, I am making this CSP tutorial about adding a background to your character art along with using the CSP Free Assets and different brushes to create whole new vibes and atmosphere in your artwork!
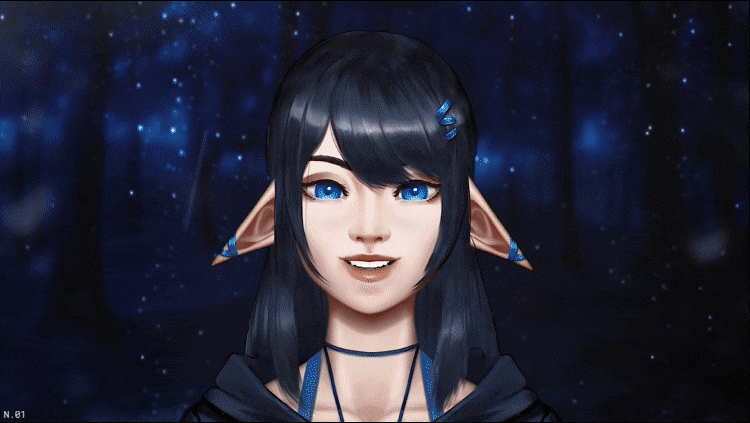
(𝐻𝑖𝑔ℎ𝑙𝑦 𝑟𝑒𝑐𝑜𝑚𝑚𝑒𝑛𝑑𝑒𝑑 𝑒𝑠𝑝𝑒𝑐𝑖𝑎𝑙𝑙𝑦 𝑖𝑓 𝑦𝑜𝑢 𝑎𝑟𝑒 𝑛𝑒𝑤 𝑡𝑜 𝐶𝑙𝑖𝑝 𝑆𝑡𝑢𝑑𝑖𝑜)
𝗩𝗜𝗗𝗘𝗢 𝗩𝗲𝗿𝘀𝗶𝗼𝗻 𝗨𝗥𝗟:
This Tutorial will cover a Moody Gloomy Rain weather and vibe, a Dramatic Sunset, and a Cold, Melancholy Snowfall.
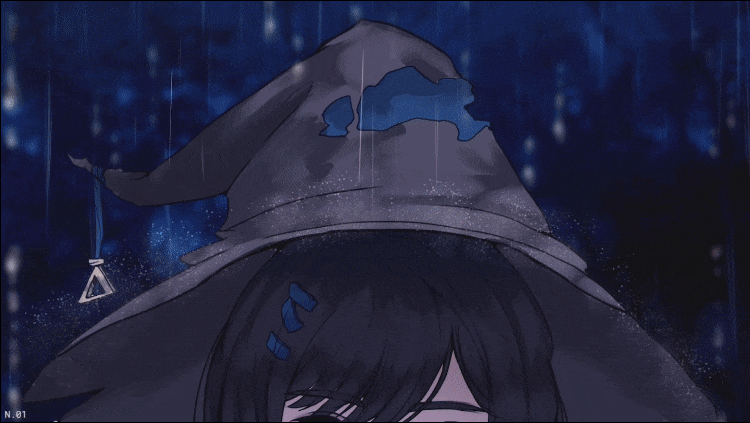
𝐻𝑜𝑤𝑒𝑣𝑒𝑟, 𝑡ℎ𝑒𝑠𝑒 𝑚𝑒𝑡ℎ𝑜𝑑𝑠 𝑐𝑎𝑛 𝑏𝑒 𝑢𝑠𝑒𝑑 𝑡𝑜 𝑐𝑟𝑒𝑎𝑡𝑒 𝑎𝑙𝑚𝑜𝑠𝑡 𝑎𝑛𝑦 𝑡𝑦𝑝𝑒 𝑜𝑓 𝑤𝑒𝑎𝑡ℎ𝑒𝑟. 𝐴𝑛𝑑 𝑖𝑓 𝑦𝑜𝑢 ℎ𝑎𝑣𝑒 𝑎𝑛𝑦 𝑞𝑢𝑒𝑠𝑡𝑖𝑜𝑛𝑠, 𝑓𝑒𝑒𝑙 𝑓𝑟𝑒𝑒 𝑡𝑜 𝑚𝑒𝑠𝑠𝑎𝑔𝑒 𝑚𝑒!
𝘏𝘢𝘷𝘪𝘯𝘨 𝘰𝘶𝘳 𝘥𝘳𝘢𝘸𝘪𝘯𝘨 𝘪𝘯 𝘢 𝘯𝘢𝘵𝘶𝘳𝘢𝘭 𝘴𝘵𝘢𝘵𝘦 𝘸𝘪𝘵𝘩 𝘢𝘮𝘣𝘪𝘦𝘯𝘵 𝘭𝘪𝘨𝘩𝘵𝘪𝘯𝘨, 𝘮𝘦𝘢𝘯𝘪𝘯𝘨 𝘸𝘪𝘵𝘩𝘰𝘶𝘵 𝘢𝘯𝘺 𝘥𝘪𝘳𝘦𝘤𝘵𝘪𝘰𝘯𝘢𝘭 𝘭𝘪𝘨𝘩𝘵𝘴 𝘱𝘢𝘪𝘯𝘵𝘦𝘥 𝘪𝘯 𝘰𝘳 𝘤𝘰𝘭𝘰𝘳𝘴 𝘵𝘩𝘢𝘵 𝘢𝘳𝘦 𝘵𝘰𝘰 𝘤𝘰𝘭𝘥 𝘰𝘳 𝘸𝘢𝘳𝘮, 𝘸𝘪𝘭𝘭 𝘨𝘦𝘵 𝘵𝘩𝘦 𝘣𝘦𝘴𝘵 𝘳𝘦𝘴𝘶𝘭𝘵𝘴.
𝘏𝘰𝘸𝘦𝘷𝘦𝘳, 𝘪𝘵'𝘴 𝘯𝘰𝘵. 𝘕𝘦𝘤𝘦𝘴𝘴𝘢𝘳𝘪𝘭𝘺 𝘯𝘦𝘦𝘥𝘦𝘥.
Backgrounds - the easy CSP assets way🖼️
To start, we’ll create a cloudy, gloomy rainy atmosphere that will allow us to go over multiple methods we will need to create other moods using weather.
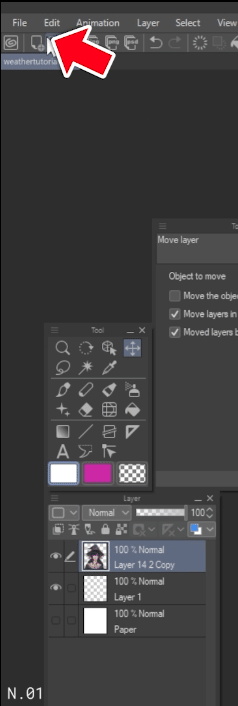
We’ll begin by first getting some free essential materials from the Clip Studio Asset store that can be opened by clicking on the ‘File’ at the top left tab and then hovering down to the ‘Open Clip Studio….’ option
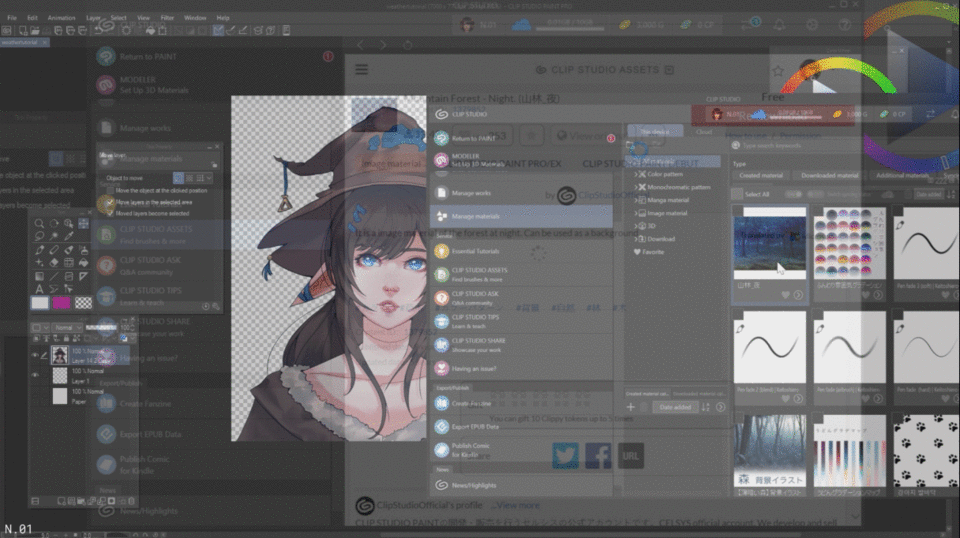
Inside this newly opened window, we will first navigate to the Clip Studio Assets tab on the left.
Then, in the search window, look for Background, filter it by Image Material, sort it by Popular, and look for a fitting background image.
Download the background by clicking on the red button in the top right
and then navigate to the ‘Manage Materials’ tab on the left.
Now you can simply drag and drop the background onto the canvas,
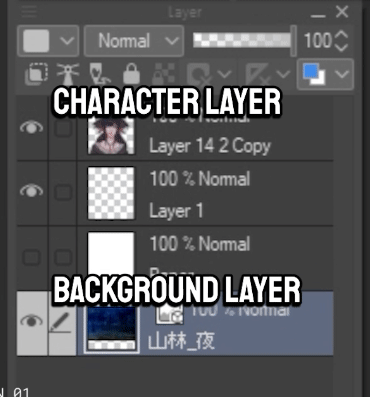
reorder the background layer to be behind the character,
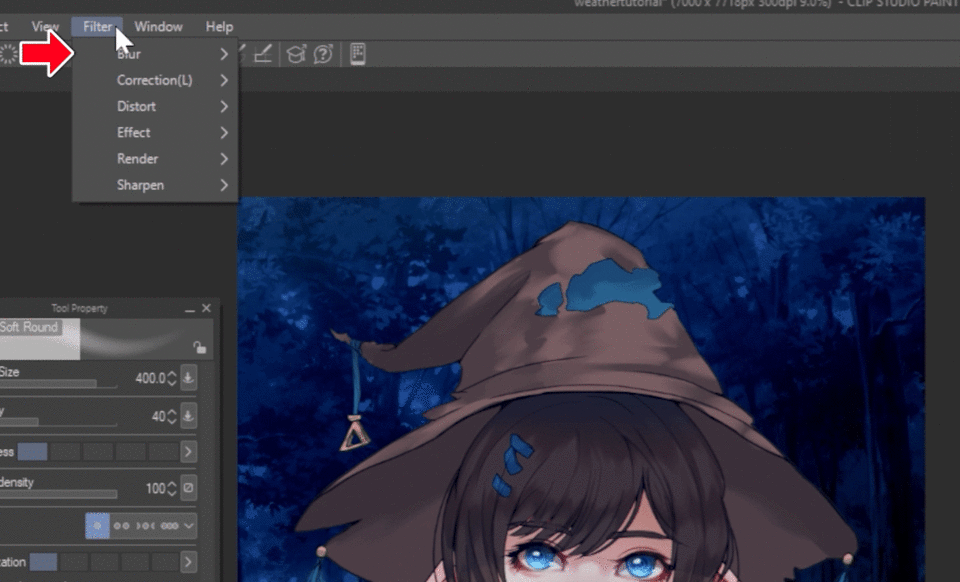
And Using the filters tab, you can optionally blur the background image if you wish to add some depth. By Navigating to Blur and choosing Gaussian blur.
Gradientmap - Tie it all together! 🟪🟧🟦
You might notice that the character doesn't exactly fit the background, so we will use Gradientmaps to fix this.
Gradient maps change the base colors of our drawing; it will require getting new Gradient maps from the Clip Studio Assets or Creating your own. We will go over the aforementioned method in this tutorial.
I will search for Gradient Maps,
set the search to the most popular, and then choose a gradient map that looks fitting with a Rainy weather vibe
𝘊𝘰𝘯𝘵𝘦𝘯𝘵 𝘐𝘋 𝘶𝘴𝘦𝘥 𝘧𝘰𝘳 𝘵𝘩𝘪𝘴 𝘗𝘢𝘳𝘵𝘪𝘤𝘶𝘭𝘢𝘳 𝘛𝘶𝘵𝘰𝘳𝘪𝘢𝘭: 1723549 - 𝘚𝘬𝘺
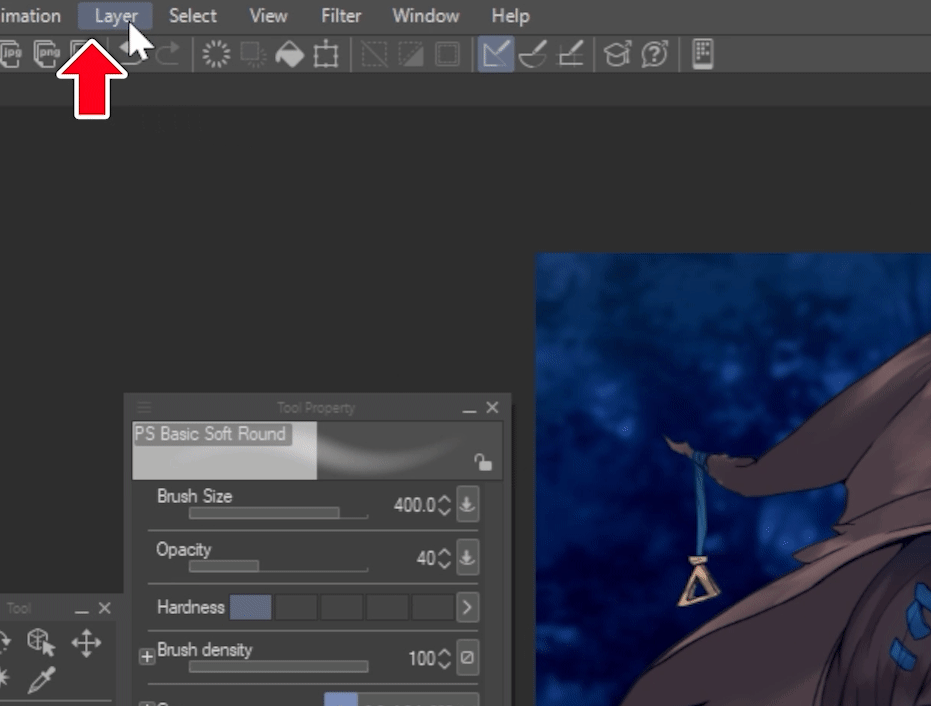
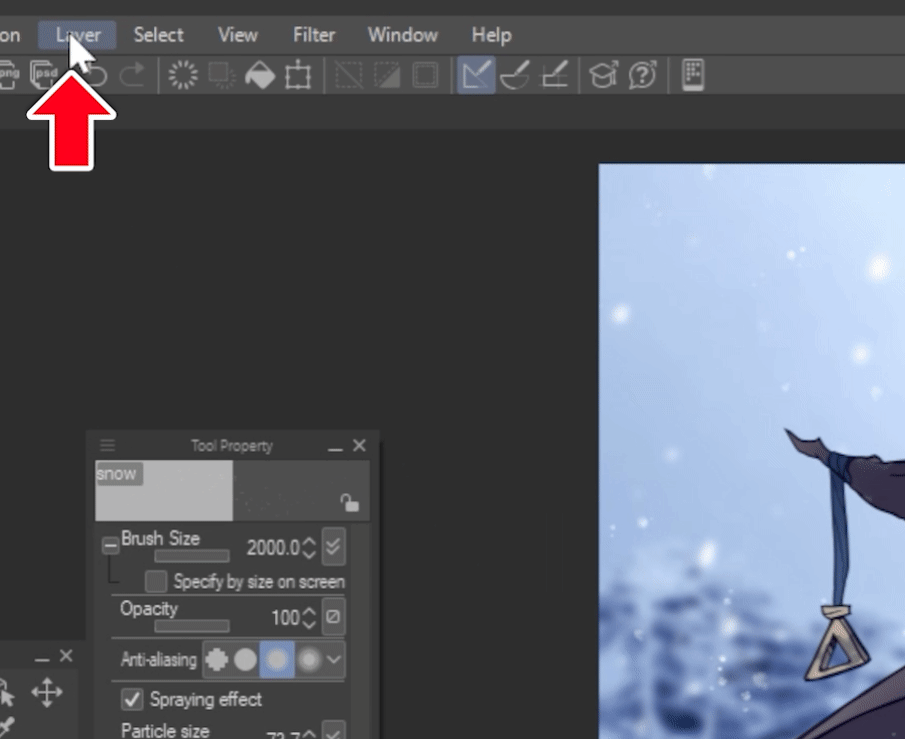
After it finishes downloading, you can simply open up the Gradient map window in Clip Studio by going to the ‘Layer’ Tab on the top left near where the ‘File’ Tab was for opening the Assets window.
There, under ‘Layer’, you will want to navigate to the ‘New Correction Layer’ option and go to the Gradient Map option
This will create a new layer in your Layers window
while also opening the Gradient Map window.
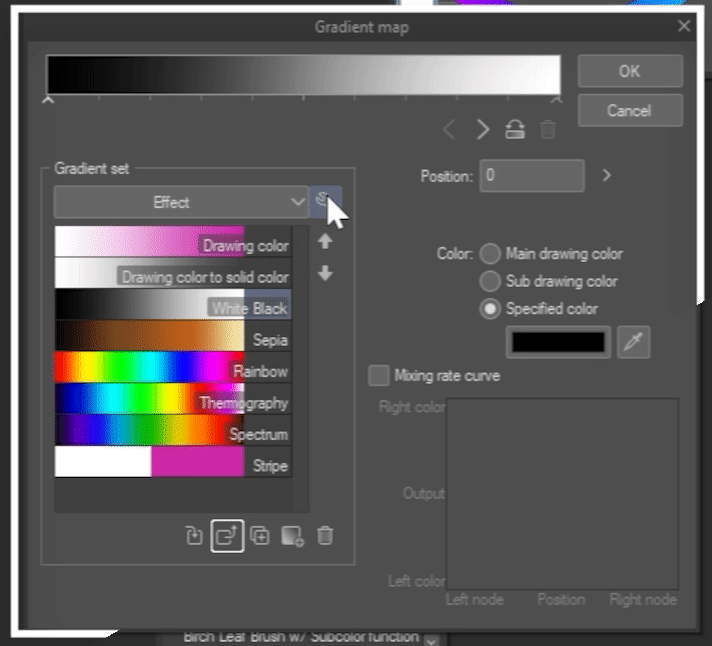
From there, Click on this wrench icon inside the Gradient Map window
And navigate to ‘Add gradient set.’ It will open a small window showing you which materials you have yet to add,
and then Select your newly downloaded Gradient set.
And then click on Add! =)
(𝐷𝑜𝑛’𝑡 𝑏𝑒 𝑤𝑎𝑟𝑦 𝑎𝑏𝑜𝑢𝑡 𝑖𝑛𝑠𝑡𝑎𝑙𝑙𝑖𝑛𝑔 𝑚𝑢𝑙𝑡𝑖𝑝𝑙𝑒 𝑡𝑦𝑝𝑒𝑠 𝑜𝑓 𝑔𝑟𝑎𝑑𝑖𝑒𝑛𝑡 𝑚𝑎𝑝𝑠. 𝐴𝑠 𝐶𝑙𝑖𝑝 𝑆𝑡𝑢𝑑𝑖𝑜 𝑠𝑜𝑟𝑡𝑠 𝑡ℎ𝑒𝑚 𝑎𝑢𝑡𝑜𝑚𝑎𝑡𝑖𝑐𝑎𝑙𝑙𝑦 𝑖𝑛𝑡𝑜 𝑔𝑟𝑜𝑢𝑝𝑠 𝑏𝑦 𝑛𝑎𝑚𝑒 𝑎𝑛𝑑 𝑎𝑠𝑠𝑒𝑡.)
In our Gradient window, we can browse the different newly downloaded Gradient maps to find one that fits the mood we are looking for.
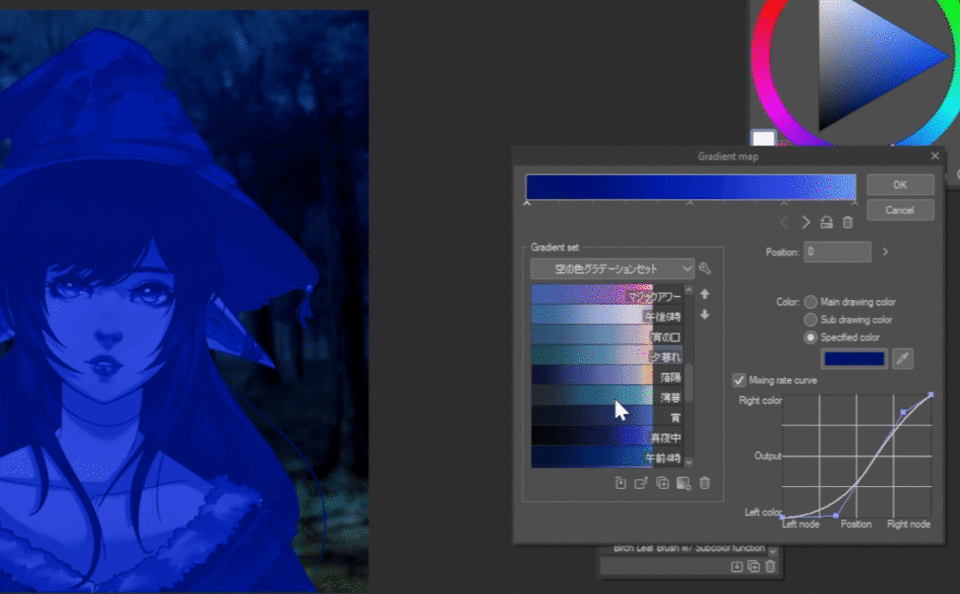
If the gradient window is created under the character, you might need to drag it to sit on top of our character and then clip it on using this ‘Clip to Layer Bellow’ button.
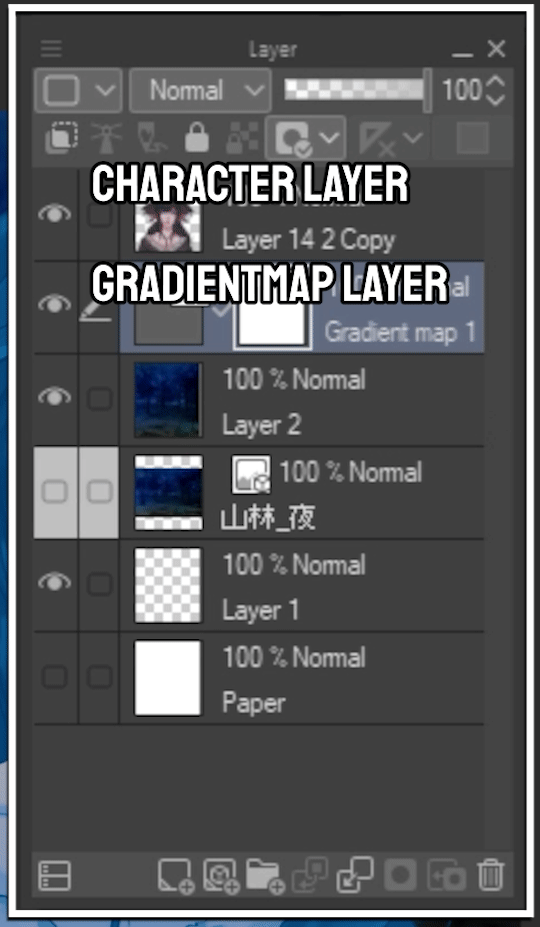
The artwork will appear a bit dissonant as you browse the different gradient options at first, however,
After finding the right color scheme for us, we will navigate to the Gradient map Layer in the Layer Window and click on the drop-down menu that, by default, says normal, the blending option for the layer.
And navigate down to the ‘Color’ options. At times the Overlay and Multiply or Add Glow options work well too. However, for this one, I’ll be choosing the Color Option. And lower the opacity to about 45% percent.
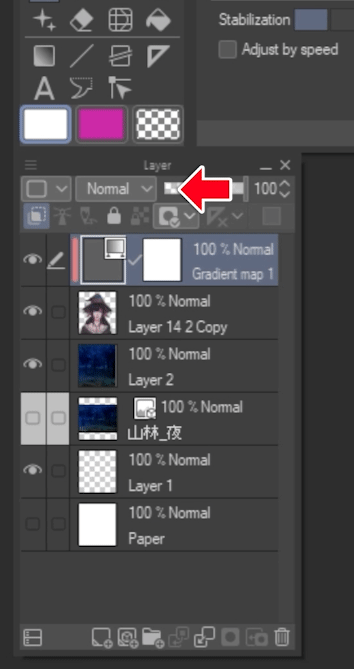
And we can already see how much better our character fits the background!
𝐒𝐩𝐞𝐜𝐢𝐚𝐥 𝐁𝐫𝐮𝐬𝐡𝐞𝐬 - 🖌️
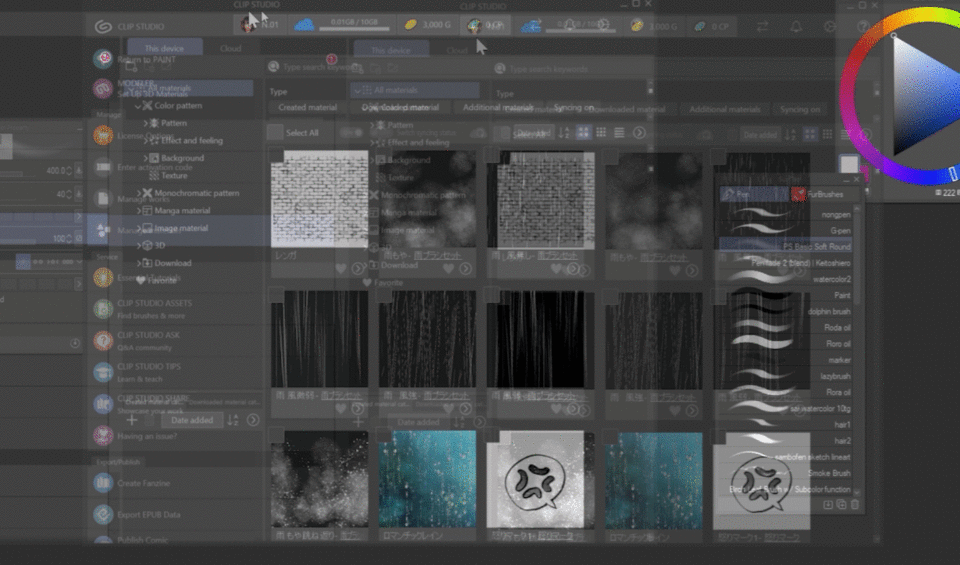
You might notice that we lack rain for our rainy weather mood, so we can now navigate to the clip studio Assets to obtain brushes to create the rain!
Searching for ‘Rain brush,’ we will find brushes that are made to create a rain effect.
𝘊𝘰𝘯𝘵𝘦𝘯𝘵 𝘐𝘋 𝘜𝘴𝘦𝘥 𝘧𝘰𝘳 𝘵𝘩𝘦 𝘙𝘢𝘪𝘯 𝘣𝘳𝘶𝘴𝘩𝘦𝘴 𝘢𝘳𝘦 𝘐𝘋: 1668309 𝘐𝘋: 1550003 𝘐𝘋: 135881
After downloading them. You must drag them onto your brushes from the manage material tab to use them!
Create a new layer above and below your character,
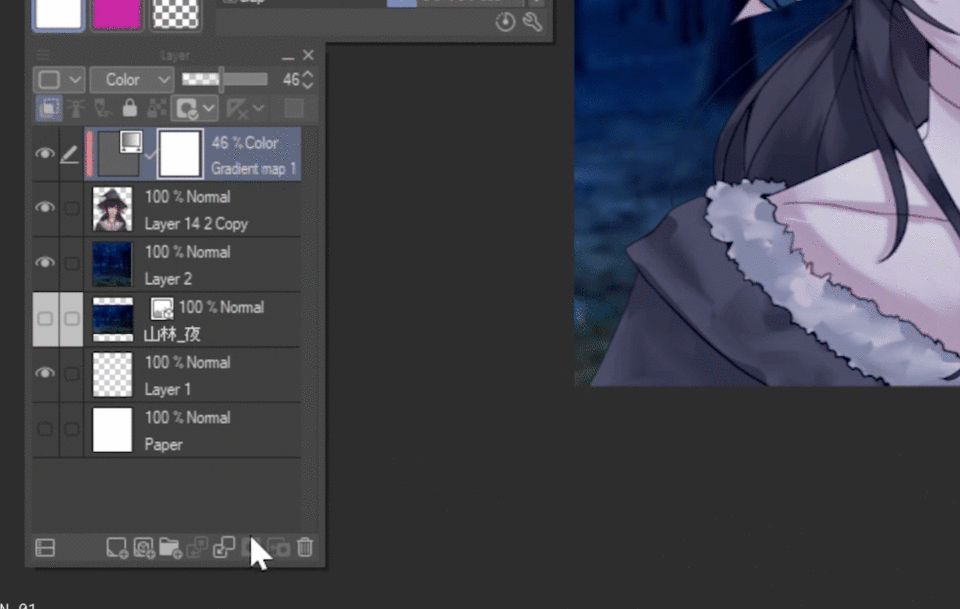
and start creating some foreground and background rain! using the brushes we just downloaded
You can also slightly blur the background rain as we did in the background! And even use some large rain droplets in the front and blur them out a bit as -well.
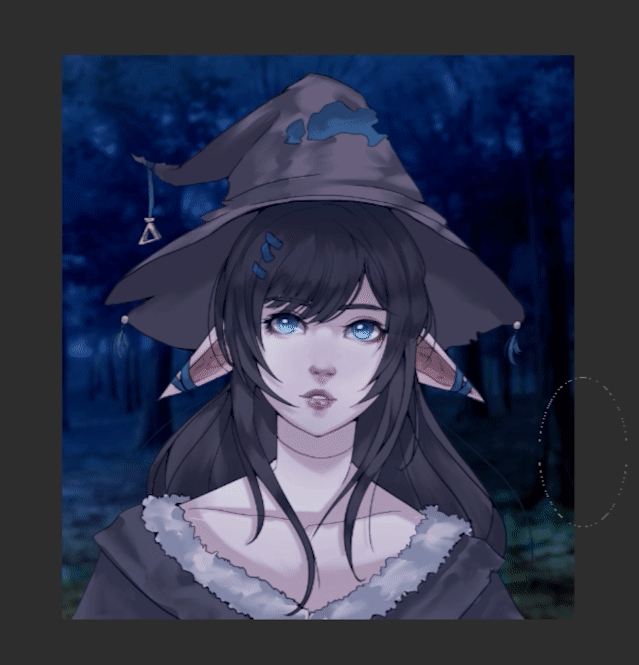
After we made a gloomy rainy vibe, we can re-do the same process with other weather and vibes.
𝗦𝘂𝗻𝘀𝗲𝘁 𝕍𝕀𝔹𝔼 🌇
Just like earlier, we will go get our background, put our character in a layer above, and then apply the gradient map.
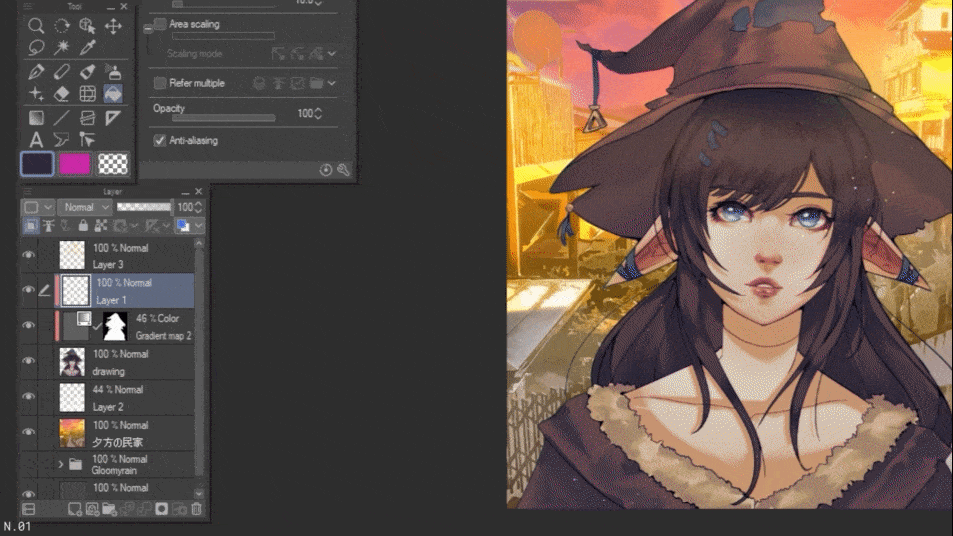
And as needed, we will have to add brushes behind and in front of the character; in this case, I got a sunset vibe background image that I have blurred like earlier and used an orange-purple gradient map while getting some dust brushes to create the same effect as we had with the rain.
However, even though we have color-corrected our character, the values are still a bit off,
Since the light source comes from behind, we want to increase the shadows on the character so it looks a bit more dramatic so that we will make a new layer with the multiply blending mode. Clip it on to our character layer
Fill the new multiply layer with a dark purple-blue and lower its opacity to about 65% and then make a mask by clicking this button and start erasing the edges of our dark purple layer to create a sort of hallow effect.
We will then make a new add(glow) layer on top to add some saturated orange colors at the same areas we had deleted in the mask earlier.
To create a bit of a saturated halo effect adding warmth and a refraction effect.
It is important not to clip this layer down as the added benefit of some spilling color will only add to the contrasting effect.
𝗦𝗻𝗼𝘄𝘆 𝘄𝗲𝗮𝘁𝗵𝗲𝗿 𝗮𝗻𝗱 𝕍𝕀𝔹𝔼 ❄️
At this point, I hope we established a workflow to work with so that you won't feel lost whenever you try to make your own weather vibes.
By starting with a Backgroundimage, Background Brush, character layer Foreground Brush, and then a clipped down Gradientmap onto our character.
And as we have seen earlier with the sunset vibe, we have different elements coming into play depending our weather,
for a Snowy calm sort of mood, we will introduce a new type of adjustment layer that will clip down to our character after the gradient map, a Hue/Saturation/Luminosity layer.
Here we will lower our saturation and increase our luminosity to help and actually reduce the colors and contrast in the image to simulate the cold weather with fake atmospheric dust.
BEFORE:
After:
Now we can be done here as this is its own mood.
However, if you want, you can create a new layer and set it to overlay and paint in some of the colors back in.
From adding some red to the lips, nose, cheeks, and ears to adding a new vibrant blue to the eyes,
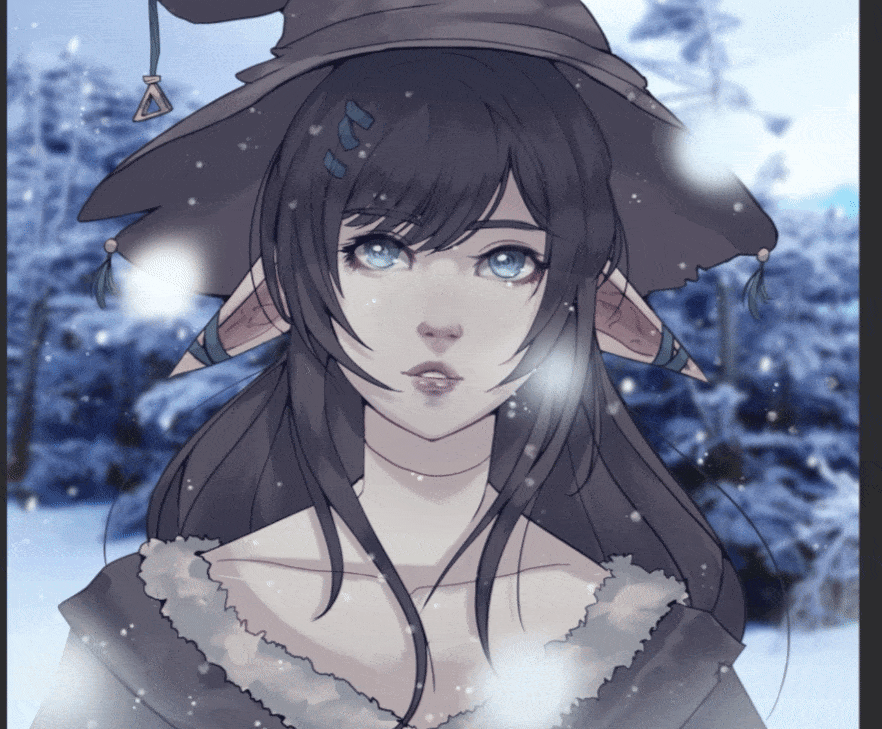
and by doing this, you will add some saturated points and draw the viewer's eye to those points, effectively making a new focal point.
Closing Notes 🗒️
Hopefully, you found this tutorial helpful. You can create a new unlimited amount of moods with these methods, and of course, you can improve on them and make your own method that suits you better.
If you found this tutorial helpful, and if you have any questions, feel free to comment down below, and I’ll do my best to answer =)
𝐵𝑎𝑐𝑘𝑔𝑟𝑜𝑢𝑛𝑑 𝐼𝐷𝑠: 1379852 (𝑁𝑖𝑔ℎ𝑡 𝐹𝑜𝑟𝑒𝑠𝑡) 1795374 (𝑆𝑛𝑜𝑤𝑦) 1921158 (𝑆𝑢𝑛𝑠𝑒𝑡)
𝐵𝑟𝑢𝑠ℎ𝑒𝑠 𝐼𝐷𝑠: 1722639(𝐷𝑢𝑠𝑡)𝘐𝘋: 1668309 𝘐𝘋: 1550003 𝘐𝘋: 135881 (𝑅𝑎𝑖𝑛) 1702509(𝑆𝑛𝑜𝑤)


댓글