Blending Modes: Normal
Hello!
This is Mana1057 and we're gonna talk about some basic to intermediate uses of Blending Modes. From Basic of the basics to Effects even to Correction Layers and Component Blending Modes.
This topic has been divided into five (5) parts; Normal, Darken, Lighten & Contrast, Effects, Component - Blending Modes.
This FIRST part is about the introduction of the topics and the Default Blending Mode.
You can check out this video right here for the first part:
◊ INTRO
We use Blending Modes because it makes the computation of colors easier and that’s what Blending Modes are, they compute (Add, Subtract, Multiply, Divide, etc) the values of RGB, Vibrancy, Saturation and Color of the Blending LAYER and the Base Layer or Layer Below
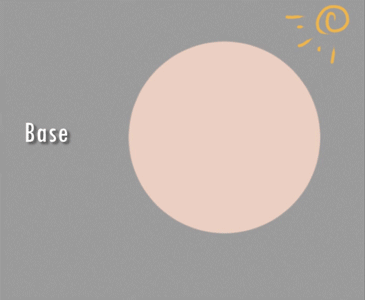
Okay! Please look at this ball right here:

We will be using Blending Modes on these areas/parts right here for the basic Blending Modes.
For the intermediate parts, we'll talk about some uses of Correction Layers in terms of shading
Let’s start with the Basic and the default Blending Mode.
◊ DEFAULT BLENDING MODE - NORMAL
Default Blending Mode is Normal; whatever is on this Blending Mode won’t affect the Layer Below and the Layer Above.
We use this for Sketching, Line Arts, Base Colours, some people even use this for Coloring; which is amazing! I can’t do that! We'll talk about some other uses of the Normal Blending Mode which includes Background Placing mix with Correction Layers.
→ DRAWING
Coloring or shading on Normal Blend Mode is quite a task for me because I have to analyze the base colors through and through to make sure that they match, make sure that they blend together on the Blending Layer (Normal).
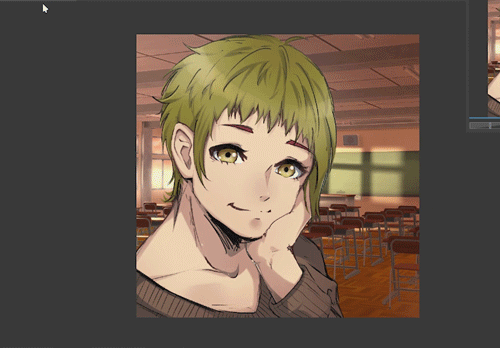
The example below is a drawing purely on NORMAL Blending Mode
Using the Normal Blending Mode is like doing Traditional Art, you’re not relying on the special effects of Glow Dodge, not the tones made by Multiply, everything is on you. You have to decide everything.
→ Placing Backgrounds
Other uses of the default Blending Mode; NORMAL, is for placing Matte Painting or Pre-made Backgrounds. You can make your own or you can grab some at Clip Studio’s Assets Material
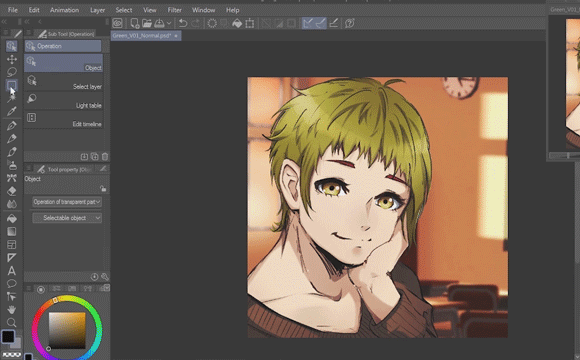
My most used Pre-made Background is the Classroom from the Assets Material. Just drag and drop that material to your drawing. Make sure it’s at the bottom of your Character/s layer.

TIPS
• You can zoom it in. Scale it up so that you can get the portion that you only need and this helps randomize it, so that you can use it again and again on different drawings.
- Pre-made BGs from Clip Studio are very very high quality. You can zoom it in and it won’t pixelate.

- When I get the portion that I want, I duplicate that Background and [Right Click] the Duplicated layer > [Rasterize] . The Duplicated one is the one I edit, usually Hue and Saturation, sometimes Gaussian Blur, there are times that I've paint over few details
• Since this is a pre-made background, using Tonal Corrections or Correction Layers can help you randomize your background of choice, just to mix things up.
→ Correction Layers
Other uses of the NORMAL Blending Mode is on Correction Layers.
Correction Layers are sometimes called Adjustment Layers. These are the Brightness and Contrast, the Hue and Saturation and so on and so forth. Correction Layers make a New layer that is purely for Tone Adjustments, Blending Mode and Opacity works on them, so is Masks.
We use them to adjust or to correct our drawings without the need to recoloring and such. You can access them on [Layer > New Correction Layer]
Almost every Correction Layers works great on the Normal Blending Mode.
My most favorite is Tone Curves. Basically, everything is already there. Just place the Tone Curve Correction Layer at the very top on your Layer Tab.
On the example on the left. the Background is darker and much saturated because everything is being affected by the Tone Curve.
On the example on the right, if you only want a certain layer to be affected, place the Tone Curve/Correction Layer of your choice ABOVE that layer and click CLIP ON LAYER BELOW.
For this example, I want everything affected so I'll be using the on the left / I will not be using CLIP ON LAYER BELOW on this Correction Layer.
→ Core Shadow on Normal
Let’s say that I want a Core Shadow to be on the character. We could make a New Layer > Set on MULTIPLY > and just make a shadow, right? But let’s turn this whole drawing on PURE NORMAL Blending Mode.
Get your Lasso Tool > Draw the areas that you want to have a shadow > Then go to Layer > New Correction Layer > Level Correction.
This will create a New Correction Layer – make sure this is ABOVE your character!

At the Level Correction Menu > Drag the Right Slider at the very bottom to the Left – depending on how dark you want the shadows to be.
We now have a shadow and it’s still on NORMAL. If your shadows are too hard on the edges > Click the Mask Icon of the Level Correction Layer (The second icon)
• If you want to add more areas to be affected by the Correction Adjustment, get an AIRBRUSH > make sure it’s on color WHITE and draw the areas
• If you want to erase the areas to remove the Correction Adjustment, get an ERASER > and just erase the parts you don’t want to be affected anymore.
• If you want to edit the shadows, just double click the Correction Icon and feel free to edit again
So we started with a character, then we added a background, and some correction layers – and everything is on NORMAL Blending Mode!
◊ NEXT TOPIC
Next Topic, let’s talk about DARKEN Blending Modes; what they are and their common uses along with some intermediate uses.
Please remember that this is a 5 part series, this is the first one – now let’s go to the next one!


Kommentar