
Hello! In this article we will learn step by step how to make a Watercolor style Animation in Clip Studio PAINT, we will see the whole process so that we can achieve a great result.
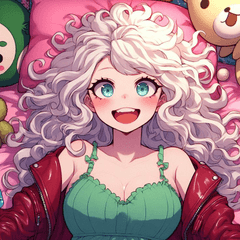
The animation we will make:
On this occasion we will make a watercolor style animation trying to make it as artistic as possible, that is, so that the brush strokes are noticeable when painting, remember, we are not looking for perfection.
To do this, we will go step by step with each of the parts of the process, so that you understand it in the best way.
Therefore, I invite you to watch the following video:
Tutorial: Watercolor Style Animation in Clip Studio PAINT
Remember to activate the subtitles in your language, you will surely find them ;)
And tell me what you thought of the tutorial?
We saw step by step how to make a Watercolor style animation in an easy and simple way.
Step-by-step tutorial summary:
Now I invite you to review what you have learned through a guide that will support what you learned in the video tutorial.
1. Creation of the Animation Project:
File - New and choose the last option, Animation and put the following values, but if you want to make it smaller you can do it without problems :)
You can try with the following sizes:
5760 x 3240
3840 x 2160
1920 x 1080
And the animation will be 72 frames and 24 fps.
Remember to activate the timeline in: Window - Timeline
And don't forget to save the project in File - Save.
2. Key Poses of Watercolor Animation
We are going to make a simple animation, so we will make 3 key poses, which are the following:
Key Pose No. 1 in frame 1.
Key pose #2 will be on frame 33
And key pose #3 will be on frame 52
Achieving for the moment, the following result:

3. Watercolor Animation Breakdown
This drawing is very important, so we will do it in frame 26 and it will be like this:
Don't forget to activate the onion skin tool, so you can see the before and after drawing.
Initially we will have this result, with the main drawings:
4. Intermediate Drawings of Watercolor Style Animation
In this part of the animation process we will add more drawings to make the girl's movement more fluid.
The first intermediate drawing will be in frame 24.
The second intermediate drawing on frame 29.
The third intermediate drawing will be on frame 31.
The fourth intermediate drawing will be in frame 48:
And the last intermediate drawing will be in frame 50:
Achieving the following result:
5. Watercolor Style Animation Sketch

Simple but cute, isn't it? Now, we will continue with the process of Lineart and Color in Watercolor style.
6. Animation Color Palette
Outside the animation folder I have created a layer called colors where I will have all the colors that I will be taking when painting the animation:
7. Watercolor Style Animation Lineart Brush
For this part of the process I will use a brush from the Clip Studio PAINT Assets page to clean up the animation, which is free and which I share with you below:
I thank the creator of these brushes, they are beautiful!
Once we have downloaded it, we can take it and drag it to the Subtool panel of the Pencil or Pen tool and we can test how this brush works.
And as you can see, it is a textured stroke which looks very natural, it is very useful for cleaning up our animation in a more natural and artistic way.
8. Convert frames to folders
As an Animator, this is definitely one of my favorite options in Clip Studio PAINT. We can convert a frame from the timeline to a folder where we can add the layers we want. Below I will show you how to do it again.
First, we select the Animation folder called Sketch and lower the opacity to 50% and previously activate Change Layer Color:
Then we go to the timeline to create a new Animation folder, we can call it Lineart, Color or Final Animation, whatever you want.
At the beginning it will be empty, so we need to create a new Animation cel, on frame #1:
Now we go to the layers panel and selecting Frame 1 we are going to create a New Layer Folder:
And we change the name of the new folder, the name must be the same as the Frame, in this case "1".
Then we take the layer called "1" which is the frame and put it inside the folder called "1":
This is how this folder becomes the frame in our animation and in the timeline. If you want to change the name of layer "1" you can do so, and the idea is to create more layers as you can see in the following image:
Try to create the same layers as me and with the same name because we will work in order on each of them, so the process of this animation will be easy to do and entertaining.
9. Watercolor Animation Cleanup
We select the Lineart layer which is a vector layer and with the brush that we downloaded, installed and tested previously we will begin to clean the first drawing of the animation:
Once we have the first drawing clean, we move to frame 33 to clean up the second key drawing, and here comes one of my favorite Clip Studio PAINT options.
We added a new animation cel on frame 33 and a new folder has been created in the layers panel keeping the same layers that we created in the first frame of the animation, I love it!
This is how we will clean our drawings in the Lineart layer of each of the drawings as we create them, achieving the following result:
10. Girl Animation Background Color | Important!
Before starting to fill our work with color, it is very important to select the "WHITE BG" layer and paint white on all the animation drawings, remember that watercolor works with water, therefore, if we do not have a solid background and when we add a background to our project, the colors will mix with the girl and it will not look good.
11. Base color of the Watercolor style animation
To start we select the "Base Color" layer to paint the flat colors of our animation:
And this time we will use a brush that comes by default in Clip Studio Paint, when you select the Brush tool, in Subtool you can select the Watercolor tab and choose the Round Brush.
And doing the same with each of the drawings in the "Base Color" layer we will achieve the following result:
12. First Texture for Watercolor Style Animation
To further enhance the watercolor color of our animation, we are going to add a paper texture that is included in the brush that you can download from the Clip Studio PAINT assets, which is free like the previous one and is the following:
Once again, my thanks to those who create these beautiful brushes :)
Once you add it to Clip Studio PAINT, you grab it and drag the material to the work area:
It is very important that you first select one of the layers that are outside the animation folder, so that the texture is a normal layer and is visible throughout the animation.
Now we take the texture layer and place it on top of all the layers in the project, covering all the elements for the moment:
Once the texture layer is selected, we go to Blending Mode and change it from Normal to Overlay:
Making it look like this:
13. Cool Watercolor Brushes
Now I'm going to use 2 types of brushes for the shadow of the animation, to paint I'll choose Watercolour and Wet Blend:
14. Shadow 1 from Watercolor Style Animation
Now we are going to paint on the "Shadow 1" layer of each of the animation drawings, to further artistically improve our animation by making it look like a watercolor painting.
Achieving the following result for the moment, but we need a little more:
15. Shadow 2 of Watercolor Style Animation
Now we will paint on the "Shadow 2" layer to add more details:
Obtaining the following result:
16. Watercolor Animation Details
Now we are going to select the "Details" layer of each of the animation drawings to add the last color details:
17. Animation Lineart Edition
We duplicate the lineart layer of each of the drawings:
And we are going to select the Line Correction tool, in Subtool Modify Line Width and in Tool Properties we activate Reduce:
What we are going to do is play with the strokes, so that in some areas it is thinner, almost invisible, and in other areas the line will be stronger, this will give the sensation that the color we were adding was mixed with the lines naturally:
18. Animation Project Fund
We create a new raster layer outside the animation folder and choose one of the brushes that comes in the resources we downloaded and installed previously, we drag it and leave it in the Brush Subtool to use it:
And we hide the girl's animation and the color palette for a moment to calmly paint a simple background:
At the moment we have this animation and it is much better :)
19. Final Animation Texture
We open the Material panel and choose the other texture that comes with the brushes I shared with you earlier:
We take the material and put it on top of all the layers of the animation:
And in blending mode we set it to Overlay:
Making it look like this:
And finally, we edit the size of the texture with the Operation tool achieving the following effect:
20. Export your Animation as .mp4 video
Let's go to File - Export Animation - Movie
We choose the folder where we want to export our animation and we can change its name:
And in the window that appears called Movie Export Settings I will change it:
At Full HD 1920 x 1080 and we accept:
21. Export your Animation as a .gif video
Let's go to File - Export Animation - Animated Gif
We choose the folder where we want to save our .gif animation
And in animated GIF export settings we can change the size if you wish, when finished we click accept:
22. Final Watercolor Style Animation in Clip Studio PAINT

I hope this article has been very useful to you and that it motivates you to make your own watercolor-style animations.
I send you my greetings, I hope you are doing well and I'll see you in the next TIP.
Users who liked this post


Comment