
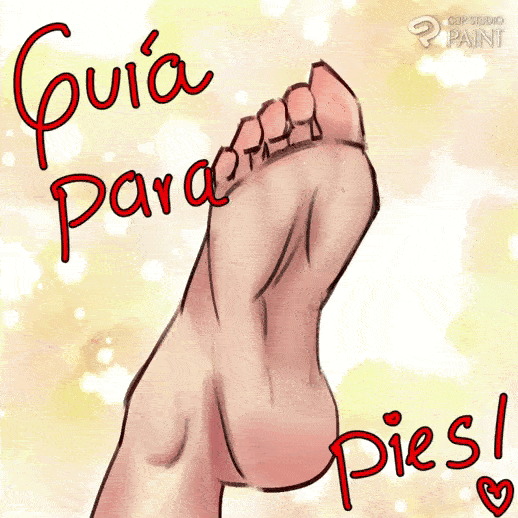
🦶| Introduction
The foot is the extremity of the legs, they allow us to stand, walk and run.
The feet are easier to draw than the hands because their movements are more limited, the fingers are aligned, and despite their multiple movements they do not lose their basic shape.
Drawing the foot correctly will allow you to make convincing illustrations!
🧦| Simplifying the foot
We can simplify the feet into basic triangle, circle, and rectangle shapes. This will help us further understand and express three-dimensionality.
The most important parts of the foot and on which we will base ourselves to draw are:
1. heel
2. Instep
3. Tibia (Ankle Knuckle)
4. Fibula (Ankle Bump)
5. Fingers (phalanges)
6. Foot arch
7. Achilles curtain
Using geometric shapes we can build our foot.
Another method of simplification is the stocking 🧦 it is simply trying to see the feet in the simplest way possible, that is, just as if you were wearing a stocking, we can observe our own feet and make a simplified version, and from there we will build our foot.
I was guided thanks to the protuberances of the phalanges (fingers).
Let's also remember that the anatomy varies a lot from person to person, so I included some types of feet.
Here using the stocking method I made a construction of the foot from various angles.
For a moment you can forget about the arch of the foot and imagine it as if it were flat so that it is easy for you to project on the ground and once positioned, build.
Think of it like a sculpture, where we start with the silhouette and work our way down to create the foot.
Here I did some quick studies using the 🧦 method, I focused on drawing the silhouette correctly without worrying about the details, the proportion is the key to make it look realistic and nice, the fingers are the final detail.
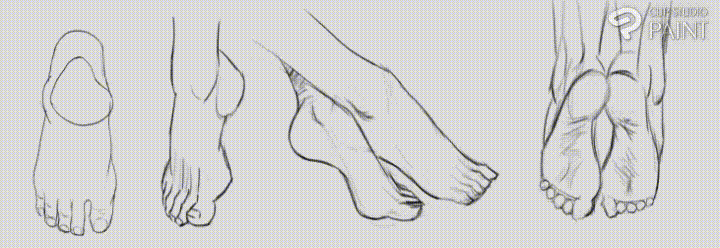
👣 | a bit of anatomy
Now that we have seen the simplest form, now we will see some more realistic drawings.
The sole of the foot is an elastic tissue, composed of muscle and adipose tissue (fat), it has an asymmetrical curved conformation, arched on the inside and lying on the outside.
The joint and the achilles curtain allow movement, the achilles curtain joins the heel with the calf. and this is always visible because it is quite thick.
In the front and back view of the foot we can clearly see the unevenness of the ankles, the highest being the tibia on the inside of the foot, and the lowest outside being the fibula.
NOTE: The foot should be the length of the head in a realistic drawing. For a simplified foot, we can change the proportion and omit details like the ankle, round the instep, or even reduce the arch.
🏃 ♂ ️| foot movements
The movements of the foot are more limited than those of the hand, but they have many similarities, they can move back and forth, to the side, you can curl your fingers or stretch them, and some people can spread them.
Standing on tiptoes is when instead of leaning on the sole you lean on the metatarsals of the toes, this position is maintained when you wear heels, so it generates fatigue since it is not the normal position of the foot.
As a homework, do the movements you can with your feet, and watch how the tendons tighten, an exercise to improve quickly is to draw your own foot several times. Don't forget to watch how the tendons tighten.
I also recommend downloading this free material, where the bones are represented and allows us to understand the structure
Here we see a sequence of running, it is a cyclical process, initially one foot is supported on the heel, then it is supported on the toe to gain momentum (during this process the other foot is in the air), and we raise the foot to support the other foot.
To study we can analyze dance scenes, jumps and practice drawing these movements paying special attention to the feet and thus give our illustrations more realism.
As you can see, paying special attention to the feet is very important, especially in the action scenes: jumping, dancing, running! Here is a study I did of action poses where I analyzed several photos of athletes and dancers, as you can see the position of the feet is very important to transmit the movement.
👠 | Detailed process to draw a foot
I decided to record my process to be able to explain in detail, it's a video without comments, so feel free to fast forward it or put it too fast if it's too slow, I'll explain what I'm doing here.
1. I look for references, on my other screen I am seeing different references, once we have practiced enough it is possible to paint without them, but since I wanted to make a detailed caption, I decided to use some photos.
2. I sketch the stocking 🧦 without worrying about the fingers, you can use your favorite pencil, the most important thing is the shape.
3. Then draw the fingers
4. Here I did the inking, you can use the brush that you consider more appropriate, since the painting is realistic, it is not necessary to worry so much about how "clean" the lineart is.
5. I filled it with a skin color base and decided where the light is coming from, the skin of the foot is very pink because the skin is thin, so I reflected that in my colors.
6. Now I just continued with the rendering, adding details like veins, tattoos, and experimenting until I felt satisfied
I also include this little time lapse of a foot, it's the same process but this time the coloring is easier.
👟 | The shoes
To draw shoes, we can start with the sole, it is not necessary to sketch the fingers if the fingers are hidden, in this case of sandals it is necessary to draw them, we simply draw a strap that joins the soles. It is important when drawing sandals to wrap the foot, so that it does not come off.
Basically the boots, the tennis shoes have the same base, we can draw the sole and cover the shoe by wrapping the foot, depending on the fabric and the fit of this can be looser or tighter to the foot, when drawing let's try to think about the style of the shoe
To draw heels, the foot must be inclined, in this type of shoes the weight of the entire body falls on the front of the foot.
1. We determine the height (it is very important because the height can influence the inclination)
2. We determine the thickness of the heel (this gives you extra centimeters without the need for the slope to be so high, the more balanced the more comfortable the shoes will be)
3. We choose the design, the shape of the tip (it can be round, square, triangular) if it is covered or uncovered
4. Another example of covered boot platforms with almost the same construction.
Plus we can always explore using the 3D shoes! Here I have some materials to recommend, you can see them from different angles and use them as a guide for your drawings.
✨ | Thank you!
I hope you found this tutorial very useful and it will continue to help you in the future to make convincing feet.
Normally we tend to relegate the feet to a secondary role, but the feet can be very expressive.
Think of how to show a character's shyness using the whole body, their enthusiasm or their desire to go to the bathroom! You will see that the feet are an excellent way to communicate all kinds of emotions.
Keep learning and don't forget to have fun!
I leave you my social networks if you want to be in contact
After doing this tutorial I discovered that drawing tennis is fun!
Do not forget to practice and put your doubts in the comments!
Users who liked this post


Comment