
Hello Hello! I’m Jay,
And today I’m going to teach you how to draw legs and feet!
I've also made a video walk-through of this tutorial if you prefer learning that way!
Learning How To Have FUN When Drawing The Legs And Feet
When it comes to character design, reference sheets, and general illustrations you'll have to understand how to draw the legs and feet. However I find that perfectionism tends to keep artists from actually having FUN drawing them.
Which is why before we go into the depths of sketching and understanding the basics of drawing the legs and feet, I've designed an exercise that you can use whenever you're in an art slump or if you want to study anatomy in an exaggerated way.
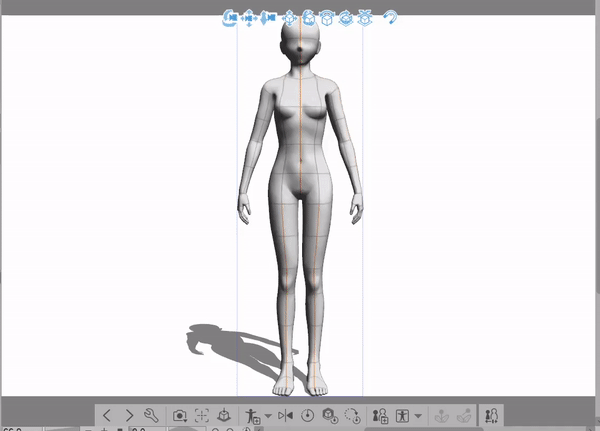
For this we'll be using the built in 3d Character models found within Clip Studio Paint!
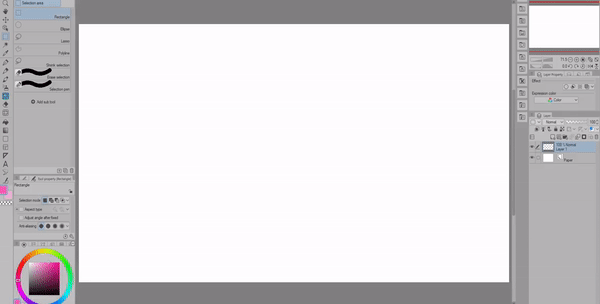
Go ahead and create a new canvas.
It doesn't matter what size it is, I personally like using a canvas size of 1920 x 1080 PX because it gives me enough space for my sketches and the model.
You can find the 3d models in the materials panel,
which you should find within your workspace but! If it's not there go ahead and look at the top menu.
From here you'll see various menus you can click or hover over to open up more options and settings.
We'll be going to the "Window" Menu, this is where the extra tool panels go when you close them in your workspace so if you're ever watching a tutorial and can't find something, it'll be here!
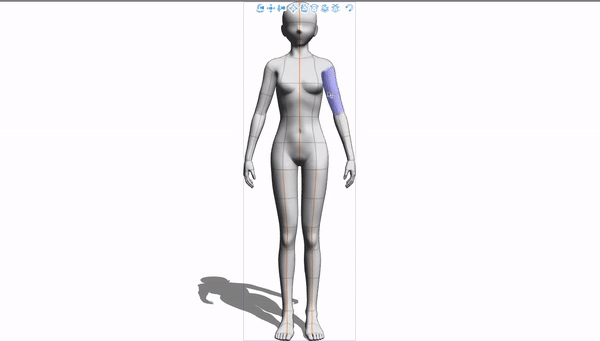
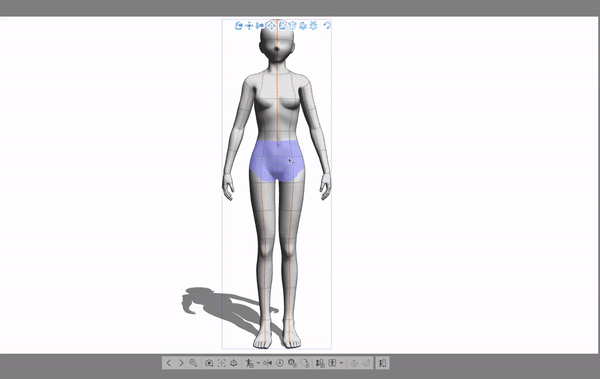
once you click on the option "material [body type]" you'll find the 3d models in clip studio paint. We'll be using them to create some custom references.
Click and drag the model you want to use, and place it onto the canvas. Don't worry if you're unfamiliar with the controls in the next section I'll show you everything you need to know! For now, you can just follow along
If you've used the 3d models before, you might not know that you can actually change the proportions of each part of the body. To find these settings look at the grey bar found at the bottom of the model
If you can't see these options,
make sure you have the "Operation" selected otherwise you won't be able to see them.
Click the wrench Icon, this will open up all of the settings for the 3d model.
Then click the option "3D drawing Figure"
Now we can edit the proportions of the model itself. This includes the body's muscles and body type and even the size of each part of the body! For this section you should make something that ideally makes you laugh or excited to draw from.

For my model I'll be increasing the size of the feet and changing the overall height of the legs.

If you're looking for a model that's a bit more realistic you can use the 2nd set of 3d models in clip studio paint. These models are much more balanced proportion wise and are less anime like when it comes to the head and body.

after you've created something you want to work with. Go ahead and click on the 3d model layer and rasterize the image. You won't be able to change the posing of the model anymore but, you'll be able to remove the rest of the body and increase the size of the legs on your canvas
Now you can draw on top of the 3d model! After you're done you can take the lines and make a slightly altered sketch as well to further play with the lines and curves of the body!
These models are used by so many professional artists! They're a great tool for creating references that are hard to find online and they will save you a lot of time when it comes to drawing complicated angles and perspectives.
Drawing should be fun and if this is a method that helps you create more art in the future, whether you draw directly on top of the 3d models or use them as references, take advantage of them! It's much better to have something on the canvas than nothing at all, even if you decide to draw something silly just for your own enjoyment.
3d models are also good to use in combination with references of real people to better understand the way the body folds and changes in different poses.
Posing The 3D models
The best way to learn how to use Clip Studio Paint's 3d models is to play around with them. Here's some basics if it's your first time using them.
When you click on a section of the 3d model for the first time. You'll activate the first set of control options.
On the bottom of the model you can control the overall rotation and placement of the model.

If you click on the circles you'll be able to pose the model from a central control point like this.
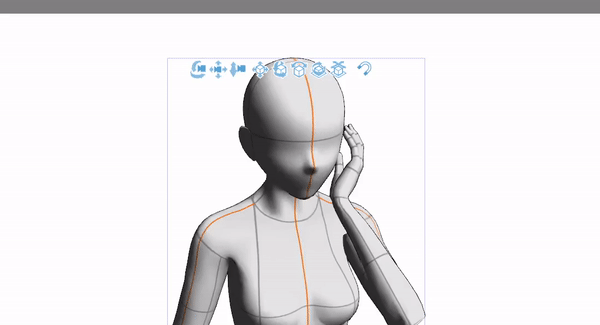
Once you click again on the section you want to pose you'll activate the second set of options. Now you can rotate the body.
I would recommend changing the position of the camera frequently to check that the parts of the body that you are moving are actually positioned in the right place. In this example it looks like the hand is touching the face but it's actually a fair distance from it.
To change the angle of the camera click anywhere outside the model and drag.
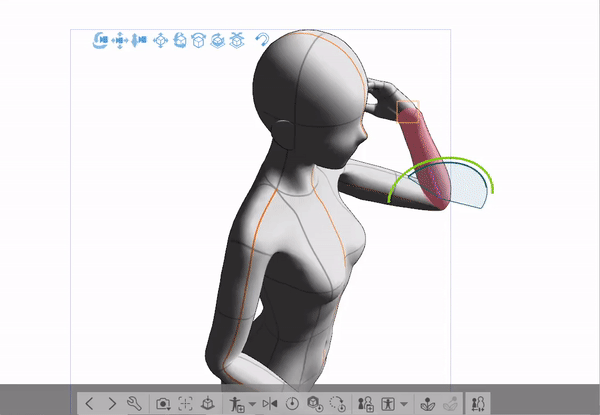
You can also use these set of buttons on the top of the model to change the camera as well
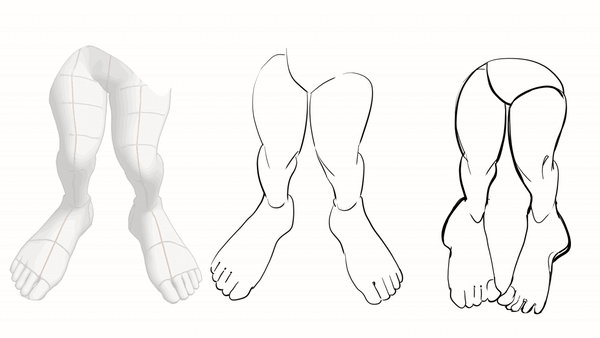
Breaking Down Shapes Of The Foot
Now that we've discussed 3d models and how to make them into references, let's talk about how to break down the shapes of the foot. Keep in mind that this is only one way to draw the feet and that my methods are designed around getting the most dynamic pose out of drawings.
(I'm using the Lasso Fill tool found in the "Figure" tab )
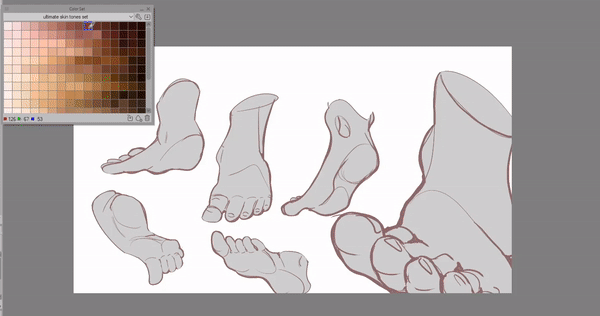
I find that the easiest way to draw feet is to turn them REALLY simple shapes. (Basically blobs)
I like to use this tapered rectangle shape to show the movement and position of the foot because it gives me the most dynamic base to work with.
I'll also split off another rectangle to represent the toes before drawing them in.
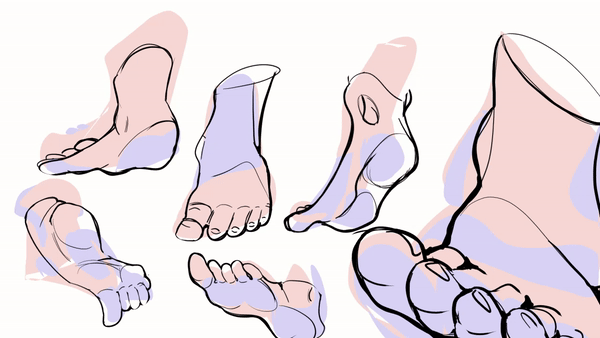
Keep in mind that there are many different kinds of toes you can draw! You might be used to seeing toes shrink in shape with the pinky being the smallest of the bunch. However, some people have toes that align with the big toe, or even have other toes that are longer than the big one!
Before drawing in each toe, I'll create an arc that follows the biggest toe I want to draw in. Then draw the rest in with simple circles.
Next I'll add in the in-between connection points and lines that split each toe apart.
By starting out with circles, I can choose which toes will slightly break away from the others and which ones will stay together.
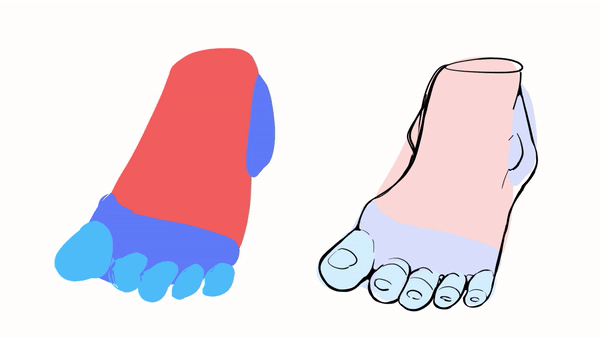
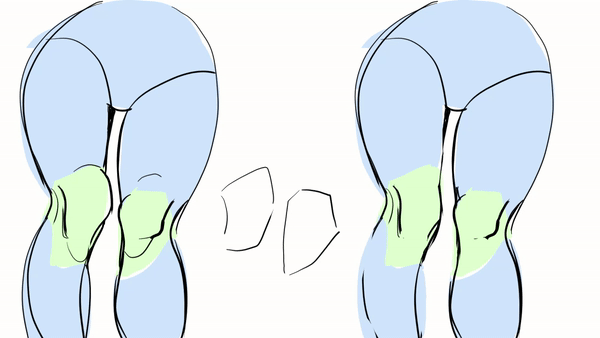
When it comes to drawing foundations of the ankle. I'll draw a circle in the area where the leg connects to the foot
Keep in mind that the bones found within the ankle are asymmetrical. The interior bone ( called the Tibia) will always stick out further than the exterior bone ( the Fibula) by drawing these bones in, you'll give your foot a more natural and appealing look.
The arch of the foot is another thing that will change from person to person. Depending on the angle you'll only see a part of how the arch changes the shape of the foot. But overall I find it easier to draw in the heel and then determine how intense I want the arch to be from there.
with the help of 3d models and references you can break down any angle of the foot with simple shapes. Remember to keep it as simple as possible and build up from there!
Breaking Down Shapes Of The Legs
Let's break down the shapes of the legs!
I like to start with the hips using a round or square shape then determine the angle that the legs will be moving towards. At this point I'm just trying to plan out where everything will be placed on the canvas and I can also use 3d to check my work as well.
After I've made the hips I'll create a wireframe to build the shape of the legs from. This sketch will include the knees and the way they'll be facing. We'll talk about the knees in the next section so for now I'll just use circles.
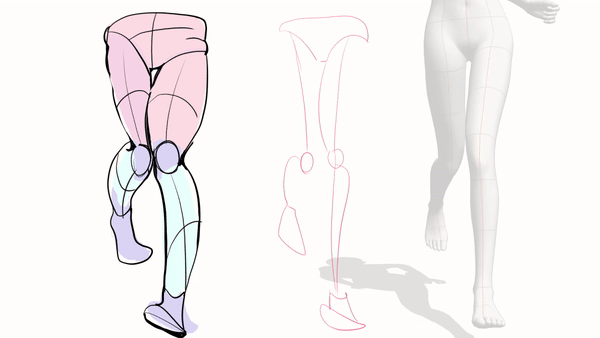
The legs are made up of many curves, and depending on the character you're trying to draw you'll have to decide how much you want to include. Every body will have different kinds of curves and points where the skin overlaps with itself. For these areas I'll play with the line weight to further emphasize the shapes.
Unless you're stylizing the legs, which we'll talk about later. You won't be drawing them with perfectly straight lines. Instead the legs will also curve slightly inwards then back out. Depending on the body type this curve will also vary from person to person! Another reason to study real life photos when you can!
Legs can have so many beautiful and diverse shapes that I truly recommend looking at many many different types of bodies to fully understand how many options there are when it comes to drawing people!
Drawing The Knees
Now that we have some legs drawn in, let's add in the knees!
Just like the legs, knees come in many shapes and sizes!
you can simplify the shapes of the knees as much as you want. Usually you'll see them reduced to two lines. To understand where these lines go, you can draw a pentagon shape to roughly represent the shape of the knee.
I like this shape because it can wrap around the whole leg in a 3 dimensional sense and it helps me place my lines a bit better than circles.
I usually won't put much detail in the knees unless they are bent or pushed in a direction where they are seen by the viewer.
Further Studies
If you are like me and struggle with remembering how the bones are placed within the body or even have a difficult time imagining the bones at different angles I highly recommend this skeleton model from the asset store to use (it's free)!
When you place the model for the first time you wont actually see all the details, don't worry! All you have to do is activate the shadows from the 3d model settings menu and it'll fix the problem
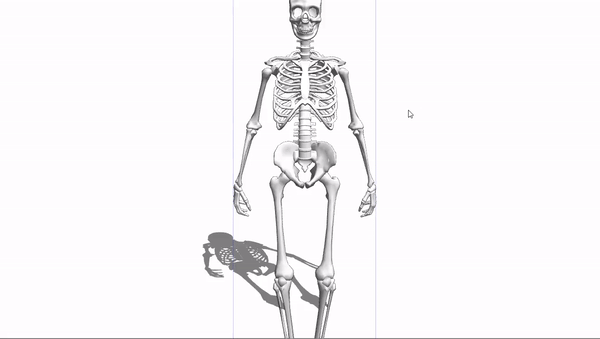
This model is perfect for adding that extra bit of anatomy help for your drawings. Because It allows you to see all the bones in multiple instances instead of some of the limitations you'll find when it comes to looking up references online.
Drawing Shoes
Let's talk about how to draw shoes!
Just like the feet you can break down shoes into the same simple shapes we used earlier.
I usually have a few references of the shoes I want to draw beside me. Depending on the type of shoe you're drawing, you'll have to decide how much the shoe will bend. For example Sneakers will bend much more as you walk compared to high heels.
Sometimes shoes can be hard to imagine in different perspectives, especially if you're drawing them for comics
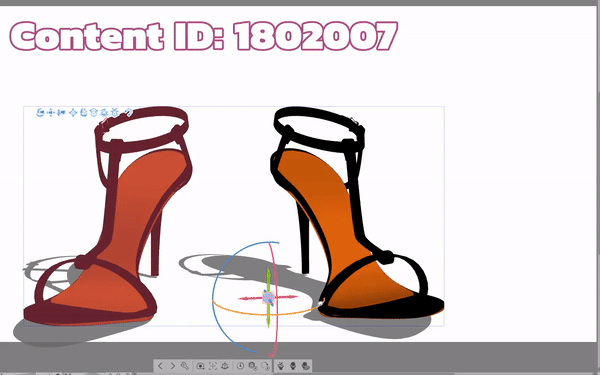
Luckily the Clip Studio Asset store has many free to use 3d shoe models to use!
There's always assets being uploaded to the store everyday by other artists. I went through the store to find the best free to use shoe models you can drag and drop onto your canvas to start using right away!
You should keep in mind that sometimes you'll come across models that are split into separate parts and are generally hard to pose like you normally would.

All you have to do to pose these kinds of models is go into "Tool Property (Object)"panel and select the whole object from there.
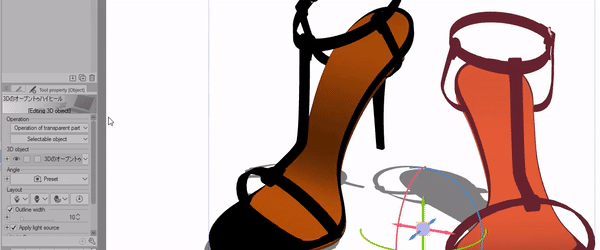
You should try to find shoe models that allow you to bend the sole of the shoe. These are generally much easier to work with out of the box especially if you're not used to using 3d models in clip studio paint
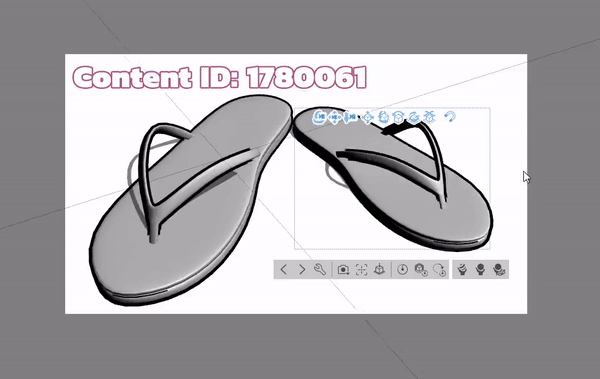
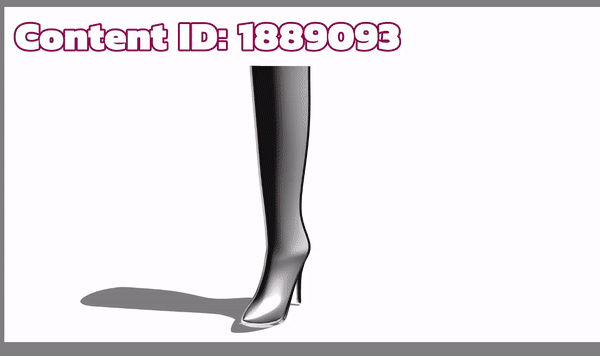
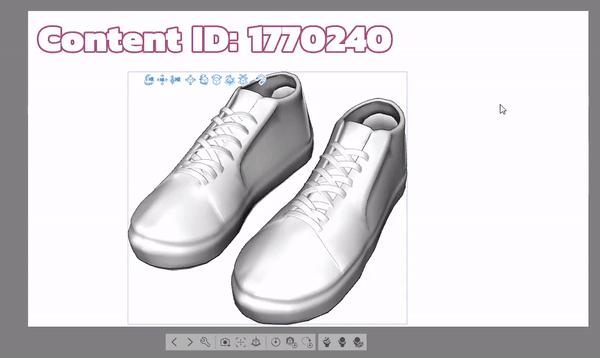
Here's my favorite collections of 3d shoes models on the asset store
sandals;
High heels,

Boots;

sneakers;
We've discussed a lot!! So let's take everything so far and play with shapes and styles you can use in your art!
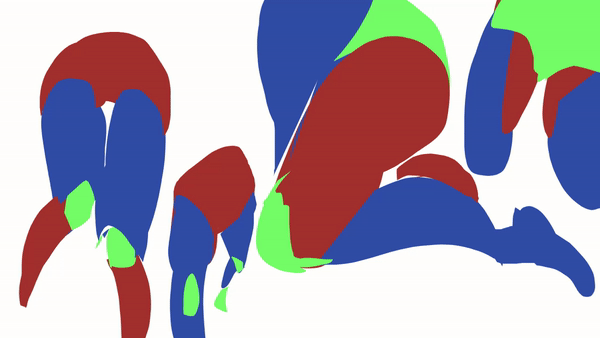
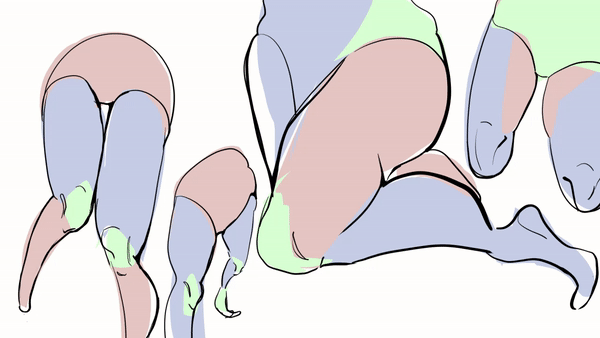
Stylization and Simplification
Legs and feet have very fun shapes you can work with! Although usually we don't stare at feet for very long, you can simplify their shapes in many different ways
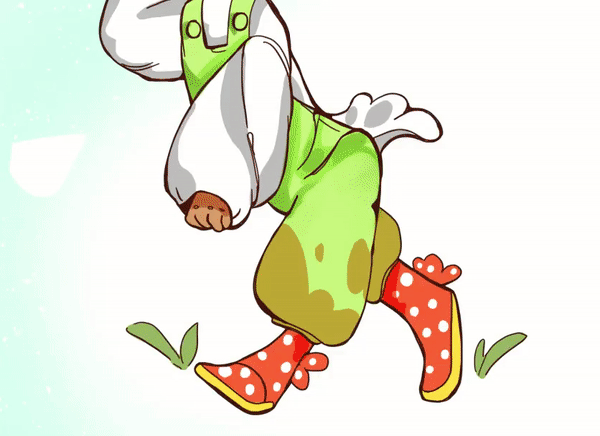
the size of the feet will change how a character appears, for example big shoes and feet will feel very fun to look at. Kinda like clown shoes! Characters with exaggerated feet will come across as more bouncy and silly. In contrast, tiny feet will feel more delicate and fragile. That's why a lot of chibi art feels so young and baby-like.
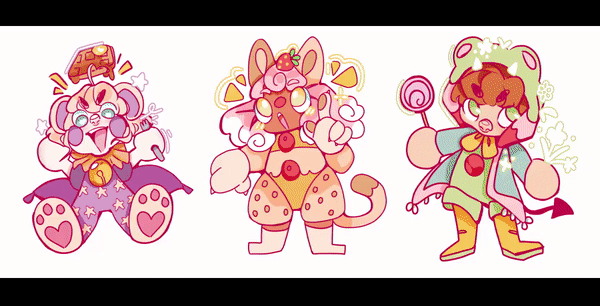
A middle ground can be found as well. If you want something more detailed looking but not crazy, try adding some details only in the areas you want the viewer to focus on. For example I'll put a lot more detail into the shoes instead of the legs and knees. This strategy is great for when you want the viewer to only pay attention to one or two things in a composition.
You can also play with the shapes of the legs and put less detail in the feet and shoes. This approach is great for art that is more shape based (squares, circles, and triangles) instead of a more realistic route.
The possibilities are endless when it comes to legs and feet and really it comes down to your own personal tastes. The lesson I want you to take away from this section is that there are many many many ways to draw legs and feet, no method or style is better than the other and it all boils down to how YOU want to play with shapes and details.
Tips For Coloring The Skin
Before I end off this tutorial I'd like to show you something pretty cool about clip studio paint. If you're someone who struggles with skin tones and are still learning how to pick them from the color wheel, you can use color palette sets made by the community!
I've provided some links for some skin tone sets to get you started. If you download a color set you'll have to open the color set panel to access them. Usually you can find it in the extra tabs found on top of the color wheel but! If it's not there,
Go to window, then find the option that says "color set" and it'll open it up for you
Now click the little square icon that says "Add new color set" then click "add palette" and you're good to go! All you have to do is select the color you want to use.
I like to use color sets when I'm having an "off" day and can't seem to visualize skin tones on the color wheel. These help me get a good starting point to work with then I'll add more colors or slightly change the hue if I want.
Conclusion
I hope you've learned a few new tricks to use in your workflow! I know it's a subject that isn't everyone's favorite but I think you'll find there's a lot to discover and learn but, more importantly, have FUN with when it comes to drawing the legs and feet! Thank you so much for joining me
Make sure to like and favorite this tutorial to save it for later. It also lets me know to make more tutorials in the future!
If you want to see more of my artwork you can find it here on my Linktree where you can find my Insta, Tiktok, and Youtube where I post even more content like this!
and with that I'll see you next time buh bye!
Users who liked this post


Comment