
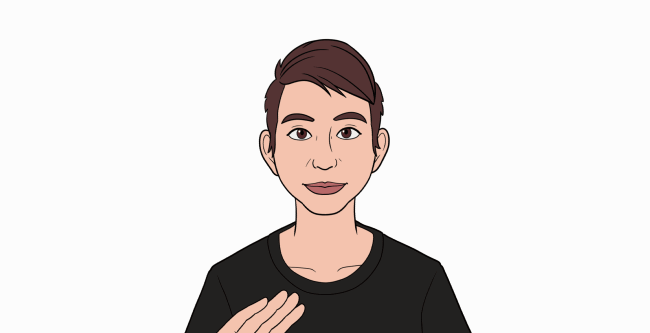
My name’s Sarrah, and this tutorial will cover three really useful character animation tips in Clip Studio Paint. I’ll cover making duplicate copies of animation cels, lip syncing, and combining frame-by-frame animation with keyframe animation.
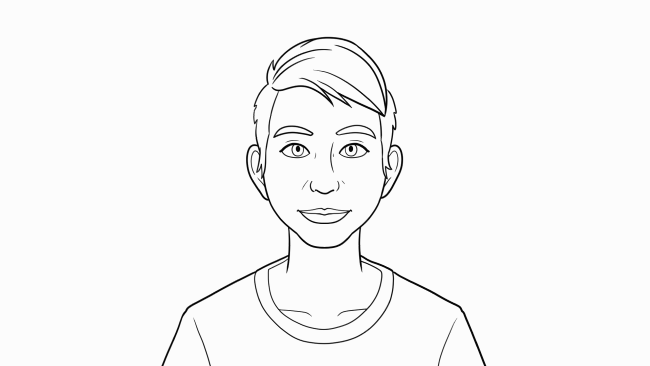
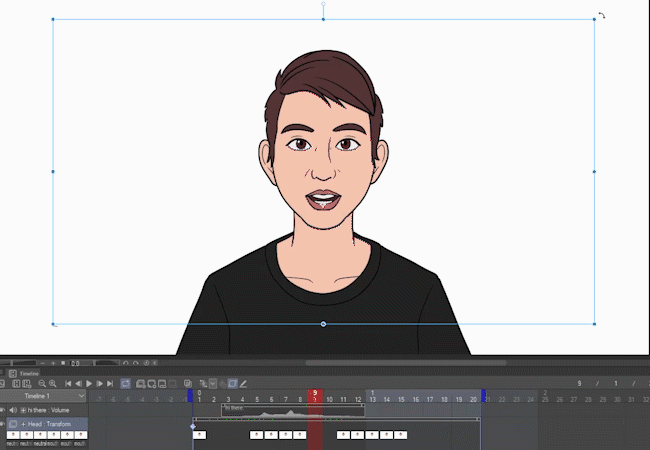
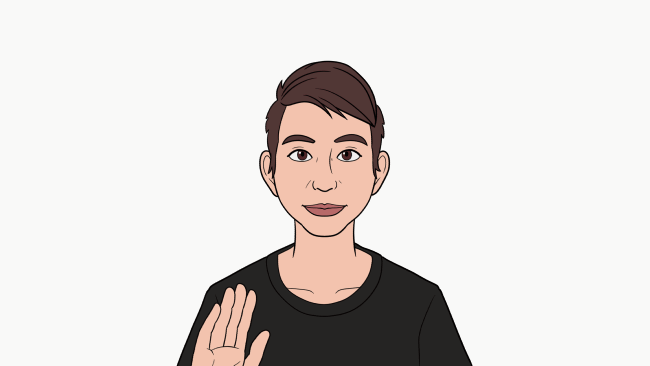
In the end, I’ll have created this animation:
Each section has both a video and text version, whichever you prefer. Let’s get started!
Tip #1: Copying Frames
First up is how to duplicate a frame in your animation.
I've covered the timeline and animation basics in other videos. Check out my YouTube playlist on animation in CSP, or the animation tips I’ve put up on Clip Studio Tips via the link below, if you need a primer.
Copying a Cel Layer
When you add a new animation cel to your timeline, it's blank.
You can turn on onion skin to see a faded view of the previous frame, of course, but you'd still have to redraw this new cel.
Instead, what you want to do is go to the Layer palette, right click on the layer you want to copy, and select Duplicate Layer.
Depending on your CSP settings, you might get this message. You can't have multiple layers in an animation folder that share the same name.
If you do get this, just click OK.
Then be sure to rename the new layer (the one on top) to something unique.
Add New Cel to the Timeline
To add this new copy as a cel on your timeline, right click, and select the name of the layer from this list on the left.
You can now draw on the second cel without affecting the first.
Paste to Selected Layer (CSP Ver 2.2.0)
Another option was added if you have Clip Studio Paint version 2.2.0 or above, the ability to paste to the selected layer rather than creating a new layer when pasting.
Note: As of CSP version 3.0, this setting is currently only available for animation cels. It will not work on normal layers.
Go to File and choose Preferences.
Go to the Animation section. Change the dropdown that says "How to paste to cels" to "Paste to selected layer". Click OK.
Go to the cel you want to duplicate, and use Ctrl-C to copy.
Right click the timeline and create a new BLANK cel.
Use Ctrl-V to paste, and you now have a duplicate image.
Using either of these methods, you can create duplicate cels that you can now draw on without affecting the original.
You can repeat this as many times as you want to complete an animation, such as this eye blink.
It's as simple as that!
Tip #2: Lip Syncing
To help with syncing audio and especially speech to your character animations, you can import an audio file into Clip Studio Paint.
Import an Audio Clip
First, you'll need an audio clip. This can be in .wav, .mp3, or .ogg format.
Go to the File menu, hover over Import, and choose Audio.
Select the file, and click Open.

It will appear as a new layer on the timeline.
Since I was on frame 1, that's where my audio imports, but you can also click and drag the clip to move it. In this case, I want it to start on frame 3.
You can now see the file's waveform, and hear it when you hit play. If you have CSP version 3.0 or above, you can now scrub the playhead to hear what the audio sounds like on each frame.
Phonemes and Visemes
To animate a character speaking, you just need to know how their mouth looks when making each sound.
You can do this by creating a chart like this as a guide for your character. (Feel free to download my chart to use as a guide!)
The individual sounds of speech are called phonemes. These visual representations are called visemes. As you can see, the same viseme can be used for multiple phonemes, such as A, E, and I.
It's also really helpful to keep a mirror handy so you can see at a glance how a sound looks when you move your mouth into that position.
Lip Syncing
Lip syncing, at its simplest, is just a matter of matching the correct viseme to the audio clip.
For my example, I’ll have my character say the phrase “Hi there!” It's important to listen closely to the sounds rather than thinking about individual letters of the words.
I've drawn just the visemes I need for this phrase. Each is on a different layer in an animation folder, so I can add them anywhere I wish on the timeline.
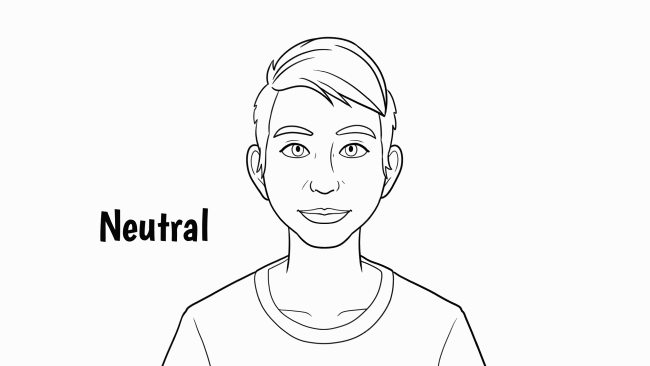
Frame 1 starts with a neutral mouth position. The "H" in "Hi" doesn't really have a viseme of its own, going right into the long "I" sound instead. There's a pretty specific viseme for "TH" sounds, then we go back to the same one as "I" for the "E" sound, and finish off with an "R" sound. Finally, after a couple frames, I'll return to my neutral mouth position.
Here’s how the animation looks:
And here’s a slowed down version so you can see the individual visemes I used:
Jaw Movement
Up to now, I've only been changing the mouth, but the jaw also moves quite a bit when you're speaking!
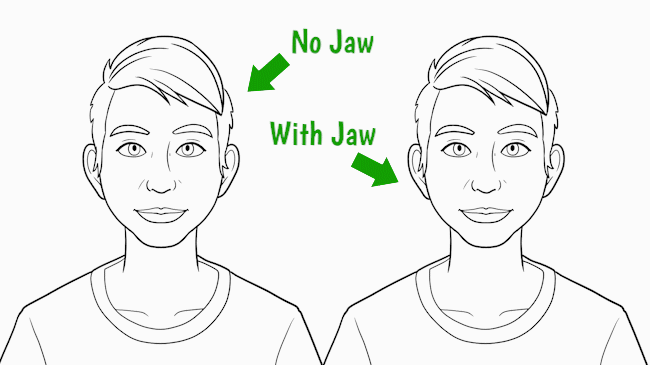
Of course, some animations omit jaw movement for stylistic reasons, but if you're going for realism, be sure to move the jaw too.
Audio Scrubbing and Viseme Placement
As I mentioned before, it's important to listen to just the sounds being made, because accents and the speed at which someone's talking all affect which visemes you'd use.
The new audio scrubbing feature introduced with CSP version 3.0 is great for pinpointing which sounds happen on which frames.
Something important to note is that the mouth will start forming the shape of the sound slightly before making it, so often you’ll want to place the viseme a frame or two earlier than the actual sound.
Emotion, Volume, Eyes and Eyebrows
Volume and emotion makes the mouth open larger. On the other hand, speaking in a murmur may result in very little mouth movement at all.
The eyes and eyebrows play into emotive speaking a lot too!
Tip #3: Combine Frame-by-Frame and Keyframe Animation
There are two types of animation available in Clip Studio Paint: Frame-by-frame, and keyframe. You can also combine the two to bring your character animations to life!
I won’t be going over the animation process step-by-step here. If you're not sure how to animate in Clip Studio Paint, be sure to check out my Animation Overview tutorial first!
Quick Overview
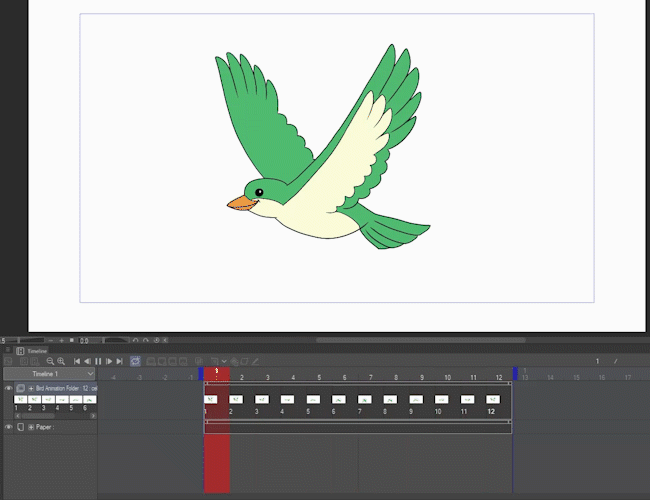
Frame-by-frame animation is when you have multiple cels in an animation folder, and each cel is placed on one or more frames in the timeline.
Keyframe animation, on the other hand, does not need an animation folder. It's used for animating position, rotation, scale, and opacity. You just set the start and end frames, called the keys, and the program interpolates everything in-between automatically.
You can add keyframes to just a single layer, or to an entire folder and the layers inside of it, which allows you to chain multiple motions together.
Combining Keyframe and Frame-By-Frame Animation
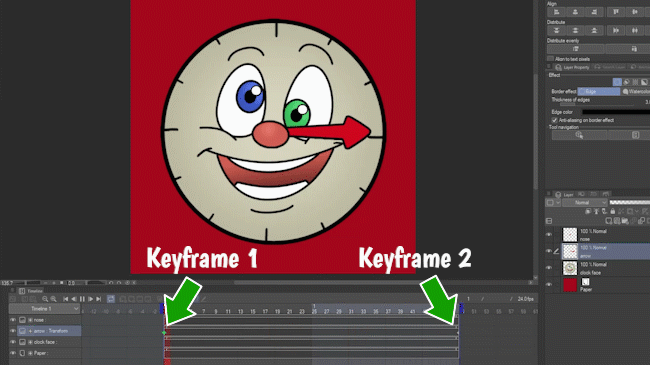
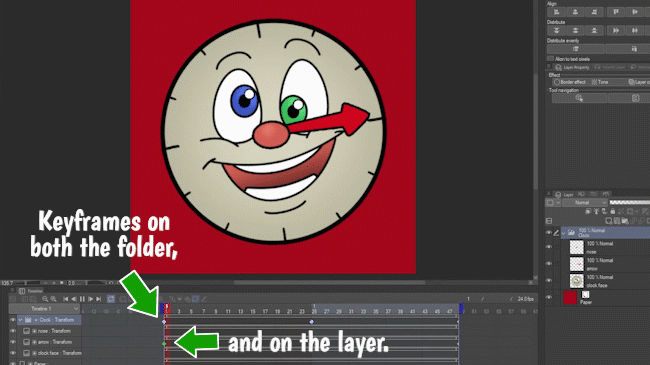
What you may not know, however, is that you can add keyframes to animation folders too!
I added some color to my character! To simplify things for this example, the head, along with all of my lip sync and blinking animations, is now in a single animation folder, called Head.
I also moved the neck and shoulders to a separate, stationary layer called Body.
If I play it right now, you can see the frame-by-frame animation for my character’s head playing.
Adding Keyframes
I'll select the Head animation folder, and click Enable Keyframes on This Layer.
To control a keyframe-enabled layer or folder, go to the Operation tool and select the Object sub tool.
Making sure I'm on frame 1, I'll move center of rotation for my head down to where the neck would connect with it.
Any action that changes the object (such as moving the center of rotation) causes a keyframe to appear on this folder.
Next, I'll move the playhead to frame 9, and then tilt the head object, causing another keyframe to appear.
When I play the animation now, you see both my frame-by-frame animation and the head tilt from the keyframes.
Why Can't I Edit the Frames?
You may have noticed you can't edit layers with keyframes turned on.
All you have to do is click Edit Layers with Active Keyframes, which temporarily disables keyframes so you can make adjustments. Just click it again when you're done.
Note: In fact, you can just turn keyframes off entirely and make your edits. When you click Enable Keyframes on This Layer again, they'll reappear.
Chaining Multiple Keyframe Animations
Remember when I mentioned chaining animations? Frame-by-frame animation folders can be included in the chain too.
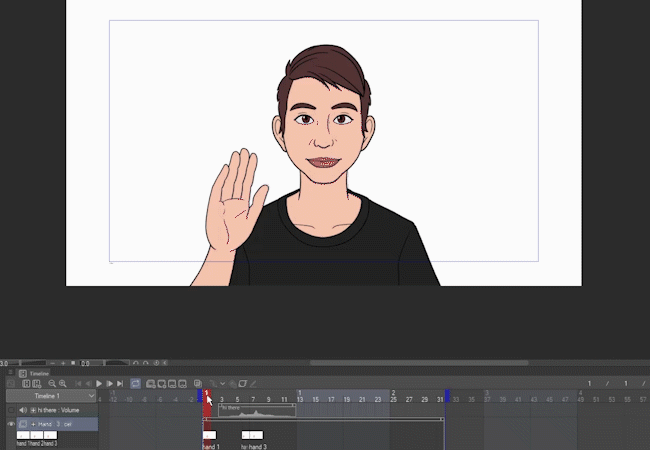
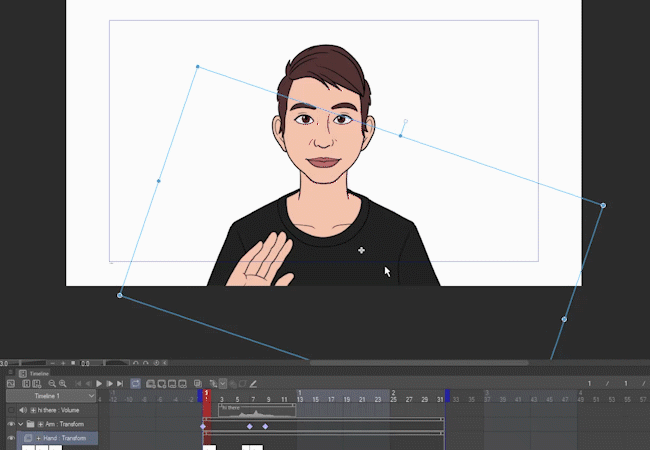
For example, I've added a subtle animation of the fingers spreading a little as I wave my hand.
Hand is an animation folder which contains the animation of the fingers moving, while Lower arm is its own separate layer.
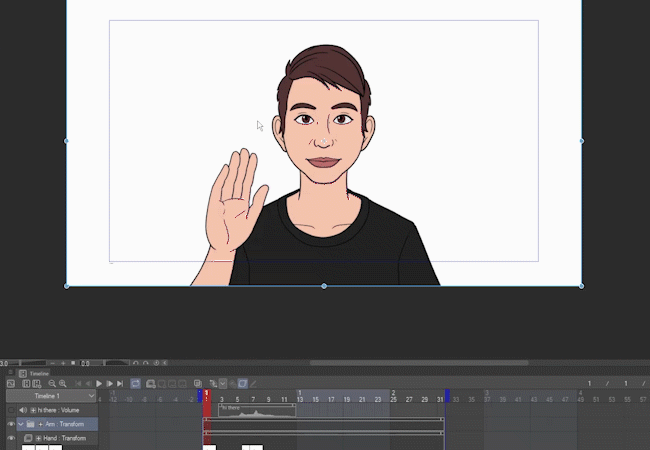
In the second image, you can see I’ve added both of these to a single, parent folder named Arm.
With the parent folder, Arm, selected, I’ll click Enable Keyframes on This Layer.
Using the Object sub tool, I’ll move the center of rotation down offscreen to where the whole arm would rotate.
Hint: Be sure to note the keyframe that appears on the timeline!
First, I'll move and rotate the arm to its starting position on frame 1.
Then, I'll put the playhead out to frame 7 and move the arm to a little past its final position.
By doing so, I’m adding some overshoot to the animation to emphasize the movement. I talk more about this in my Animated Emote tutorial:
Finally, I'll move it back a little to its final resting position a couple frames later on frame 9.
That looks pretty good, but the wrist is stiff, so let's animate the hand too.
When I select the animation folder with the hand, note that the Enable Keyframes on This Layer button is greyed out.
IMPORTANT: Because the parent folder already has keyframes enabled, they're enabled for child folders automatically.
On frame 1, I'll move the center of rotation for the hand to its base.
Again, note the keyframe that automatically appears.
As with the arm, I’ll rotate the hand to its starting position on frame 1.
Then, I'll go to the end of the animation and rotate it to the position I want it on frame 9.
Finally, I'll include a little overshoot with this motion on frame 7 as well.
Hint: I did the middle overshoot frame last this time, just to demonstrate that it doesn’t really matter the order you set up your animation in!
Now you have three animated motions chained together:
1 - Keyframes moving the arm
2 - Keyframes moving the wrist (which is moving with the arm)
3 - The frame-by-frame motion of the hand

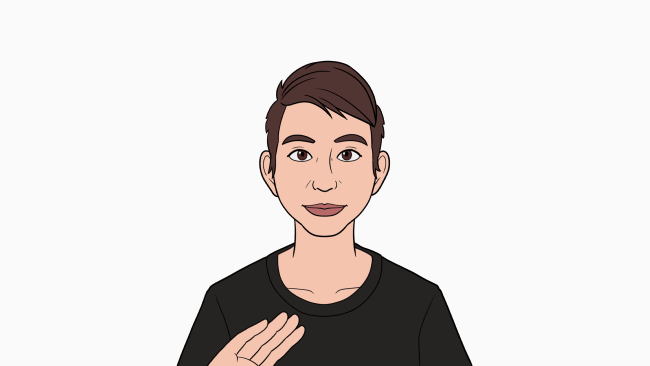
Finally, I’ve added just a couple more motions using these same techniques. The body now has a small motion that moves the head as well, and I drop the hand down at the end.
These are some easy ways to add a lot of movement and life to your character animations!
Conclusion
This is a fairly simple example, but I hope it helps you see how much you can do with Clip Studio Paint’s great animation tools.
Be sure to follow me @MsRedNebula on Twitter, Instagram, Bluesky, or Mastodon to see when I announce new tutorials. You can also follow me here on Clip Studio Tips, or subscribe to my YouTube channel.
Have fun animating!
Users who liked this post


Comment