Animate an Emote with Keyframe Animation
This tutorial will show you how to animate parts of an image with keyframe animation to turn it into a cute animated emote!

If you’d like to follow along, you can download the .clip file from my website here:
Here’s the video version of my tutorial. If you prefer text, that can be found below.
Setup
Character Part Layers
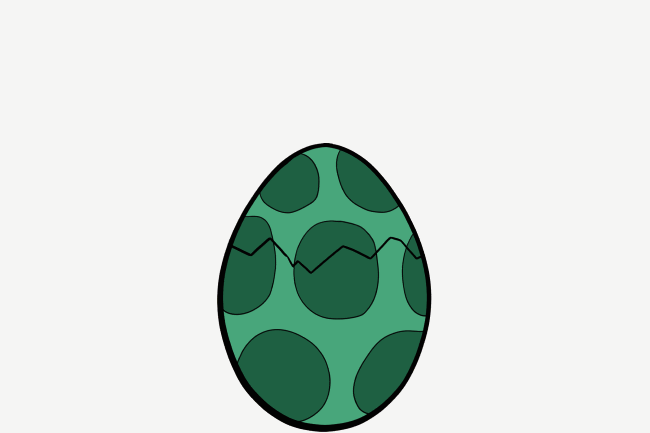
To animate a character with keyframes, all of the parts that move need to be on their own separate layer. My dragon has six pieces - the two parts of the egg, the head, the body, and two wings.
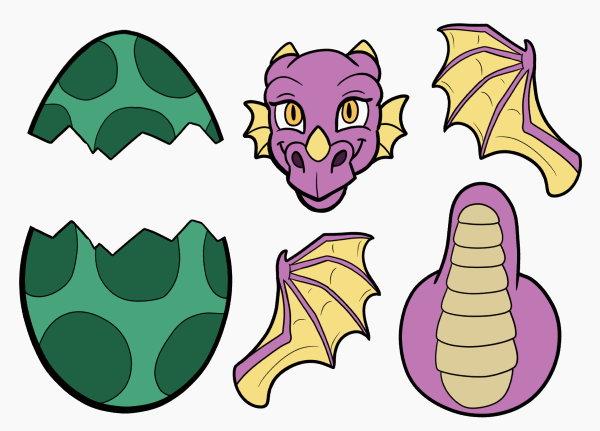
With keyframes, you can make each layer move, rotate, and scale however you want.
But the real power of keyframe animation is that you can use it on folders, and chain multiple animations together. Let me show you how it works.
If you're following along with the file download, I've arranged the pieces as though the dragon is squished down behind the egg layers, making it look like they're inside of the egg.
Create Folder Hierarchy
First, let's organize the layers into a hierarchy using folders.
The top egg shell will be balanced on the dragon's head, so I'll start by making a folder and putting these two pieces in it. I'll call this folder "Head".
Next, I'll want to move all the pieces of the dragon together, so I'll make a folder and put the head folder in it, along with the dragon's body and wings. I'll name this one "Dragon".
Finally, if the egg moves, the dragon will too, so I'll make a final, main folder to put all of the layers in, and call it "Base".
+ **Hint:**TheshortcutCtrlG(or**⌘**\GonMac)willcreateanewfoldercontainingthelayersyouhaveselected.Youcanalsosimplyusethe“NewLayerFolder”buttonatthetopoftheLayerpalette.
Set Up the Timeline
Next we'll need an animation timeline.
If you don't see the Timeline palette, go to the Window menu and click Timeline.
Click the New Animation Timeline button (green arrow above).
The New Timeline dialog will appear. I'm going with a frame rate of 8 and a playback time of 24 frames, which is a 3 second animation. Click OK when you’re done.
Hint: Clip Studio Paint Pro has a limit of 24 frames of animation per timeline, which a lot of people take to mean you can only have a 1 second animation. But that’s only true if your Frame Rate is 24 FPS! By reducing the frame rate, you can make longer animations. There are no limitations in Clip Studio Paint EX.
Check out my Animation Overview tutorial for more about frame rates:
When you're working on a short animation with several layers, it can be helpful to see the timeline vertically instead.
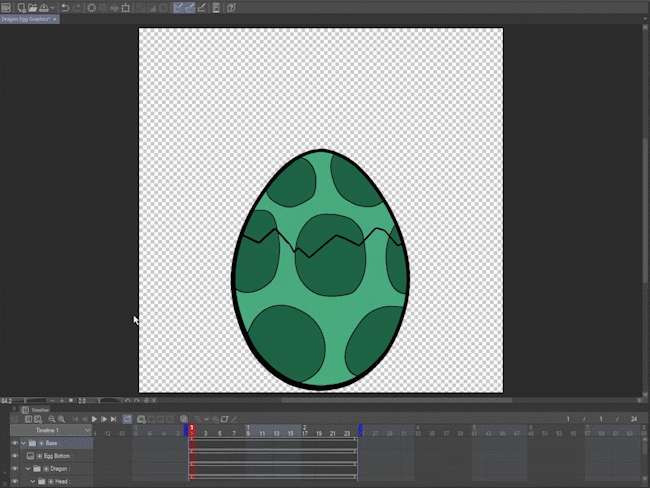
Click the palette's tab and drag to reposition it at the side of your workspace.
Don’t worry if it covers the whole workspace at first, this is easy to fix!
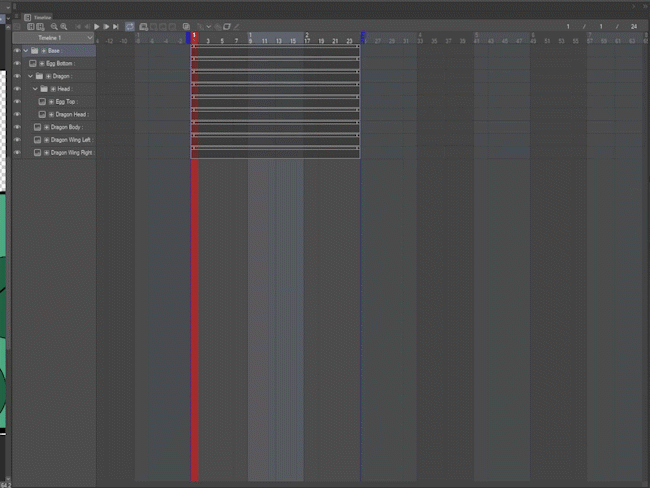
Hover over the edge of the Timeline palette until it turns into a double arrow, and drag to resize it.
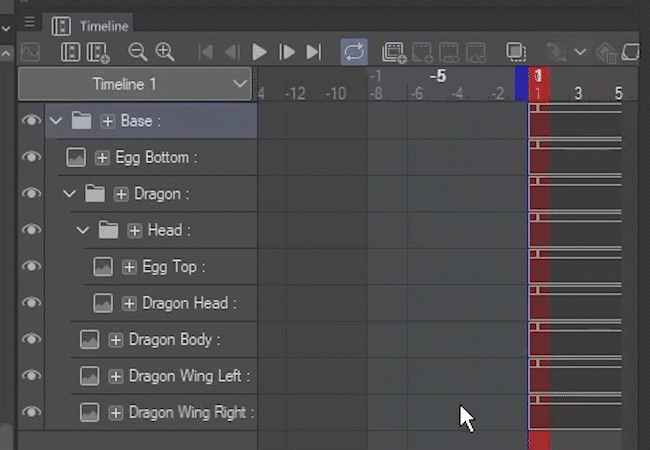
+ UsetheSpacebartoturnyourcursorintoahandtomovetheview,anduseCtrlSpacebar(or**⌘**SpacebaronMac)toenablezoominginandout.
This may take a little practice to get the hang of, but learning to reposition parts of your workspace like this can save you a lot of time in the long run!
Enable Keyframes and Adjust Layer Pivot Points
Keyframe animation means we'll be using our folders and layers as objects.
Go to the Operation tool and make sure the Object sub tool is selected.
Click on the Base folder.
Hint: You can select folders and layers by left-clicking on them either in the Layer palette or on the Timeline directly.
On the timeline, click “Enable Keyframes on This Layer” to turn it into an animatable object.
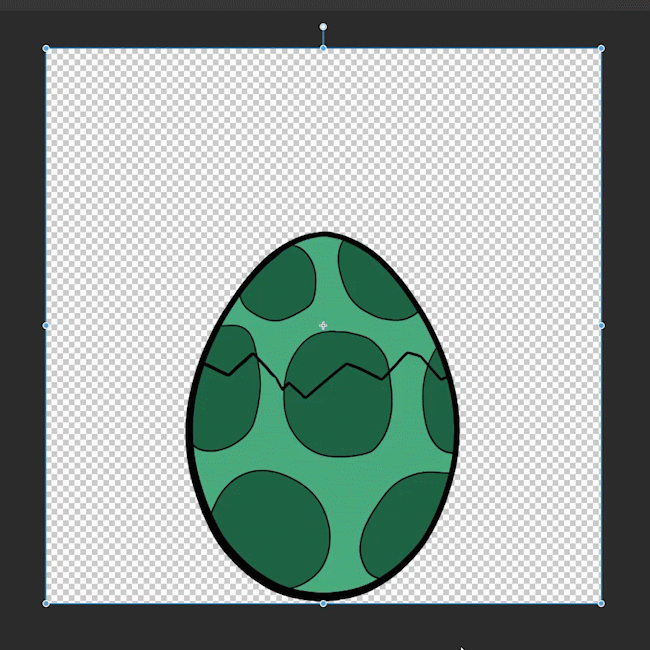
An object can be moved, rotated, and resized, and it has a Center of Rotation, or pivot point. To make animating them easier, let's go through and adjust the pivot points now.
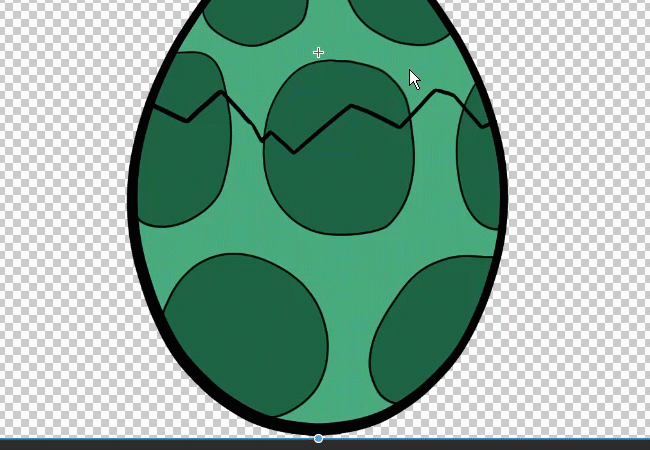
Imagine where you want the base layer to rotate. If we want the egg to rock back and forth, we can click and drag the pivot point to the bottom.
Notice that a blue diamond indicating a keyframe has appeared on the timeline for the base folder.
A keyframe will appear at the location of the red playhead anytime you change any aspect of a layer that has keyframe animation enabled.
Hint: If yours isn't at frame 1, you can click and drag it to move it there.

Also, if your keyframe isn't blue, click the Keyframe Interpolation dropdown and choose Smooth Interpolation, then click the Add Keyframe button. I’ll go into this more later in the tutorial!
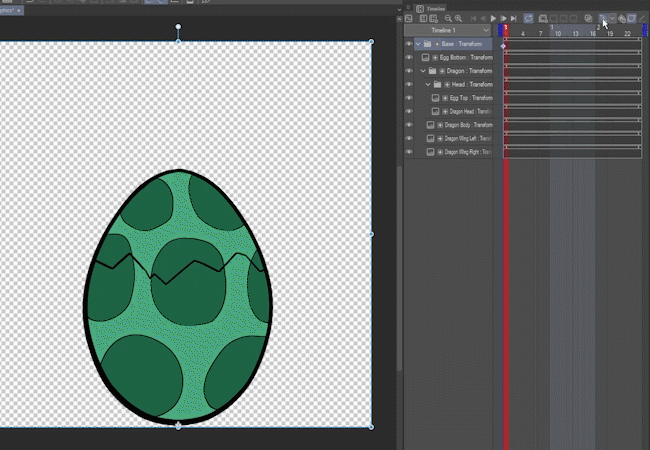
Now, hide the two egg layers so we can see the dragon.
Hint: You can hide a layer by clicking the eye in the Layer palette or the Timeline palette; they do the same thing.
Click the Head folder - the whole folder, not just the Head layer - and move the pivot point to about the middle of the nose horn, where on the back of the head it would join the neck.
Because the Base folder has keyframes on, all child folders and layers will inherit this trait, so a keyframe automatically appears here too!
Note: I'm skipping around a little because not all layers will be animated separately from the folder they're in; it'll make more sense as we start animating.
The dragon's body will be controlled by the Dragon folder, so select that and place the pivot point in the center mass of the body.
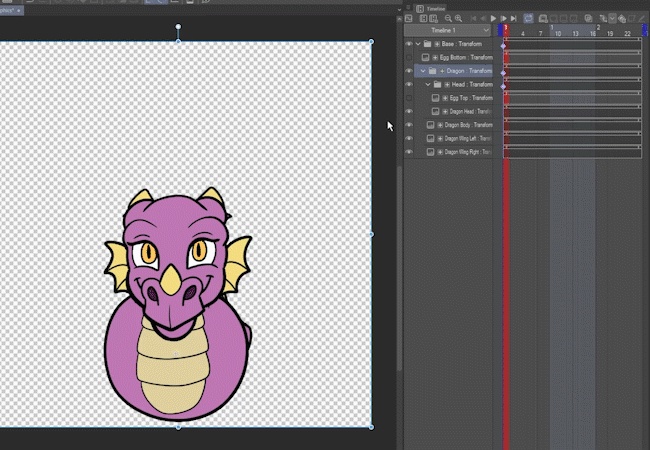
Next, hide the Head folder and the Dragon Body layer so we can see the wings.
Their position may seem a little strange, but trust me - it'll look right when we animate it!
Converting Layers to File Objects (Optional)
If the object you're animating is just one small individual layer, like each wing, you can may want to convert it to something called a File Object.
Right-click on the layer, go to File Object, and select Convert Layer to File Object.
Make sure Area is set to Drawing Area and Keep Original Layer is unchecked, and hit OK.
You’ll be asked to save the object in Clip Studio Paint’s .clip file format. Choose a location and a file name, then click Save.
If you get this message, just hit OK.
Now we've got a much more compact object surrounding just the wing, rather than it taking up the entire canvas. Converting parts of the animation to file objects is optional, but it's useful to know about!
You can move the pivot point into position at the wing's base just the same way as you do with a normal object.
Then, repeat the process of making the right wing into a file object and moving its pivot point.
I'll also unhide the Egg Top layer and convert it to a File Object.
Its pivot point is fine where it is, but we'll still want a starting keyframe on this layer, so click the Add Keyframe button.
Animation
Moving With Keyframes
Now, make all of the layers visible except the Egg Top; we'll get back to that one.
First, we want the dragon to pop out of the egg. Select the Dragon folder.
Click at the top of the timeline to move the red playhead over to frame 8.
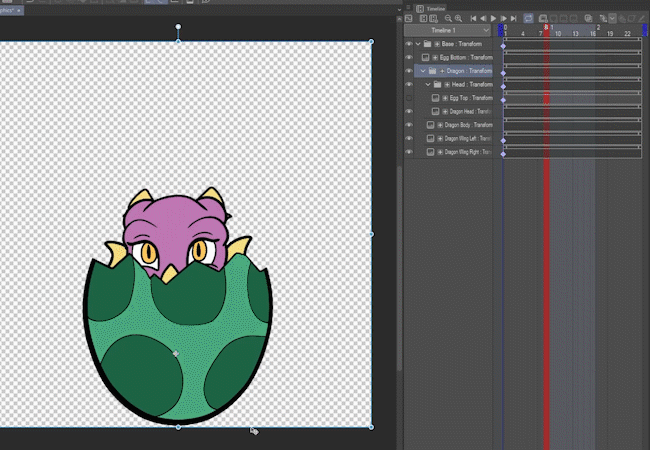
Hover the cursor over the edge of the object's bounding box to get the move icon, and click and drag to move the dragon up.
Notice a second keyframe has appeared on the timeline at the playhead’s location on frame 8.
Keyframes indicate the start and end point of an animation, and the computer calculates the path in-between.
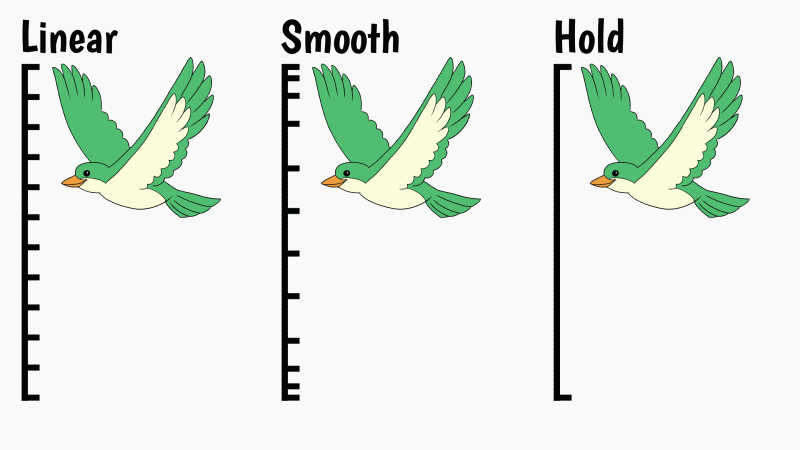
There are three keyframe types: Linear, Smooth, and Hold. They affect how your animation moves between keyframes. (You may remember this graphic from my Animation Overview tutorial!)
 + **Linear**-Movesevenlybetweenkeyframes

   + **Smooth**-Hasanaturalslowdownnearkeyframes

     + **Hold**-Simplyjumpsfromonepositiontothenext
You can change between them using the dropdown I showed earlier. We'll just be using Smooth Interpolation for this animation.
Follow Through
When you do a quick animated movement, you often want to overshoot a little to emphasize momentum. This is an animation principle called follow through.
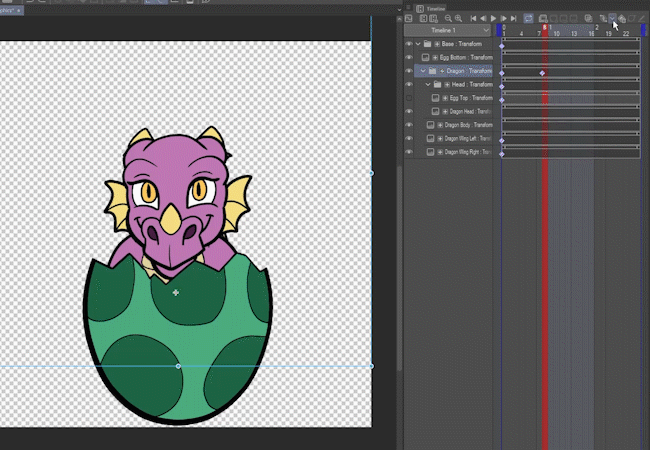
Go to frame 6, and move the dragon up just a bit higher than its final location.

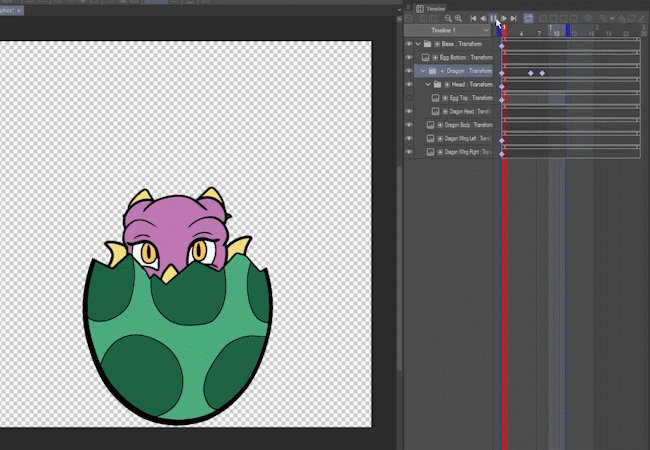
Now I'll preview the animation - but first, a quick hint. If you don’t want to play your whole animation, you can drag the blue brackets to just play a selected portion of it.
Press the play button to see it in action.
Adding a Secondary Animation to a Subfolder
Right now, the head is tucked down to fit in the egg, but we want it to rise up too.

Make sure you're on frame 8, select the Head folder, and move it up.
Notice how the head is still moving up with the body (since it’s a subfolder of the already-animated Dragon folder), but it has its own independent motion too.
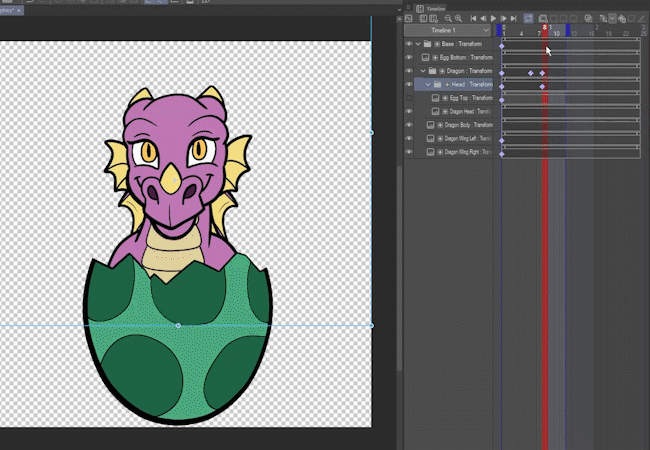
I'll add a little follow through with the head on frame 6 too so it looks more natural.
Separate Position, Scale, and Rotation Keyframes
Back on frame 8, I'll also rotate the head folder a bit.
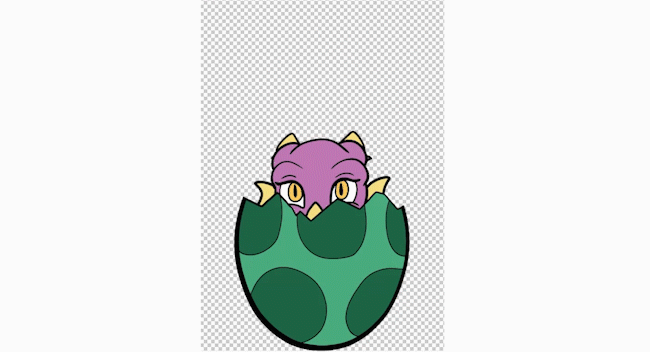
Note the tilt only happens once we reach frame 6, because there's already a keyframe there. Now, you may like how that looks, but what if you wanted the head to start turning right away?
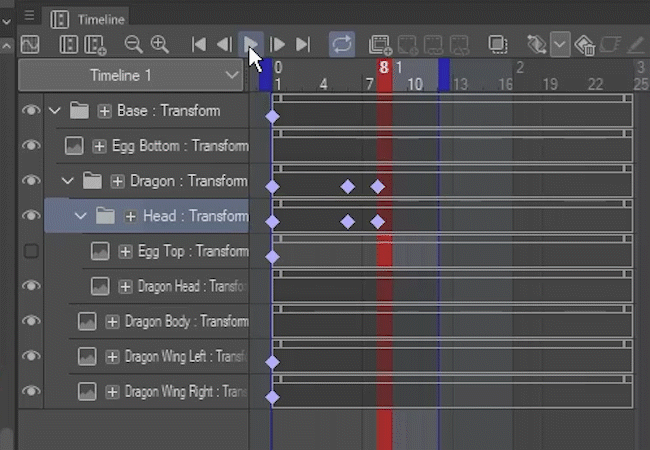
Click the plus button next to the layer or folder’s name (in this case, the Head folder), then the dropdown that appears next to it.
As you can see here, you're creating not one but several keyframes for each motion - for the position, scale, rotation, and pivot point.
Note: While we won’t use it for this tutorial, notice there's a keyframe where you can adjust the opacity too! I showed how to use that in the Sparkles section of my 3 Magical Animated Effects tutorial if you’d like to learn more.
Left click the middle keyframe next to Rotate to select it. This part is important - if you don’t see the red highlight around JUST the Rotate keyframe, you might delete more than you want.
Once the keyframe is selected, right click on it and choose Delete.
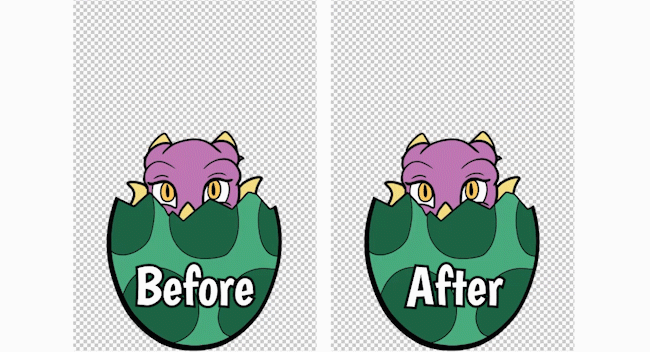
Now the head’s rotation starts at frame 1 instead.
Also, take note that the top keyframe has changed into a smaller, hollow diamond shape, indicating that not every property on that frame has a keyframe.
Finishing the Pop-Up Motion
Now, select the left wing, and go to frame 8. Move and rotate the wing to its final position.
As before, you can overshoot a little at frame 6 to add a follow through motion here, too.
Do the same with the wing on the right.

Un-hide the Egg Top. Since it's a child of the Head folder, it follows the head's motion and tilt already.
On frame 10, I'll move it into a better position and actually shrink it a little to keep it out of the way of the dragon's face.
And then, on frame 8, I’ve added a little overshoot, making it look like the egg top bounced up a bit before settling on the dragon's head.
Note: When you have animations within animations like this, make sure to drag the playhead back and forth through the frames (this is called “scrubbing”) to make sure no parts of your animation end up overlapping the outside of the canvas. You may have to tweak your keyframes a bit to make sure the final animation looks good!

See how moving these frames out a little adds a nice secondary motion? The dragon is moving, and the egg is reacting to that movement just a moment later.
Copy Keyframes to Reverse the Animation (Looping)
At the end of the animation, the dragon will pop back down into the shell. The easiest way to do this is to reverse the frames.

Reminder: If you dragged the blue bracket in to shorten your animation, make sure you drag it back out to the full animation length now.
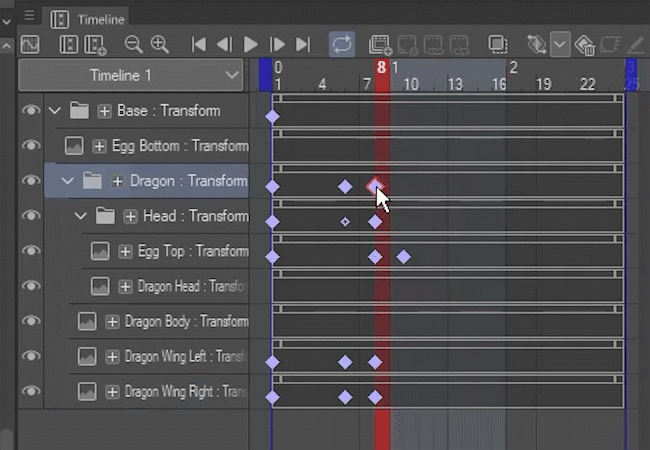
Left click on the first keyframe on frame 8 to select it. Hold down the Shift key and click on each of the other keyframes on frame 8 to add them to the selection. Skip the Egg Top layer for now.
Hold down the Alt key, then click and drag the keyframes over to frame 16. This makes a duplicate copy of the keyframes.
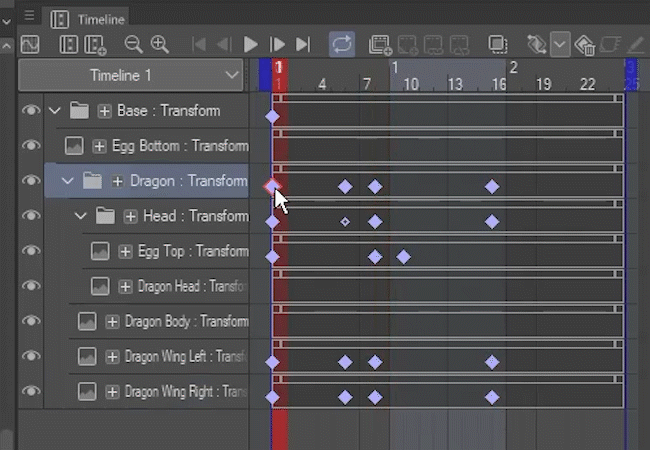
Do the same with the keyframes from frame 1, duplicating them over to frame 21. Again, skip the Egg Top, and also the keyframe on the Base layer.
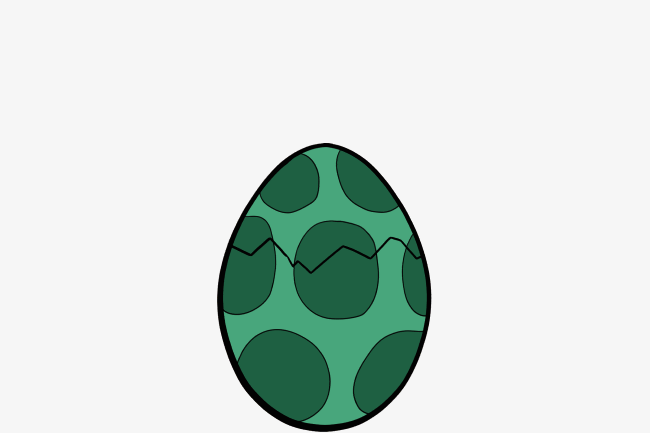
By copying the keyframes from the beginning to the end, we’ve now created an animation that will loop seamlessly!
(Except for the Egg Top layer, but we’ll get to that in a moment.)
Anticipation
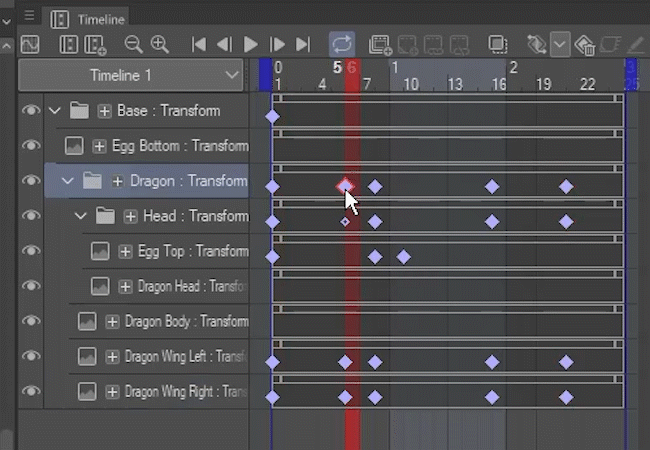
I'll also copy the overshoot keyframes, moving them to frame 18.
Notice that the special icon indicating there’s no rotation keyframe for the Head folder on frame 6 is retained, so there won’t be a rotation keyframe on frame 18 either.
This slight raise up before the downward motion is an animation technique called anticipation.
It's kind of the opposite of follow through. Think of it like how you have to crouch your body a bit before you jump!
Finishing the Animation
Now, the top of the egg shell needs to get back into position. Since the dragon moves so fast, I'd like the shell to hover for a moment before following - another type of follow through animation.
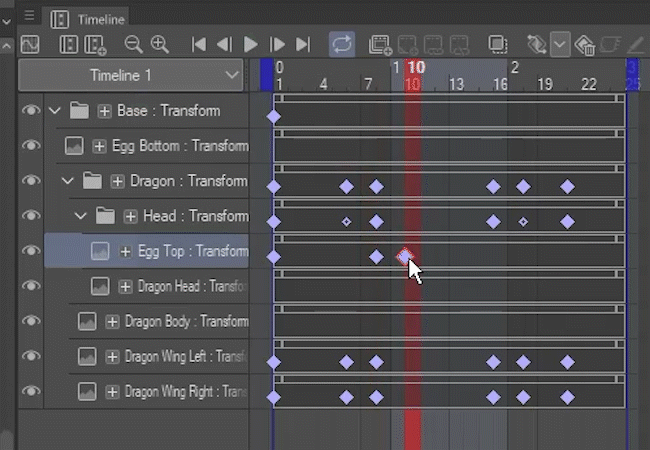
Copy the Egg Top keyframe from frame 10 to frame 18, and the one from frame 1 to frame 23.
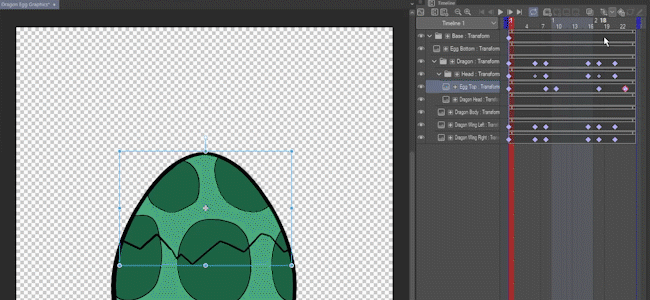
Because the egg shell is attached to the head, we'll have to add a few extra keyframes here to manually keep it up in the air.
Starting at frame 19, move the egg back up to the top of the canvas.
Repeat this for frames 20 and 21, moving it down just a little each time.
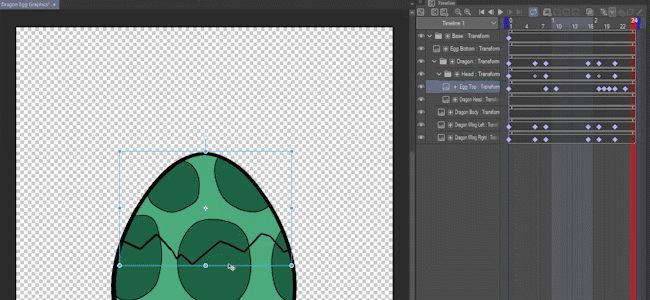
One last thing for the egg top! Go to frame 24 and lift and rotate the shell just a smidge to give it a nice bounce.

Now the top pauses for just an extra moment, before quickly falling back down to the shell. When it arrives, it bounces!
However, the dragon jumps straight into the action a little too soon, so one more thing I'll do is move the beginning of the animation forward a couple of frames.
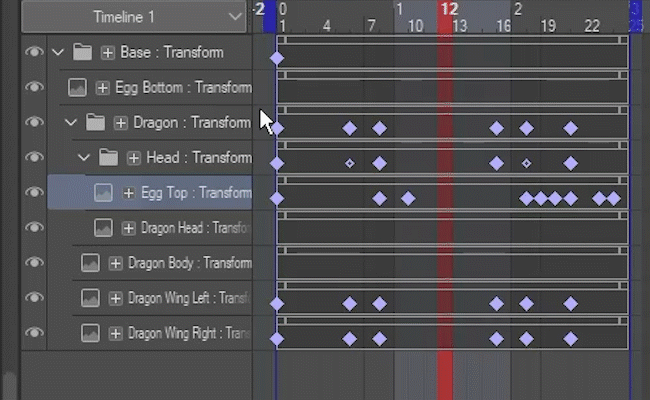
You can mass select keyframes by clicking and dragging. Select all of the keyframes before the halfway mark. (We haven’t done any animation on the Base folder yet, so I’m skipping that one.)
Click and drag to move all selected keyframes over two frames.
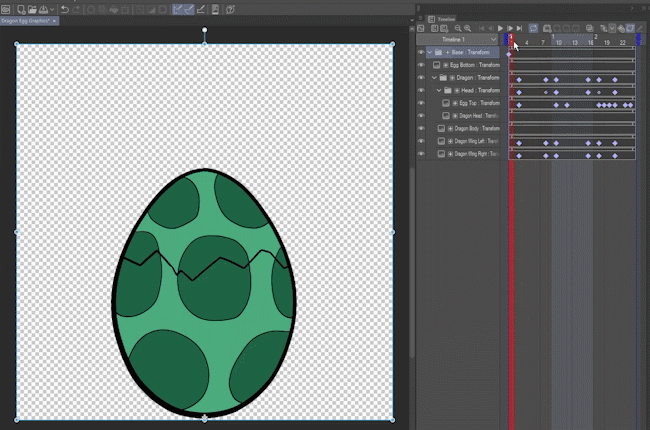
I'm going to finish off my animation by using the base folder to add a gentle rocking motion, and I'll also add a little more movement to the wings.
Note: Remember if you want something to loop, like the animation of the egg rocking, copy the first keyframe using the Alt key and move it to the end.
As you can see, a lot of finalizing an animation like this is just making small tweaks until you’re happy with the result.
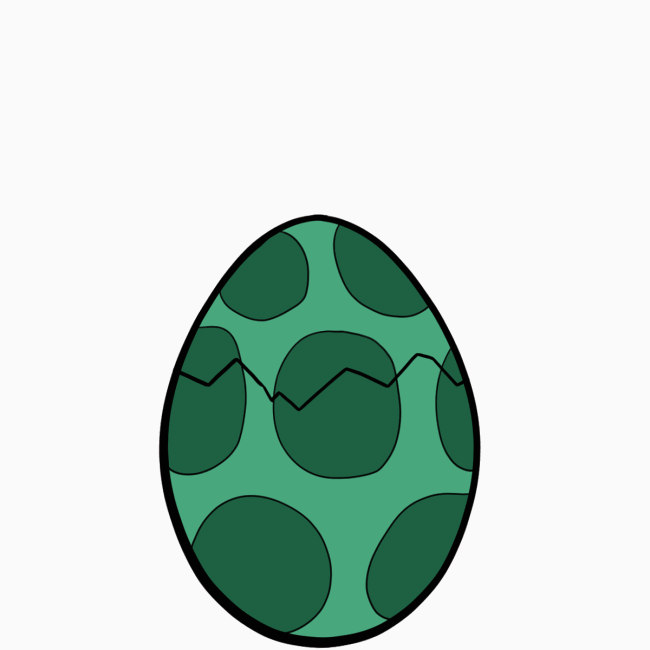
That brings us to the the finished animation!
Saving as Animated GIF
For animated emotes and stickers, check the platform you intend to upload it to for the correct file format and size. The ones I checked, like Discord and Twitch, both preferred animated GIF as the file format, so we'll choose that one.
Go to the File menu -> Export animation -> Animated GIF.
Hint: There are several other export options here, which I explain in much more detail in my Animation Overview tutorial!
Select a location and name for your exported file, then click Save.
Here, you can resize your finished gif. Discord recommends 128 by 128, so we'll go with that. Be sure to match the export range and frame rate to your animation: in this case, frames 1-24, and 8 FPS.
Good news - as of Clip Studio Paint version 2.1, animated gifs can now save with transparency! Check the Make Background Transparent box at the bottom to save your GIF with transparency.
Note: If your image has color gradients, saving it with Dithering turned on can make it look much nicer at the expense of a larger file size. I always try both to see which I prefer - however, for this little dragon animation, it is not necessary.
Click the OK button when you’re ready to save your finished animated GIF.
Conclusion
And that's it! Hopefully you enjoyed following along, and I'd love to see your animations. Tag me @MsRedNebula on Twitter or Instagram, or Mastodon and show me your work. Follow me here on Clip Studio Tips or over on my YouTube channel for more art and CSP tutorials!


Comment