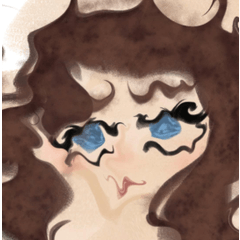
Rendering fur and hair
Hello. In this tutorial I'll show you how I paint fur and hair step by step.
We'll need any soft brush that also doesn't blend too easily. I'm using the basic "Uneven layering brush", but you can choose anything else.
Fur painting process
First, I'm starting with basic shapes. Since I'll be painting I don't feel the need for lineart or even sketches, it's just basic colors without any details for now. Both the hair and the fur are on separate layers.
What I do next is make another clip layer with a soft shadow, using a basic airbrush. Clipping a layer means whatever you draw, it will show only on the layer below.
So now we have a shape base for our fur. This way while detailing it later we won't accidentally lose track of volumes and flat it out - and that's easy when you're painting.
For detailing itself, I simply take shades I got out of that soft shadow and layer them on top of each other:
Note how erratic the fur is. All the layers are in the same pattern of little waves going from the centre.
In this fashion I make a few more layers and go through them with a brush.

Here I'm changing in-between the usual painting mode and the transparent mode, pressing [C]. Unlike the eraser tool, transparent mode saves all the properties of the brush, and you can't see the difference between the strokes.
Looking good already! Still lacks some depth, though. So the next thing we'll do is mix it with the background a little, adding reflected light. Since fur is fluffy and soft, the reflected light isn't going to be too shiny, and I'm using a basic airbrush for that again.
And just like before, I add some details with a brush.
Now the last thing you could do is add an overlay layer with a cold-colored gradient. This will help create the illusion of depth, since cold colors are usually associated with shadows and darkness.
And I'm lowering the opacity a bit so the original color is still readable.
Hair painting process
Just like with fur, I'm drawing a shadow first to lay down the basis for volumes. But! Straight hair wouldn't be as fluffy, so I'm using a basic pen brush. You can choose any hard brush.
Before going on with details, I'll also soften this shadow first. It's either because the hair is less dense and may seem transparent on its tips (blue circles), or because it's reflecting light (yellow circles).
While detailing, I'm also already adding semi-transparent layers with different hues, since with not-so-fluffy hair I'll need to incorporate these colors through locks.
Since I'm painting ginger hair, I'm using the color purple, but with blonde hair you might use red hues, with green - blue, and with blue - red. Don't be afraid to experiment! The only thing I'd advise you not to do is to paint shadows with gray or black, even if the base color is gray/white.
Now the obvious difference between hair and fur is with hair straight hair you need strokes that all have the same direction.
But with hair you could also use some variation in softness: press harder where shadows meet with light to create edge, but use bigger brush size and paint softer where the shadow turns into reflected light.
Now going on to the highlights. Yellow hues work with most colors if you need a colorful highlight, so I'm using that.
This time it's a brush rather than an airbrush, since I need some solid colors right where the light falls, but I still even it out on the edges.
And for a better glossy effect I use the "Add(Glow)" blending mode and detalize the highlights, just like before.
An overlay gradient of light purple and yellow as a final touch...
And we're done here! The only thing I sometimes still do after all the painting is finished is tweak the brightness a bit (through right-clicking on the layer and going to New Correction Layer -> Brightness/Contrast) or use any effects (found in Filter -> Effect) until it looks good:
And that's the final drawing used in the headline.
Thank you for reading so far! :)


Commentaire