
Hello everyone, I hope you are well. In this tutorial I'm going to show you how to make a Simple Holiday Card Illustration in Clip Studio Paint Pro along with some personal tips of mine. Let's get into it.
Design/ Planning
- This section just gives some information about designing or planning your own Holiday Card. You can skip this section and go straight to the demonstration.
The first thing to consider before you even start to draw anything is to at least have an idea of how you want your card to look. This includes, but is not limited to, the elements below.
● Layout
This entails specifics like the size of the card which is influenced by whether you want it to be landscape or portrait oriented. A good dimension for a digital card would be 800 pixels for the width and 530 pixels for the height. If you intend to print your digital card, I recommend using a DPI of 300 or more. Computer monitors usually have DPI of 72 or even 96 with the images looking fine. However, if you were to do your card at this DPI and then print it, it will most likely look blurry.
Another thing to consider is the placement of the words and the visual decorations. How will they interact with each other on the card? Will you have the words in the center and a custom-made border around it, or will you have a christmas tree to the right of the card and the words to the left?
● Words
The words are a very important element of any card, after all, they are used to form the message that will be on the card. Here, you will think of the font and size of the words including other ways you can treat them such as making them bold, slanted, etc. You can even be more creative like making the words form a certain shape or be made using stars, stitches of thread or glitter. You can think of effects too like making the words look like they are carved into the paper or emerging from the paper like bevel fonts. Be creative.
● Color scheme
It is nice to incorporate a color scheme into the design of your card. Not only will it make your card look organized, it will also make it easier on the eyes and help to keep it looking simple. One popular way of choosing your colors is by using those popularly associated with the holiday or event your card is dealing with. For example, a Christmas will make use of the colors red and green in their design. Additionally, you may also direct the viewer’s focus to certain parts of the card by how you place your colors.
● Visual Decorations
Apart from the words that will be on the card, there will also be other items that serve to make the card attractive. These can be any visual decorations including borders, patterns and images that come in many different styles. An example for the borders can be one made of snowflakes, stars or even Christmas tree lights. For the pattern, you may add a textured or wooden table pattern as the background surface of your card. And lastly, you may add an image of Santa, an image of the numbers of the new year or Christmas presents.
Below are some additional visual decoration ideas you can use. Most are for Christmas and The New Years though.
Borders made of:
-Lines of different thickness and color
-Stars
-Snowflakes
-Christmas tree branches with ornaments
-Curly Motifs
-A Wreath
Patterns consisting of:
-paper texture
-wooden table texture
-stars
-Socks
-snowflakes
Images of:
-Santa
-Bells and Ribbons
-Presents
-Santa’s reindeer
-Christmas tree balls
-Mistletoe
-Christmas tree
-Fire Works
-Balloons
-Confetti
-The Year
After reading all this, designing your holiday card should be easier.
Now. I am going to be demonstrating how you can create a beautiful Simple Holiday Card using the features in Clip Studio Paint Pro as well as some assets from Clip Studio Assets.
About the Card Design
This card design is for the holiday Christmas. It will be landscape and makes use of the color scheme consisting of Red, Yellow and White. The words on the card will be 'Wishing You A Merry Christmas' and will be aligned to the left.
The Visual Decorations will consist of a textured background, a Christmas tree and a border made out of snowflakes, stars and sparkles.
The Background
Open Clip Studio Paint Pro and create a new canvas by clicking from the menu above File > New. A dialogue box will appear where you will enter the name of your Illustration, the width, height and the resolution.
For my canvas, I set my Width to 800 pixels, my Height to 530 pixels and my Resolution to 350 dpi. Then press OK to create your canvas.
A personal Tip of mine is to save my work after I have created it. To do this, go to File > Save As, then choose where you want to save your file and click 'OK'. Now, anytime you want to save what you have so far, just go to File > Save this time.
For the background, the color will be Red with a nice texture pattern.
To do this, go to the Layer Palette and click on the blank layer that was created along with a paper layer when you created the canvas.
Now, from the menu above, go to Filter>Render>Perlin Noise. When the dialogue box appears, scale down the image until the particles are smaller. See image below for reference.
Now, go to the Layer Palette and create a new blank layer below the layer with the Perlin Noise. To do this, click on the paper layer which is the very last layer, then click the 'New Raster Layer' icon above the layers in the Layer Palette. A blank layer will be created above the paper layer this is also below the layer with the Perlin Noise.
Then, turn the visibility of the layer with the Perlin Noise off. Do this by going to Layer>Layer Settings>Show Layer, or by simply clicking the eye shaped icon beside it in the layer palette.
From the color wheel, choose the color you want your background to be. Since I want my background to be Red, I will choose Red. With the new blank layer selected in the layer palette, select the Bucket Tool and click on the canvas to fill this layer with Red.
Then turn the visibility of the Perlin Noise Layer back on by clicking the eye shaped icon again.
Click on the Perlin Noise Layer from the layer palette and change its Blending Mode to 'Multiply' by changing it from 'Normal' to 'Multiply' from the Pop-up list at the top of the layer palette.
Now you have a nice textured background for your card. You may adjust the color by filling it with another color and adjust the texture by changing the opacity of the Perlin Noise Layer until it is to your liking.
The Christmas Tree
Now, it's time to create your Christmas Tree as part of the visual decorations.
First, do a rough sketch of a triangle to the right of the canvas so that you know where to paint while ensuring that the tree is symmetrical. To save time, just type an 'A' onto the canvas with the Text Tool using an appropriate font and you’ll have your triangle. Quick and Easy.
Do this on a new layer and preferably using a dark color, like black. Luckily, when we use the Text tool, a new layer will automatically be created for us. The font that I used for mines was 'Yu Gothic Light'. Any font that gives you a symmetrical 'A' will work. Also, leave some space at the top of the 'A' for the star on the top of the tree.
Lower the opacity of our 'A' so that it is still visible by sliding the Opacity Slider in the Layer Palette. Then, create a new layer above this layer with the 'A'. The Christmas tree will be made on this new layer.
The tree will be made using any fancy decoration that can be found in Clip Studio Paint Pro itself, and/or from the Asset Store. Namely, stars, snowflakes and pearl chains.
Now, ensure that you are on the new layer. You can tell by it being highlighted in the Layer Palette. Click the Decoration Brush and select the Pearl Brush from the Clothing category. Use this brush to add lines of pearl to the tree using the 'A' on the layer below as a guide. A Tip to get your lines smoother is to increase the Stabilization of the brush in its Tool Property Palette.
If your lines happen to go outside the 'A', just erase the excess with the Eraser afterwards.
Select a Yellow color from the Color Wheel and create another new layer above the one with the pearl chains on it.
Go to the Decoration Brush Tool and use brushes found in the Effect category to construct your Christmas Tree. You might want to dedicate a new layer for each different brush you use.
Brushes that I used are the 'Sparkle' and 'Soft' brushes that were already in Clip Studio Paint.
Though, I downloaded additional brushes from Clip Studio Asset to complete the Christmas tree.
The brushes can be found below.
To download the brush, click the link above and press the ‘Download’ button on the page. When the brush is finish downloading, go to the Tool Pallette of a brush that is in the location you want your new brush to be. Then, click the 'Add Sub Tool' icon and select the brush you downloaded. You will now see your brush added to the bottom of the list of brushes.
A tip when creating your tree is to apply the brushes with the bigger particles first, making sure they are even/balanced, then apply the brush with the smaller particles to fill up the remaining spaces.
For the brushes that splatter, you can use the Lasso Tool from the Selection Tool to select a particle, for example a sparkle, then select the 'Scale/Rotate' option and move the particle to where you want it. Then press the Deselect option. Do this until the particles are where you want them. See images below for clarification.
You also want to make sure you define the edges of the Christmas tree by outlining the edges of the 'A' using the particles of the brushes.
Now, delete the layer with the 'A' on it, as it is no longer needed.
The Words
For the words, first, ensure that the color you want the words to be is selected on the Color Wheel. Then select the Text tool and click on the Canvas to create a new Text Layer. Before you start typing, go through the fonts and choose a nice thick and curly font from the Tool Property Palette. Check the' Bold' option for the 'Style' to make the text thicker. Next, adjust the text size and type the words that you want onto the canvas. Next, adjust the words so that some fall on the next line while the 'Justify' option in the Tool Property Palette is set to 'Center Align'.
Also, keep in mind that borders will be added so leave some space at the edges.
Create a new layer above the layer with the text and clip it to it. To do this, click on the new layer from the Layer Palette then go to Layer> Layer Settings> Clip To Layer Below or simply click the 'Clip To Layer Below' icon from the top of the Layer Palette.
On this layer, use the Tone Scrapping Airbrush to apply a saturated color to the text with a small particles size. Then select a lighter color and use the Glitter brush from the Decoration Tool to apply glitter to the text.
The Border
Time for the Border. Select the color white, and create a new layer. While on this new layer, go to the menu above and click Select> Select All. With everything selected, go to Edit>Outline Selection from the menu above. When the dialogue box comes up, check these options: “Draw inside” and ‘Draw on canvas edge’. Set the line width then click 'OK'.
To Deselect everything, press Ctrl + D or go to Select>Deselect.
Create a new layer above this layer with the white border. On this layer, use decoration brushes to add to the inside of the border using the color white. You can use brushes previously used to construct the Christmas tree.
And there you have it, a simple Christmas card.
Thank you for reading and I hope you found this tutorial useful. Goodbye.
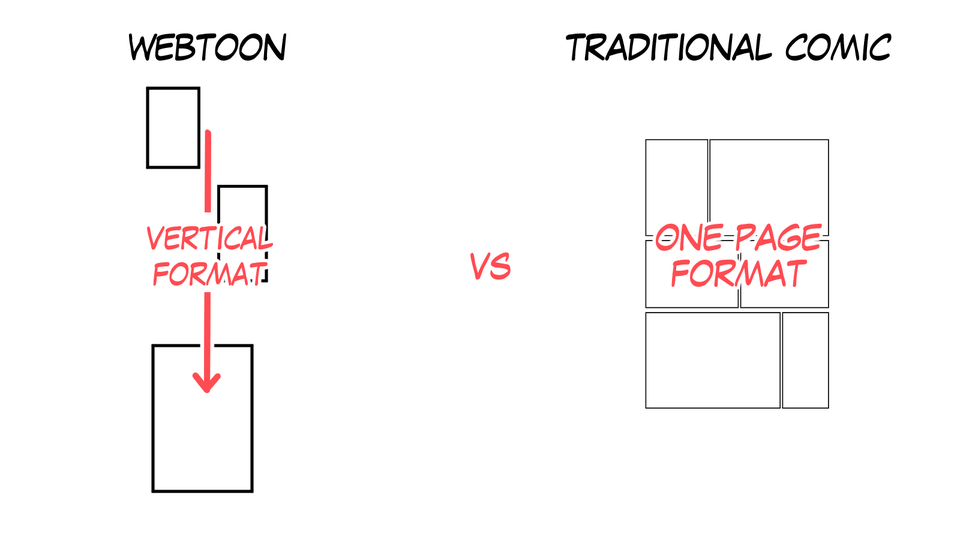
Check out my comic on Webtoon Canvas, I recently started it and I am so proud of it so far.
この投稿を「いいね!」したユーザー


コメント