Line art any way you want it!
If you are new to digital art, line work is probably one of the things you struggle with. Whether it is the accuracy of the line, or it’s aspect, digital programs constantly continue to improve to provide artists with both the practicality of digital art, and the beauty of traditional. In this tutorial, I’ll try to teach you everything I know about lineart and how to make it.
Using your sketch as line art
Let’s start for the beginning, the sketch.
There are two main ways for me to do sketches, digitally...
Or with pen and paper!
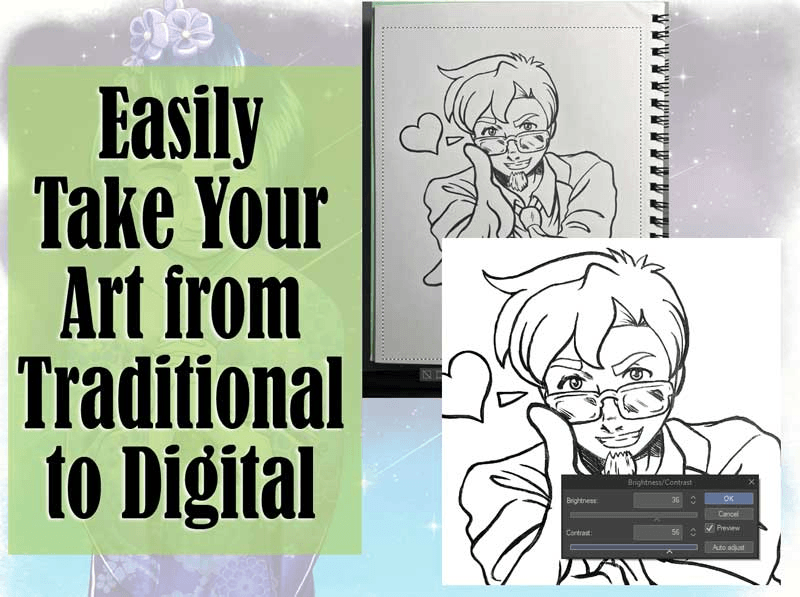
Whichever the case, your sketch should be understandable enough that you can trace it to make a finalized line art. If you prefer to make sketches on paper, take a photo of the drawing with as good light as possible, and import it to CSP. Then, play around with Level Correction. You want your whites to be as white as possible, and your blacks to be as black as possible:
If your picture has those dark shadows too, create a new layer and set it to Overlay. The Overlay layer should be over the photo, but under the Correction layer. Cover the dark space with gradients, as many as you need. You can also use the airbrush tool:
If your lines are too light, play around with Level Correction again. Then merge everything, and go to [Edit] > [Convert brightness to Opacity]. This will make the white invisible and you can draw right under your sketch.
You can clean the drawing with your eraser, at this point it’s up to you. If you took a good picture, and your sketch is clean, you could even use it as your lineart! But that’s almost never the case for me, so I prefer using it as my sketch and trace it in vector layers. Whatever the case, you’ll want to change the color of your sketch to a lighter color than you intend your lineart to be, and lower the opacity as much as possible. I like to make mine as transparent as possible, until I can barely see it.
Here, the opacity is set to just 13, but I usually lower it more, just right to see it. That way, I make sure that the sketch will not affect how I see the lineart. Instead, it’ll guide me.
How to make a vector layer
Vector layers allow you to edit the lines you made without losing quality of line, nor the character of the brush. To make one, go to your layer palette, and select the icon for the vector layer.
Or go to [Layer] > [New Layer] > [Vector Layer...]
Let me show you the tools you’ll more likely use as you draw.
Tools: [Correct line]
Correct line allows you to edit the lines on the layer. It has many Sub Tools, and you'll want to become acquainted with them.
There’s [Control point] that edits the nodes of the lines, either by moving them, deleting some, adding more, switching from curve to corner and vice versa, changing width and opacity, or even splitting the line at a certain point.. This tool only works on each control point individually. In the photo, I changed the width of a line with this tool. Compare it bellow with [Adjust line width]
There’s also [Pitch vector line], that lets you drag a portion of that line.
[Simplify vector line] reduces the amount of nodes the path has, while trying to keep it as similar as possible. This is very useful if you find yourself needing to edit a complicated stroke.
[Connect vector lines] joins two separate paths into one.
[Adjust line width] let’s you narrow or thicken a line. It can work on many control points at a time, so it creates a more holistic look.
Tools: Brushes
In vector layers, you can use any brush available to you on Clip Studio Paint. The layer will save the path and the stroke. Let’s see some of the brushes' properties that can help you create better lines.
--Stabilization--
This changes how smooth your lines are. The higher the value, the smother the line. This is going to save you many times as you draw.
--Starting and ending--
If you have this on, the brush will change properties in the beginning and/or end of the line, independently of your input. You can select what properties change, and how much on the [Sub tool detail] menu. Be careful with this, if the values are too low, it can give a shoelace effect. I mostly use this with Bezier Curves.
--Pressure sensitivity--
If you own a modern tablet, it probably accepts some dynamics on input depending on the pressure you apply with your pen. Many properties can be affected by this, and it creates a more natural line.
If the property has this setting available, they will show a little box next to the value, as seen next to Brush size or Opacity settings.
--Vector magnet--
This option is only available when you draw in vector layers. It works by connecting two overlapping lines automatically. It will save you the hassle of having to use [Connect vector line] later on, but it’s a little tricky, you’ll want to practice it a little beforehand.
Tools: Figure tools
Of course, many of these settings you’ll only enjoy at their fullest if you own a drawing tablet, If you use your mouse to draw, it may be easier to use a figure tool. Bezier curves and figure shapes are lifesavers! You can do any and every line using figure tools. If you turn on Starting and ending, or use the [Correction line] tool, you can create dynamics similar to the ones created with pressure sensitivity.
You can also use different brushes, as long as you have them registered. I’ll show you how to register them a little further.
Tools: Erase
--Eraser--
You can use your erasers as you usually do, but you’ll only hide the lines, as if the erase was a stroke itself.
This can clutter your layer and make it very difficult to edit later on. It’s best to turn on the vector eraser.
It has three options:
Touched areas, where it only erases the part of the stroke touched by the erases.
Up to intersection, where it deletes the line up until it connects with another one.
And Whole line, where it deletes the entire line.
--Layer masks--
If you want to erase one part of a line, but want to keep the integrity of the figure, it’s better to use a mask to hide the undesired lines without actually erasing them.
Changing line color
You can change colors three ways. First by creating a clip layer on top of your line art, and coloring there.
Second, by selecting the [Object] tool and changing the color on the [Tool property] palette.
Or third, by selecting the color you want, going to [Edit] drop menu > [Convert to drawing color].
Coloring (Fill up to vector line)
This is a lineart tutorial, so I won’t touch on coloring, but it would be a shame to get you interested to try vector layers without telling you how it can help you with coloring. Whether you use the selection or the bucket tool to color, both have an option under [Reference] in the [Sub tool detail] menu called [Fill up to vector path].
This will do exactly as its name implies, and it’ll fill your object until the vector path of the stroke. You can decide whether to include the vector stroke or not.
Look how it’s filled up until the middle of the line. That’s where the path is. I find it very helpful in the coloring stage, and felt the need to pass it on. Back to the tutorial!
Different styles examples!
Registering brushes
What if you’ve made your lineart, and then changed your mind about the brush you used? If you were on a Raster layer, you would have to do it all over again, but with vector layers you can change the brush of a stroke with a few steps!
First, your desired brush should be registered to preset. To do this, go to the brush’s [Sub Tool detail] > [Brush shape] > [Register to preset]. The brush will be saved with the default settings at the time of saving.
Afterwards, select the [Operation] tool, and go to [Tool property] > [Brush shape] and choose the brush you want. The first one on the list is the last one you saved.
If you only want to change some strokes, select those in particular and do the same steps.
You can also change the properties of the brushes by going to the [Operation] tool’s [Sub Detail palette]. But one important setting that you can’t edit is the opacities' pressure sensitivity. This can leave you with invisible lines if you changed to a brush with low opacity for low pressure, so be careful.
Let me show you my examples. These three were done with the same base stroke. The difference lays on the brush used, and in coloring.
For this one, I registered this brush.
Then, it was as simple as selecting my layers, and changing the brush shape. For some, I had to edit the size to create the desired look. Besides that, I only had to redraw the eyebrows.
Here, I wanted to create a "lineless" feel. To hide all the lines of my art, I paint them of the same color and use similar textures as the subject. I prefer coloring them in because that way I can preserve the same quality on the borders when I resize my work.
For this other example, I wanted to make her look like an illustration for a children’s book. They are filled with texture, as if they were drawn in chalk. I used this set of brushes:
Then, I colored the lines just as above.
My best advice if you want to experiment with your lines is to find an artist you love and try to imitate their style. Ask yourself, how did they achieve this look? Could this effect be achieved with a blending mode, or did they choose different colors? Is there a texture? Is the texture on the brush, or over all the layers? Keep experimenting and trying new styles until you find somewhere that is appealing to you. Your own style will come from an amalgamation of everything you love mixed with everything you know!
Resizing artwork
I’ve mentioned resizing art several times throughout this tutorial. I usually work on a relatively small canvas, no larger than 1500px, because I work on a laptop. But If I want to make print of anything, I may need them to be larger than that, to fit the sizes of all the products provided in stores. This can be as high as 4000px for the smallest size! My computer would get fried! So I draw in smaller sizes, and then use [Change Image resolution] in the [Edit] menu to resize my illustrations.
If I enlarge them this much with raster layers, the lines would lose sharpness.
But If I keep vector borders, even on lineless art, the lines remain sharp.
This is another of the many perks of using vector layers!
I hope this tutorial was useful to you! If you have any questions, write them in the comments, I check them everyday! You can check my art on Instagram and Twitter.


댓글