Laser beam with depth
Tips to add depth to the laser beam using a layer mask
It seems that there is no demand
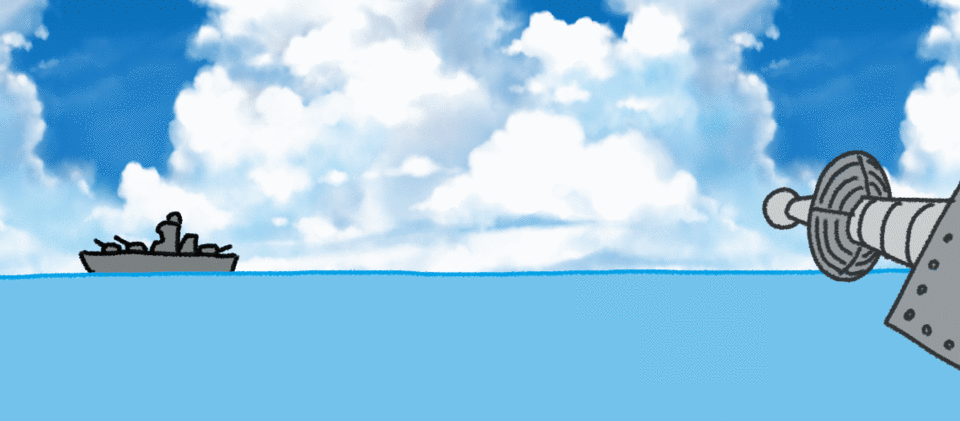
It is an animation that attacks "future spaceship Yamat" using the latest "future laser cannon"
1)
Prepare a new illustration 1140px × 720px 72dpi
Draw a single horizontal line and draw the sea
Floating the boat over the sea
Place clouds behind battleships
Draw the latest secret weapon aiming at it in the foreground
You can download the cool "Aozora 01" with "Search for material"
Laser beam
2)
Sea, sky and ship layers are put together in a folder called "Background"
Create a "vector layer" on top of the laser cannon layer
On the vector layer
Draw a parabola with the "Shape" sub tool of the "Figure" tool in yellow
Fire from a laser cannon so that it falls to the sea surface
Select the sub tool "Control Point" of "Line Correction Tool"
Change the "Processing content" pull-down to "Line width correction"
Increase the control point on the laser cannon side
This is the "laser beam"
Mask for displaying laser beam
3)
Create a strange selection in the selection on the laser beam layer
This shape is important
Since the figure is troublesome, I used "Polyline selection"
If you can write beautiful ares, you have never been better
`` Create layer mask '' on the laser beam layer
Timeline
4)
Show the timeline
Create a new timeline
Frame rate is 8, playback time is 3 seconds + 0 frames
5)
Select "Object" of sub tool
In the layer palette
Move the “Laser Beam” layer below the “Laser Cannon”
Select the “Laser Beam” layer in the timeline
Click on the "Enable keyframes for layer" icon
Click (+) next to the layer name of "Laser Beam" and select "Mask"
Select (second frame) on the timeline
Set "Keyframe interpolation" to "Smooth"
Make sure the layer mask next to the laser beam thumbnail is also selected in the layer palette
While checking the canvas
Hold down the shift key with the cursor keys on your keyboard and move the mask down
(You can shift it in other ways)
Move the laser beam so that it is no longer visible
A key frame has been added to the second frame of the mask on the timeline
Click in the middle of the timeline mask
(1 second + 4th frame)
This is where you end up shooting the beam
Similarly, shift the mask up while holding down the shift key with the cursor key on the keyboard
Stagger until the laser beam fires from the laser cannon and disappears into the sea
"Play" here for confirmation

Function curve edit mode
6)
Check that "Mask" on the timeline is selected
Click the "Function curve edit mode" icon on the timeline
Since only the "position" of "Y" is edited
Click "Y", then click "Mask Position"
Turn the handle at the beginning of the key frame downward
This will increase the beam's firing speed
I think you will feel more depth
Click the "Function curve edit mode" icon again
I will go back
What is the original mode?

Draw beam firing effect and water column
7)
"Play" once
Since the beam alone is not powerful
Add a fire effect and a water column with the feel of "Bee, Dodone"
On the timeline
Create a "New Animation Folder" on the "Laser Cannon" layer
Select the second frame and add "animation cell"
Select "Create folder and insert layer" in the animation menu
The cell layer is inserted into the folder and the folder has the same number as the cell
8)
Draw beam firing effect
Draw a water column
The water column ripples and spreads over the sea surface
Working with keyframes
9)
After drawing, select the object tool
Express the ripples gradually disappearing using key frames
Select the animation folder and "Enable layer keyframes"
Click (+) next to the animation folder name to open it
Click "Opacity"
Select where the water column in the timeline has changed to ripples (2 seconds + 4th frame)
Change the "Opacity" slider in the tool property palette
(100), but once again, select another value and choose (100) again.
A keyframe has been added to "Opacity" on the timeline (2 seconds + 4th frame)
Choose the last piece
Set the value of "Opacity" on the tool property palette to (0)
A keyframe has been added to the "opacity" of the last frame on the timeline
This will remove the ripples
Ten)
Because the beam is inconspicuous
Put the beam layer in the layer palette into the folder
Click "Boundary effect" of "Effect" in the layer property palette
Set the value of “Border thickness” to (2)
Add color to the edge of the beam to make it stand out
The color of the water column has also been modified to make it stand out a bit
This is completed
carry out

TIPS with casual CLIP functions
End


Comment