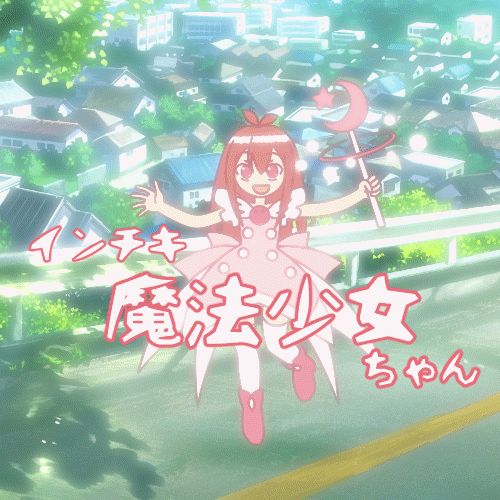
Makeover magic with effect tone noise!

-
 MVP ◆This user has contributed greatly to the management of the community, by posting many great responses to the questions asked. Once every three months, MVPs are determined based on the points earned during that period and will be recognized accordingly.
 -
 New Valuable Player (NVP) ◆These are the next-best contributors to the community after MVPs. This is awarded to users who have not yet won an MVP award, based on the number of points they have earned.
 -
 Official Expert ◆Chosen out of all MVP awardees, who are already proof of excellence, this is a testimony of outstanding correspondence in the community. After careful screening, they are appointed by CELSYS and assume their position.Note: Formally called “Evangelists”
 -
 CELSYS official moderators ◆Moderators are official CELSYS staff members who are fluent in Japanese as well as various other languages. As moderators are not experts on software or creative work, they will not be able to directly answer your questions. However, moderators will provide communication and language support to ensure that everyone can smoothly communicate with each other.
 -
 CELSYS officialThis is the official administrator account.
Use "Tone" of "Effect" in the layer property palette like a mask
Create magical animation by using it to switch layers
Introduction
The tone layer displays changes in density and changes in the angle of the net very neatly
Even if you try to make use of this numerical change in animation
The numerical value set in the layer property palette is not reflected in the timeline keyframe
Even if you add an effect tone to a normal layer, it is the same and the value of the layer property palette is not reflected in the keyframe of the timeline
I want to do something...
That's where I came up with...
Add an effect tone to the folder and create a layer filled with black inside the folder
By changing the opacity of the layer, the density of the tone also changes.
Layer opacity is reflected in timeline keyframes
Still can't rotate the tone etc.
try noise now
Create a (500 x 500px) canvas with the "new" illustration
It's hard to see the effect on a white background, so I'll lay out a checkered layer.
Fill the raster layer with black
Right-click around the layer name of the blackened layer and select "Create folder and insert layer"
A folder is added to the layer palette and a solid black layer is placed in that folder
Apply "Tone" of "Effect" in the layer property palette for the folder
Change "Net settings" to "Noise" in the layer property palette as it is
Set "Noise Size" to (500)
Select the layer filled with black in the layer palette
Show timeline palette
Select "New Timeline" from the command icon on the timeline palette
Set the frame rate to (24) and the playback time to (3+0) seconds+frames
Click the "Enable keyframes on layer" icon
Keyframe Set a keyframe for the black fill layer
Set "Keyframe interpolation" to "Constant speed"
Move the opacity slider in the layer palette left and right to return the opacity to (100)
This will add a keyframe to your timeline
A keyframe is added to the timeline palette, but it is hidden and I do not understand it
You can display hidden keyframes by pressing the (+) to the left of the layer name on the left side of the timeline palette
Press the "To the end" icon to the right of the play button on the timeline palette
Displays the end of the playback range
Move the opacity slider in the layer palette to the left to set the opacity to (0)
The layer placed as the base is displayed on the canvas
Play up to here

The noise disappears like it melts away
next
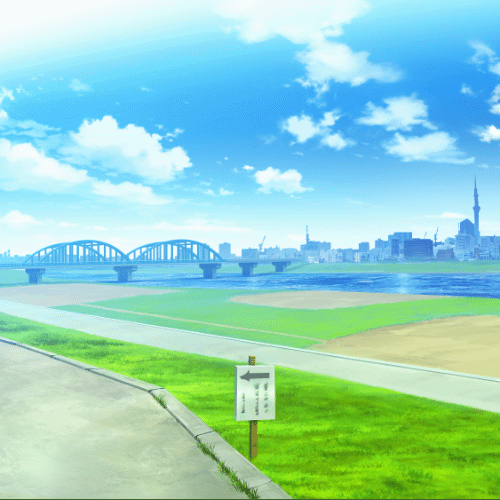
CLIP STUDIO PAINT has an image material called "River_Day" in the "Material" that is included from the beginning
Place it on the folder with "effect tone" in the layer palette
Change the display size on the canvas and make the layout as you like
As it is, press "Clip at Layer Below" in the layer palette icon
play in this state
Add a keyframe to the "River_Day" layer
First, remove "Clipping at layer below" from the "River_day" layer
Press "Enable Layer Keyframes" on the timeline palette
Select "smooth" for keyframe interpolation
"Add keyframe"
Press "End" on playback
Move "River_Day" on the canvas slightly to the left
Since the playback time is short at 3 seconds, it is only a little movement
This is because it is not possible to confirm this movement while "clipping" is done.
keyframe added
Finally, “clip at the layer below” for the “river_day” layer
Completion of noise
play this
You can also erase while moving the layer
I think it would be fun to combine various

Background used "Park 2_Daytime"
Content ID: 1379133
Try cross effect tone
I wrote at the beginning
When changing the density of the image, there are some effect tones that do not express beautiful shades.
Among them, "cross" can be a beautiful expression
(Why is there a problem with the effect tone?)
Now use magic
There are things to be aware of when using effect tones at the beginning
Requires a high resolution (300dpi or higher)
However, if you set the resolution to high (201dpi or higher), the image that plays the animation will be rough.
If you want to check it properly, you need to see what you exported to a movie etc.
Create a (500 x 500px) (300dpi resolution) canvas with the "new" illustration
Add a gradient layer to your canvas
The sub tool uses the gradation "drawing color to transparent color"
Set the drawing color to (black), the shape to (straight line), and the edge processing to (do not repeat).
Set the drawing target to (create a gradient layer)
Create a gradient from the left edge of the canvas to the right edge
Right-click around the name of the gradient layer created in the layer palette
Select "Create folder and insert layer" from the menu
A folder containing a gradient layer is created in the layer palette
Check the layer properties palette with the folder selected in the layers palette
Press the (tone) icon in "Effect" on the layer property palette
Press the "Net settings" pull-down and select (cross)
Set "Number of Tone Lines" to (5)
Creates a large lattice pattern
Density changes from left to right due to gradation
Select "Gradient layer" in the layer palette
Display the "Timeline Palette"
Press the "New Timeline" icon on the timeline palette
of the new timeline settings
Frame rate to (24)
Set the playback time to (4 + 0) seconds + frame and click "OK"
You will be able to work with the timeline palette
With the gradient layer selected in the layer palette
Press the "Enable keyframes for layer" icon on the timeline palette
For "Keyframe interpolation", select (keyframe to create: constant speed)
I think that the sub tool is suddenly selected as an object
If you select another sub tool, set it to "Object"
Move the canvas gradient layer to the right (500px)
The displayed handle is the same 500px as the canvas, so just push it to the right
Be careful not to let it deform
When you move it, a keyframe is attached to the timeline
on the tool property palette
Make sure that the (X) number in the "Position" of the transformation is (750)
This (750) is moved from (250) to the right (500)
continue
Press the "To the end" icon two to the right of the "Play" icon on the timeline palette
Move to the last frame of the playback range
Move the gradient layer on the canvas to the left
Move it until the steering wheel turns to the left
If it is troublesome, the tool property palette
You can directly enter (-250) as the value of (X) in the "position" of the transformation
A keyframe was added to the last frame of the timeline palette
write up to here

No anti-aliasing in effect tone
That's my only regret, but I don't care
Add "image material" above the layer palette folder
Even if the image material layer is added to the folder, move the image material layer to the top of the folder without panicking.
Make the image material layer "clip at the layer below"
completion of the cross
write up to here
You can see that the clipped illustration changes
The bottom paper is displayed, but you can switch illustrations by simply preparing another illustration instead of paper
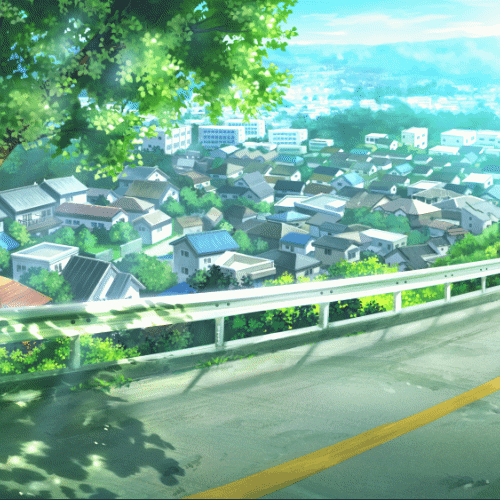
The Sakamichi no Irashi used is the "material" that I like too much
Content ID: 1379855 (slope-downhill_daytime)
Sakura is over
Overlay two cloth gradations
I tried to shift the timing to be displayed to chase
Cherry blossoms are in the neighborhood park 📸
I often use this again, the colorful "celebrity lady"
Content ID: 1680613
end
It was a magical animation using effect tones
You can do it in the same way by using (expression color gray layer) and (binarization of color tone correction layer), but it may be a little complicated
I think that magic animation can be more dynamic and can do various things, but the size of the exported file exceeds 10MB in no time.
it becomes small
This is the animation I first created as a test for this TIPS
I use noise and cross
Maybe this is where the real magic begins
Let's play a lot with CLIP
Users who liked this post


Comment