
1.First of all
The perspective ruler is a convenient tool that draws an accurate line toward the set vanishing point without complaint, but it can be difficult to handle unless you can make the appropriate settings for the screen you want to draw.
Here, I will explain how to make an appropriate perspective ruler from the person you have already drawn.
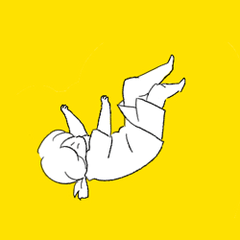
I think that the height of the girl drawn in the center of the screen this time is about 155 cm. I will make a perspective ruler to draw a natural indoor landscape around her.
2, making a perspective ruler
I will make a perspective ruler from a girl's picture.
① Observe the person you drew and look for a line that seems to get perspective
Most people should have a sense of space, even if it cannot be theorized, so when you draw a three-dimensional object called "a human body that looks natural," perspective should exist there. Look for potential perspective clues, such as shoulders and eyes, leg and arm lines, and clothing seams and decorations.
Let's organize it a little with the straight line tool. Somehow it seems that the eye level can be found under the base of the neck.
The intuition at this point may be different.
② Based on the observation, draw a box that fits the human body freehand
Roughly, let's draw it as if the space where this box exists feels good. This box will become the standard for the space you want to draw.
③ Make a perspective ruler
There are several methods, but this time, click the layer on the menu bar → Select the perspective ruler with two-point perspective from the ruler / frame frame.
Then, as shown in the figure, a ruler is created with the eye level set in the center of the screen and the left and right vanishing points set at both ends of the screen.
④ Adjust the perspective ruler
Of course, the perspective ruler in the default state does not fit the space you want to draw at all, so adjustment is necessary. When you click the ruler you created with the object tool, various points will be displayed on the ruler. You can move the perspective ruler by clicking, selecting and moving each point.
First, move the eye level to the expected position.
Click on the eye-level white circle in the center of the screen to select it, and move it to the bottom of the neck, which was atari in the first observation.
Next, pay attention to the vanishing point on the right side.
The purple line extending from the vanishing point is a guide showing the line toward the vanishing point. (This can be increased or erased later.) Click the white guide circle to move it, and you can move the guide while keeping the vanishing point fixed.
Align the white circles on the top and bottom of the two guides with the top and bottom of the front corner of the box drawn by freehand.
If you move the purple handles before and after the white circle, the vanishing point will move according to the movement.
Align the guide with the line by tracing the bottom side of the roughly drawn box. The vanishing point moves accordingly, in this case moving out of the screen.
The guide on the lower side fits perfectly, but it was far away on the upper side.
This is because the eye level decided by the calculation was off. Click the white circle on the eye level again to start it and search for the appropriate point.
By moving the eye level up and down and repeating fine adjustment of the guide line, the perfect vanishing point on the right side was found.
The same work will be done for the vanishing point on the left side.
The problem occurred again here. Although the vanishing point on the right side and the guide line are exactly the same, the guide line on the left side will inevitably shift slightly.
If it is a subtle error, there is a way to compromise with "Well, is it okay?", But since even a small error becomes larger toward the edge of the screen, it is possible that the deviation from the ideal space becomes stressful. Repeat the eye level up and down and fine-tuning the guidelines to find a point that fits the guide box you drew first as much as possible.
If you find a point that is close to your ideal, let's make a clean copy of the box drawn by freehand. If it looks good, you have a perspective ruler that fits the space you want.
3, draw the background
Draw the background using the set perspective ruler.
At the beginning, the height of the main character was decided to be about 155 cm, so the size of the surrounding room and the size of the furniture can be determined from that. If it's difficult to understand, it's a good idea to use a perspective ruler to draw a box that can be used as a rough guide, just like when you wrote a box that fits a person.
A natural indoor landscape has been added to the person drawn earlier.
↑ The method of drawing an appropriate staircase from a person was released earlier, so please take a look at it as well.
4, draw an appropriate person from the background
You can also reverse the procedure and determine the appropriate size of the person for the background drawn earlier.
Make an appropriate perspective ruler in the same way from clues such as the floor and beam lines, and draw a box that fits the person in the position where you want to place the person in the space.
I will draw a silhouette of a person using the box as a guide. This time, let's make it a place where two people with different heights are facing each other.
It is in a state of being agitated.
It is a technique that can be used when you want to add a person to the purchased background material and finish it as a work.
5, draw from a person who is not the whole body
Even if the whole body of the person is not included in the screen, the same operation can be performed by drawing a line connecting both eyes, a shoulder line, or drawing a body outside the frame.
I think it will be easier to give a guide to the ceiling line, circular building, orientation of natural objects, etc. even for a part of a small piece.
Users who liked this post


Comment