Introduction to the basics of the 3D Materials
The 3D section of Clip Studio Paint's Material palette contains 3D materials that can be loaded and used on the canvas. 3D materials can be used as backgrounds and accessories for illustrations and comics as they are, or they can be used as rough sketches as a guide for drawing.
In this article, we will explain the basic usage of 3D materials.
1. Importing 3D materials to a canvas
In the 3D section of the Material palette, you can find 3D materials such as drawing figures, primitive shapes, accessories, and backgrounds. To load a material, you just need to drag and drop from the Material palette to the canvas.
3D materials will be placed in the middle of the canvas upon first import. But once you paste in a 3D material the tool will automatically become the [Object] sub tool.
2. Loading 3D files onto the canvas
By selecting the File menu > Import > 3D file, you can load general-purpose 3D files such as OBJ format or LWO format into the canvas, and edit them in the same way as 3D object materials.
The supported formats will differ depending on your OS. For more see system requirements
Importing Normal Map materials (Ver.2.3 or later)
From Ver.2.3 onwards, you can import 3D models in FBX format (.fbx) or GLTF format (.glb, .gltf) that use Normal Maps.
Import Materials with built-in shape keys (Ver.3.0 or later)
From Ver.3.0 onwards, you can operate shape keys used on 3D models in FBX format (.fbx) or GLTF format (.glb, .gltf).
Shape keys are functions that change (morph) the shape of a 3D model.
It is used when you want to smoothly transform complex shapes such as a character's face or wrinkles in clothing.
Shape key operations are performed from the Tool Property palette > Shape > Shape keys.

The number of sliders displayed matches the number of shape keys. You can also combine multiple sliders to create complex shapes.
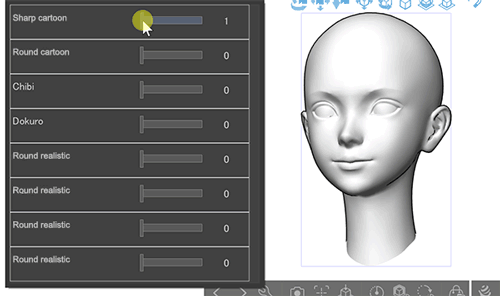
▲ An example of an imported 3D head model with multiple shape keys
Clip files that contain 3D materials with shape keys can only be edited using Clip Studio Paint Ver. 3.0 or later.
In versions lower than Ver. 3.0, the canvas can be viewed but not edited.
Importing VRM files (Ver.2.2 or later)
Clip Studio Paint Ver.2.2 or later can read VRM format files. You can import VRM format files as a 3D character material. You can also load poses onto them. However, certain features like character expressions are not supported.
Read more about how to pose figures in Using 3D Drawing Figures: Adjusting Poses
・When you load a VRM format file, the VRM Information dialog is displayed, allowing you to check the usage permissions of the file. Be sure to always check the usage conditions for the VRM format file before using it.
・If VRM format files are slow to display, it is possible to improve this by setting Display settings for editing to Fast on the Tool Property palette.
3. Adjusting how the image looks on the canvas
Adjust the imported 3D material so that it appears at just the right angle. You can adjust the camera by moving the Movement Manipulator above the 3D material, or by dragging an area on the canvas that does not have a 3D material.
● Moving back and forth
Select the icon for moving the camera forwards and backwards from the Movement manipulator to turn it on, and then drag up and down on an empty area of the canvas. If you are using a mouse, you can perform the same operation by holding down the right button and dragging up or down the empty space on the canvas.
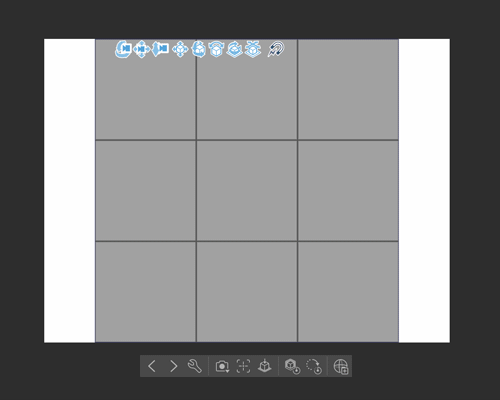
● Rotating
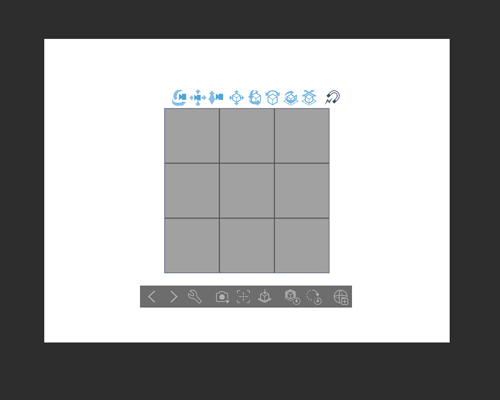
Select the icon for rotating the camera from the Movement manipulator to turn it on, and then drag up and down on an empty area of the canvas. If you are using a mouse, you can perform the same operation by holding down the left button and dragging up, down, left, or right across the empty space on the canvas.
4. Using Parallel Projection (Ver.2.3.0 or later) [PRO/EX]
From Ver.2.3 onwards, 3D layers can also be displayed in Parallel Projection without perspective.
< Perspective Projection/Parallel Projection >
In Perspective Projection, the visible size of a 3D object changes depending on the distance from the viewpoint, but in Parallel Projection, the apparent size is not affected by distance, it is used to draw illustrations that do not have a vanishing point, such as cityscapes, floor plans or isometric art.
To switch the Projection Method, go to the Sub Tool Detail palette, then select the Camera category, and then click on Projection Method.
Selecting Parallel Projection disables Perspective in the Camera category and enables Projection Scale.
Projection Scale
Projection Scale allows you to adjusts the width of the field of view.
The higher the value, the wider the space on the 3D layer that will be displayed on the canvas, creating a zoomed-out effect.
Note: When Parallel Projection is selected, the Panorama will be hidden and the Manga Perspective and Perspective ruler will be disabled.
5. Moving the 3D material itself: Root manipulator
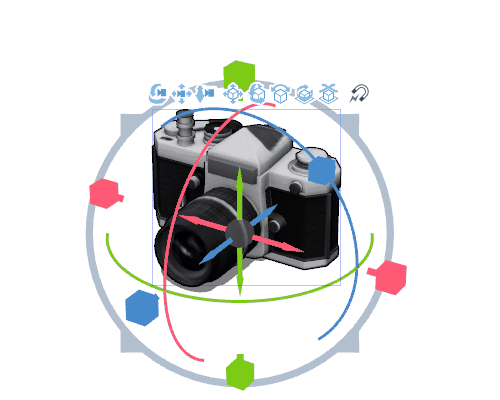
3D materials can be moved, rotated, and scaled using the Root manipulator that appears when you tap on a material. If you want to enter exact angles or values, you can do so from the Tool Property palette.
Moving the position
The arrows extending from the center circle of the Root manipulator can only move in the X, Y, and Z directions. By dragging the center circle, you can move it anywhere, up, down, left, or right, but it may be difficult to find its position on the canvas.
Changing the angle
Drag the horizontal (X), vertical (Y), and depth (Z) rings around the Root Manipulator in the direction you want to tilt it.
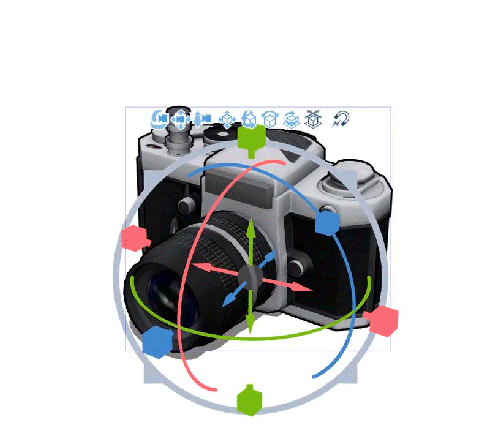
In Ver.2.3.0 or later, the color of the scale changes from blue to pink only on the tilted parts.
Changing the size
If you drag the grey ring around the root manipulator you can control the object’s total scale.
By changing the axis-specific scaling handles you can alter different dimensions independent of each other.
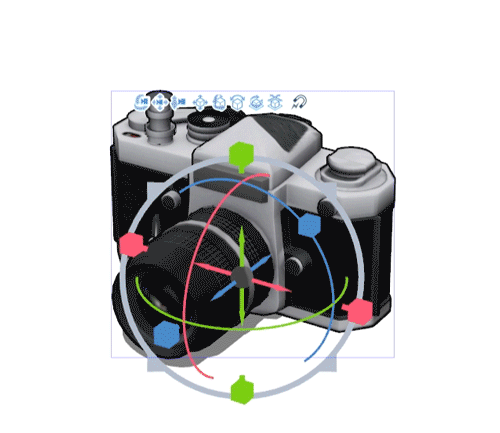
Note: The manipulator will be in the direction of the object.
If you want to have the manipulator facing the direction of a rotated object then go to the [Sub Tool Detail] palette > [Operation] category > and change [Movement axis] and [Rotation axis] to [Object axis].
Note: Switching the root manipulator display (Ver. 2.0)
If manipulators are overlapped and difficult to operate, you can set the [On-screen manipulator] in the [Tool Property] palette to show only the manipulators you want to operate.
If manipulators are not shown when a 3D material is selected, checking this setting may remedy the situation.
6. Placing multiple materials
The first imported material will be placed in the center of the canvas but any material placed after that will be wherever it was dropped on the canvas. Make sure you pay attention to where you drop them!
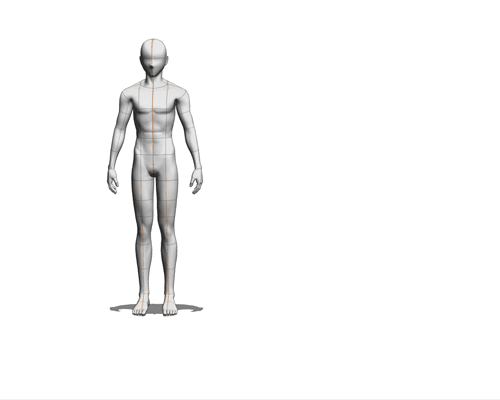
If it doesn't appear where you expected, adjust the camera so that you can see the floor's surface, and then drop it to make it easier to see where it is.
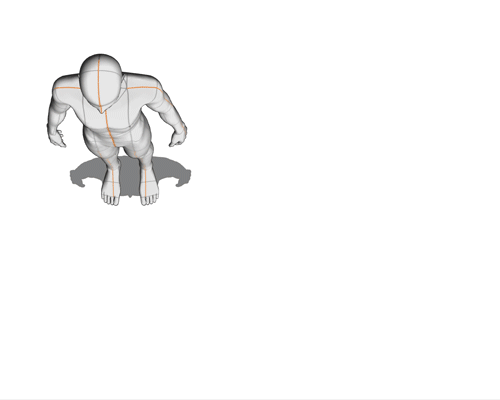
Note: Using the All Sides View palette (EX only)
If you want to place multiple 3D materials on the same layer, it is convenient to use the All Sides View palette.
The image is shown from the top and side views, allowing you to specify and adjust the position of the material without changing the position of the camera.
Move multiple materials at once
If you press the [Shift] key on your keyboard/edge keyboard while selecting a 3D material you can select multiple 3D objects on the same layer.
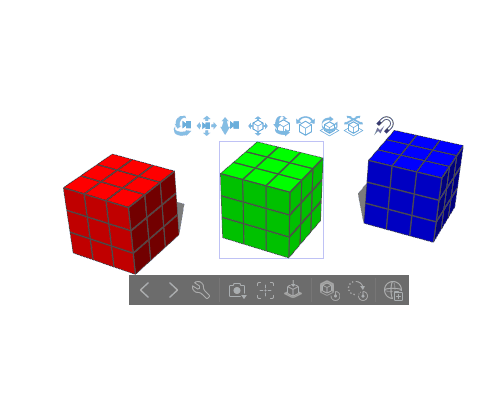
Rotating/scaling multiple materials at once
If you have several materials selected and they are not rotating or scaling as you’d like with the root manipulator, go to the [Sub Tool Detail] palette > [Operation] and change it to [Pivot point for multiple objects].

7. Changing the shadows and light source of a 3D material
You can change the settings of the shadows and light source by selecting the 3D material you want to change and using the Tool Property palette.
Learn how to set up shadows and light sources here.
8. Object Launcher functions
The Object Launcher, which appears below the 3D material, allows you to specify the camera angle from a preset, and to reset its size and rotation. The items displayed will vary depending on the type of 3D material.
In this section, only the standard options are explained.
(1) Select previous 3D object
(2) Select next 3D object
Allows you to switch between 3D materials on the same layer. This is useful when it is difficult to select a 3D material by tapping, such as when 3D materials are placed on top of each other.
(3) Display object list (PRO/EX)
Tap the icon to display the [Sub tool Detail] palette and check the 3D material on the layer in the Object List. This is useful when you want to select multiple materials efficiently.
(4) Specifying the camera angle from presets
Tap the icon to display the camera angle presets. Use this when it is difficult to operate the Move manipulator, or when you want to adjust the position to the front or right side.
(5) Placing the model on the floor
Places the 3D material at the base (floor). This is used when you move a 3D material or change its scale when its center point is not at the bottom, causing it to float from or sink to the floor.
*The icons (1), (2), (3), and (4) are not displayed in the smartphone version.
9. Save Multiple Camera Angles
By default you can only use one camera but you can save multiple camera angles to make a more convenient workflow.
・You want to change the pose of the 3D drawing figure for your sketch while keeping the current angle.
・You want to use several specific angles in the same scene (background set).
Note: .clip files with a 3D layer with multiple camera angles saved in it will not be able to be opened in versions below ver. 1.12.6.
Duplicate cameras
[Tool Property] palette > [Object list] > [Camera] and select [Duplicate] to get more camera angles. If you double-tap the camera name you can rename it as you like.
You can go between camera angles freely through the [Object list].
You can see the thumbnail list of saved camera angles by going to the [Sub Tool Detail] palette > [Camera] > [Switch camera] > [Current camera].
Lock camera settings
Be sure to lock your camera settings in so you don’t accidentally change anything if you plan to reference a camera angle multiple times.
From the [Object list], tap the box on the left side of the camera to lock it.
For more information on how to use 3D drawing figures, please see the following article.
For more information on how to use 3D materials from the [Material] palette > [3D] > [Background] tap here.
10. Register 3D Materials [PRO/EX]
Register 3D objects as materials (Ver.2.2 or later)
From Clip Studio Paint Ver. 2.2 and later you can register 3D object materials right from Clip Studio Paint.
Select the 3D model you want to register and tap on Register Material on the Object Launcher.
You can also register it by going to the Sub Tool Detail palette > Object category > Register Material.
The size (scale) of the 3D object will be saved as well when you register it. We recommend that you adjust the size with the root manipulator or by using the Object scale in the Tool Property palette before registering the material.
When the Material property dialog is displayed, set the Material name, Choose save location, and Search tag, then click OK.
Materials will be registered to the Material palette.
Registered 3D materials can be published to Clip Studio Assets from the Clip Studio material management screen. However, if you register additional materials that are included by default in Clip Studio Paint or materials downloaded from Clip Studio Assets, you cannot publish them to Clip Studio Assets.
For details on how to publish materials to Clip Studio Assets, please see the following article.
3D materials registered in Clip Studio Paint cannot be used in environments lower than Clip Studio Paint Ver.2.2.
Please use Clip Studio Modeler when registering layouts, camera angles, and movable parts with 3D materials. Clip Studio Modeler allows you to create 3D materials that can be used even in Clip Studio Paint Ver.2.2 or lower.
Register 3D image materials (Ver.3.1.0 or later)
With Clip Studio Paint Ver.3.1 or later, a 3D layer layout that combines multiple 3D materials can be registered as a 3D image material. Select the 3D layer you want to register, then select Edit menu > Register Material > Image.
When the Material property dialog is displayed, set the Material name, Choose save location, and Search tag, then click OK.
You can also register 3D image materials by dragging and dropping the 3D layer onto the [Material] palette.
In addition, from Ver.3.1 onwards, you can paste 3D image materials onto existing 3D layers. For more information on how to paste materials, please refer to (5) Importing 3D Image materials in Making backgrounds & accessories with 3D Primitives.
Note:
3D image materials that can be published to Clip Studio Assets include 3D drawing figures, 3D Primitives, and 3D head models that are included with Clip Studio Paint, as well as your own 3D models.
If you publish a 3D layer containing 3D materials or 3D models created by someone else to Assets, it will be subject to deletion. Please avoid including these in your materials.
For more information, please refer to the Guidelines About Posting and Behavioral Guidelines and Best Practices for Posting on CLIP STUDIO ASSETS
[11] Utilization of 3D materials in artwork
Combine with illustrations
You can adjust the size and angle of the 3D material imported onto the canvas to match the rough sketch. Use it as a base for illustrations or manga, or as part of your work as is.
The image below shows a drawing of a character using 3D materials such as a 3D drawing figure, a violin, and a picture frame arranged in layers.
First, based on the 3D objects and outline of the character, a rough sketch with the base colors is created.
For the violin, the lineart is extracted using Convert to lines and tones and color is added on a newly created raster layer.
To create the picture frame, the 3D material is used as it is. However, since it overlaps with the character, a layer mask is applied to erase the overlapping part. To add a shadow to the picture frame, a layer with blending mode Multiply is used.
Adding color and pattern textures to the background creates the illusion of the artwork being displayed in a museum.
Using **Convert to lines and tones** for black and white manga.
On a 3D layer select the Layer menu then click Convert to lines and tones to extract the lineart and fill from the 3D material.
You can extract lineart only, lineart and gray areas, or lineart and tones, so they can be used as materials for black and white manga.
By selecting [Texture Lines] and [Tone] in the [Convert to lines and tones] dialog, the direction of the light source and the darkness of the shadow will affect the LT conversion.
You can extract the lineart better by increasing the density of the lines or by deepening the shadows in the areas you want to fill.
If you have a specific idea of the scene you want to use, we recommend adjusting the light source before executing Convert to lines and tones.
- When the shadows are hardly visible
- When the shadows are darkened
For more information on Convert to lines and tones, please read the article below.


Comment