
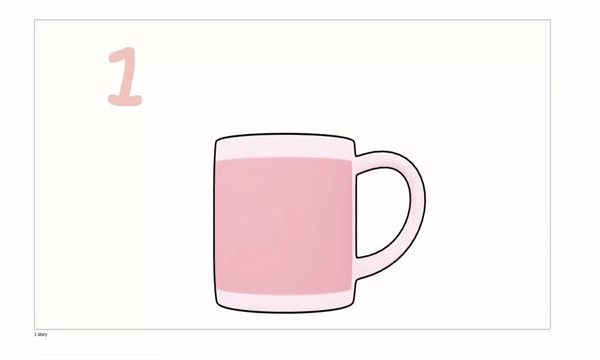
Today I'll be teaching you how to make this cute and simple animation that can be done in both the EX and PRO version. This is perfect if you're just getting started with animation in Clip Studio Paint.

Before We Get Started
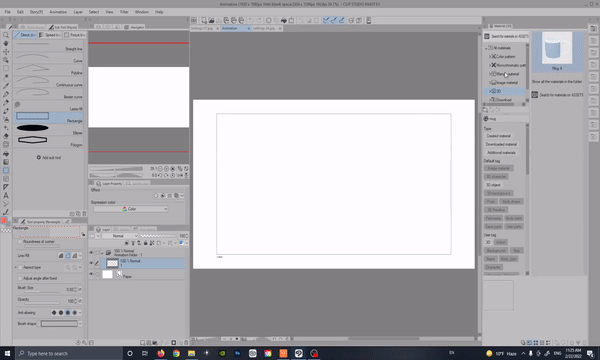
When creating a new file, go to the animation tab and click the preset 1920 x 1080. We won't be worrying to much about the other settings for now.
The last thing we will do before creating the file is set up our timeline. In the timeline settings, set the frame rate to 10 and the playback time to 19
Once you've created the new file make sure to enable the timeline from the window menu.
Setting Up The 3D Model
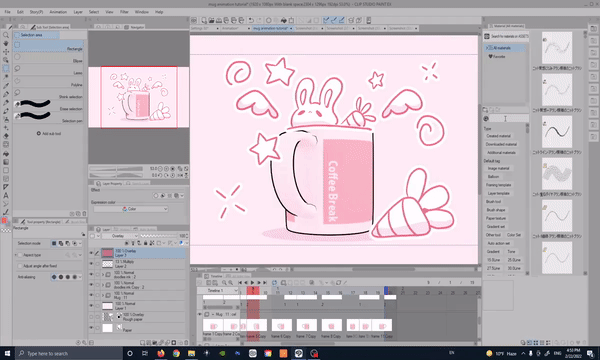
Your workspace should roughly look like this. Keep in mind that my workspace might look a little different from yours. I have personally moved a few things over to the left as it works better for my workflow. However you don't need to have your workspace like this for this tutorial.
This is the materials panel, here we will find the 3D models we'll be using in today's tutorial. Click the top button that looks like a folder to see your materials.
Now that the materials panel is open, look for the bar that says "Type search keywords" in there you will type in "Mug". Later we will be using the same search bar to find some Textures that come with Clip Studio Paint to add a paper effect.
If the mug material has this cloud icon, then you will need to download the material. All you have to do is click on the model and drag it to your workspace you will then get a prompt to download the material. You do not need to close the program to do this once the material is downloaded click back into the program. It should then refresh and you will be able to use the model.
Now place the mug into the workspace. You'll notice that it wont show up at first but don't worry. This is because the mug was automatically placed into the animation folder. If you drag the mug outside the folder you will be able to see it again. For now keep in inside the animation folder.
Customizing The Mug
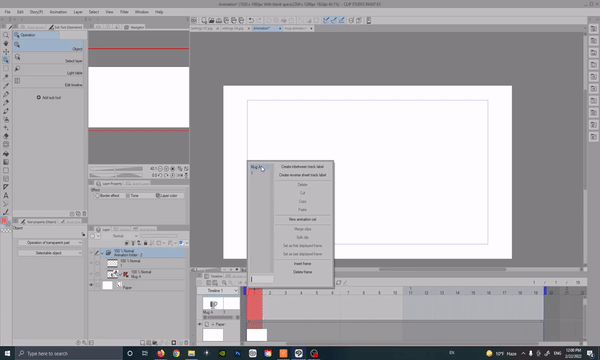
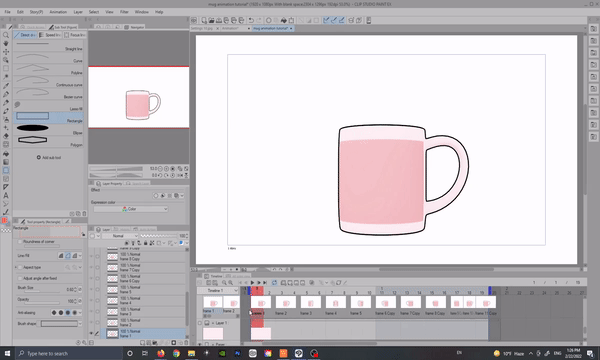
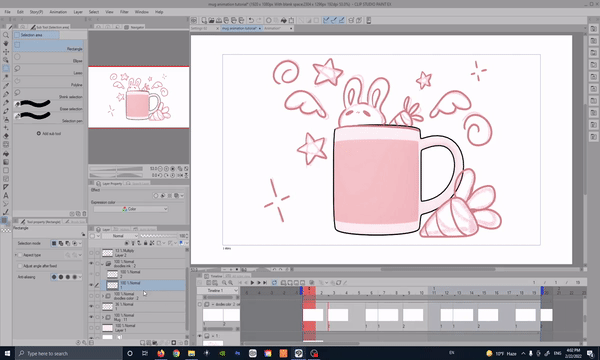
In order to be able to edit and see our mug we will add it to our timeline. Click the first frame then, right click to bring up the frames menu. From there select the mug. Now it's ready for our next step!

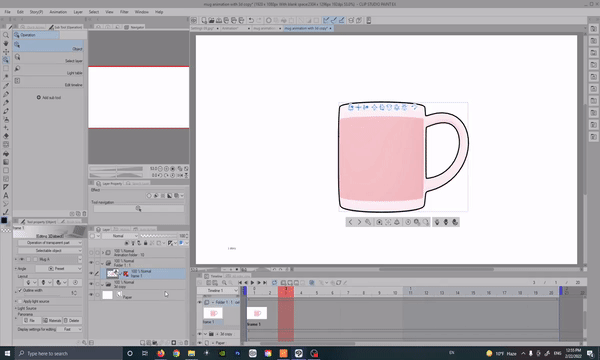
We will now change some settings with the mug before we begin to animate the rotation. First shrink the mug with the grey outer ring
then, use the red and green arrows to roughly place the mug into the center of the canvas. This doesn't have to be perfect because we can change the position of the mug at any time.
You'll notice when you click outside of the mug there's two sets of menus. We will be focusing on the bottom menu.
Click on the first hand icon. From there you can select the color of the mug. Feel free to pick whatever color you would like. I'll be using pink for mine.
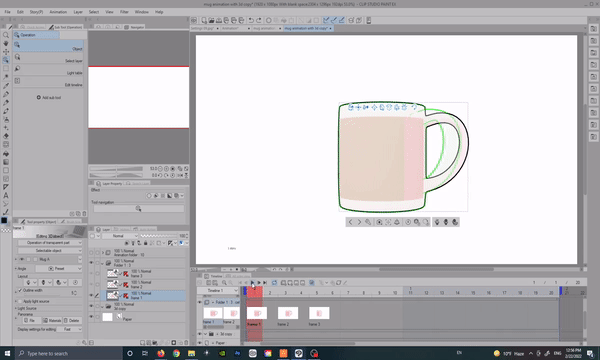
To open the sub tool menu first click on the wrench icon.
The two settings we'll change will be the outline and the shadows.
For the outline set the width to 5
For the shadows uncheck both boxes.
This will give our mug a nice 2d look that will work with the doodles we will be drawing on top later.
Animating the Mug
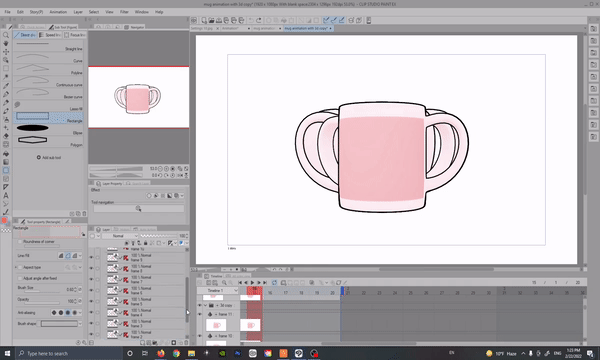
In the timeline click on the button that says enable onion skin. This will allow you to see a faded version of previous frames behind the one you're currently working on.
From now on I will be naming my frames in the folder as "Frame 1" "Frame 2" and so on. This helps when selecting the frames in the frame panel.
Right click on the first frame and hit "Duplicate Layer"
Then click on the 3rd frame in the timeline and add our new frame.
This creates an exact copy of our previous frame that we can rotate as we go along.
You'll notice that when we play our animation right now it's jumpy and skips around. This is because our layers are still 3d models and I believe it does this to save processing power on your computer.
Once we're done rotating the mug in 3d space we will rasterize all the layers. Then the animation will play smoothly like we want it to.
If you find that the program becomes laggy as you duplicate the frames go ahead and rasterize the layers as you go along. The only reason we are not doing it now is to allow us to go back and edit the model's rotation before turning it into a flat image we can't edit anymore.
I recommend to save an extra copy of your file with the frames still as a 3d layer. So if you find that later on you want to add more frames or adjust them you still can without losing progress.
We will be creating 11 frames don't worry too much about making them exactly like mine.
As a general rule you will have the side frame of the mug, two inbetweens, a middle frame, and two more inbetweens before you make it to the next side frame of the mug.
You can play with the speed of the frames by placing them differently in the timeline. At this point it is up to you how fast you want to mug to rotate. The closer the frames are together the faster the rotation will be. When they're further apart the rotation will be slower.
For my frames I skip about one space. You can see this with the red highlighted section of the timeline.
Once I get to frame 9, 10, and 11 I put them right next to each other so the animation will appear slightly faster at the end.
For our last step in animating the mug,
Select the first frame, and while holding shift click on the last frame, then right click and hit "Rasterize"
This turns all the 3d layers into flat images that will play smoothly in the timeline.
If you want to adjust the mugs position at this point, simply select all the layers the same way and hit CTRL T as a shortcut for the transform tool. Then you can move the mug and it will move all of your layers into the same position.
You should also right click the red ruler icon and hit delete on each frame this is unfortunately a bit tedious but we won't be needing them as we continue to our final parts of this tutorial.

Congratulations!!
You've just made your first rotating animation!! Take a deep breath and enjoy what you've accomplished so far
Next we will move into making a cute doodle animation on top of the mug!
Sketching The doodles
Create a new layer under the animation folder. Here is where you'll make a sketch of whatever you want to animate in our next step.
It can be anything! A dinosaur, cat, raccoon, or even Godzilla!! The sky's the limit in this step be creative and have fun!!
Inking The Doodles
Going back to our timeline click New Animation Folder. This creates a section in our timeline that will play independently on top our cup animation.
In the layers panel click "New raster layer" and name them "1" and "2" or "frame 1"/"frame 2"
Just like with the mug go ahead and place them in the timeline.
Once you have the frames in the timeline you can click on the first one, hold shift then copy and paste them through the whole timeline. This is another section where you can play around with different speeds. but for reference here's mine
Before we start to do our inks duplicate the inking folder, put the new folder underneath
Then rename it to "Color"
We will be using this in a later step to color in the doodles.
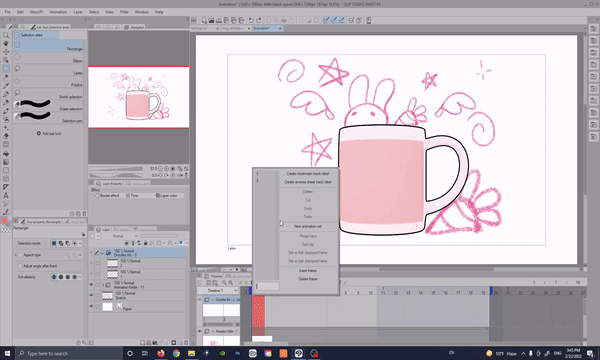
With the Onion skin still on. Do your inks on both layers. We'll be drawing on them very similarly to give the doodles a jitter. For the sparkles on the second layer I drew a them tilted so they will jump back and forth.
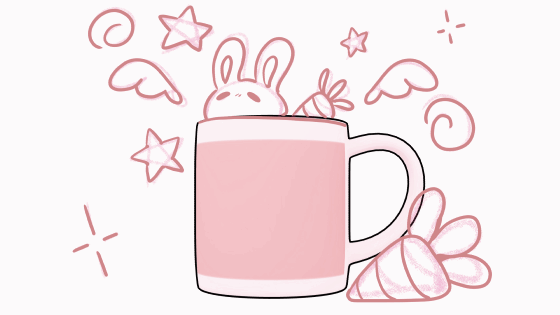
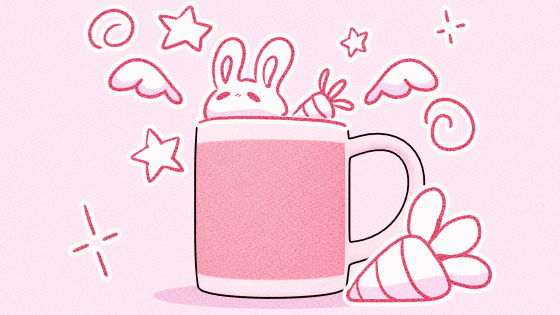
This will be the result!! Make sure to take plenty of breaks and allow yourself to doodle freely. The more messy they are the better!!
Coloring the Doodles
Just like the sketch layer, I've added a light pink background color in a new layer outside of the animation folder to help me see what areas I need to color in
Now we'll be using that color folder we made before to do flat colors for our doodles!
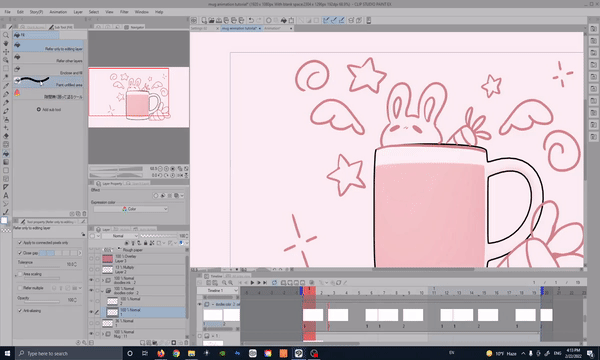
Turn off the sketch layer and select the paint bucket that says "refer to other layers"
This tool will detect our lines and fill them in cleanly like this
White Line Effect
We're almost there hurray!! Just a few more things left to do!
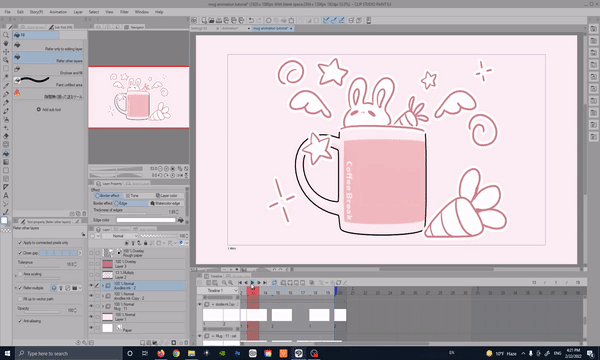
To get a white border effect select the ink folder and click "Border Effect" and set the line thickness as you like.
This is how it will look.
Shading and Overlays
For shading I've created a new layer outside the animation folder and set it to "Multiply"
Then in another layer outside the animation folder I set it to "Overlay" and used a pinkish purple over everything
Texture
Going back to the materials panel. Search paper, and find a texture that you would like to use. After that set it to overlay and you're all done!!
Exporting Your Finished Animation
Congratulations you've just finished an amazing animated loop. Really you should be proud!! Especially if this is your first time animating.
To export go to file and "Export animation"
I've exported mine as a gif so it loops over and over again
Finishing Thoughts
I hope this tutorial inspires you to go outside your comfort zone and make something spectacular!! Keep being creative and I'll see you next time Bye bye!!
Users who liked this post


Comment