
Hello! In this article I will teach you step by step How to animate a Soccer Player in Clip Studio PAINT. For this, I will use the protagonist of my Manga Penalty: Ryoda, but in Chibi style.
Whether you use the Clip Studio PAINT PRO or EX version you will be able to follow all the steps in this super tutorial.
The Animation that we will make:
It will be a soccer player dominating the ball, in Chibi style.

VIDEOTUTORIAL: How to animate a Soccer Player in Clip Studio PAINT
The video is in Spanish but you can activate the subtitles in your language, I assure you that you will find it.
What do you think about the video? I tried to make it as short as possible because it was a lot of content and I wanted to show you the whole process of this Animation, so that you can do it too.
Animation creation process:
Now I invite you to see the step by step process of this animation, so you will understand it even better.
1. Animation Project Creation
We go to File - New and we choose the last option, Animation.
And in Preset we choose 1920 x 1080, but in resolution we change it to 300 dpi.
The speed will be 24 fps and the Duration will be 24 Frames.
Once ready, press accept.
2. Save your Project
In File - Save As, you can save your project, choose your folder and don't forget to always save in .CLIPSTUDIOFORMAT
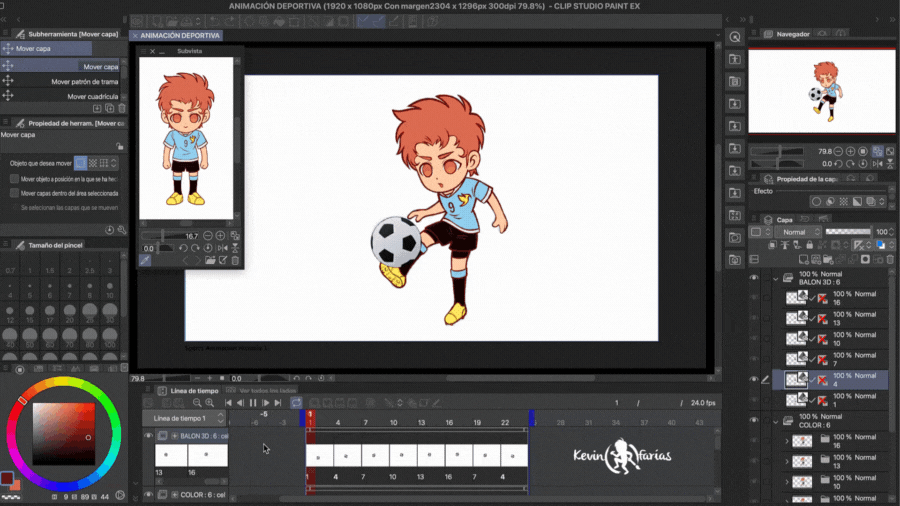
3. Subview
To always have the character that we are going to animate in view, we will activate the panel: Subview.
And in the folder icon we import the design of our character.
And we can take the Subview panel and leave it in the place that we want.
4. Timeline
We go to the menu: Window - Timeline.
5. Animation Cel to Layers Folder
When creating the first animation cel in the layers panel we create a new layers folder with the same name as the original animation cel, we take the layer that is the animation cel and put it inside the layers folder created, achieving that the animation cel becomes a layer folder, which looks like this:
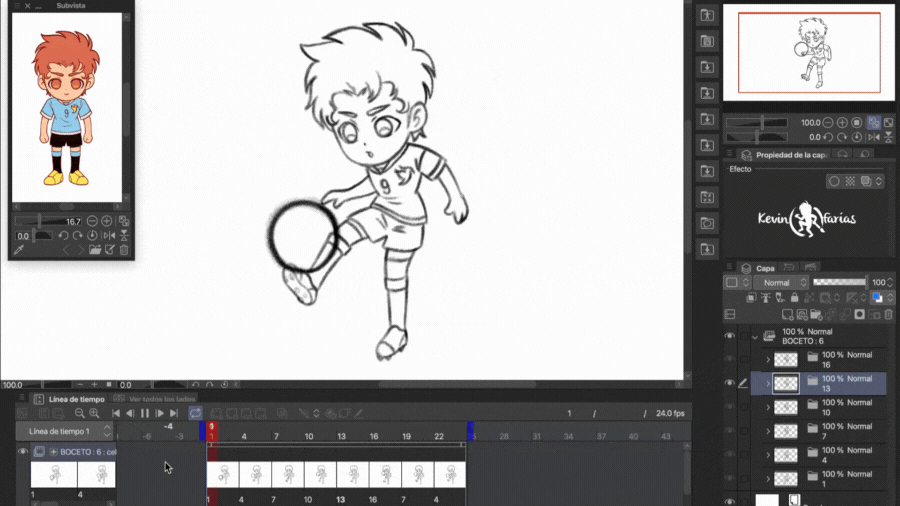
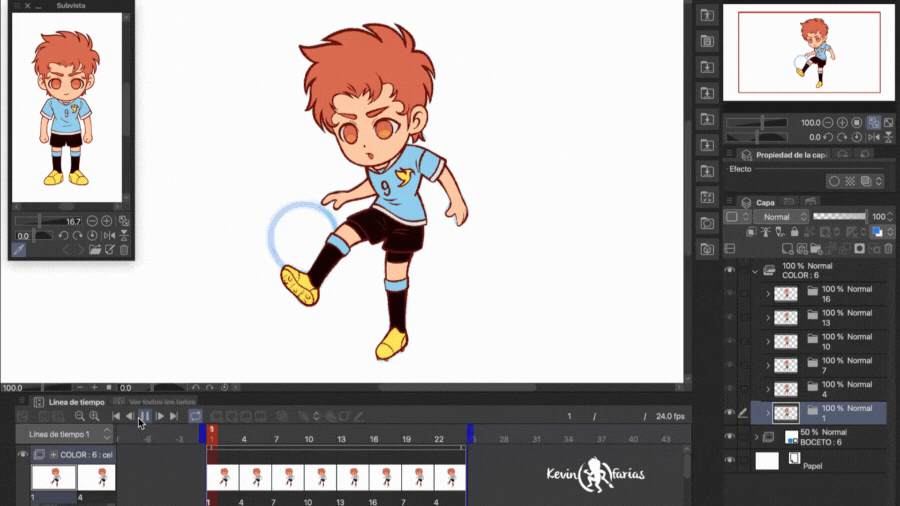
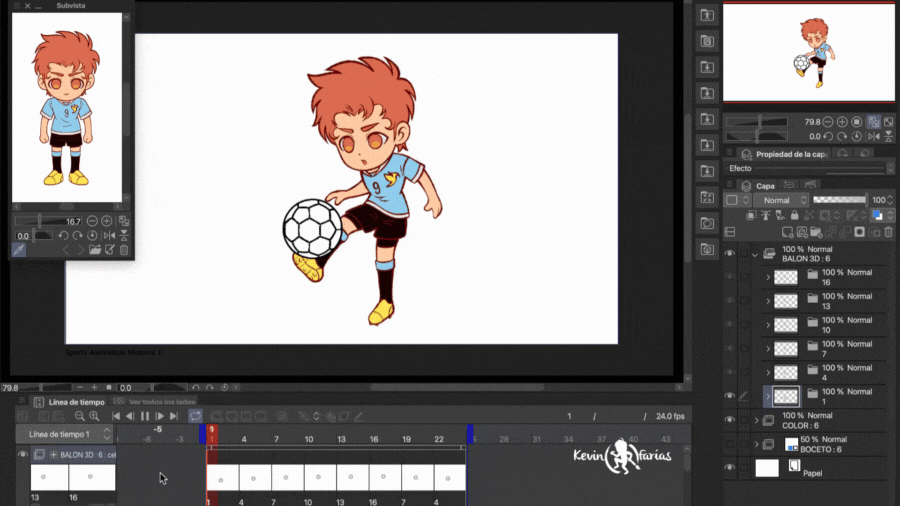
6. Animation Sketch
In the Character layer we draw the body and in the Ball layer we will draw the circle of the ball shape.
Once we have the first drawing we create a new Animation cel in frame 16.
We have the new animation cel and we change the name on the left side.
We change the name to 16, respecting the same position in the timeline and we are going to do the same with the other drawings of the Animation. (4-7-10-13)
And we have the same layers with the same names, which is something I love about Clip Studio PAINT!
Remember that we can always activate: Enable onion skinning.
And we create the second key pose of our Animation.
In frame 4 we create a new drawing, which will be the breakdown of the Animation (another of the main drawings)
To make the animation cycle we go to frame 22 and activate: Specify Cels.
In the window we select drawing 4.
When we do drawing 7 it will also be visible at frame 19 with specify cels, just as we did with drawing 4.
And then we do the intermediate drawings, on frame 7, 10, and 13.
Achieving the following result:
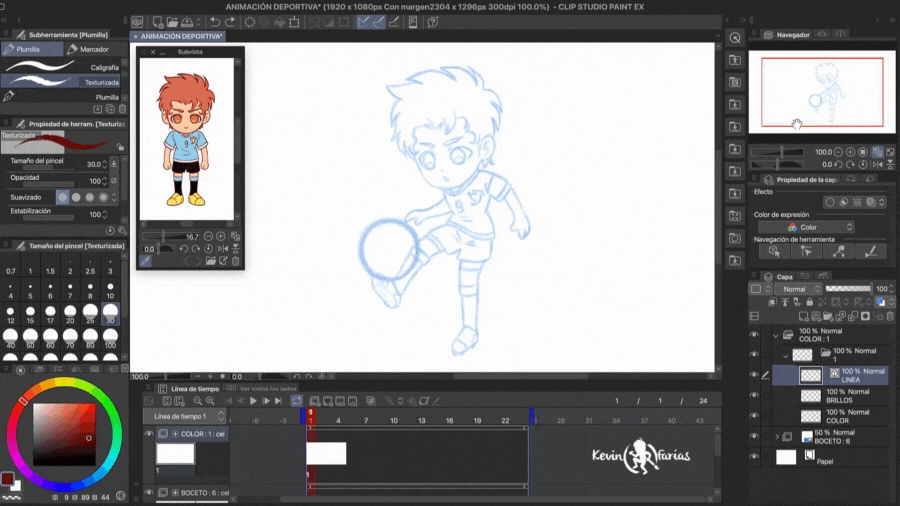
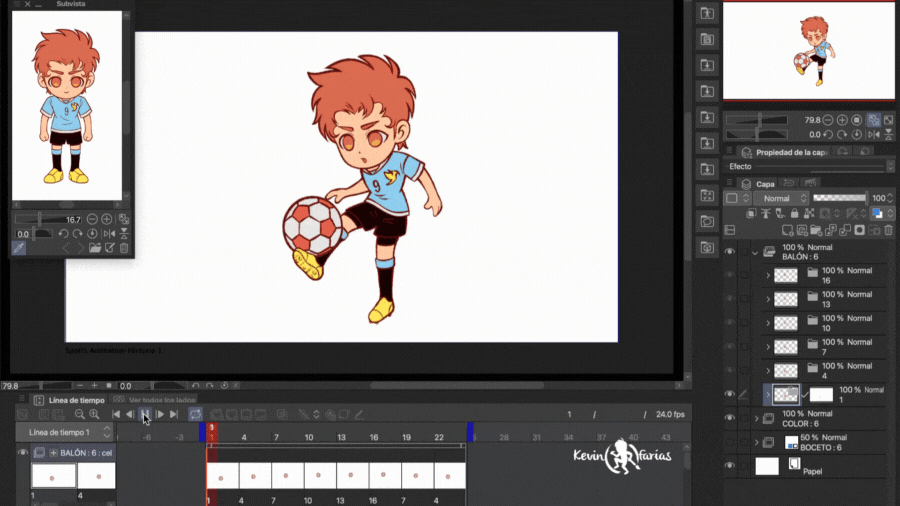
7. Sports animation cleaning
We select the animation folder of the Sketch and activate: Change layer color.
And we lower the opacity to 50% or 25%
Now it's time to make the animation line, we go to the timeline and activate: New animation folder.
And we change the name to color.
And we create a new animation cel which we will later turn into a layer folder.
And we create the following layers: Vector layer called Line and two raster layers, one called Brightness and the other Color.
For the line we are going to use the Pen tool, in sub tool we choose: Textured. In Tool Properties in Smoothing we activate the first option and if you want, you can activate the Stabilization.
In the Subview window we activate: Automatically switch to eyedropper, so every time we pass our cursor over the Subview window we can choose the colors of our characters.
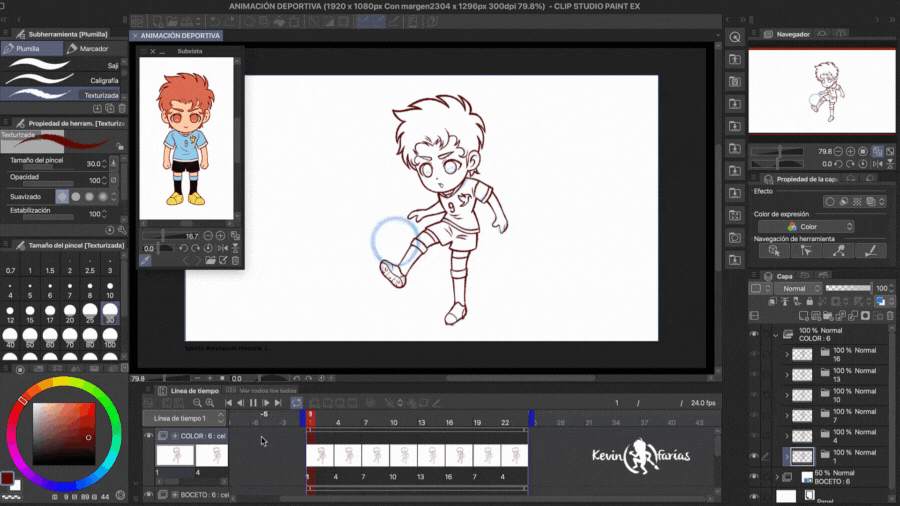
And we do the Animation cleanup in the same order that we did it in the sketch stage.
By creating the next drawing at frame 16 you will notice again that it respects all layers and names.
And following the same order of the animation sketch stage we can complete all the cleaning of our Animation.
This is the result of the Animation Cleanup:
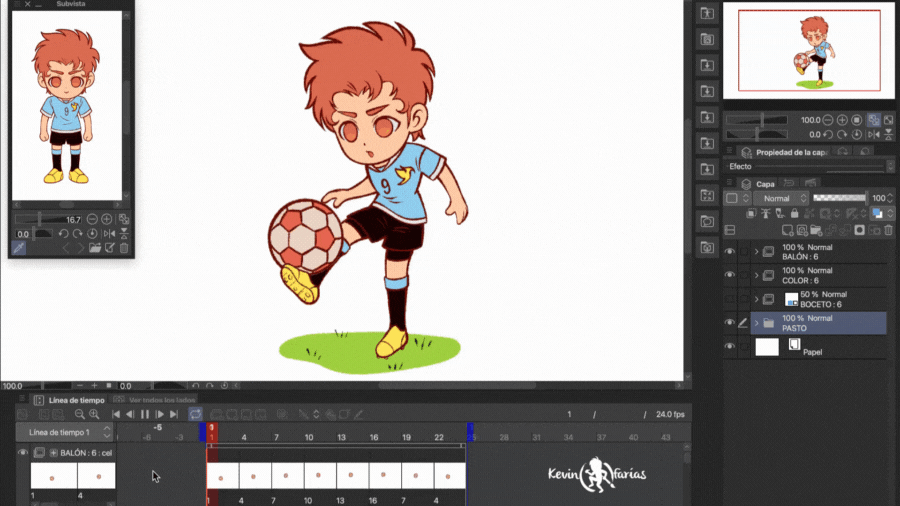
8. Sports Animation Color
To paint the character we are going to select the layer: Color. In each of the drawings of the Animation.
We select the Fill tool, in Sub Tool: Refer to other layers. In Tool Properties we can activate: Area Scaling.
And with a single click we can add the color to our animation, to each of the drawings.
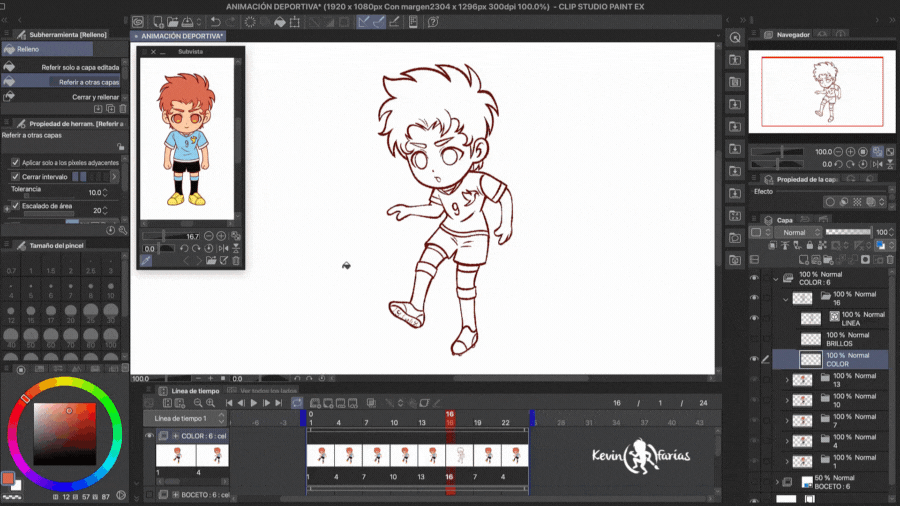
And this is the animation we can achieve.
9. Animation with 3D Objects
For the Ball we are going to choose a 3D object in the folder: Material.
With the Operation tool we can edit the size of the 3D Object, with the camera tools.
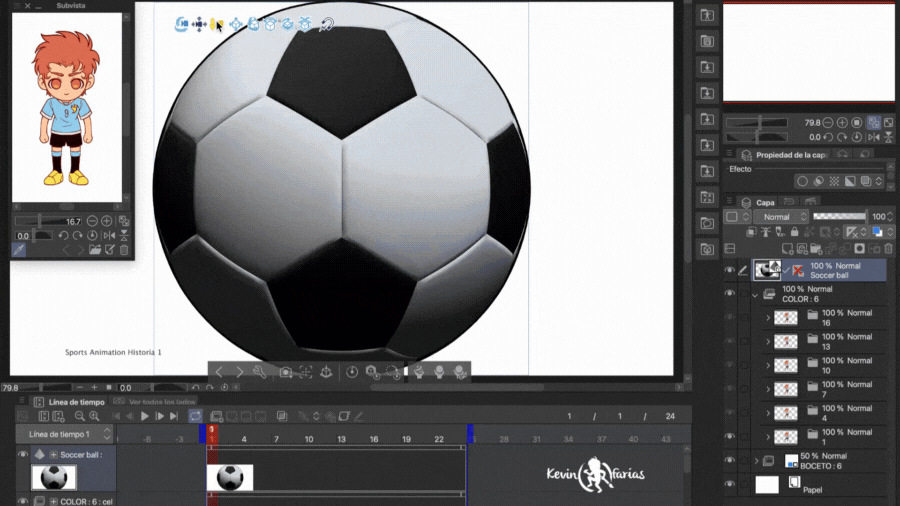
We create a New animation folder for the 3D Ball
And we changed the name.
We take the 3D object layer by inserting it into the animation folder called Ball.
In the timeline we activate: specify cels to call drawing 1.
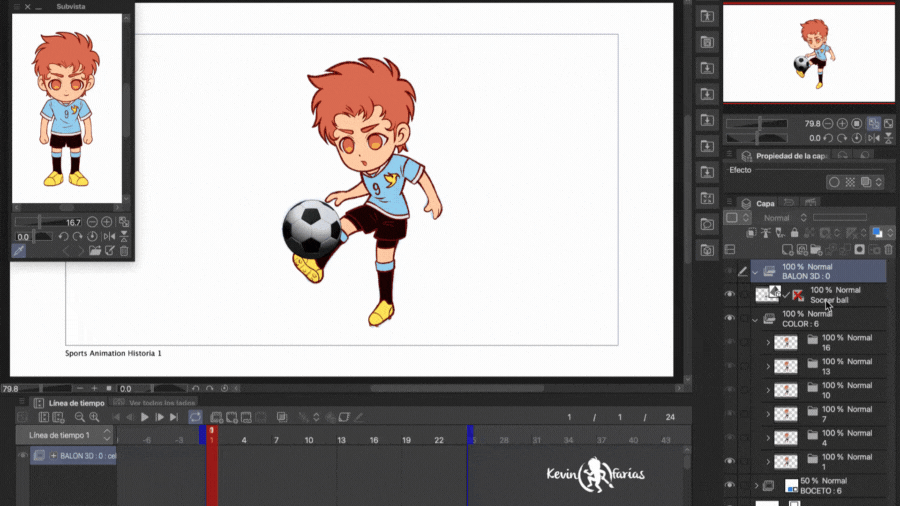
To animate the 3D object we simply have to duplicate it each time according to the corresponding drawing:
Remember, we first duplicate the object, rename it, and specify cels to make it visible.
Remember to rotate the 3D Object to make its movement even more realistic.
And we managed to animate the 3D ball throughout the Animation.
This is the animation we achieve with the 3D object.
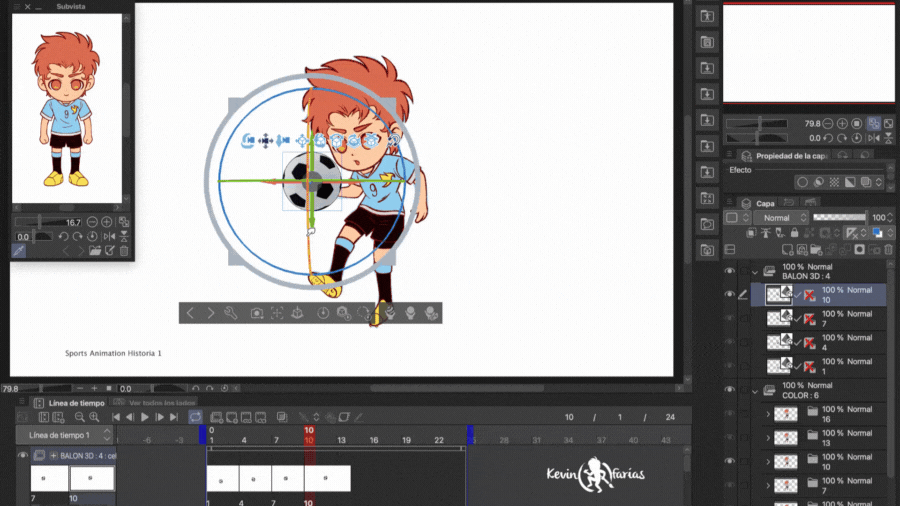
10. Convert to Lines and Fills
We select the layer of the 3D Object:
And we go to the menu: Layer - Convert to lines and patterns...
In the Convert to lines and patterns window we deactivate: Extract texture line and Patterns. We give you to accept.
The result is the following, we have the border line of the ball and the fill color separately.
And the animation is great!
11. Ball Color
To add color to the ball we create the following layers:
Vector Layers: Helmets and Ball (border of the ball)
Rasterized Layers: Color and Details (Color of the hulls)
As a detail in drawing 1 we activate: Create layer mask.
We choose the transparent color and with the pen tool we eliminate a little color from the ball, so that it integrates with the foot of the character.
Achieving the following animation:
12. Animation Background
For the background we're just going to make a small soccer field like this.
And the Animation looks like this:
13. Export your Animation as .GIF
Let's go to File - Export Animation - Animated GIF...
14. Export your Animation as a video
Go to File - Export Animation - Movie...
15. End Animation
This is the Animation that we managed to do in this tutorial, I hope you can do it too.
It seems difficult but it is simple :)

You can find me on social networks:
See you in the next TIP!
My manga on Webtoon
Penalty is a Soccer manga which is found on Webtoon (Spanish) and you can see it at the following link:
Users who liked this post


Comment