
Hey guys for this tutorial I’m gonna talk about the 3d model in csp , this is gonna be a beginners guide, so if you don't have any knowledge regarding the 3d model , this might be the tutorial you’re looking for .
LOCATION :
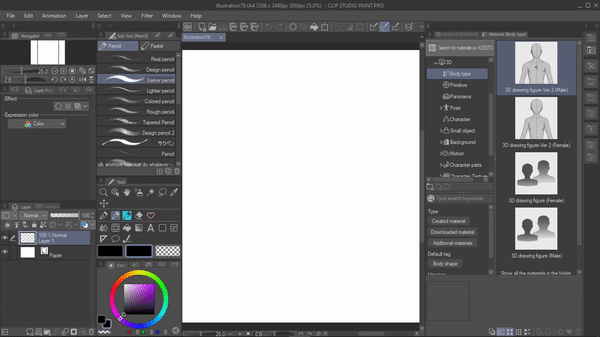
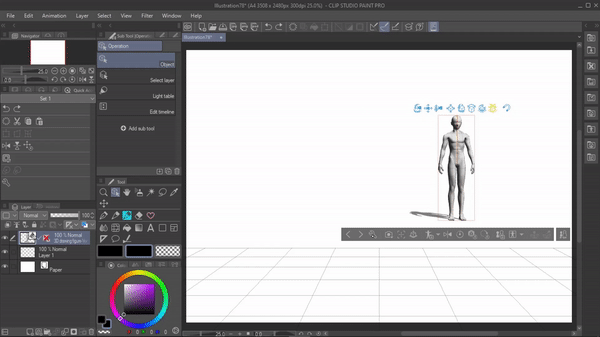
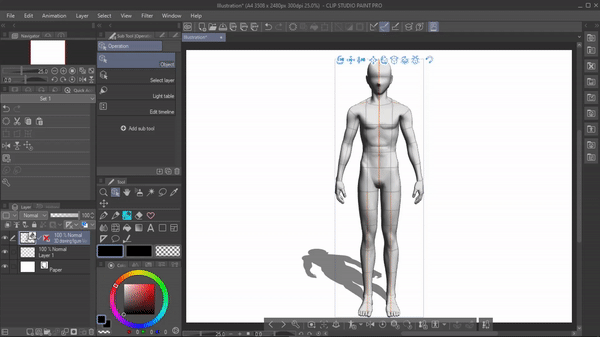
To work with a 3d model we need a canvas . so start by creating a new canvas
Once you have created the canvas , go to the material tab .
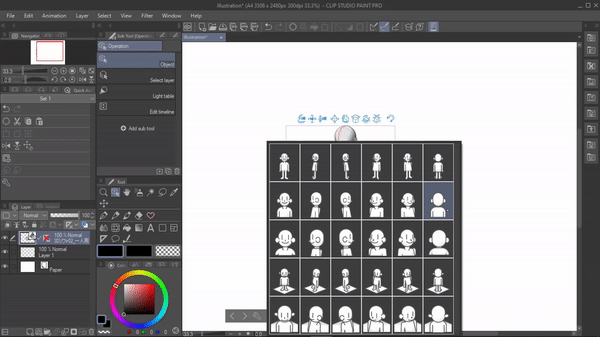
Here , double click on the 3d option , and then select “ body type”
Here you will see these 4 options , the bottom two are old model versions . and the above ones are the new versions of models you can differentiate them by their body types . the older ones have more realistic bodies while the new version has more anime and manga style bodies , You can use whichever one you prefer .
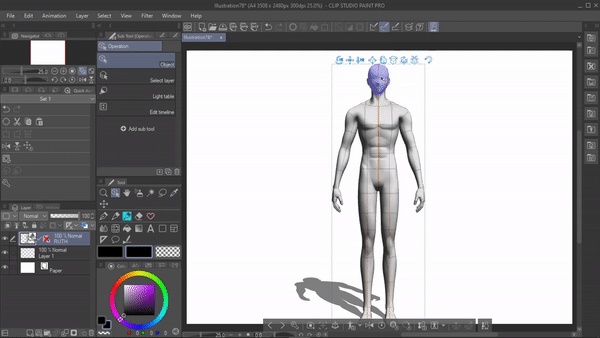
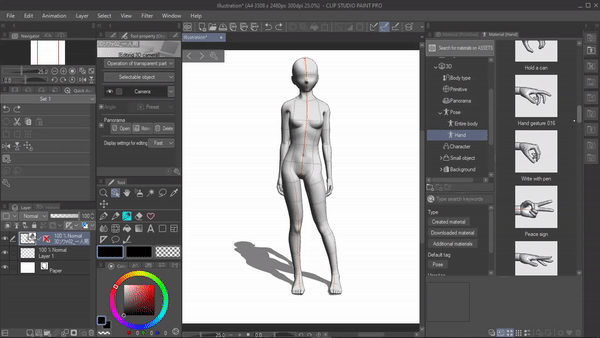
Now just click on the model you wanna work with ,drag and drop them onto the canvas .
Now your 3D model is ready to be worked with.
------------------------------------------------------------------------
CONTROLS :
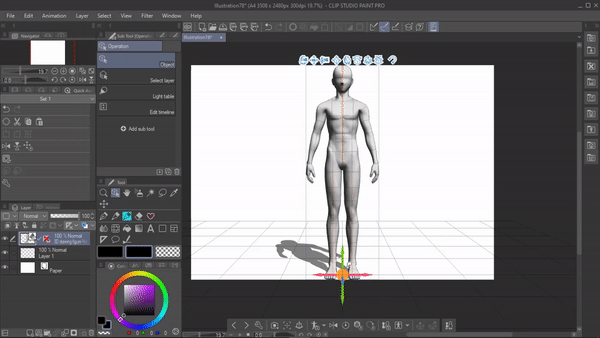
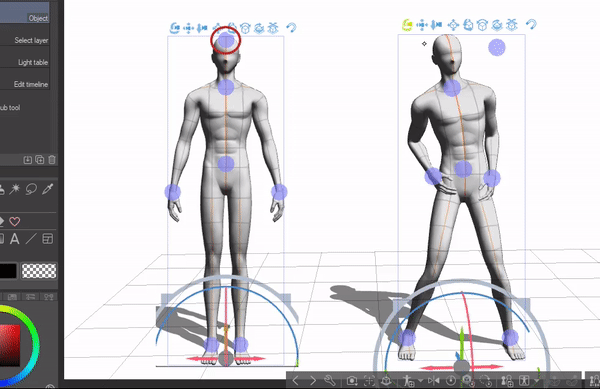
When you click on the model , you can see a set of different tools which are used for controlling camera angles , movement and rotation of the 3d model. from which we’re first gonna concentrate on these three .
These are camera controls . it's also almost like you have a camera and can control from which perspective you the model to be looked at
>Using the first icon , we can rotate the camera angle however we want in any direction . >The second one is to move the camera position. >Using the third one we can control how much we want the camera to zoom in or out of the model .
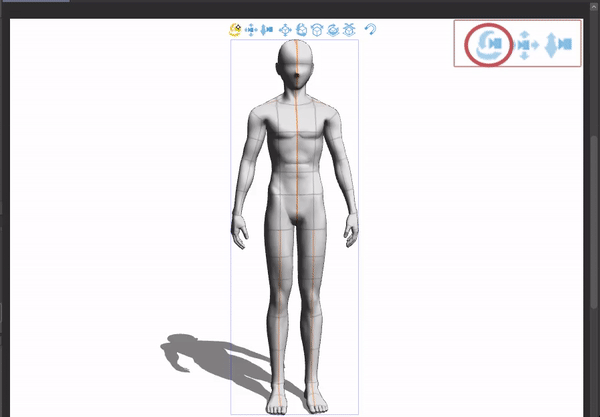
[NOTE] One thing people often get wrong is that they think they’re moving the model with these three controls . No you're not . Look at the grid below , the model does not move an inch from its original position . it's the camera that's moving, not the model .
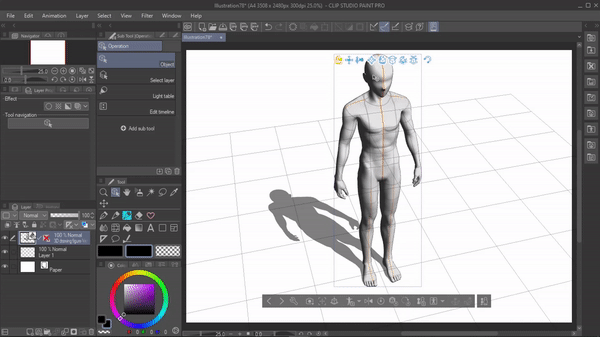
MOVING THE MODE :
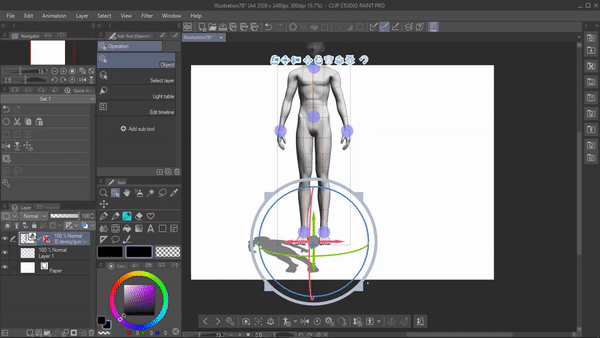
To actually move or rotate the model in this 3D space we can use these 5 icons or the sphere .
This icon allows you to move the model without being attacted to the grid .

EX: Useful to create poses where the character is not touching the ground like this
The next icon allows you to rotate the model itself in any direction
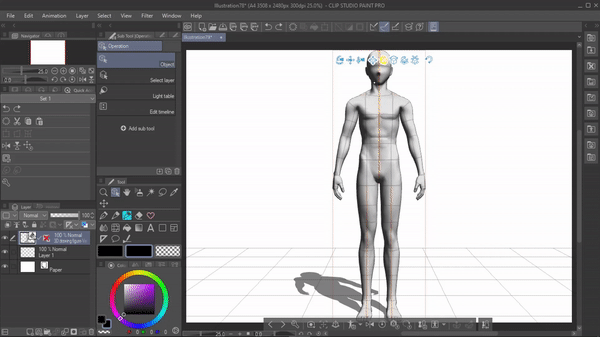
EX :Really helpful while creating poses where the body needs rotation .
The third allows you to move the model sideways.

The next one allows you to rotate the model in a 360 turn .

[NOTE] If you want to reset the rotation then click on this icon “reset model rotation “.
EX: Really useful in scenarios like where the characters are facing each other or facing something .
Lastly this icon allows you to move the model while being attached to the grid
EX: really useful in positioning when you’re working with multiple 3d models .
SPHERE :
Now Let's talk about the sphere , it almost does the same thing as the icons above .
This outer circle in the sphere is used to make the model bigger or smaller . Click and drag out to make the model bigger and drag in to make it smaller .
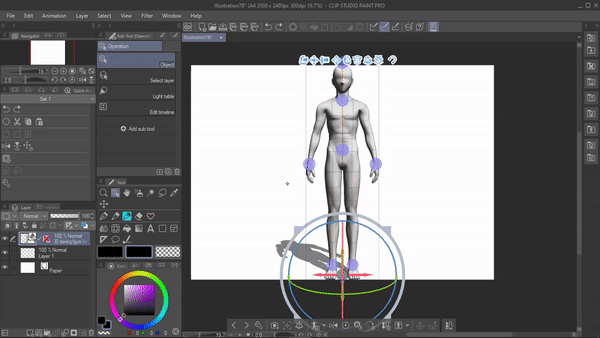
[NOTE] To reset the model SIZE to its original scale clicK on this icon .
NOW Inside the sphere we have this dot using which we can move the model without being attached to the ground ,
[NOTE] To bring the model back to the ground click on this “place model on ground level “ icon
And finally these axes are used to rotate the model . click on the axis and drag it along the line to rotate .
------------------------------------------
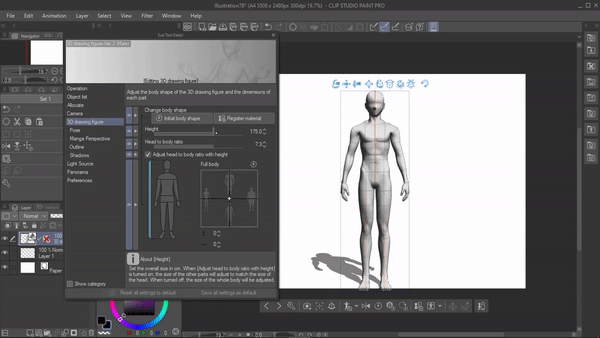
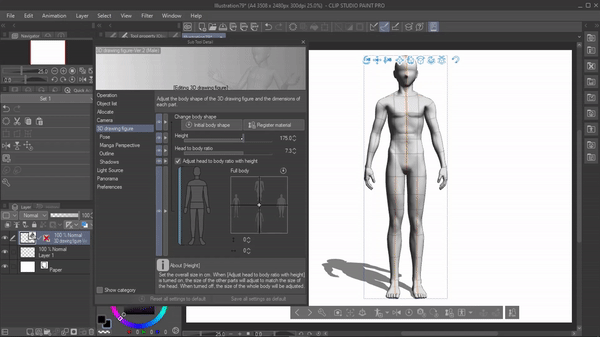
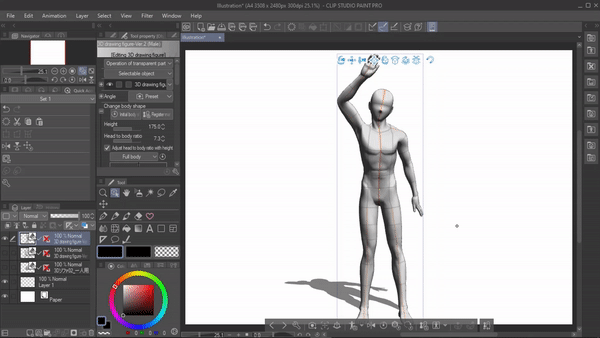
CHANGING BODY SHAPE:
In csp we can customize the 3d models body shape to fit the description of the character we’re drawing . For example : I’ll be changing this 3d models shape to one of my oc’s who has a muscular and taller body frame with a wide shoulder .
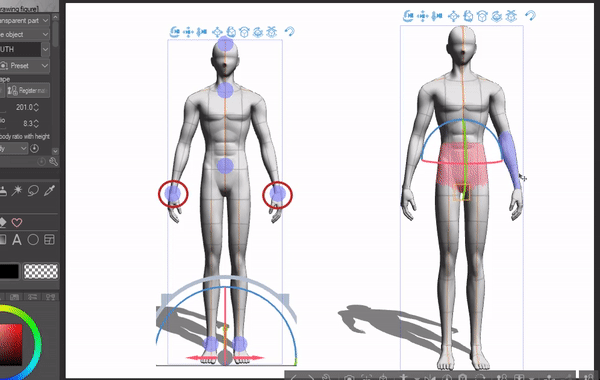
To change the body shape, click on this icon which opens up the “Editing 3d figure window Or go to the tool property and expand the “ change body shape “
HEIGHT :
This slider allows us to change the height of the 3d figure .
Defaultly male ver 2 body figures are set to 175cm , but for my character i want it to be higher
So we’re gonna move the height slider to 190 cm .
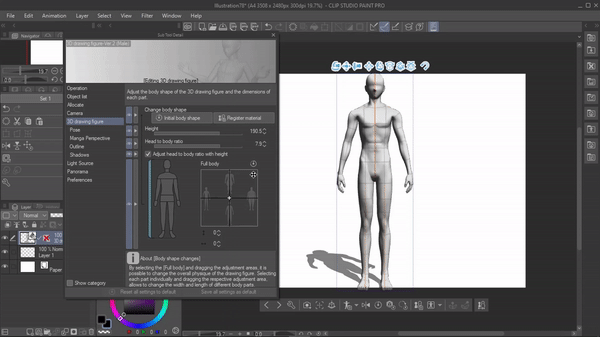
If you notice when we move the height slider , the “ head to body ratio “ slider automatically adjusts with it . That is because it makes sure that the head is at proper proportion to the body's height .
If you want to adjust the head separately you can disable “ adjust head to body ratio with height “ and adjust the slider . But for my character here I will keep it enabled .
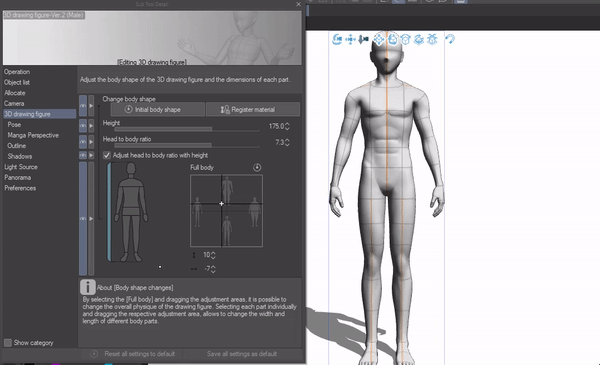
- CUSTOMIZING THE BODY SHAPE
Now let’s move on to actually changing the body shape .
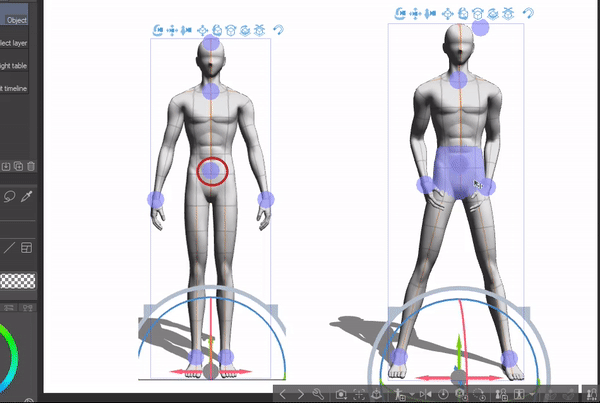
1 - click on this line to change the whole body shape
2 - this is the adjustment area , where you can adjust the body shape by moving the 2d sider .
In this adjustment area , we can move the cursor /2d horizontally or vertically to get different body shapes
>The upper you move the 2d slider , we will get a strong muscular body . >If you move the d slider downward , we will get a child-like body with no curves . >If we move it to the right , we will get a fatter body . >If we move to the left , we will get a slim physique .
For my model , I want it to have a lean muscular body and for that I will move the slider to the upward left . somewhere between the slim and muscular body shape to get my ideal physique
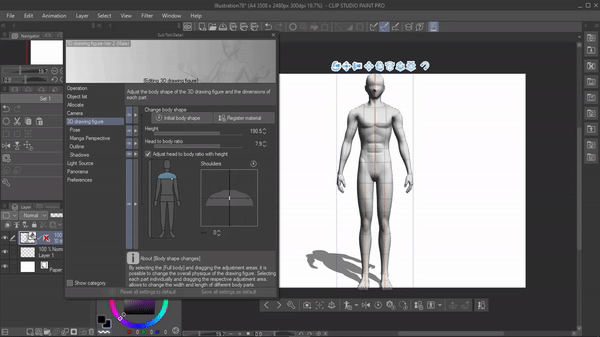
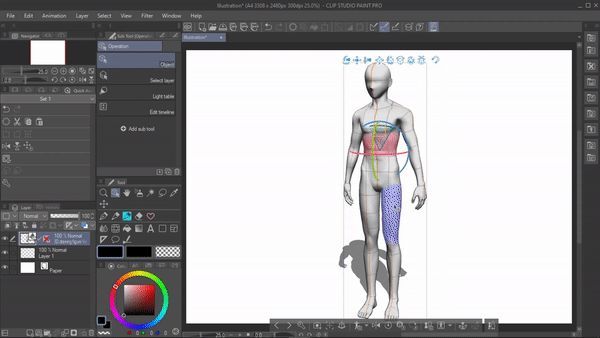
CUSTOMIZING INDIVIDUAL PARTS
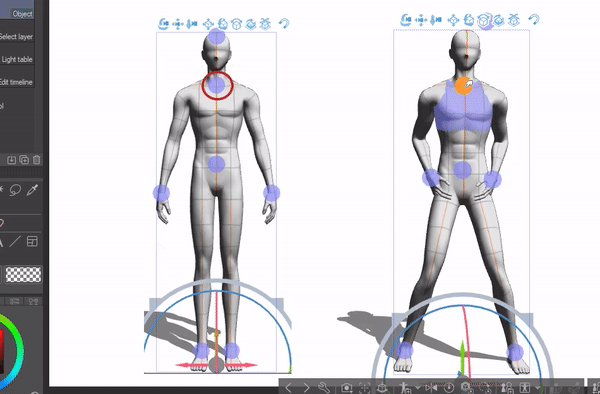
Not only just the whole body but we can customize each individual part of the body separately .
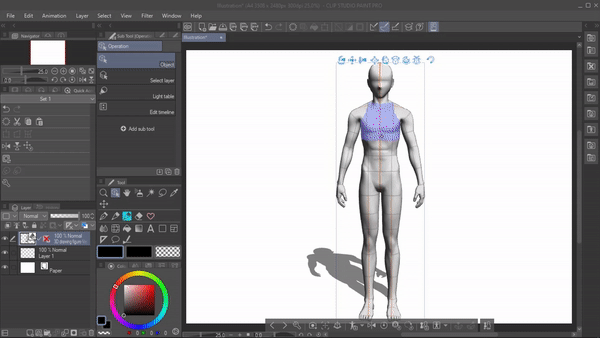
When you surf through the body diagram here you will see different parts being highlighted . You can click on the particular part you want to adjust .
Now in the adjustment area we can move the cursor to customize that particular body part .
Similar to what we did to customize the whole body shape
But The adjustment area for individual parts of the body works abit different than the full body .
>The higher you move the slider the longer that body part will get . >The downward you move the slider the shorter the body part will get .
The left and right work the same as the full body .
>Right to get fatter body part >Left for a slimmer body .

As For my model , I want to make its shoulders a bit for weider . so I’ll select the shoulder and move the slider to the right to make it weider .
Then i’ll Make its neck longer by dragging it upward
And finally I’ll make his legs and hands a bit longer .
Note : If you don't like the changes you made you can click on the “ reset” here and it will reset that particular body part to its initial shape .
If you want to reset every body shape changes you have made, including the height to its initial shape, then click on “ initial body shape “ .
------------------------------------------------------------------------
OTHER BODY SHAPES
Remember that the customization of body shape in csp is not limited to an adult body only. We can create a lot of different body shapes based on age and individual character traits .
Not only for humans we can also create body shapes for various fantasy characters like goblins and monsters . By disabling the “ head to body ratio with height “ we are able to give small bodies big heads useful body shape to draw characters like chibis or goblins . Even though the 3d model doesn’t look exactly like that , it's enough of a vessel to draw one .
---------------------------------------------------
REGISTER BODY SHAPE :
Now that we have customized the body shape for our character it's better to save the body shape so that we can use it whenever we want later .
TO register the body shape follow the below instruction
Take a screenshot or save it as a png so that we can use the image as material image >Now click on “ register material “ in the editing 3d figure or click on this icon below to register the body shape
>A material property box will pop up , where we will name the material and then in the material image click on “ select file “ and select the image of the 3d model that we just saved .
Then finally choose a location to save the material . I will be choosing the “ body type” under the 3d to save the material
finally click on ok .
Now if you go to the location where we just saved the body shape material , we will be able to use that body shape whenever you want . Just drag them and drop it on the canvas.
-----------------------------------------------------------
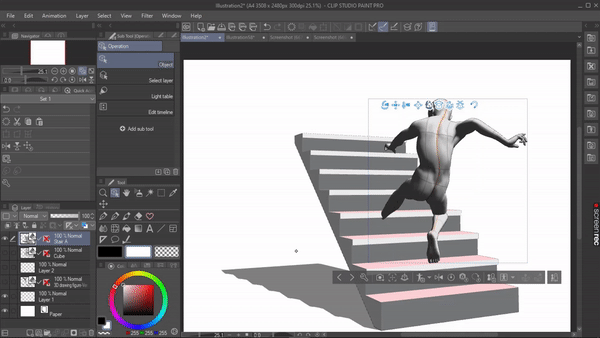
POSING
Now that we’re done with the body shape let's move on to actually posing them . There are different ways / methods To move a body part ,
But first Make sure under operation we have the object tool selected .
Now when we trace through the 3d model we will see different parts of the figure being highlighted in blue color . We can just click on a particular part and drag it to Manipulate it .
I personally find it hard to create a pose in this method because when we try to manipulate one body part it automatically influences heavy movements in other parts .
But once you get used to it . It’s a decent way to pose your 3d figure .
[Note] The blue highlighted part will turn to pink when it is clicked to manipulate.
[note] To to reset the model to its default pose click on this icon .
------------------------------------------------------------------
+POSING WITH THE CONTROLLER DOTS
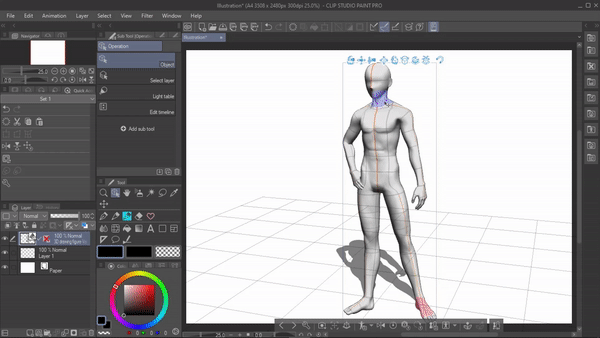
When we click on the 3d model , These 7 dots will appear. Using these dots we can move the limbs and torso of the 3d figure to make basic movements . we just have to click on the dot and drag it to move the body part .
NOW LETS LEARN WHICH BODY PARTS THESE DOTS CAN MANIPULATE .
Using these dots we can control the movement in the arm
Using these dots we can control the movements in the legs .

This dot in the torso has control over the whole body because when you drag it the whole body acts according to its movement .
Using this dot we can control the upper part of the body .
By dragging this dot we can pose in which direction we want our 3d figure face to look at .
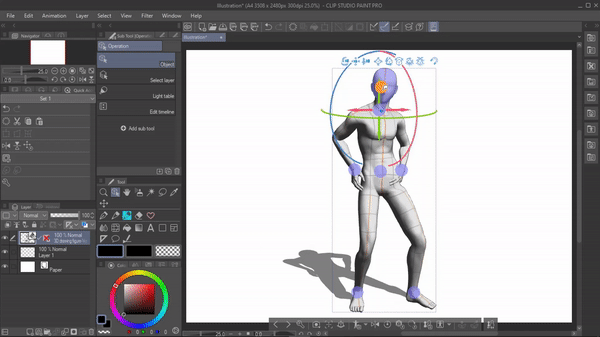
Not only that When we click on the dot , A sphere with axis lines will appear using which we can rotate , twist the body parts .
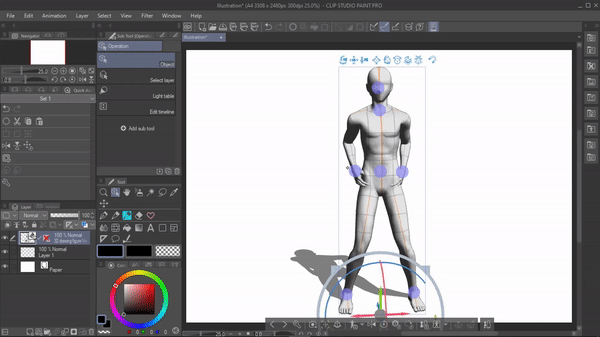
The dot to manipulate the head has only one line using which we can tilt the head .
-------------------------------------------------
+POSING WITH MANIPULATOR
Within the highlighted parts , double click on any certain part . A sphere will appear which we can use to manipulate that part .
The manipulator will have these axis lines (similar to what we saw before )
Which we can click and drag along the line to twist and turn or bend that body part .
This method of posing allows us to pose the model in a more detailed way since we can manipulate different body parts individually .
Not only that it has its anatomical limits to it ,for ex: when I try to move the leg , It will only move up to where it’s humanly possible .
Similarly with the forearm , whereas the other part has a sphere with three lines, the forearm has only one because we can only bend our forearm and not twist it . To twist the arm we will have to manipulate the upper arm . Same theory goes to the thighs and the lower leg .

[tip] A tip for beginners I would give is if you’re gonna manipulate the head , first manipulate the neck then adjust the head for more natural posing .
And if you’re manipulating the arm , adjust the shoulder first then move on to the arm .
And that's how we can pose a 3d figure .
=-----------------------=
I personally like to work with both the controller dots and the manipulator.
Using the dot method I’ll create the basic pose since it has more natural movement to it .
Then with the manipulator method I can add more details and construct a proper pose .
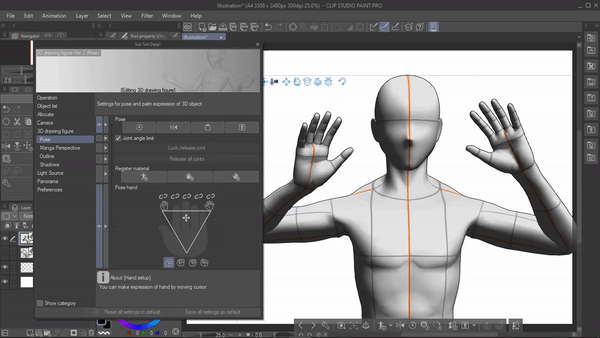
POSE A HAND
Let's talk A bit in detail about how to pose the hand . Lets first zoom into the hand for a clear view . When we trace through the hand we can see different individual sections of the fingers and palm being highlighted . We can double click on these highlighted parts to manipulate the pose using the sphere , just like what we did previously to pose the whole body .
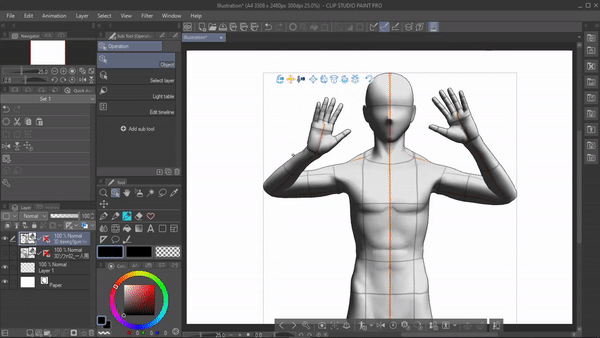
But There’s an easier way we can pose a hand . For that, go to > display object list > subtool detail box will appear under which select [pose] or we can just click “ show detailed setting” under pose in the tool property .
In this hand setup , we can move the cursor to make hand expressions .
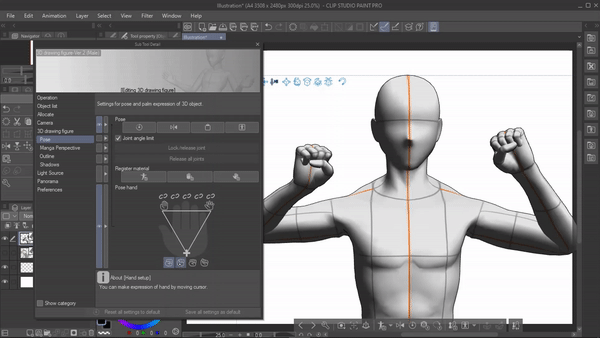
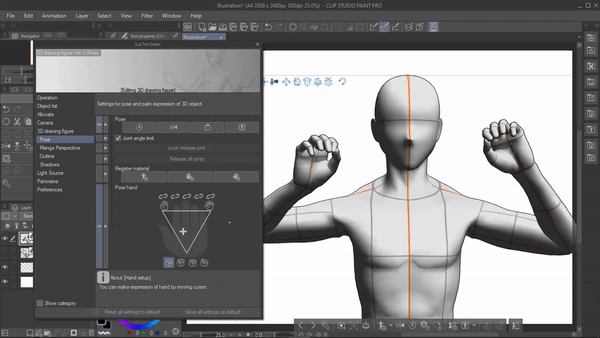
If we move the cursor to the bottom , we will get a closed fist pose .
Below which we have some different default poses for the closed fist . You can select any one of your choice
If we move the cursor to the upward right , we will get an open hand with the fingers spreaded .
And if we move to the upward left , we get this stiff open hand .
If you look a bit above the hand setup we have these locks using which we can lock individual fingers . You just have to click on the lock to lock that particular finger .Once we have locked the finger we can not manipulate that finger until it's unlocked .

Let me give you an explanation on how to use this feature to our advantage
Let's say I want to create a peace pose in the hand
For that first make sure all the fingers are unlocked .
Then in the hand setup I’ll drag the cursor to the upper right to spread the hand open.
Next I’ll lock these two fingers. Now I’ll drag the cursor to the bottom to close the fist .
With that we have created a peace sign
----------------------------------------------------------REGISTER PREGISTER POSE OR HAND POSE :
If You feel like You will re-use the body or hand pose you just created make sure that you register the pose for later use .
In the register material click on “ register body pose as material “ to save the full body pose
To save the hand pose , click on this to register the left hand pose for both hands .
Or click here to register the right hand pose for both hands .
[NOTE] we have the same options under this icon below
It’s the same process as what we did to register the body shape . We have the name of the material , Select a material image and then choose a location and finally click on ok .
The pose will be registered in the location we just saved , we can just drag and drop it to use it .
---------------------------------------
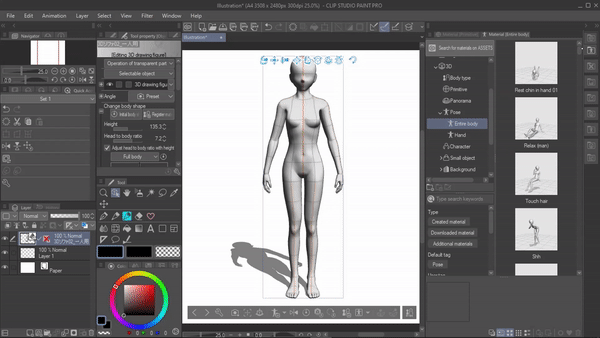
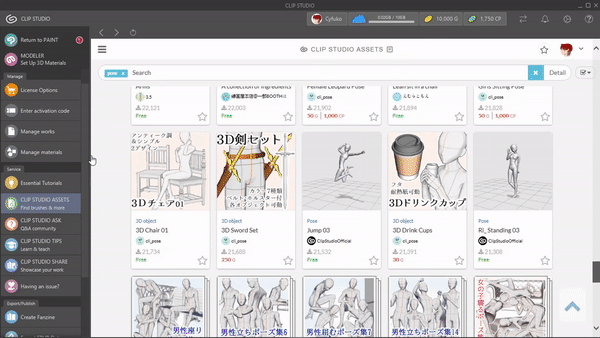
APPLY A POSE : material tab and assets .
We are provided with many default poses in csp that we can just apply to ousr 3d model .
These poses are available under the material tab > 3d > pose.
If you double click on pose , we will have two options , “ entire body “ which has full body poses
And "hand “ which has only the hand poses .
We can click on the pose that we want to apply , drag it and drop on to the 3d model .
Make sure You drop on the 3d model because if you drop at random pace it will create a new 3d model with that pose .
Same with applying hand poses, make sure you drop on the hands of the 3d figure .
[note] If you want the hand pose to apply to only one hand , make sure to select that hand and then drop the hand pose . This way it will only apply to that hand .
We also have the clip studio assets , which have so many different poses available , we just have to search for the pose we’re looking for and download them .
The downloaded poses will be saved in the material tab under download , from where we can just drag and drop it to use .
Finally I wanted to mention this icon . click on this icon and then select “ use 3d pose “ . A dialogue box will open up which will contain all the default poses , the downloaded poses as well as the poses we created and registered in a single place .
We use the user tag by selecting a keyword to filter out the poses . Or type in keywords in the search bar
--------------------------------------------------------------
DRAWING FROM A 3D MODEL
Now that we know how to control angles , change body shape and pose our 3d models lets finally move to drawing from a 3d model .
Once you have created the pose and set them in angle you want draw them either you can have your 3d model on the side and create a new canvas . And use the 3d model as a reference to draw.
Or you can draw above the d model . For that you can lower the opacity of the 3d layer and create a new layer above and start drawing .
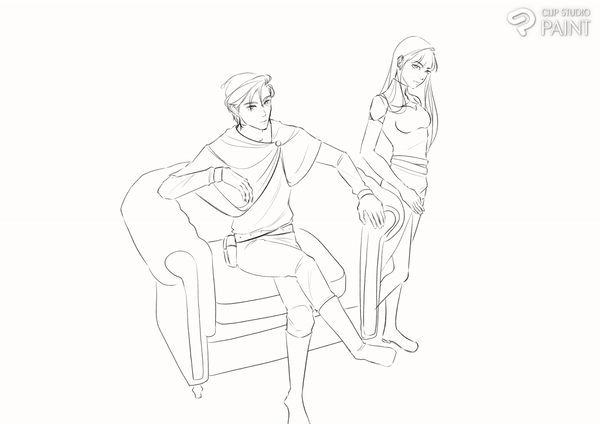
And thats basically how we can use a 3d model to draw our illustrations or comics .
SOME HELPFUL FEATURES / TOOLS FOR BEGINNERS
There are certain features and tools that will make your process of working with a 3d model much easier , especially if you’re a beginner these features will cut down some hard processes for you
PRESET ANGLES
If you remember we talked about these three icons which are used for controlling camera angles . There is also a “specify camera angle from the preset “icon when you click on it . It has many preset camera angles that we can choose .
According to the angle you have selected the 3d figures camera angle will change to that .
So If you want the camera to face the models back, click on this option . Or if you want the models' side profile click here .
If you’re working with multiple models make sure you select the model who’s camera angles you wanna and then choose the angle , you can use this icons to choose between the 3d objects .
-----------------------------------------------
POSE SCANNER
Now there is one more way you can pose your 3d models but this method includes AI .
There is a feature called pose scanner , using which we can extract a pose from an image and apply it to the 3d model .
For example : let's say I want this particular pose on my 3d model .
Once you have your 3D model on the canvas,
Go to file > import > pose scanner or just click on this pose scanner icon and select the image .
It will now replicate the pose from the reference image into the 3d model in a few secs.
[NOTE : you need the internet for this process ]
Most of the time the pose from the reference image will be replicated properly but sometimes it may need some small adjustments other than that this is such a quick way to pose a 3d figure .

--------------------------------------------------------
MANGA PERSPECTIVE:
If you read a lot of manga , you might have noticed some crazy perspectives the authors use in their drawing . Using the “manga perspective” setting we can create something similar to that .
To give you an example how the manga perspective works ,
I will apply the manga perspective to this 3d model with this pose .
You can find the manga perspective setting under “ display object list “ > manga perspective or in the tool property .
Enable the manga perspective ,
Once we enable it , whatever body part is closer to the camera will get bigger in perspective . Look how cool the pose already looks .
Using the slider we can adjust how intense we want the perspective to be .
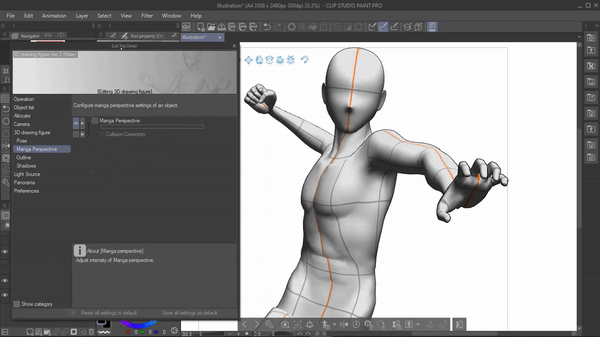
We have another setting under the manga perspective called “ collision correction''. If we enable this , it will basically correct any body parts overlap and adjust its limbs when the manga perspective is turned on .
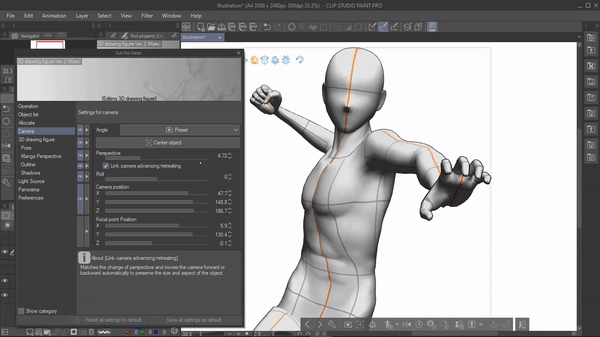
There is also another perspective available in the camera option , when we increase the value of this perspective slider , the perspective is applied to the body entirely and not just whatever is close to the camera .
-----------------------------------------------------------
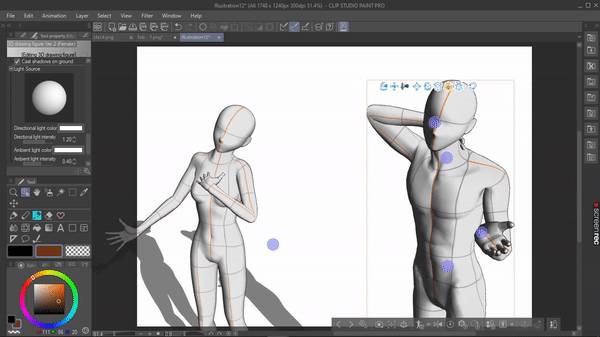
LIGHT SOURCE :
There is a cool feature called light source in clip studio . Using which we can change the direction of the light that hits the 3D model .
Using this feature we can study how light and shadows work
Or use it as a reference for your artwork .
To access the light source First make sure you have a 3d model in the canvas
Then go to the tool property and extend the light source .
You will see this sphere which has light as well as shadow . We can drag it to set the direction of the light .
As you drag the sphere you can see the live changes in the 3d model easier for us to
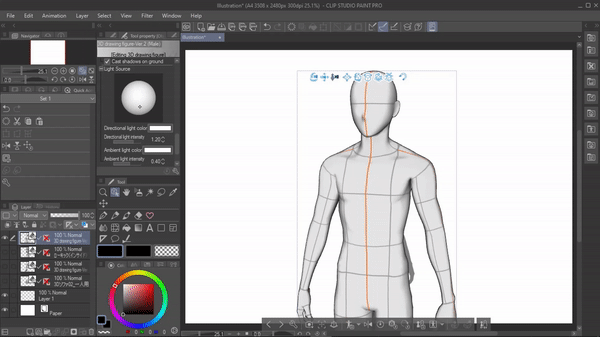
Not only that we can also change the color of the light . for that click on “ directional light color “ , color setting will pop up from there, choose the color you want and click ok
The light color will be changed to that color

------------------------------------------------
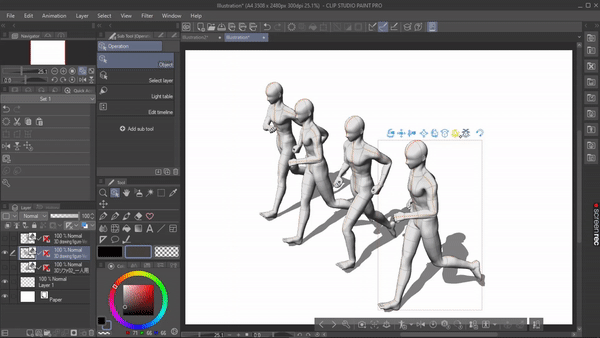
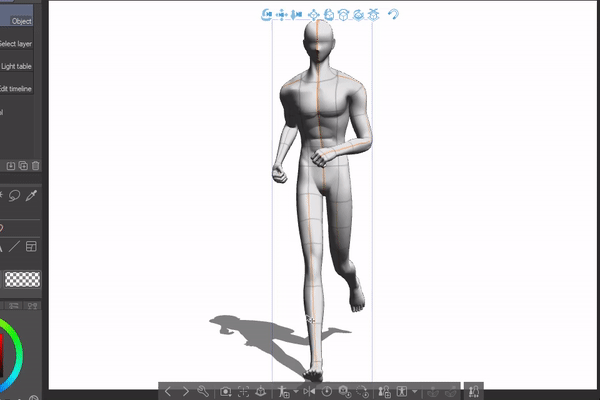
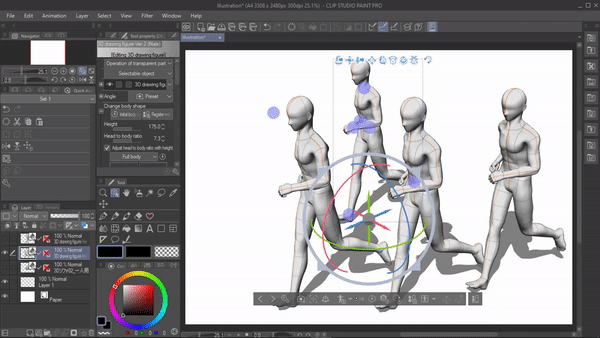
THE FLIP :
This is flip . This tool basically mirrors the 3d model . It may look like a simple tool but it can be really useful in group settings where you have a bunch of 3d models in the same pose , you can use the flip tool to make it look like it's a different pose .
For example : I have a bunch of 3d figures in the same running pose . To change up some of the poses instead of looking for a pose in assets, we can just flip that 3d figure and manipulate it just a little bit to make it look like a whole different pose .
-----
And that is all for the tutorial . Thank you for reading .
---------
Users who liked this post


Comment