
Hands are notoriously a pain to draw, so I’ve made this tutorial to show you some techniques and tricks I've learned.
I'll be using the program Clip Studio Paint, but of course you can use any drawing medium you want. There'll just be one section at the end where I talk about a tip especially for CSP. Let's get started!
Here’s the tutorial in video format, but if you prefer text, it’s below.
Hands are complex objects - and like any complex object, the best thing to do is break it down into simple shapes and use them as guides.
Simplifying the Hand - Top Down
Let's start with a top-down view. Feel free to follow along!
Blocking Out the Basic Shape
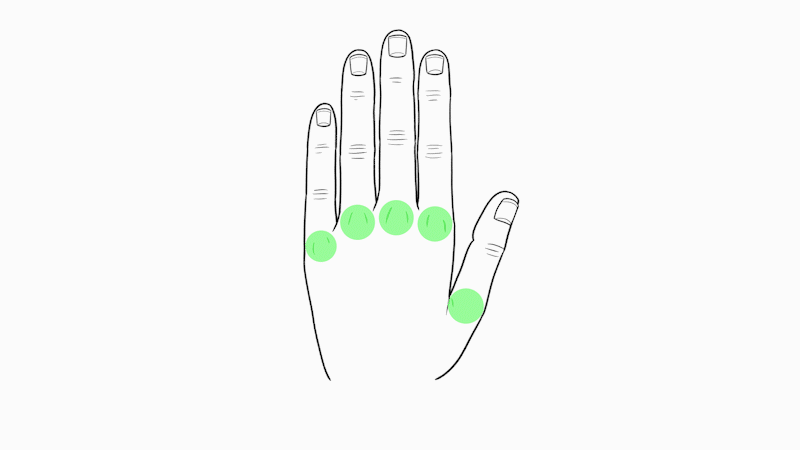
Here's the hand we're going to draw. I'll show you how to get there, step by step.
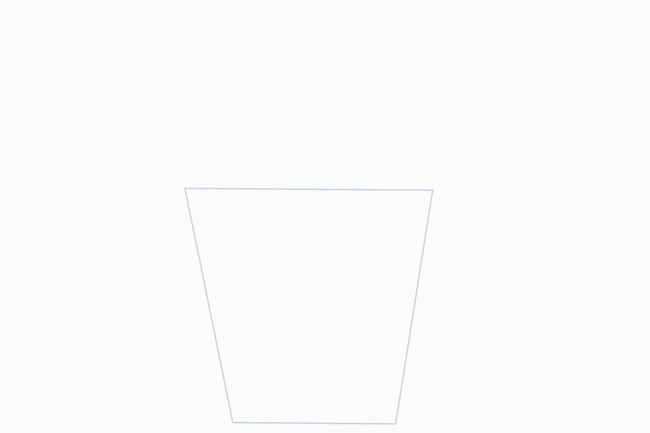
1. Draw a trapezoid just a bit wider at the top than the bottom.
2. Divide the top into four equal parts for the fingers.
3. I'll also add lines for these three fingers; we'll get to the pinky and thumb in a bit.
4. Add a curve at the base of these fingers.
5. Now, take the same distance from the bottom of the trapezoid to the top of the curve to get the length of the middle finger.
6. The pointer and ring fingers are just a little shorter; use the curve as a guide.
Hint: The pointer and ring fingers might be the same length, but this varies on different peoples' hands!
7. Add lines as guides for each joint. As shown on 7b, the bottom segment is the longest, and the other segments get shorter toward the fingertips.
8. The pinky is much shorter. Continue the curved line down into the trapezoid.
9. The top of the pinky comes to around the last joint of the ring finger.
Hint: The exact length of the pinky also varies per person.
10. The joints of the pinky, too, are much lower than the other fingers.
11. Finally, bisect the trapezoid.
12. From there, draw a line coming out about a finger's width.
13. Complete the triangle down to the wrist.
14. The thumb is just shorter than the pointer finger's middle joint.
15. Draw a rectangle to represent it.
16. There's only one joint in the thumb, so divide the rectangle in half.
Adding Details
To turn this bunch of blocks into a hand, just soften the edges! I like to do this on a separate layer and a different color from my guides.
Add curves to the fingers and taper them just a little toward the fingertips. Remember the joints are a bit wider than the rest of the finger.
Look at your own hand to get an idea of the more detailed shapes and curves, like your knuckles.
Fingernails take up about half of the top finger joint, starting with a curved base. With short nails, you'll still see the fingertips.
The thumb is turned a little, so you'll see its nail at an angle.
I mentioned the joints are a bit wider than the rest of the finger. Most of the time, this is subtle, but some peoples' hands show the bones more. You can even go extreme for stylized or monstrous fingers!
Spread Hand
When the hand spreads, the knuckles of the three main fingers don't move much. The pinky only moves a little. The thumb, however, has a great deal of movement!
Note the small webs of skin that appear between each digit when the hand is spread.
Bones, Tendons, and Veins
Aside from the knuckles and fingers, the bones of the hand are largely hidden.
However, depending on the position and tension of the hand, you may see the tendons. Interestingly, the tendons don't follow the line of the bones, but rather come together down at the wrist.
You may also see the veins on the back of the hand, especially in warmer temperatures or if the person is very active or tense.
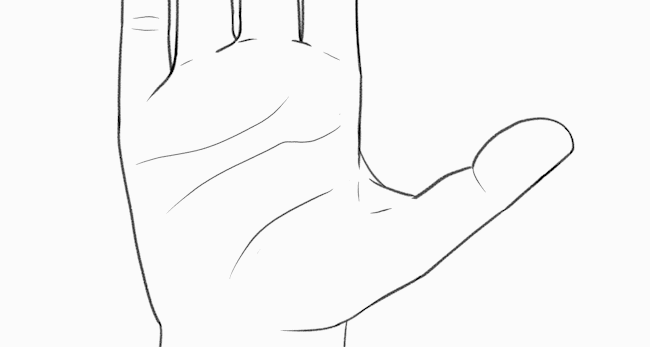
Hand, Bottom View
From underneath, the hand blueprint is the same as it is from the top, but you'll see lines where the fingers fold, and the creases and padded parts of the palm.
While there are tendons on the underside of the hand, they’re not visible and thus we as artists can ignore them. The veins on the palm are very small and don’t stand out like the ones on the back of the hand sometimes do.
Masculine and Feminine Features
Hands look more masculine when you draw thicker fingers, shorter nails, and more details, sometimes with visible hair.
Feminine hands are usually more slender and smooth, with long nails.
Those are just guidelines, though. Remember, everyone's hands are different!
Distance and Amount of Detail
You'll see a lot of detail in a hand close-up, but if you're drawing a person further away, simple is best - especially for more stylized or cartoony characters.
Perspective: The Hand in Three Dimensions
Now that we know the basics, let's change the angle!

Perspective is a big subject, but simply put, if you view a cube straight on, it'll look like a square. Turn the cube so you can see two faces, and the back edges appear to get smaller as they're now more distant. Turn it to see three faces, and they all skew to get smaller in the distance.
You can do this with any shape. Here, I've given our starting trapezoid a bit of depth.
I've followed all the same steps, but this time, I've drawn the shapes as though they were three-dimensional blocks in perspective. As you draw in the blocks, pay attention to how the nearer fingers will partially block the ones further back.
Bending Fingers
Of course, the hand is rarely just flat!
All four fingers bend in the same way. You can bend at the base knuckle, the finger joints, or both.
Notice how it's almost impossible to bend just your top finger joint by itself! The tendons make both joints bend together.
Strong ligaments at each joint prevent the fingers from bending too far backwards or sideways.
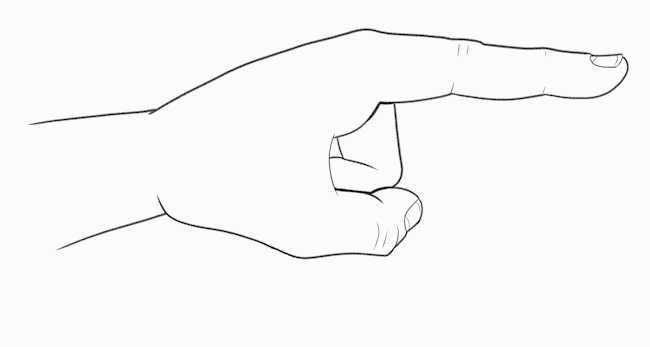
The thumb has a much wider range of motion, capable of bending at each joint and even tucking under the hand entirely.
Tips on References and Practice
The hands are capable of incredibly complex motions, so no wonder they can be intimidating to learn to draw!
As with most anatomy, the best way to learn is to study real-life references, and practice.
Fortunately, most people are lucky enough to have a pair of references right at the end of our wrists!
Of course, you're usually drawing with one of those, so what do you do when you need to draw your drawing hand?
If you can't quite visualize your other hand in reverse, keep a mirror handy!
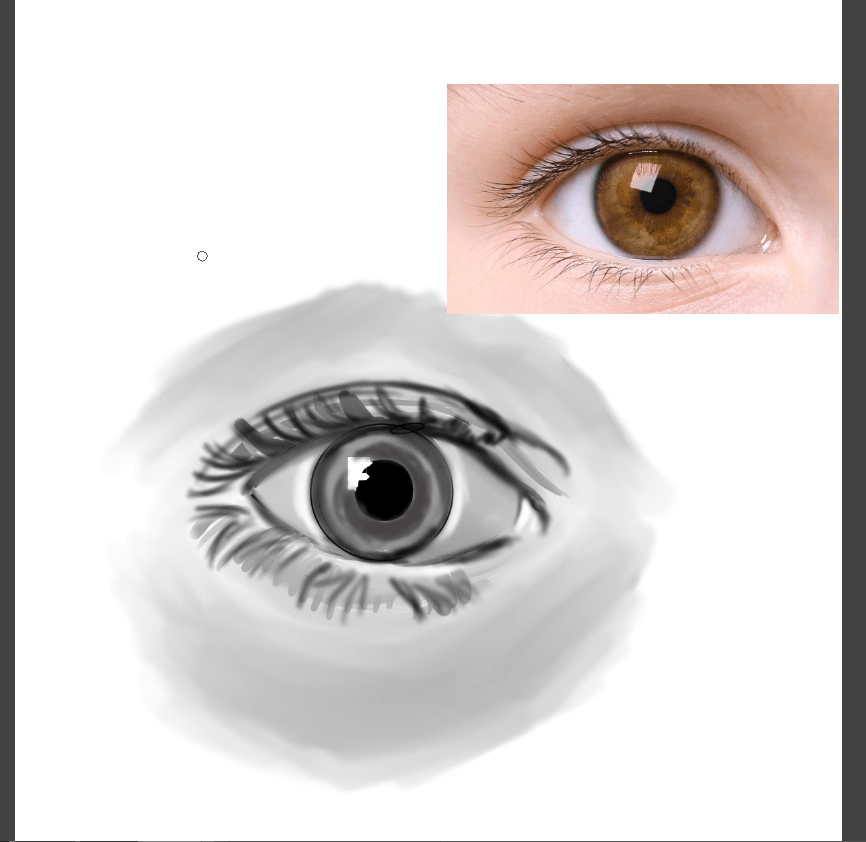
If you need a specific angle that you can't quite see, you can always look up photo references online, or take a picture to use as your own reference.
Clip Studio Paint 3D Hand Poses
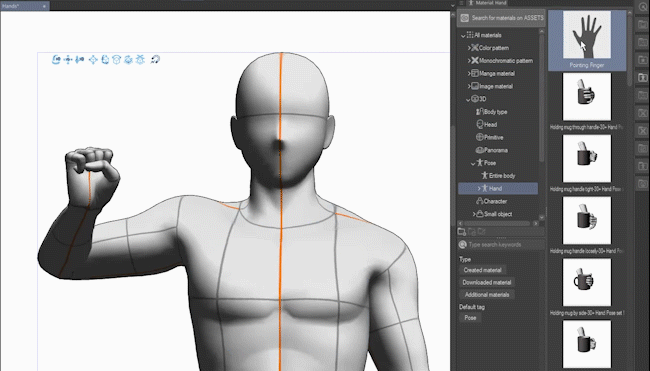
If you're using Clip Studio Paint, some poseable 3D human figures are included.
If you're using Clip Studio Paint, some poseable 3D human figures are included. In the Material palette, go to the 3D folder and choose the Body type subfolder.
Hint: If you don't see the Material palette, go to Window -> Material and choose any of the options from the submenu.

Click and drag one of the provided models onto your canvas.
Posing the Hand
Since I’m just focusing on hands here, I’ve already set this guy up to take a look at the hand features. I may do another tutorial in the future on posing 3D figures in Clip Studio Paint; let me know if you’re interested!
1. When you have a 3D model selected in CSP, you'll see this menu at the bottom. Click the button on the far right. This takes you to the 3D drawing figure section of the Sub Tool Detail palette.
2. Click Pose.
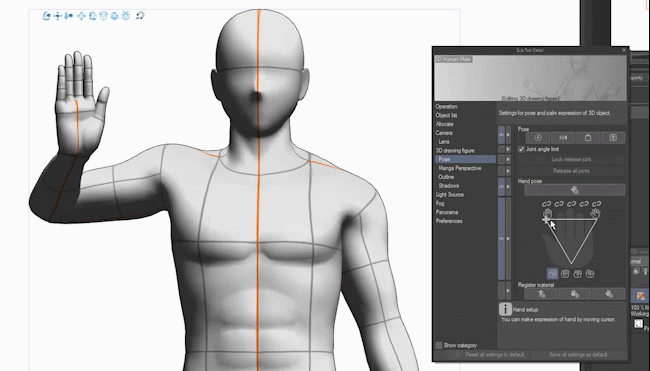
Click and drag on the triangle. At the top left, the fingers are straight and held together, and spread out if you move to the right. The bottom is a fist.
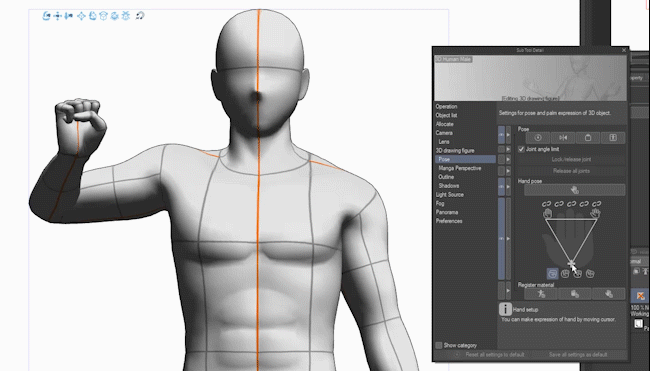
The buttons underneath change the type of fist.

You can lock the position of the fingers by clicking the chain icon above each one, which allows you to pose them individually.
Manual Posing

You can also click directly on each finger segment and pose it manually if you wish.
Important Note: The locks do not prevent you from moving joints manually.
Apply Pose to Only One Hand
The automated hand posing will be applied to both hands by default.
If you just want to apply it to one hand, select any part of that hand or arm and it will be limited to that side only.
Use a Webcam to Pose (CSP v2.0)
If you have CSP version 2.0 or higher, clicking this button will bring up an interface where you can capture hand poses using a webcam.
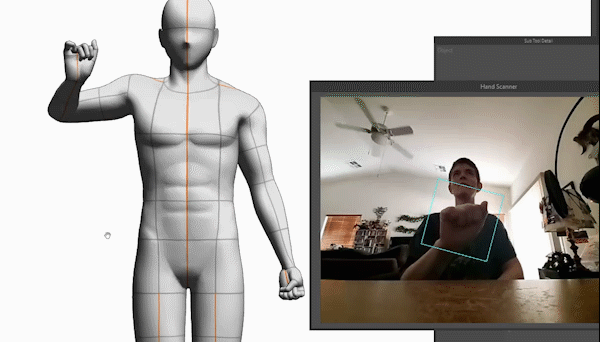
It's quite a fun feature!
Save a Hand Pose as a Material
If you want to save a hand pose to re-use later, you can register it as a material. This is the right hand, so I'll click "Save right hand pose."
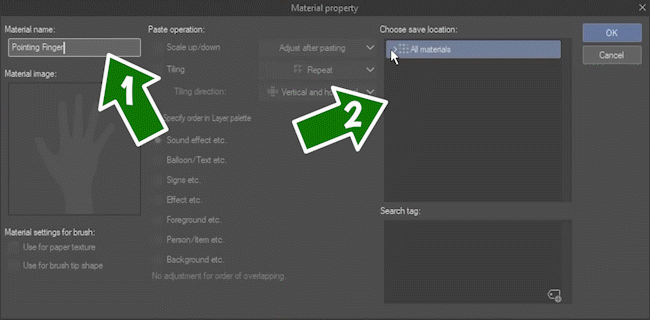
1. Give the pose a name.
2. Choose a save location. For hand poses, there’s a ready-made folder. Go to All materials > 3D > Pose > Hand.
You can also add some search tags if you want, but it’s not required. Click OK when you’re done.
Now, you can just drag the hand pose from the Material palette onto your model to apply it!
Hand Poses from Clip Studio Assets
There are also a bunch of hand poses you can download from Clip Studio Assets. For example, here’s one I’ve used!
It’s a paid asset, but there are several free ones with individual poses too. And you can get Clippy points to buy assets like this by releasing your own assets
Drawing From a Hand Pose

Once your model's set up, you're ready to use it as a guide for your art.
Hint: You can trace the model too - just lower the opacity of its layer. Personally, I find using it as a reference like this gives me a more organic looking result, and it’s great for practice!
More Hand Examples and Conclusion
Hopefully with everything I showed you, you're ready to jump in and draw!
I mostly talked about human hands, but you can extend what you've learned to drawing furries, monsters, fantasy folk, original creatures, aliens, and anything else you come up with.
That's it for this tutorial! Now get out there and draw hands with confidence. 😁
If you’d like more of my tutorials, follow me here on Clip Studio Tips or subscribe on my YouTube channel! Don't forget to tag me @MsRedNebula on Twitter (or X, I guess?) and Instagram, or @MsRedNebula@mastodon.art and show off your art.
Users who liked this post


Comment