
This quick tutorial will show you how I set up my sketch layers in Clip Studio Paint. I’ll also go into a little more detail about a really convenient feature I use for this: Layer colors.
Here’s the tutorial in video format, but if you prefer text, you can find that below!
Setting Up a Sketch Layer
Create a New Canvas
To get started, go to the File menu and choose New.
The size doesn't really matter, but I like to work on a nice big canvas at 300 DPI in case I want to print my art later!
(Want to learn more about canvas sizes and image resolution/DPI/PPI? I created a tutorial for that a while back. It’s not required knowledge for doing this tutorial, but in case you’re curious. 😀 )
Click OK to create the canvas.
Take a look at the Layer palette. You start off with a white Paper layer as your background, and an empty raster layer.
I'll rename this layer to Sketch.
Turn on Layer Color
I like to sketch in light blue - it's a holdover from how I and a lot of other artists draw with pencil and paper.
You can change the color you're drawing with, of course, but there's an easier and more consistent way - just turn on the layer color.
You can turn on the layer color by clicking the button on the Layer Property palette, or there’s also a shortcut on the Layer palette.
Both of these palettes should be visible on your default layout, but if you don’t see them for any reason, you can turn them on by going to Window -> Layer Property and Window -> Layer, respectively.
The default layer color is already light blue, so when you draw on the layer now, anything drawn in black appears in that blue instead.
Draft Layer
Something else I like to do is click here to change my sketch layer into a Draft Layer. On the Layer palette, click the icon that looks like a pencil. Notice the blue bar and pencil icon that appear on the layer to indicate it is now a Draft Layer.
This is completely optional, but it's a nice way to differentiate your sketches and working layers. Plus, you have the option to hide draft layers when you export your image, just in case you forgot to turn the layers off!
Creating a Digital "Pencil" Sketch
To really imitate pencil and paper, I like to sketch with a pencil tool.
Click on the Pencil tool. You'll see different options than I have here since I've downloaded and customized some pencil sub tools, but the default Pencil at the top is what we'll be using for this example!
The brush size will depend on the size of your canvas. In my case, a size of 50 works great.
And with that, we’re ready to draw!
Here’s the sketch I did on the sketch layer I set up. (You can also see a timelapse in the video at the top of this tip, if you’re interested!)
While it is possible to sketch with a mouse, I highly recommend getting yourself a drawing tablet if you’re planning on doing a lot of digital art. There are some wonderful inexpensive options out there these days! A tablet with pressure sensitivity allows you to draw smooth lines that taper naturally, and really makes you feel like you’re sketching with pencil.
Setting Up a Lineart Layer
When your sketch is finished, you can use it as a guide to either ink or paint over. In this case, I'm going with linework.
Now that I'm done with the sketch, I'll drop the opacity on that layer down a bit to make it easy to see the lines I'm going to draw over it.
Next, I’ll create a new layer for my linework, above my sketch layer.
For more organic forms like this, I like to ink on a raster layer. Some people prefer a vector layer for all their inking, but I tend to use those for inorganic forms and cartoony images, myself. There are definitely advantages and disadvantages to both. It's up to you!
Digitally "Ink" the Drawing
Finally, I'll switch to the Pen tool and select the G-pen sub tool to draw my lineart.
I draw my linework on the new layer, using the sketch layer as a guide. Because of how I’ve set up the sketch layer, the blue sketch lines are evident, but don’t get in the way of the final drawing at all.
Here’s a closer look, with the sketch layer turned back up to full opacity so you can see how I used the blue lines as guides for my digital line art.
Again, the video has a brief timelapse of the drawing, but when I’ve completed the art, there will be a full timelapse up on my YouTube channel!
Layer Color Tips
There are a few other tips I'd like to share about the Layer Color feature!
Changing the Layer Color
Here, I've hidden my linework and put my sketch back to 100% opacity.
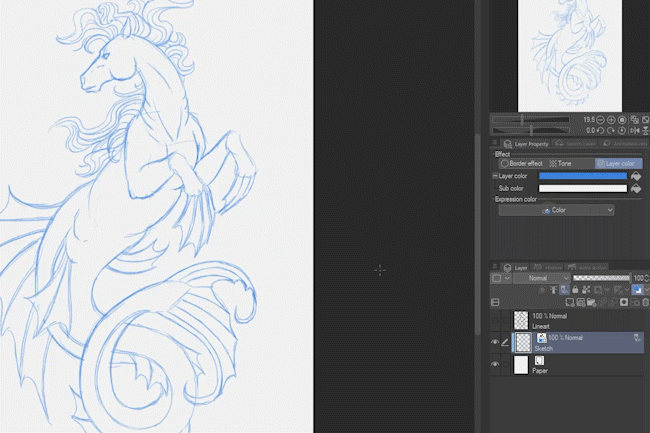
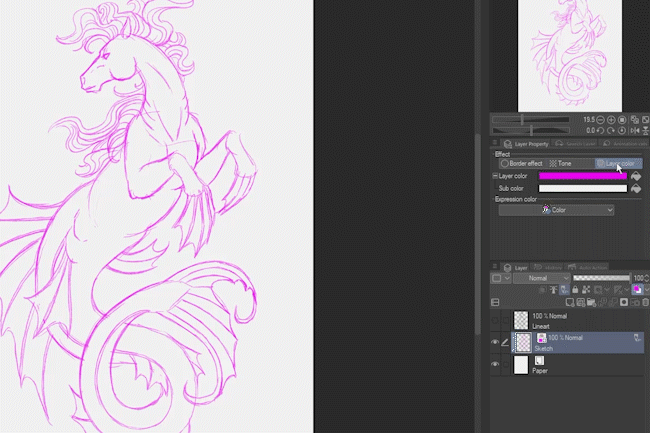
Say you don't care for light blue, or you want a different shade. Simply click the layer color swatch and choose an alternate color.
Another option is to select a drawing color on your color wheel, and then use the paint bucket icon to transfer that color to the layer color.
You can also change the layer color by clicking the dropdown next to the layer color swatches on the Layer palette, and selecting the “Layer color” option.
Toggle Layer Color Off and On
You can toggle the layer color off by clicking the Layer Color button again.
If you turn it back on, it remembers any layer color you previously chose.
Layer Sub Color
I'm sure you noticed there’s a second color under the layer called the Sub Color. If your drawing is all black, it doesn't appear to do anything.
The reason is because the main Layer Color affects dark tones, while the Sub Color affects light tones. The best way to see this is with a gradient going from pure black to pure white.
When I first turn on the Layer Color, the darker values shift to blue while the lighter ones remain white.
However, if I change the Sub Color to green, the lighter tones go green, while the grey areas are a mix of the two.
Hint: If you set both the Layer Color and Sub Color to the same color, everything on that layer that isn’t transparent will be that color.
Quick Greyscale and Sepia Tone using Layer Color
It doesn't matter what color the layer was before, only the brightness.
Changing the layer colors to black and white will result in a greyscale image.
Brown and tan will give you a quick and easy sepia-tone effect!
I used the following colors, if you want to replicate the effect:
Brown: #551C00
Tan: #FDD790
Change the Default Layer Colors
If you mainly use the layer color for sketching, like I do, you may have a color preference.
For instance, I like to use a slightly less vivid blue, and I put it on both the Layer Color and Sub Color so I don't have to worry about changing my pencil color to black every time.
Click the Layer Property palette menu and select "Save as default".
Check the box next to Layer color to indicate this is the layer property you wish to save as the default.
Note where it says “Layer type: Raster layer”, which means this default will only affect raster layers. You can save separate defaults for vector layers, text layers, and so on.
Click OK.
These will now be the default Layer Colors for every raster layer you create in the future.
Layer Color Works on Folders Too!
One other useful thing to know is that you can apply a layer color to an entire folder!
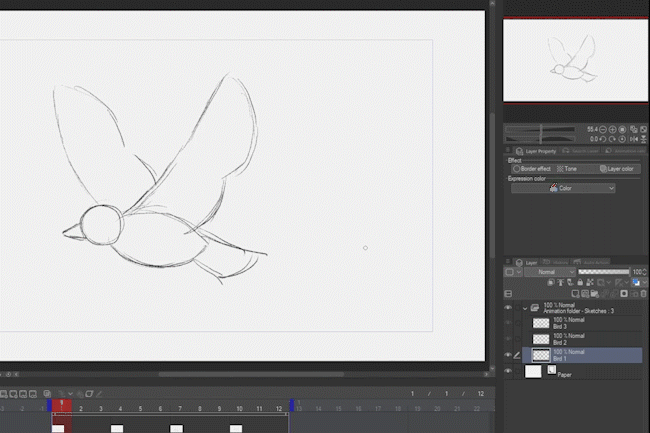
A great use-case for this is if you are working on an animation, and want to set up an animation folder for all of your rough sketches.
Simply select the folder, and turn on the Layer Color just the same as you would on a single layer.
Now, the color is applied to every layer in that folder.
(If you’d like to learn more about animation in Clip Studio Paint, I did a whole beginner tutorial for that too.)
Conclusion
That’s everything I wanted to cover - I hope you’ve enjoyed this dive into Layer Colors, a very convenient layer property feature I use all the time!
As always, tag me @MsRedNebula on Twitter or Instagram, or my new Mastodon account and show me your art. Follow me here on Clip Studio Tips or over on my YouTube channel for more art and CSP tutorials!
Users who liked this post


Comment