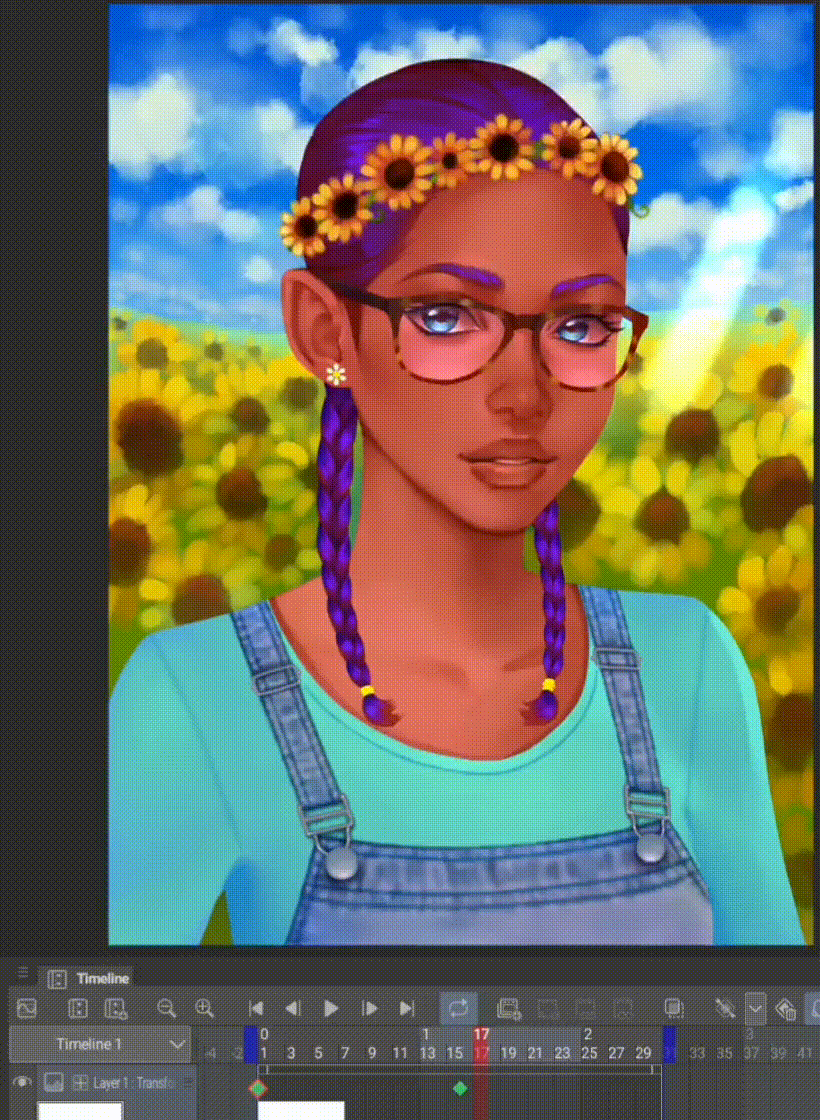
Animate Glasses Shine In Your Illustration
Hi. For this tutorial I will be showing how you can animate a shiny glasses in your illustration using Clip Studio Paint. Let's get started.
Setting Up Canvas
This is the image I will be using for this tutorial. I had recently drawn it and added a glasses on her for this tutorial.
Take a note of the height and width of the image you are planning to use. This image is 900 × 1200. Then open up clip studio paint and create a new file by going to File> New. Choose he animation ption for use of work. Enter the width and height then fill out the section below containing frame rate, playback time and other settings for the animation.
Along with a blank canvas, there will be a timeline and a layers already added to your work. In the Layer's Palette there will be an animation folder that you can go on ahead and delete as you won't be needing it for this tutorial as we will be making use of keyframes.
Now import your illustration that has a character wearing a glasses by going to File> Import> Image. Then create a new blank layer above it by going to Layer>New raster layer. You can use the three horizontal lines to the right edge of the layer to drag it in place so that the new layer is above the illustration layer.
Now that we have everything all set up it's time to draw the shine.
Draw The Shine
Set the blending mode of the blank layer to Add(Glow) . While on the new layer, select a color you want for the shine and use a brush to draw it on the canvas. You can use the airbrush for soft edges or a brush like the g-pen for hard edges. Don't worry if your shine is bigger than the size of the lenses of the glasses as that will be taken care of later. You can even add more than one line of shine at any angle you want.
I added two lines of shine that is diagonal using a light blue color.
Now it's time to make the shine move.
Animate The Shine
While still on the layer with the Shine, go to Animation>Edit track>Enable keyframes on this layer or click it's button on the timeline.
Select the starting position on the track then add a keyframe by going to Animation>Edit track>Add keyframe or click its botton on the timeline.
Then select the Object Tool and a box should appear around the shine layer. Hold down Shift while you drag to keep it in a straight line. Move the shine so that it doesn't fall onto the lense of the glasses.
Then add another keyframe to a further position on the track and repeat the steps but move the shine to the different side of the canvas.
Press the play button to see your progress.

Now it's time to make our shine show only when it is passing over the lense.
Apply Mask To Shine.
First, disenable keyframing on the layer by repeating the same steps we did to enable it.
Now, select lasso selection tool and select as much of the lense area as you can. Then, apply a mask to everything outside the selected area by going to Layer>Layer mask>Mask outside selection. You also want to make sure you are on the mask, which is the second box on the shine layer in the Layers Palette. A white outline will appear around it once you are on it. Then check the 'show mask area' check box at the top of the Layers Palette. This makes distinguishing between the mask and unmasked areas more easily.
Use the brush tool to erase parts of the mask that is covering the lense. Likewise, use the eraser tool to mask areas that are not part of the lense area. Then uncheck the 'show mask area' check box. After that, re-enable keyframing on the layer once more.
Click the play button and you will see the shine moving only across the lense area.
Now it's time to export our animated illustration as a looped gif.
Export Animated Illustration
Go to File>Export animation>Animated GIF. Then type the name you want to name it and press save. Ensure the loop count is set to unlimited. In the export settings change the height and width back to what it originally was or you can make it smaller if you intend to share it on social media. Then press OK.
Then when the File operation/ share dialogue box appears, ensure the gif is selected Then press export. Select where you want to save it and press OK.
Note: personal stuff were blocked out in yellow for privacy.
This is the finish product.

This is the end of my tutorial and I hope you found it useful. Bye.


コメント