PROCESS OF CREATING LOFI ART
Hey guys in this tutorial , I will guide you through the process of creating lo-fi art .
This is gonna be a step by step creative process . We are gonna start from brainstorming to bringing the ideas into an art piece
-------------------------WATCH THE VIDEO FOR VISUAL EXPLANATION -----------------------
---------------------------------------------------------------------------------------------------------------
BRIEF INTRODUCTION TO LO-FI : -
Before we get into the steps , let me give you some brief information on lo-fi .
"Lo-Fi is a largely music-centric aesthetic that utilizes muted tones and mundane imagery to evoke a feeling of calm and nostalgia"
You might come across a lot of lo-fi art in youtube and as well as in the form of merchandise . The keywords to take away from the lo fi aesthetic is ” calm, nostalgic and dreamy “. Our whole process will be centered around these three words , so keep them in mind .
Now that we have had a basic intro to lo-fi art . Let's start with the process of creating one .
STEP 1 : LOCATION
The first and crucial step to create a lo-fi is location . Ask yourself : where do you want this whole aesthetic to take place in ? Does that location has dreamy vibe to it ? .
List down all of those places and pick out the one which has more relevance towards the lo-fi theme .
I typically consider two types of places while drawing lo-fi art .
1. Familiar place
2. Non - Familiar place
1- Familiar place : Most of the time lo-fi art is made based on familiar places like a bedroom , cafe , streets , hill station , forest etc .
Any place that gives you a feeling of sentiment and nostalgia you can choose that location to draw .
Lo-fi art certainly has the essence to make the viewers reminisce about their past since certain locations can remind them of their own life and experiences and all those places come under the familiar type .
2. Non - Familiar places :
As for Non familiar places ,your creativity is your limit! There are a lot of lo-fi arts that are based on a fantasy world , So use your imagination to come up with unique concepts. It can be as random as a witch cafe ,a library in space , cats owned restaurant
As long as they maintain that calm and dreamy aesthetic you're good to go
------------------------------------------------------------------------
STEP 2 : ATMOSPHERE /MOOD
Once we’re done with choosing a location , we will be deciding on what kinda atmosphere we’re gonna draw and the mood that will compliment the atmosphere . Deciding this early on is important because it will help with other factors in the upcoming steps .
Ask yourself , What atmosphere will compliment the location ?
For instance : you can choose a rainy atmosphere with a gloomy mood
Or
A Snowy atmosphere with a joyful mood .
Surf the internet to get inspiration and ideas. Once you have a mental image of what you want to draw , write it down with confidence!
-----As for me, I will be choosing a breezy atmosphere and a calm mood
---------------------------------------------------------------
STEP 3 : DECIDING THE ELEMENTS
In this step we are just gonna write down a list of elements that you want to add in our artwork. It's crucial to match your ideas for elements with your location, atmosphere and mood. Basically Steps 1 & 2 act as the basis to add or eliminate elements from your list
Like for ex :Consider the location as bedroom and the atmosphere as snowy
You might want to note down elements like a room heater as it's snowy, window, books on a rack, hot coffee on a desk , curtains etc things that you often see in a bedroom . You might want to write down things like these
----------------
As for me , since my location is hill station . I have decided on these elements
> mountains > clouds > grass > butterfly > flower
-------------------------------------------------------------------
Step 4: CHARACTER
In this step we re gonna decide the pose , the expression and elements of the characters
But first of all , it is not necessary to draw characters , many lofi art are just background and no character . so if you dont wanna draw a character you can definitely skip this step .
But If you do want to draw a character , We will draw the character complimenting the above steps [ step n 1 + step 2 + step 3]
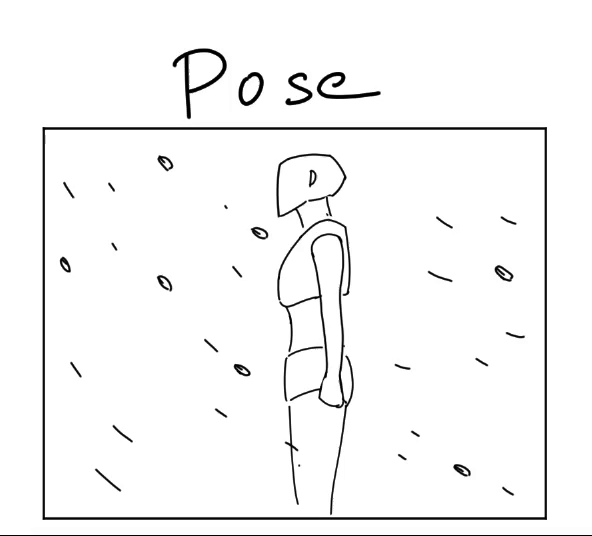
Since I have chosen a breezy atmosphere, I want my character to be posed like she is enjoying the breeze in warm clothes.
And to match with the calm mood, i will give her relaxed and composed facial expressions
-----------------------------------------------------------------------------------------------
Step 5: COMPOSITION
Now we have all the things we need to create our lofi art
In this step , we are gonna put together all the elements that we decided on the above steps and draw and experiment them in different angles , perspective , placement of elements .
This will help you to figure out which scene looks better overall together , and will also save you alot of time
Draw a rough composition , no need to add too many details . Try changing the placement of elements and position of the character .
Attempt until you are satisfied with a rough composition
This is the three different compositions I have drawn for my hill station
I have drawn three different pieces and i really like the 3 rd one
so that's what I'm gonna go with
------------------------------------------------------------------------------------
Step 6: SKETCH
It's time for sketching and turning your lofi concept into a beautiful art piece.
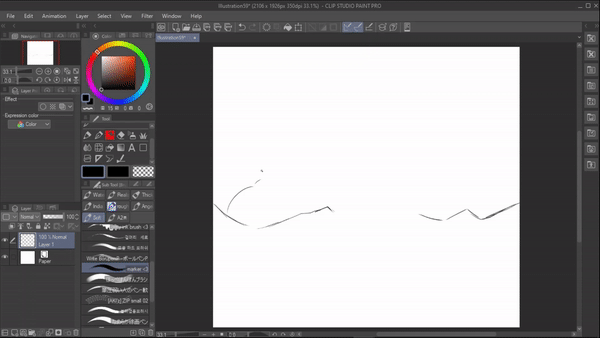
For sketching I will be using this marker pen , I'll link it below if you wanna download it .
Taking the rough composition as reference , In my sketching process my main focus is on placement of things and overall shape of the elements , as I will not be doing lineart for this piece . i will be doing a lineless art so the overall shapes should be proper for me to follow along in upcoming steps .
--------------------------------------------------------------------------------
Step 7 : DEMO COLORING
I do this step before actual colorin so that I can Experiment and play around with the colors and keep in mind that it's necessary to choose the appropriate color palette for your art piece. I usually start by applying the colors and testing with them until I feel satisfied.
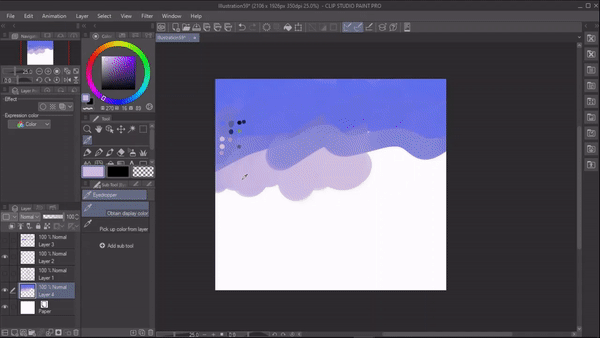
This is the color palette that i'm using for this art piece
I am going for a lot of blue tones here since they symbolize calmness and serenity
Although I will primarily be using blue tones, picking some contrasting colors will definitely help to make the art more interesting and eye catching
Yellow is complementary to blue on the color wheel. So i will draw the butterflies in yellow
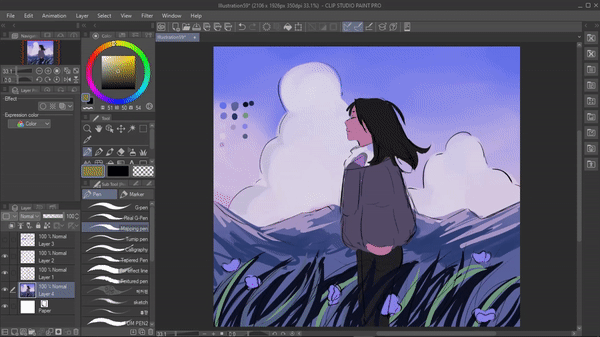
Similarly, by making the scarf red it creates a contrast with the green grass

And that’s mostly how i work with the colors
Once i'm satisfied with the colors and the overall look i'll move to the next step
--------------------------------------------------------------------------------------
Step 8 : COMPLETE THE ILLUSTRATION
I will not be drawing the lineart . I will be doing lineless art as I said before . but if you prefer to do lineart and then the color . please proceed with that
I will be using a lasso tool to draw , it really helps me with the shapes
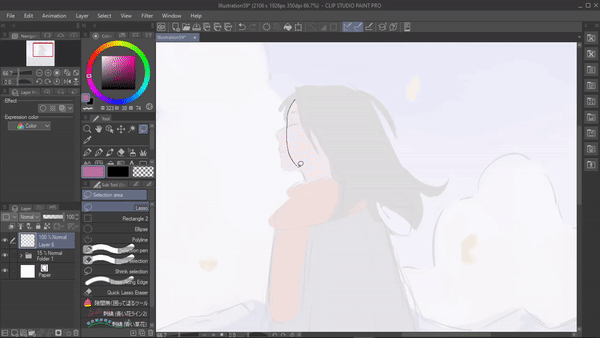
Since im drawing on top of the sketch and demo color it will be hard to keep on increasing and decreasing the value of opacity and extract colors using the eyedropper tool
So here’s a little trick I do. I will save my sketch and demo color as png and then in the sub view i will click on “ import “ and then select the png we just saved . Now I can use the subview as a reference to paint and also extract colors from here.
Using the sub view as reference I have completed my illustration here's the overall process -

I think this piece definitely has that relaxed dreamy vibe to it and the blue tones are really calming
Now we have one more step to go ,
-----------------------------------------------------------------------------------
Step 9 : ADDING EFFECTS
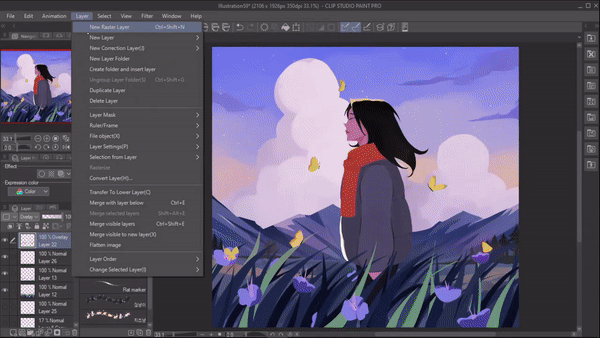
Just to enhance the overall piece even more i will be adding in some effect tone curve which is available in layer > new correction layer > tone curve
Adjust and play around with the graph to increase/decrease contrast of your artwork
And that is all
This is the finished piece
This is the finished piece , I hope this tutorial was easy to follow along . If you have any questions do comment them down and i hope you guys enjoyed it


コメント