Workhorse brush 101
Hi, everybody
I’m Lennybunny, Illustrator and 3D artist.
You can see my work and buy some prints or T-Shirts on my website
And buy my brushes on Graphixly
I've made other tutorials on Clip Studio Tips, hoping you will find them useful!
I became a CSP Expert in 2017, while it was called CSP Evangelist, up until now in 2022. Meaning that I’ve 5 years of deep knowledge on the how’s to of Clip Studio Paint (A.k.a. CSP in short).
During all this years I’ve picked a lot of tips and trick on how the brush engine work, but the most important one was on how to create a workhorse brush.
WHAT'S A WORKHORSE BRUSH
Sometimes you just want to sketch something do some color studies or just relax.
Meaning that you don’t want to worry to have a perfect brush, but just a brush that can do everything you need. Like sketching, inking, painting, blending etc. For that you create a Workhorse Brush
If you understand the reference you will probably need something for the backpain...
As an example, those three old work of mine were created using a workhorse brush
Creating it it’s pretty simple, we just need to duplicate and edit the Mili pen
How to create it
For the first step we just go to the [ Tool ] Palette and we select the pen Tool group and we go to the Marker [ Sub Tool group ]
Right click on the Mili pen and just click on [Duplicate sub tool], this will open a new menu, give the name “Workhorse brush” and press Ok.
Now we just need to edit the options by goin the [ Sub tool detail ] palette, to do so we have two choices.
1- You can go to the [ Tool property ] palette and click on that little wrench icon in the bottom right
2 – You go in the menu on the top and click on Window and click on [ Sub Tool detail ], by the way if you ever close by accident a palette you need to come here to re-open it
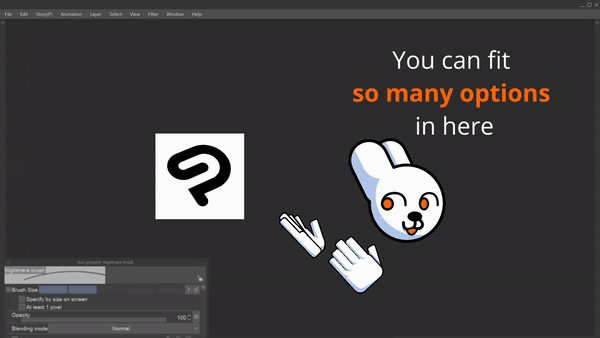
Now fortunately CSP comes with 328 options for your brush, but here’s the issue… they’re a lot and you can’t put them all in a brush…

So, I will help you nailing down those 12 options that you will use 99% of the time.
Fortunately [ Brush size ], [ Anti-Aliasing ] and [ Stabilization ] are already inside the [ Mili Pen ], meaning that you just need to add 9 options.
Those 9 options will be found on those 4 sections on the left of the [ Sub Tool detail ] palette
1- [Ink]
2- [Brush Shape]
3- [Brush Tip]
4- [Stroke]
While we will need to hide an option under [Correction]
But how do we show and hide those options?
EDITING THE WORKHORSE BRUSH
By default you should be inside the [Brush size] section in the [Sub tool detail] palette. As you can see on the left of the [Brush size] option there is a little eye.
That eye controls the option visibility inside the [Tool property] palette.
So, we go to in the [Ink] category and we hide:
1- [Opacity]
2- [Blending mode]
While we put the little eye on:
1- Color mixing
2- Amount of paint
3- Density of paint
4- Color stretch
Now we just go into the [ Brush Shape ] category and we show the option [Brush shape]…
Under the [Brush tip] category you need to show
1- [Hardness]
2- [Brush density]
3- [Adjust brush density by gap]
Under the [Stroke] category you need to show you just need to put the eye on [Blend brush tips with darken]
And under the [Correction] category you need to hide the [Adjust by speed]
With this you’ve finalized your workhorse brush
But how does this work?
HOW THE WORKHORSE BRUSH WORKS
First thing first. Do you see those little icons on the right of the setting?
Those will give you access to the Pen dynamics settings of the option.
Pen dynamics
Pen dynamics will link that option, like [brush size] or [opacity] to one of those four dynamic.
____________________________Pro’s tip:
If used in the [Brush size] option the [Random] dynamic gives you a nice rough inking brush
By the way you will see under all of those options two curves the Pen pressure curve and the Tilt curve dynamic. Those two will let you fine tune how the pen pressure and the tilt dynamic will be registered by CSP.
A simple rundown on how they works it’s this
Pen pressure curve
On the horizontal axis you have the Pen Pressure, on the left less pressure and on the right more pressure. On the vertical axis you have the pressure output.
- Tilt curve
It’s the same as the Pen pressure curve, but with different names. On the horizontal axis you have the angle of the pen, ranging from horizontal (left) to vertical (right), and in the vertical axis you’ve the output
Every time you see one of those 6 icons you can edit the dynamics of that option
Now you know how to fine tune those options, but what those options do?
OPTIONS EXPLAINED
Now technically speaking the first one it’s [Brush size] but it’s pretty much self-explanatory… it changes the size of the brush…
So, let’s start with Color mixing
- Color mixing
This is what enables the blending between colors and it’s divided in:
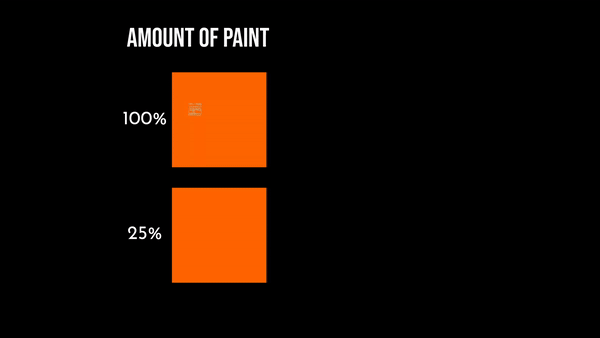
• Amount of paint, the amount of color that will be applied on an already existing color

• Density of paint, how much color will be applied on an empty part of your layer.

• Color stretch, how much your color will go from point A to B

____________________________
- Brush shape
Brush shape will let you apply the brush tips of another brush to your workhorse brush, this means that it will not change the settings you’ve put in the [Tool property] palette.
To save a Brush shape you just select a brush, go into the [Sub Tool details] palette and go to the [Brush Shape] section, and click on [Add to presets] button
This option it’s useful because it will let you change easily between your favorite brushes without changing tool or creating more shortcuts.
- Anti-Aliasing
[Anti-aliasing] and [Hardness] create a soft brush stroke in two different ways.
Anti aliasing have a fixed pixel amount that will be softened, meaning that it’s not linked to the brush size. If you have a big brush size it will seems that anti-aliasing it’s not applied.
While Hardness it’s linked on the brush size giving you always a soft stroke.
____________________________
- Brush Density settings
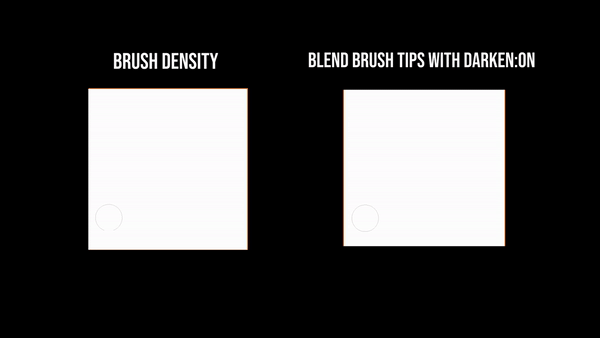
[Brush density] it’s like [Opacity] but applied to the single brush tips. This means that you can put more color on the same stroke just by passing on it again. It’s called flow in other software
But if you experiment a little bit with [Brush density] you will notice that even if you lower the setting it will seems that it’s not effecting the brush, why?
As I said before [Brush density] effect the single brush tips, but what happens when the single tips intersect with each others? It creates a “multiply” effect, wanting to simplify by a lot, creating a more opaque zone in the intersection. If those tips are extremely close with each others, you will have practically a fully opaque color.
[Adjust brush density by gap] removes this behavior. So, if you’ve set the brush density at 25% the intersection of those brush tips will not go over 25% opacity.
While [Blend brush tips with darken], wanting to oversimplify again, while this option is active the [Brush density] will behave like [Opacity], meaning that until you don’t remove the pen and start a new stroke the opacity will not change.

____________________________
- Stabilization
Stabilization just reduce the wobbling of the line while you draw. Keep in mind that it will “slow” the stroke while you draw.

____________________________
With this you’ve a fully functional Workhorse Brush. But there is one last trick, that it’s really helpful if you’re screen it’s small or you’ve trouble using the slider.
As you can see Hardness it’s not a slider, but a series of 5 rectangles that can easily be clicked by your pen
HOW TO MAKE IT TABLET FRIENDLY
Let’s use the [ Brush size ] as an example.
Go to the [ Sub tool details ] palette and click on that little horizontal arrow between the eye icon and the option.
This will will open a menu in which you can edit how the value it’s shown. Click on [ Show indicator ], this will change how you can input the value, giving you those 5 rectangles. If you want back the slider just click on [ Show slider ].
Those 5 rectangles have only one issue, they have fixed values. How can you change them? Under [Show indicator] there is the [Indicator settings] option, clicking on that will open another menu in which you can edit those fixed values.
If you need to input something outside those fixed values you just need to click on that horizontal arrow between the pen dynamics settings and the final rectangle.
And with this you’ve a brush that can carry through 99% of the stuff you will need to make, but there is a caveat.
CONCLUSION
The Workhorse brush it’s something that you can use for more or less everything. Just remember that this is in short a standard circle brush, meaning that it lacks personality. This is more of a training wheel for the digital world, because you don’t need to worry about the tool you’re using.
After I developed myself as an artist and I knew which kind of style I was searching for, I created my own brushes with a more specialized effect in mind, as you can see from my most recent works
You can find them in HD on my artstation account
By the way remembere that you can buy those brushes on Graphixly at this link
Being said that, hope you had a good time following this tutorial and that you will use it to create a lot of good art!


コメント