
Introduction
Hi!
In this tutorial, I'll talk about how to use the File Objects from Clip Studio Paint in a way that can help us to streamline and maintain consistency in our process of drawing rooms, it's a quite useful thing when you have a comic/manga/webtoon with a specific place that appears a lot!
So let's start talking about what are and how File Objects are commonly used!
If you already know how to use them feel free to jump to • How to use File Objects to draw rooms:
• What are and how to use File Objects:
File Objects are .clip files that can be created from layers/folders, using it you can “call” that information to use in another file you’re working on.
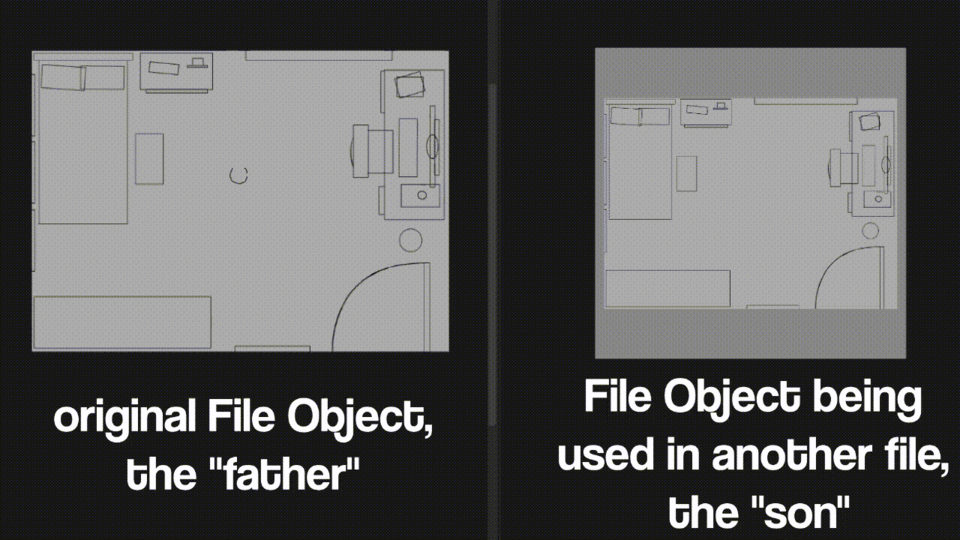
For easy understanding, let’s call the original File Object “father” and the one that you “call” to use in another file “son”.
In the “son” that you have called to use in another project you can only perform nondestructive editings, such as create a mask or transform, using it you will preserve the original content that's in the "father" and have a smaller loss of quality when applying any transformation.
You can still modify the “father” as you wish and the best part of that is that when you modify anything in it the "son" also updates with those modifications!
To create a File Object from something all you need to do is right-click on a layer/folder and select [File Object (X)] > [Convert Layer to File Object…]
In the window that appears you can choose the area of the selected layer/folder that you want to turn into a File Object:
- [Canvas Size] creates a File Object of the layer/folder with the measurements of the whole canvas, it would be all the red area in the example below
- [Drawing Area] creates a File Object of the layer/folder only with the measurements of the drawn area, it would be all the red area in the example below
- [Selection Area] is a third option that appears only when you have a selection made, that option creates a File Object of the layer/folder only with the measurements of the selected area, it would be all the red area in the example below
Use the one that best fits the situation you're in, I generally use the [Drawing Area] or [Selection Area] option because when I want to create a File Object it is from a very specific thing in the canvas and an Object with the size of the whole canvas would be unnecessary.
Below that we have three checkboxes:
- [Copy paper settings] will copy the color of paper that’s the background of the canvas
- [Copy crop mark/default border settings] can only be selected when you are working with a page, if checked it will make the File Object copy the crop marks of the page you’re working
- [Keep original layer] if checked will conserve the original layer/folder and make the File Object a “copy” of that file, I keep this box checked just for precaution
When you click OK in the File Object window you can choose where to save it as a .clip file, preferably save it in a folder properly named and close to the main project file where you'll use it, so you’ll don't lose it among other projects.
Now that we’ve saved the File Object, it will automatically add a File Object "son" in our project, use it without worry!
The original File Object, the "father", is the .clip file that we saved before, it will only suffer the modifications that you do directly in that .clip file

I recommend that you enable the [Bank of Items] window in the Window menu so you can keep track of which File Objects you have added to your project, it will appear near the [Navigator] window

Now that the File Object was added to the file we can manipulate it as we wish!
Selecting the File Object layer with the [Operation] subtool you can see why when we talk about creating patterns in CSP this feature is always mentioned: in the [Tool Property [Object]] we have the option of [Tiling]!

You can tile the canvas using the File Object as a pattern in three forms: Repeat, Reverse or Flip

You can also vary the direction of the Tiling choosing it to be Vertically and Horizontally or only one of them!

If you want to change something in the "father" file and make that reflect in the File Object "son" all you need to do is open the "father" .clip file normally or by right-clicking on the File Object layer and going to [File Object (X)] > [Open file of file object...],

make the necessary changes, save it, and if the File Object "son" open in another project not automatically updates go in their layer, right-click and go in [File Object(X)] > [Update File Object].

Update the File Objects is probably a thing you’ll do a lot so I recommend setting a shortcut to update all the Files Objects at the same time, you can do that by going to [File] > [Shortcut Settings...] > [Menu Commands] > [Layer] > [File Object] > [Update All File Objects]!
I for example defined F1 to be that shortcut.

It's good to remember that the location where the File Object "father" is saved is important!
If you eventually need to move this file you will need to find it and "join” it again to the File Object "son" that was using it as a source, you can do this by clicking on [File Object] > [Change the file of the File Object…] and then reselect the File Object "father" that was moved.
You can also do that to change the source of the File Object to any other file you desire as I did in the example below changing the source of the File Object from the "floor" archive to the "wall 1" archive
And that's how File Objects work and how they are generally used to make patterns in CSP, now I'll explain how you can use them to draw rooms!
• How to use File Objects to draw rooms:
The idea here is to use File Objects as blueprints not only of the ground of the place but for the walls and even the ceiling if necessary!
Think of the room as a cube, each one of the 6 faces will be a File Object that is a blueprint that when put together and in perspective we’re going to use as a reference to project the objects of the room!
I'll explain using as an example a bedroom that I've drawn!
Preparing the blueprints:
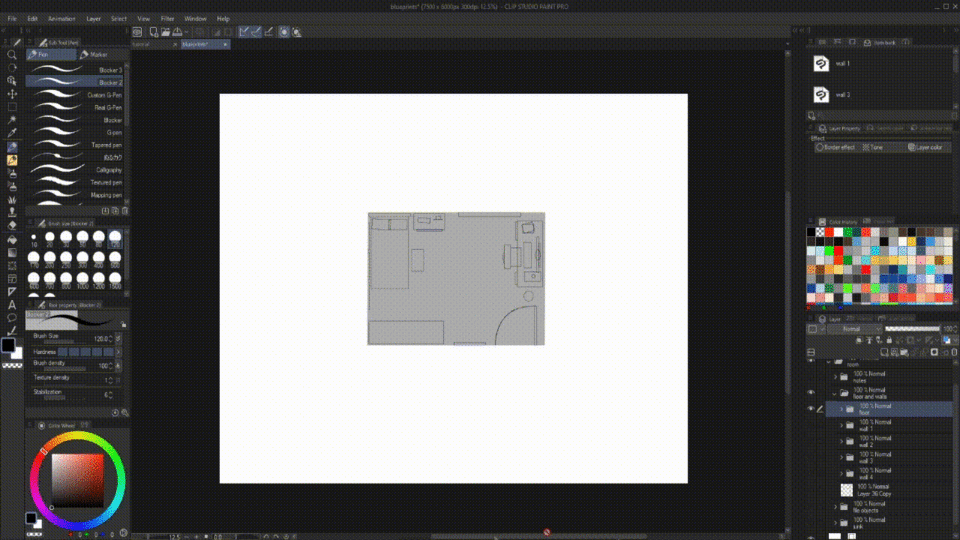
The first thing we need to do is set up an archive with all the blueprints of the room that we are going to draw, it will contain the blueprints for the floor and the walls (in this example I did not found necessary to add one for the ceiling), each one of them will be a separated rectangle in a separated layer.
This file where all the blueprints are together it's important because it's where we're going to align the position of objects and get their proportions in relation to others.
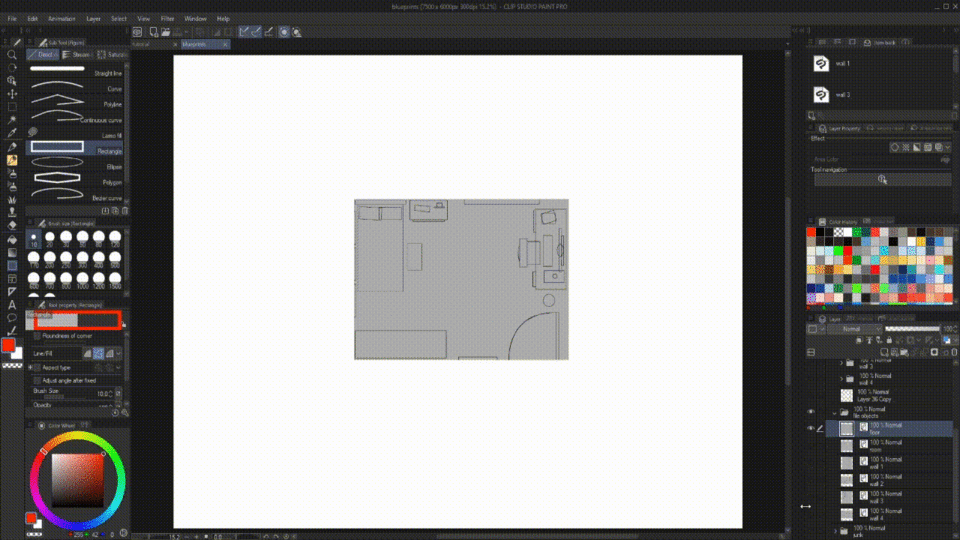
The ideal is first to draw the blueprint of the floor since it is from the position of the furniture on the floor that everything else will be determined.
What we're going to do here is simply draw everything inside the room (everything in separate layers) as if we were seeing it from above,
you can draw the windows and things like mirrors, posters and monitors as simple rectangles like this:
As a normal blueprint it's good to determine how much space the door will occupy when open:
You don't need to add every little detail of the furniture, drawing the objects in the room with basic shapes like rectangles and circles actually will help when we get to the part of putting everything in perspective and drawing from the blueprints!
A thing that I recommend you to do is draw the detailed versions of things in the room that are specific so you’ll have a reference to how to draw them as I did with the computer, the trash can and the bed!
You don't need to be so preoccupied with the proportions for now, leave it for the end when we have all the walls ready then we're going to have points of reference to compare the proportions and placement of everything.
After drawing the floor we are going to the walls.
The walls will be the blueprints that will determine the height and width of the objects closest to them while the blueprint of the ground will help to delimit some of the widths of the objects, look at the example of “wall 1” below:
the closest objects in relation to it are the bed, the wardrobe, and the posters, then these are the items that the “wall 1” will determine the height and width.
Our objective is to do it with all the walls! “wall 2” for example will be a blueprint for the nightstand, the window and the head of the bed and will help to determine the lateral width of it.
After we finish producing the blueprints it's time to turn THE FOLDERS of the floor and all the walls into File Objects. Do as I did in the gif below:
select the folder containing all the things related to the floor and create a File Object of it, save the "father" in someplace, keep that File Object "son" that was created in this file,

repeat the process with each one of the walls, preferentially save all these Files Objects in a folder dedicated to them. From now onward, if you need to do any modifications to the floor/walls, you'll do it in the File Object "father" of the respective floor/wall. The file with all the Files Objects "sons" of the blueprints will serve as a place to compare the blueprints and make changes when necessary.

Using the blueprints:
Now it’s time to use the blueprints that we have made!
The first thing we need to do is set up a Perspective Ruler and then decide in which perspective our scene will be seen, you can find this ruler by going to [Layer] > [Ruler/Frame] > [Create Perspective Ruler], I recommend that you turn on the XZ plane grid going to the [Tool Property] menu:

Now we turn on [Snap to Special Ruler] so we can draw following the perspective of the ruler. What we're going to do is draw a box in perspective to represent the room that we’re going to draw, this will serve as a wireframe to set the blueprints.

After that, we start to bring the File Objects of the floor/walls to that project!
Again let's start with the ground, if you have enabled the Item Bank window just click on the [Register] button in the inferior part and add the File Object of the floor to the project (note that it will make the File Object available in the list and not visible directly in the project, you'll need to drag and drop it in the canvas to it appear),

otherwise you can do that going to [File] > [Import] > [Create File Object...].

Now we’re going to transform the File Object of the floor until it fits in the wireframe that we’ve made, to do that click in the Object layer with the [Operation] subtool and in the [Tool Property [Object]] menu click in [Mode] and change it to Free Transform or Perspective, then transform and put the blueprint on the floor of the wireframe.

Now we just need to repeat the procedure with all the walls!
Some walls will not appear in your final drawing depending on the way you set up the perspective of the scene but you still can position their blueprints in the project to help to determine the height or width of some of the objects in the room as I’ve made with the "wall 1"

Once you've finished placing all the blueprints it’s time to start drawing the furniture!
What we're going to do is use the blueprints as a guide to project the lines of the objects and cross them, that way we'll give three-dimensionality to them!
I recommend starting drawing everything with simple shapes using the [Snap to Special Ruler] as help.

You will notice that depending on how you set up your perspective, the circular objects in the scene may have become too distorted like in the example below with the trash can,
I didn’t find a way of setting up the blueprints without encountering this problem sometimes… well, nothing is perfect and at least there’s an easy thing to fix that using the Elipse in the [Figure] subtool!
Just remember to maintain the [Snap to Especial Ruler] enabled and enable the [Enable Snapping] in the [Sub Tool Detail menu] if it’s disabled, this will make the figures in CSP snap to the active perspective ruler then we can draw above that distorted circular object with the correct perspective!

Aaaaaaand the result of this process was this bedroom!
• Conclusion:
With that method of use of blueprints, you can draw the same room from different perspectives, always keeping the same proportions and placement of the objects in the scene!
I recommend you do that only with important rooms that appear a lot throughout the story since it’s impossible to deny that the part of preparing the blueprints can be pretty laborious, but it will surely pay back later!
And this was my tip, I hope it could help you in some way!
Thank you for your attention and if you have some questions or feedback please leave them in the comments below!
이 게시물에 '좋아요!'를 누른 사용자


댓글