
Presentation
Hello!! Welcome to this new TIPS. Today I am here to describe all the processes, tools, tricks and shortcuts that I use to optimize my workflow and minimize time. These tips will be divided into two large sections, the first will guide all the tips to the workspace and shortcuts, the second will focus on the tools that the program has that will undoubtedly help us save time. I hope these tips help you. Well, without more to say.
Let's get started!!
1. Workspace and shortcuts
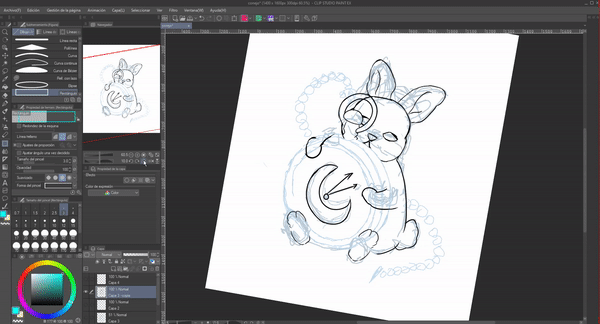
The first tip I can give you so that you have a better flow is to customize the work interface in the way that best suits you, this can be by hiding the windows, moving them or calling them to where the cursor is at that moment. Having an organized workspace with shortcuts not only for tools, but also for windows is certainly a way to save a lot of time. The CLIP STUDIO PAINT interface has the wonderful advantage of being highly modifiable.
The tips in this section are derived from the fact that sometimes it is overwhelming to see so many windows and even on many other occasions we need to have more space to work because our monitor is small or some other particular circumstance, so at these times it is necessary to hide or move the windows so that they do not distract our attention.
► Workspace
The window has this appearance by default; It is divided into six regions, it is worth clarifying that I am not going to explain the functions of these regions now, I will only explain how to modify them. We can have a better workflow by having only the windows that we use the most active. Later we will see how to appear and disappear windows using commands. A clean workspace is an optimal workspace.
• HIDE/UNFOLD WINDOWS
First of all, keep in mind that the windows can be hidden, this allows you to have more space for the canvas. To hide them we will only use the arrows that each window has in the upper left part if it is open or right if it is hidden. You only need to click on them to hide or display.
There is a shortcut to hide all windows, this will leave the workspace completely free. To access this function you must go to: Window > Hide all palettes or press the TAP key on the keyboard. To appear them again you must click on this function again or press the TAP key once again.
• MOVE WINDOWS
As I said before, the working environment of CLIP STUDIO PAINT is highly customizable, we can move the windows along the screen and dock them somewhere on the right, left, top or bottom peripheries of the screen. You simply have to drag the window from the top (where the name is) to the desired location. Windows can be left alone, floating on the screen, docked to an existing palette, or create a new palette from this window. To drag it out of its usual area you have to hold down a click to the side where you want the window; A red section will appear when the window can be docked to other palettes.
One more thing we can do is resize the windows by dragging them from the edges as seen in the GIF.

We can also move the window icons and the brushes. In this case I moved the icons in the tools window, placing the icons in order of priority, in the central part the tools that I use most frequently and in the periphery those of least use. We can also move the tool window to any other part and even change its size.
• CLOSE/OPEN WINDOWS
To close any window we will have to click on the three lines that are in each window in the upper left part. When you click, a series of options will appear that vary depending on the window, but in all of them there is the option to "Hide".
In the title bar there is the "Window" option where we can find all the CLIP STUDIO PAINT windows, such as the color circle, here we can open and close the windows we need and even bars such as the command bar.
Likewise, in the "View" section we can appear or disappear functions, tools such as scroll bars or floating menus of functions such as transform, text, rulers, grids, etc.
► Auto save
Many may know it and many may not; When I didn't know about it, I lost many jobs on occasions when the power went out or my computer restarted out of nowhere. It is for this reason that I explain it. It may be something very simple, but it is very useful, it prevents us from losing our illustrations for not having remembered to save them and with them all the time spent.
The automatic save option is located in the title bar, in the path: File > Preferences.
When you enter preferences, this window will appear. Inside it we will go to the "File" section, here we will find the saving options, in the first section "Automatic restoration" you will find the option to "Save file automatically every", there we can change the time in minutes between each save that the program performed automatically. Now we can have a backup in case an incident occurs.
► Command bar
The command bar is located at the top, we can also modify this; Add features and tools. In the bar we can create groups to store tools or colors. Customizing it allows you to have closer access to the tools, reducing unnecessary mobility on the screen.
• ELIMINATE
To delete a tool from the command bar we have to right click on it, a menu will be displayed where we will find the delete option.
• ADD
To add a function we will go to: File > Command Bar Adjustment. The following window will be displayed where we will find the program's tools and functions. We will choose the one we want, we will click add. In my case, I use the Gaussian blur tool a lot, the fisheye effect, among others, so I will add them to the command bar to later group them and make it easier for me to access them.
• GROUP
By default, to be able to move the bar icons you have to press the CTRL key while dragging them; This is as a security mode so as not to move them carelessly, to simply move them with the cursor we will first have to right click on the bar, a menu will appear where we will find the option "Change order" there we will change the option to "Drag" .
Now, to group the functions we simply drag the icons one over the other, consecutively with as many as desired.
To locate the tools easier to see and not lose them amidst the gray icon, we can change their color. To achieve this we will have to right click on the icon to modify, once the drop-down menu appears we will choose the option "Icon adjustment", a window will appear where we can modify the image, but in our case we will enable the box that is located At the end, once this is done we will click on the black rectangle where we can choose the color we want.
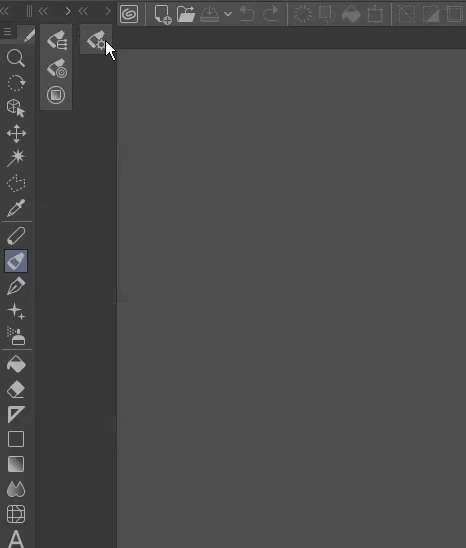
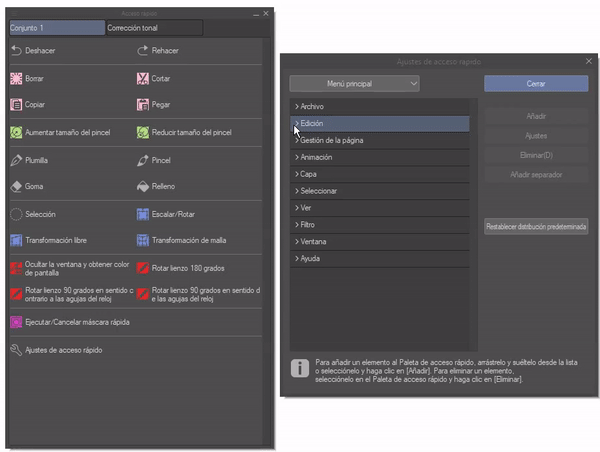
► Quick access palette
Another super important tool that can help save time due to its practicality by housing the functions we need most is the quick access palette. This palette is located in the drop-down bar on the right, its icon is a circle crossed by an arrow. We can also access it through the following path: Window > Quick Access.
By default, some tools are established within the first set, but we can eliminate them or create a new set to our liking.
To eliminate a tool from this window we only need to right click on it, a menu will appear where we will find the delete option. To add we will only have to drag the tool to the quick access.
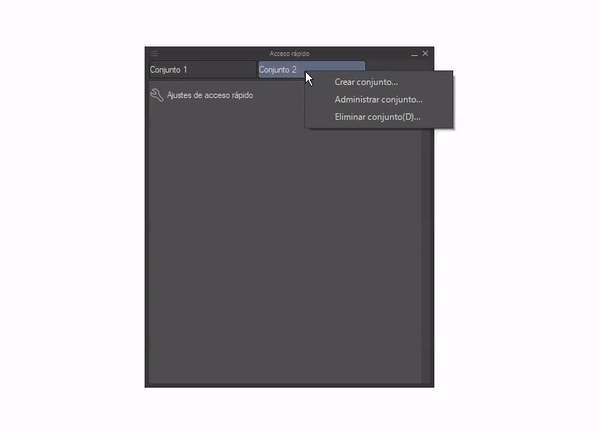
We can create as many sets as we want. By default, "Set 2" is empty. To create a new set you have to right click on the top bar, a menu will appear where you will find the option "Create set", we can also delete complete sets in this menu.
The "Quick Access Settings" option allows you to add and delete, but above all here we can add tools that cannot be added simply by dragging them, such as colors or border functions; I am a person who changes the canvas size a lot while drawing, this is why it is an essential function for me, but it is not a function that I can simply drag to the quick access window, that is why I need to find it and add it through the " Quick access settings". In addition, as in the command bar, we can set a color for the icons, the procedure for this and the options are the same.
► Pop-ups
The best tool so far must undoubtedly be this one, the pop-up windows feature allows you to invoke windows anywhere on the canvas where the pointer is located; This is certainly useful, right? Plus, it makes you look more professional. With this we can hide all the windows and invoke them without having to open them.
To set the pop-up mode window commands, we will open: File > Shortcut Settings > Category: Pop-Up Windows.
The way to establish the shortcut is to click on the desired command, the edit shortcut option will be activated, we will click, then we will press the keys on the keyboard that we want to establish for this window. In my case all pop-up windows have this configuration, I use "Alt plus a letter", this allows me not to get confused with any other command.
With this function we can hide all the windows, leaving the space one hundred percent free for the canvas and only calling the windows that we need, such as the quick access window to use a tool that we have added there, the brushes, the circle of color when we need to change color or call the layer window when we need it. Wonderful without a doubt.
NOTE: You do not need to press the shortcut again to close the window, clicking outside of it makes the window disappear automatically.

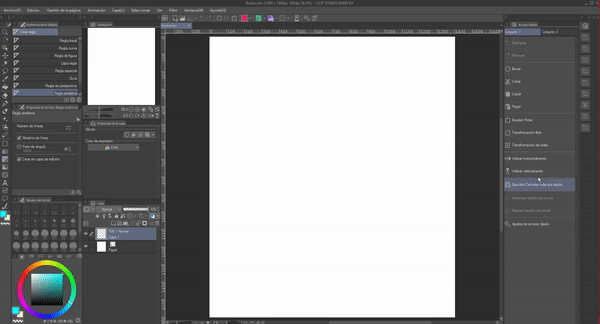
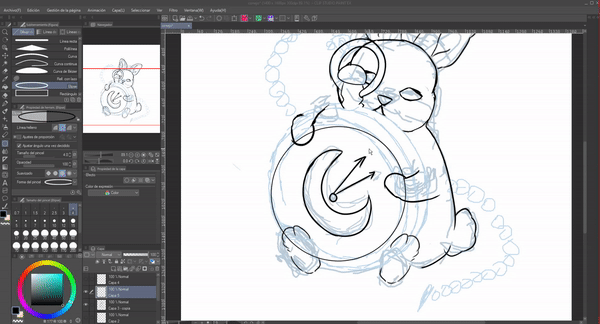
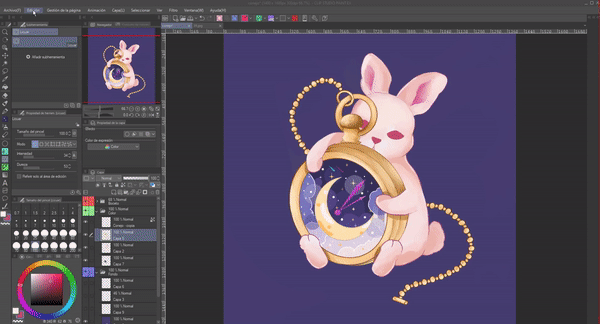
My personal workspace is as follows. As you can see, I only keep the left palettes active, I hide the right palettes when I don't use them; This is why I moved the most essential from the right panel to the left (for me the most essential is the Layer window and the navigator).
When I need some function within the title bar dropdown menus, I turn to the command bar. Also when I need to have all my attention on the illustration, I hide all the palettes and when I need them I invoke a window using the shortcuts. This space minimizes my anxiety about order, allowing me to have more space for the canvas.
► Keyboard shortcuts
The functions, tools and windows of the program have by default keyboard shortcuts that allow them to be accessed in an extremely easy way, so we can have one hand to use the tools while we draw with the other; This provides a lot of speed, therefore, we save time.
• DEFAULT SHORTCUT
When you place the pointer over a tool or display the different menus, the name and default keyboard shortcut of that function or tool appear. This works like this throughout the program. For example, if we place the pointer over the eyedropper we can see that its shortcut is the letter "L".
All default shortcuts for tools and functions can be found in the program's instruction manual. I leave you the link to the manual in the shortcuts part below:
• SET SHORTCUT
If it happens that you don't like them or they are not convenient, you can always configure the default shortcuts so that they are accessible to your preference; This way you can change the shortcuts of the tools you use most frequently to keys close to your hand.
To edit the shortcuts we will have to go to the title bar to the section: File > Shortcut Settings.
The following window will appear where the options are divided into five categories: Main Menu, Pop-up Palettes, Options, Tools and Automatic Actions. Each category has subcategories where you can change the shortcuts.
The process for changing shortcuts is done the same for any tool. First we must locate the tool for which we want to change the shortcut, in my case for this example I will use the "Reduce" and "Enlarge" functions of the canvas. Next we will select the command, with this the "Edit shortcut" option will be enabled, which we will click on.
Now we can indicate which key we want for the command. For these functions I will use the "X plus mouse" keys for both. To use the mouse in shortcuts you don't need to do anything particularly, just set the key. As it is a reduce and enlarge function, all you have to do is press the key, in this case the "x" while at the same time moving the mouse wheel forward or backward to be able to see the effect of these two keys in action.
A message may appear when changing a shortcut indicating that that key is already being used for another command, here you can choose whether to keep the old one or change it, if you want to change click on "yes(y)".
This way we can customize the entire keyboard so we don't have to move the cursor all over the screen, saving us valuable time.
• ADVICE
As a last point, I will advise you that when establishing keyboard shortcuts you do so taking into account the proximity of the keys to each other and of course also the ease of accessing them with your hand.
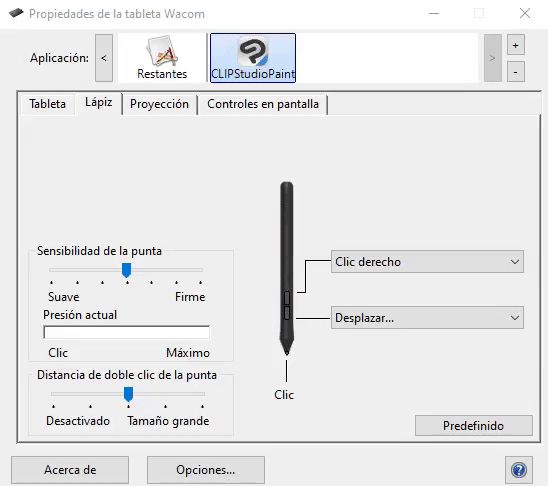
► Shortcuts with graphic tablet
We can also modify the buttons that our graphics tablet usually has using shortcuts to make the drawing process much easier; In this way we can maximize our productivity by being able to use shortcuts with both hands.
Putting shortcuts on the buttons is easy, first we will access the tablet properties. On some tablets, depending on the model, one or two things may change, but essentially the process is the same.
Once the shortcuts have been established within the CLIP STUDIO PAINT application as explained before, now we must put the same shortcuts within the tablet properties, for that we will access the drop-down menu of one of the buttons, at least in this case, On other tablets it may be a little different. Various predetermined actions will appear for the key to fulfill that function, but in our case we will go to the "Keypress" option, this will allow you to indicate any shortcut to the button.
A window will appear where we can set the key configuration. In my case I am going to put the shortcut "Ctrl plus T" which corresponds to the shortcut that I have established in CLIP STUDIO PAINT to use the transform function.
To write the command in the properties version window of my tablet I only have to press the keys that I want to be written, this means that I will place the cursor in the "Keys" section and then press the "Ctrl" key and "T", this will automatically write the command in the window. At the bottom I have an option that allows me to write a name, there I will write the name of the command so I can easily identify it. Now all that remains is to accept so that the changes are saved.
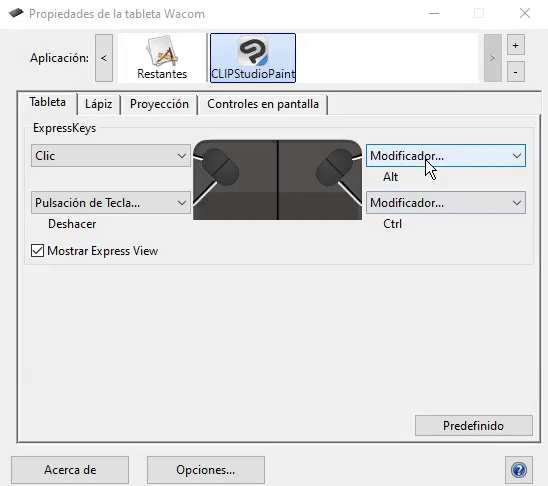
This same process works for any command that we want to establish on our tablet. I have the functions that I have on the four available buttons set with mechanical functions that I use most frequently: Lasso, rotate, transform and rectangle.
We can do the same with the pencil buttons. On my pencil I have two buttons, one that I use for the eyedropper (L) and the other to decrease or increase the size of the brush (AltCtrl). In this case Alt and Ctrl are special features that cannot be set on their own, keypress does not allow it, but the "Modifier" option allows you to add these two special keys, you just have to check the box for that key, In the GIF you can see the window for this function.
2. Tricks to save time (Program Features)
The program, in addition to having a highly modifiable interface, has various functions that allow us to save time by incorporating them into our creation process. Below I will present the ones that I always use, they save me time, they help me be faster. Each tip will cover a different tool.
► Automatic actions
We will start with a tool that is easy to apply and is undoubtedly the most efficient of all, it has the ability to save us an enormous amount of time. Automatic actions are processes that the program records that you can later reproduce, this way you will no longer have to do a series of processes, every time you want, for example, to create several layers, layers that you always use with their respective names, you will only have to do it once and the program will do them the rest of the times.
To find the window you must access the following path: Window > Automatic Action. The window in question is the following.
Some actions come by default, but let's now see how we can create our own.
• ELIMINATE
Let's start with the destruction, to eliminate an action that we no longer want we will only have to right click on it, a menu will be displayed where we will have the option to delete (as you can see, the way to delete is the same throughout the program).
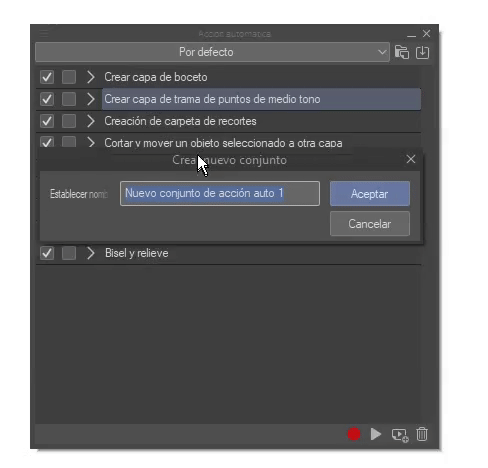
• CREATE NEW SET
On one side of the top bar we have a folder-shaped option that allows you to create a new set. Generating a new set allows us to have order; Suppose that in a set we want to have all the actions for illustrations, another for webcomic, another for animation, etc. This way we can have everything separated so as not to get confused.
Once you click on a folder icon, a window will appear where we will indicate the name of the new set.
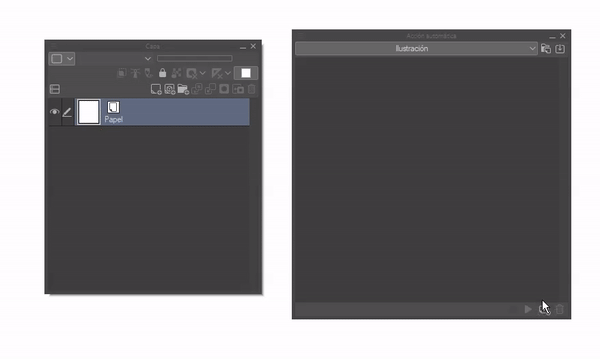
• ADD AUTOMATIC ACTION
At the bottom of the window we have four options: Start Auto Action Record, Start Play Action, Add New Action, and Delete Action. We will click on "Add new action".
Note: If it is a new set, a blank action will automatically appear along with the creation of the set.
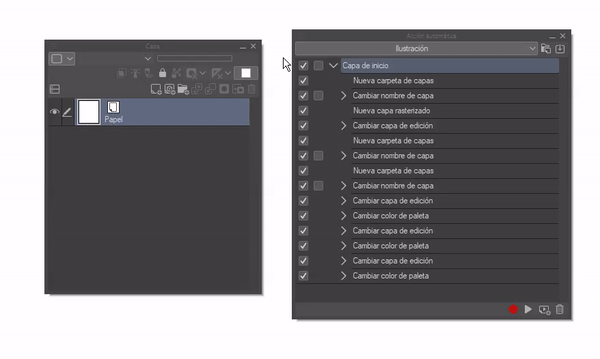
• RECORD AUTOMATIC ACTION
To start recording we will click on the red circle at the bottom of the window. Once this is done we will begin doing the action that we want to record; I will create a series of layers and folders that I always generate when I start an illustration, I will give them the name and colors with which I identify each folder. To finish the recording we will click on the red box at the end of the window.
• PLAY AUTOMATIC ACTIONS
To play an action, simply select it and click on the Play symbol at the bottom of the window. We can reproduce an action as many times as we want.
► Rotate, zoom in, zoom out and invert canvas
Other important tools are those that have control over the canvas, in this case rotate, increase, decrease and invert. These tools work just like we would normally do when drawing in a traditional way in that we constantly move the paper to find a comfortable way to draw. These functions are located under the "Browser" window.
Shortcuts can also be set for these functions to facilitate their use. I strongly advise you to establish shortcuts because their practicality comes from them, using these essential movement functions with shortcuts is what will save valuable time.
NOTE: As you can see, some functions on their icons have some color, this is because they are the same functions that you added to the command bar, to which the previous color changed.
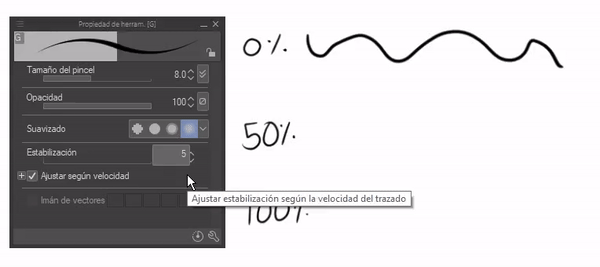
► Stabilization
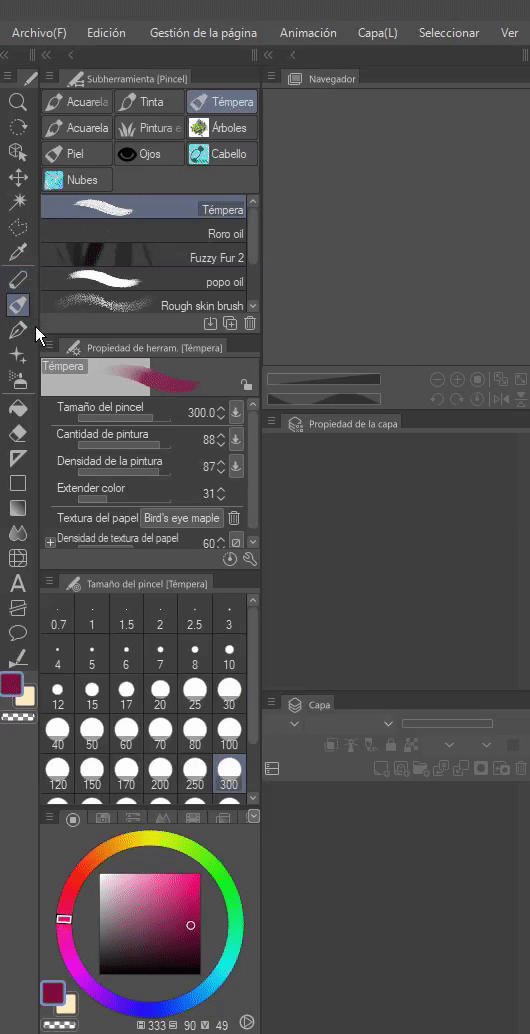
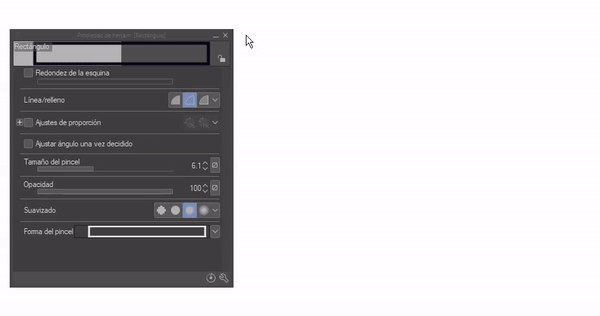
It usually happens that at first our stroke is shaky or in other circumstances for some health reason our hands are not in their most optimal state so when drawing it is very difficult to make constant strokes. The stability function allows you to make firm lines regardless of our conditions. We can find this function in the brush properties.
Stability is counted on a bar from 0 to 100, with zero being zero and one hundred being a very slow and firm line. When drawing with greater stabilization, strokes feel slower.
► Figure
Making a perfect circle, triangle, rectangle or any other figure by hand would be very complicated, but this difficulty is why this function exists. With this tool we can create any figure.
NOTE: To generate a symmetrical figure, such as a circle, it is created by clicking and holding on the place you want to draw while pressing the SHIFT key.
All tools have properties that add more practicality. For example, we can create a filled figure, the proportions, opacity, softener or the shape of the brush, in the latter case we have the option to change the shape of the line with which the figure is created, normally it is a straight line, but if we have a brush that draws a musical staff, it will change the line to that staff.
The line, polyline, curve, continuous curve, and Bézier curve options have similar options to geometric shapes.
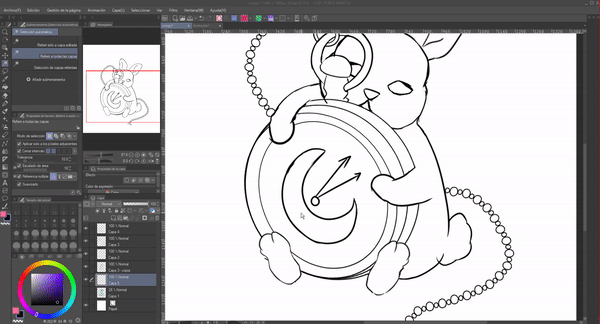
► Automatic selection and selection
The advantage that this tool offers lies in the fact that it is faster to select an object to transform it instead of doing the laborious process of erasing and redrawing or selecting it to add the direct color from the paint can. There are two types of selection: manual and automatic.
• SELECTION
The select tool allows, precisely, as its name indicates, to select a part of the illustration in order to transform it or to be able to paint over that part without damaging the rest of the illustration. There are five ways to select, these are: ellipse, rectangle, lasso, polyline and selection pencil, with respect to the latter, there is an eraser to erase the selection made with that tool.
• AUTOMATIC SELECTION
The real magic of selection is found in automatic selection, since this tool allows you to select an area, this area has to meet the condition of being closed. We can select several different sections, for them we have to click with the tool on the desired part, then for the other selections we have to press the SHIFT key while we select the sections with the cursor.
In case the automatic selection ignores an area, we can always add it using the SHIFT key while using the selection pencil.
Both manual selection and automatic selection have the same functions; we can access them in the bar that appears at the bottom of the selection. If this bar does not appear or you want to remove it, you can find it in the top bar in the View > Floating selection menu section.
NOTE: As you can see, some functions on their icons have some color, this is because they are the same functions that you added to the command bar, to which the previous color changed.
Starting from left to right the functions are: Deselect, crop, invert selected area, expand selection area, reduce selected area, delete, delete area outside the selected area, cut and paste, copy and paste, scale/crop, new plot and floating selection menu setting.
► Transform
There are different transform options, but the most important ones for now are simple "Transform" and "Free Transform".
Simple transform only reduces/increases the size of the selection or changes its location. To use this function you must first select the part to modify, then press the "Ctrl plus T" keys or access the following path: Edit > Transform > Scale/Rotate.
The free transformation, on the other hand, allows us to change the perspective of the object in order to couple it with the general perspective, we can access it by pressing the "CtrlT" keys, then we will right click inside the bounding box of the transformation, in this way it will appear a menu where we will find the option "Free Transformation" or also accessing the following path: Edit > Transform > Free Transformation.
These tools come in handy when correcting small defects in scale, rotation or perspective, because this way we can correct it without the need to erase and redraw.
► Symmetry rule
The symmetry rule allows us to automatically draw the opposite of what we draw, for example, if we draw a right eye, another identical one is reflected on the left side. Anything drawn on one side of the ruler line will be symmetrically reflected on the opposite side. This tool kills two birds with the same shot because it reduces time and makes things more symmetrical.
We can find this tool in the toolbar, exactly in the ruler subtools.
► Blend
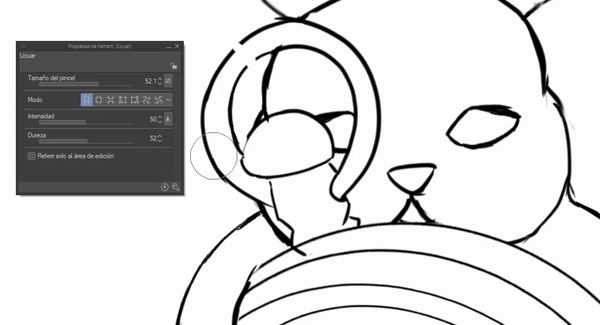
The liquefy tool allows you to make corrections, that means it allows you to modify the shape of the area where we use it. Mostly, it is a tool that works well when making the lineart or when finishing the illustration, using it to give final checks without damaging it.
Liquify is located in the toolbar.
In the properties of the tool we can find five sections that will be used to choose: size, mode, intensity, hardness and reference to the editing area.
On the one hand, intensity allows you to change the magnitude of the correction. When the intensity is weak, the correction is smaller and vice versa, when the intensity is strong, the correction is larger. Now, in the case of hardness, the lower its value, the modification is concentrated in the center of the brush.
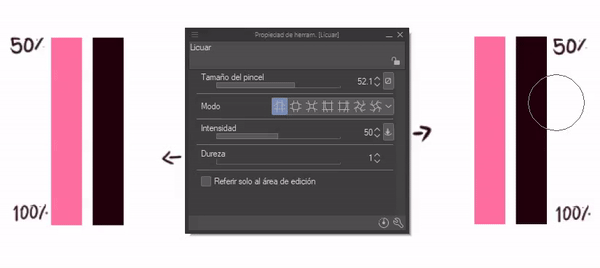
The tool has seven modes which are: Push, Increase, Shrink, Push Left, Push Right, Rotate Right and Rotate Left. With these modes we can edit the illustration without the need to delete anything, especially if we have already finished it, we just want to correct it.
This way we can change the position, the size of some parts of the illustration.
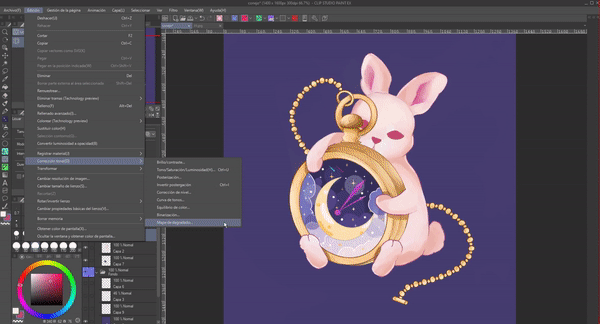
► Tonal correction
As a last tip, I recommend using the different tonal corrections, these allow you to change the brightness, contrast, color levels and even add gradient maps. These functions save time because they help you change different color values without the need to manually recolor with other values.
The way I use them is the following, first, at the end of the inking the colors are very opaque, so I use the "Brightness and contrast" function. If for some reason the colors do not convince me, I change them with the "Hue/Saturation/Lightness" function, or if I want to try colors with other shades, I test with the gradient maps. These three are the ones I use the most, so they will be the ones I present to you next.
These functions can be found by accessing the following path: Edit > Tonal Correction, when you click, a menu will be displayed where you will find all the functions.
• BRIGHTNESS AND CONTRAST
As its name says, it changes the brightness and saturation values, making the image brighter or darker, highlighting the lights or shadows. To apply it, we first have to be on the layer where we want to apply it, now all that remains is to open the function; A box will appear where we can change the values. On the right side there is a box that will allow us to see a preview of the effect without having to accept.
I turn to this feature when I want to highlight highlights and shadows because I feel like the coloring is dead.

• HUE/SATURATION/LUMINOSITY
As in the previous one, this tool, as its name indicates, allows you to change the tone, saturation and luminosity. This would translate as allowing you to change the color, and to change the saturation and/or luminosity values of the original colors, or those modified with this same tool in the first tone section.
• GRADIENT MAP
Gradient maps allow you to change the colors of an image using a gradient. This means that through mapping the tool replaces colors with their values within a tonal range, what we know as the grayscale range.
We can have a grayscale illustration and this tool will allow it to color.
We can create the gradient maps ourselves or download them from the program store. Below is another tutorial with more information about it.
Farewell
I'm sorry it was so long, but there was so much to say, it would be disrespectful not to.
I hope that what you see in this tutorial is to your liking. I hope it helps. Well, without anything to say, thank you for coming this far! ପ(๑•̀ुᴗ•̀ु) ॣ৳৸ᵃᵑᵏ Ꮍ৹੫ᵎ ॣ
Vibrate high!!! We won't see you another time ( •⌄• ू ) ✧
Users who liked this post


Comment