
A Quick & Easy Guide by Manny Guevarra
What Are Vector Layers?
Vector Layers are one of the most powerful tools in Clip Studio Paint, helpful for everything from line art to flat illustrations! Using Vector Layers allows you to correct and edit lines that you have already drawn, scale images up and down without losing line quality, and much more! However, they can seem a little complicated and overwhelming at first.
In this tutorial, you will learn everything you need to know to get you started working with Vector Layers! We will be discussing how to manipulate objects on Vector Layers, correct line art, and use the Vector eraser - all in under 10 minutes! For a YouTube version of this tutorial, check out the video below:
⬇⬇⬇
How To Create a Vector Layer
Let's start off by creating a Vector Layer to play around in! To do this, simply navigate to the [Layer] menu > [New Layer] > [Vector layer...]. You can also do this by selecting the [New vector layer] icon above your Layers as shown below:
When you have successfully created a Vector Layer, it will appear in the [Layer] menu as depicted below, demarcated by a cube icon:
Anything you draw on this layer will now become a Vector Object that can easily be manipulated in post using the [Operation] and [Correct line] tools, as well as the [Vector eraser] subtool.

Why Use Vector Layers?
▶ Objects drawn on Vector Layers do not lose quality when resized or otherwise transformed. When an object is scaled up or down on a Raster Layer, it will pixelate; when the same object is drawn on a Vector Layer and scaled, it will maintain its line quality, as shown below:
This property alone makes Vector Layers the obvious choice for creating assets such as logos, line art for comics and illustrations, and even flat illustrations.
▶ Additionally, Vector Objects can be easily duplicated on the same layer using (Ctrl+C) > (Ctrl+V) when selected with the [Operation] tool, which we will discuss in detail in the next section:
This makes Vector Layers a handy tool for creating repeating patterns and other fun graphics!
▶ Finally, as discussed above, objects drawn on Vector Layers can be easily manipulated using the: ① [Operation] tool, ② [Correct line] tool, and ③ [Vector eraser] subtool. These features allow you to correct, improve, modify, duplicate, and easily erase anything you draw - even after you've drawn it!
Let's discuss what each of these does and how to use it!
① Using The [Operation] Tool
The [Operation] tool allows you to adjust the color, brush size, brush shape, and path of objects on a Vector Layer. To use the [Operation] tool, press (O) on your keyboard, or select the following icon from your toolbar:
After selecting the [Operation] tool, you can edit the Main Color, Brush Size, and even Brush Shape of all objects on the current Vector Layer using the [Tool property: Object] menu.
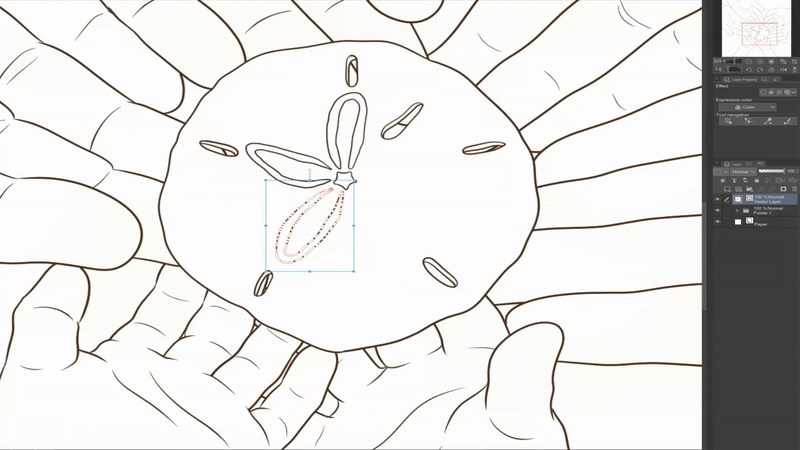
You can also transform Vector objects directly by selecting them with the [Object] subtool. This will allow you to manipulate the blue Bounding Box surrounding the selected object and the white Control Points generated along the red line path.

▶ TIP: You can select multiple Vector Objects at once by navigating to the [Tool property: Object] menu > [Operation of transparent part] dropdown and selecting [Select area by dragging]. After selecting this checkbox, simply click and drag your cursor across the screen to select your desired objects(s) that can then be manipulated as described above.
Control Points will automatically be generated when you draw an object on a Vector Layer. However, you can also add (and delete!) Control Points by simply right-clicking at any point along the Line Path and selecting [Add control point] or [Delete control point(V)].
Control Points are essentially articulated joints that can be maneuvered independently of each other, allowing you maximum control of each section of your lines.
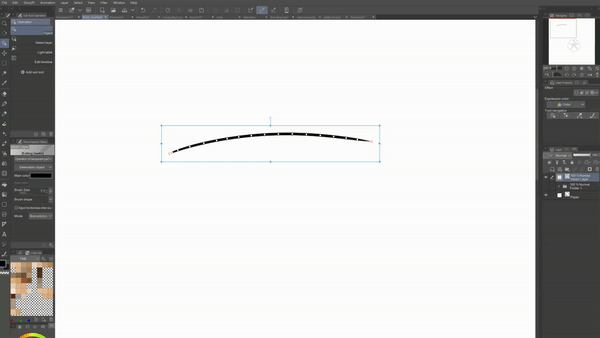
② Using The [Correct line] Tool
Control Points can also be manipulated using the [Correct line] tool. This tool also enables you to: ❷ pinch, ❸ simplify, ❹ connect, ❺ resize, and even ❻ redraw Vector Lines. To use it, press (Y) on your keyboard, or select the following icon from your toolbar:
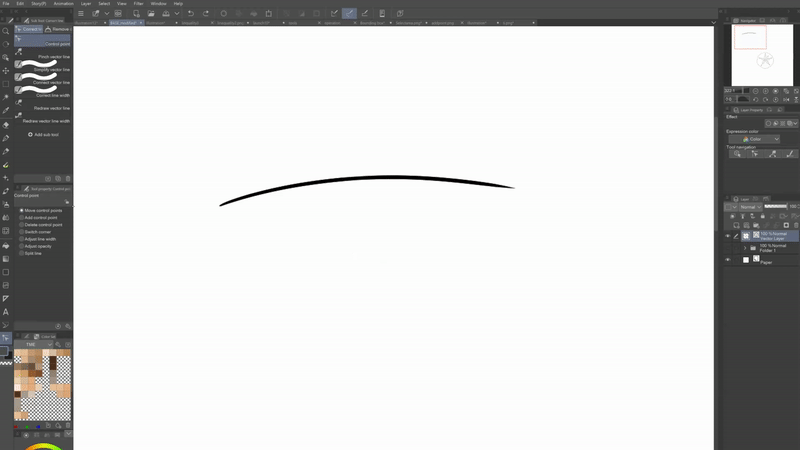
❶ For more options when manipulating Control Points, navigate to the [Correct line(Y)] tool > [Control point] subtool > [Tool property: Control point] menu. This will allow you to move, add, and delete control points, as well as utilize the following functions:
❷ Use the [Pinch vector line] subtool to "pinch" or warp lines within a selected area by tracing over the area with your brush:

❸ Use the [Simplify vector line] subtool to smooth out line paths by tracing over them with your brush:

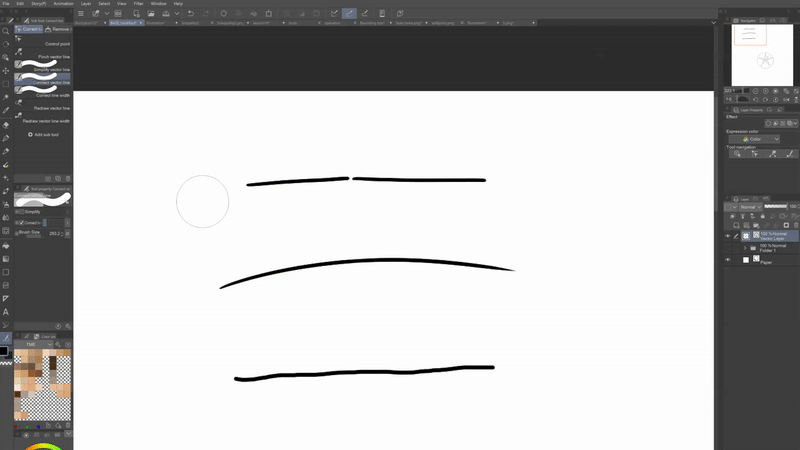
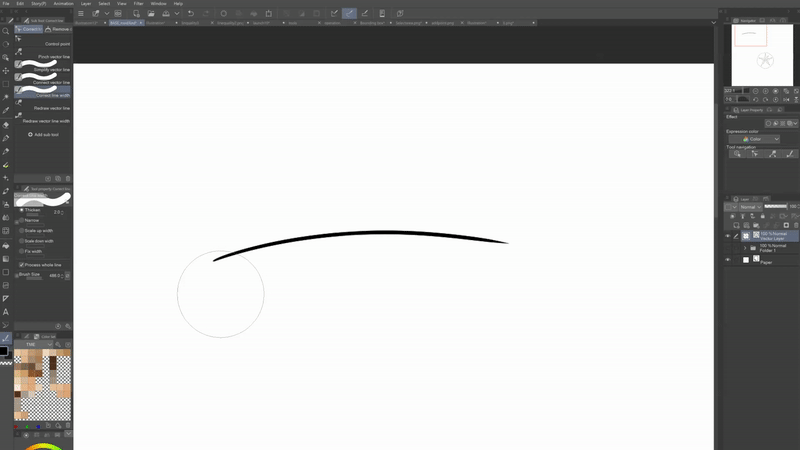
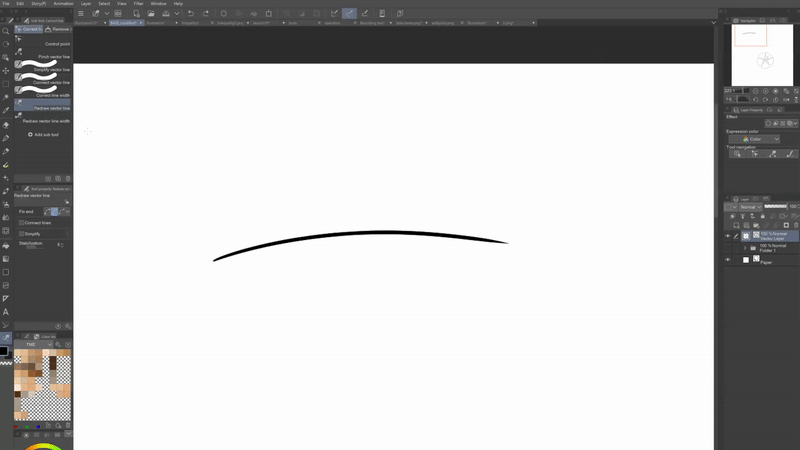
❹ Use the [Connect vector line] subtool to create a connecting Line Path between two lines:
❺ Use the [Correct line width] subtool to scale the line width of any area you select with your brush. If you would like to scale the entire line rather than a portion of it, select the [Process whole line] checkbox.
❻ The [Redraw vector line] subtool allows you to trace over the line you drew and reshape the Line Path, creating new Control Points along the way.
❼ Finally, the [Redraw vector line width] subtool also allows you to change your line by retracing it. In this case, it will retain the same Line Path, but will change the Brush Size of the line:

③ Using The [Vector eraser] Subtool
The [Vector eraser] subtool allows you to target and easily clean up portions of Vector lines. To access it, simply navigate to the [Eraser] tool > [Vector eraser].
Once the [Vector eraser] subtool is selected, navigate to the [Tool property: Vector] menu below. You can then choose which portion(s) of your selected line you would like to erase by selecting between three options:
❶ The first option will only erase the portion of the line you trace over with your cursor.
❷ The second option erases whichever Vector line you trace over, up until its intersection with another Vector line. I typically have my eraser set to this option.
❸ The third option will allow you to delete the entire Line Path of the selected Vector line.

▶ TIP: The ❷ [Erase up to intersection] option is perfect for cleaning up line art throughout the illustration process. This allows a margin for you to overshoot your lines by following through with your strokes, which is a motion that can make for much cleaner and more natural-looking line quality.
Putting It All Together
As you can see, Vector Layers open up a whole new realm of possibilities when it comes to lining your art. After reading this, I hope you are excited to try them out! As a recap, here are the top 3 tools I would recommend using for adjusting Vector Objects and where to find them:
And that's a wrap! I hope these tips were easy to follow and helpful for you. Using Vector Layers has really helped me level up my line art game and streamline my workflow when drawing comics or illustrations, and I hope they do the same for you!
If you would like to see how to use Vector Layers when making comics, feel free to check out my WEBTOON tutorial below!
⬇⬇⬇
And here is my WEBTOON!
⬇⬇⬇
Thank you so much for reading this tutorial. If this was helpful to you, please consider leaving it a ❤ or a ⭐. Thank you again and have a great day!
Users who liked this post


Comment