
[1] IMPORTING AUDIO
To import an audio file in click: File > Import > Audio
Audios can only be imported in animation projects
Supported formats: MP3, WAV, OGG
The audio is imported above the selected layer and will start at the current frame in the timeline.
If an audio layer is selected when importing a new audio, the next one will
be imported after the last frame in the previous one. To import into a new layer, you must select a different layer.
[2] CONTROLLING AND EDITING YOUR AUDIO
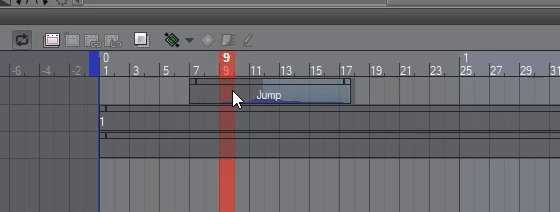
- Clicking and Dragging at the top of the audio bar, it is possible to change its position.
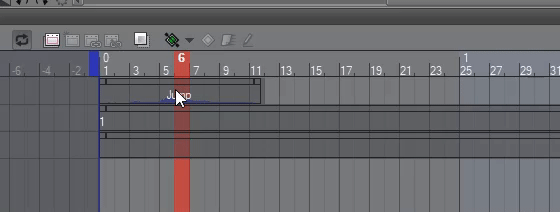
- By dragging the beginning or the end, we can change its duration.
Clicking with the right button we have the following options:
Import audio file... - Imports a new audio after the selected one
Delete - Delete the audio
Cut - Cut the audio
Copy - Copy the audio
Paste - Paste the audio
Add key - Add a keyframe to animate the volume control
Switch keyframe to hold interpolation - Changes the interpolation to hold, keeps the value until the next keyframe.
Switch keyframe to linear interpolation - Changes interpolation to linear, maintains linear growth between keyframes
Switch keyframe to smooth interpolation - Changes the interpolation to smooth, smoothing the transition between keyframes at the beginning and end.
Delete all keyframes - Delete all volume keyframes
Merge clips - Merges the selected audios (in most cases it only deletes the audios leaving only the first one).
Split clip - Splits the audios in the currently selected frame.
Set as first displayed frame - Marks the selected frame as the first
Set as last displayed frame - Marks the selected frame as the last
Insert frame... - Add frames from the selected moment
Delete frame... - Removes frames from the selected moment
Volume control with Operation Tool, Object
Start time - Slider that controls the duration of the audio by the time it will start.
Volume - Slider for the audio volume level. Its value can be controlled from 0 to 100 related to the value of 0 for muted and 100 its volume in 100% different from the original audio volume.
[3] ORGANIZATION AND WORKFLOW
The organization of a sound layer works in a similar way to video editors, being able to rename, adjust the order or put in folders. This process can be done in the Timeline or Layer window.
Double click on the sound layer to rename
Clicking and Dragging to change the order
Holding Ctrl to click and select several at the same time
Holding the Shift to select everyone between the first and the last clicked
I have several selected, click with the right button and go to the option “Create a folder and insert layer” to group everyone in one folder
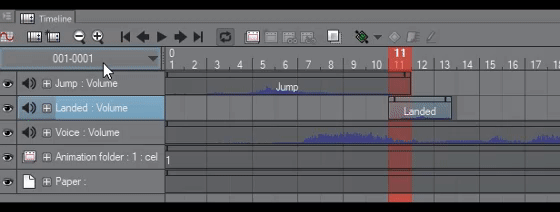
When working with many layers it is always recommended to organize by naming them, creating folders and subfolders. For example SFX, Voice, Music, etc.
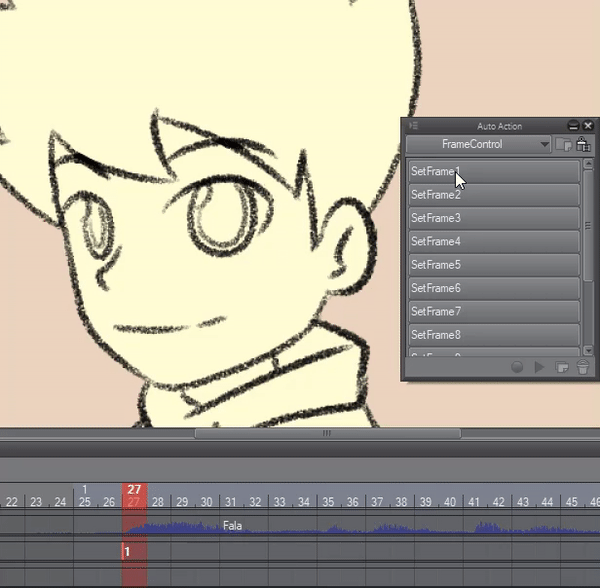
Creating lip-sync, using auto actions with shortcuts is an excellent way to speedup the process.
If you have any problems while viewing the audio, try changing the Playback to “Play in real time” or between “Prefer speed” and “Prefer quality”.
If the problem persists, try changing the audio file to another format.
[4] EXPORTING WITH AUDIO
To export a animation with audio go to File > Export Animation > Movie...
Select the folder to output, name of the file and type file MP4 or AVI.
Then select the audio settings you want and hit OK.
I hope this tutorial has helped you, thanks for the support! :D
この投稿を「いいね!」したユーザー


コメント