Every Figure Tool Explained!! Sample Applications and Tips!
Have you ever struggled to create perfect shapes, speed lines, lines for emphasis, form shadows, hatching? Or maybe you've just wanted to learn how to use the lasso fill tool effectively?
In this video and tutorial, I'm going to teach you how to use the figure subtool to draw and fill perfect shapes, add form shadows, hatching, smears, effects, and more.
This video will be divided into 4 chapters.
In chapter 1 we'll go through all the basics of using the default figures in the figure subtools palette. If you're feeling confident enough, feel free to skip ahead, where I'll be sharing how I tweak the figure tools settings to get effects like what you see here.
In chapter 2, I'll share with you some very awesome techniques to supercharge how you use the figure tools. This includes understanding curves, objects, and special layers.
In chapter 3, I'll discuss the other two types of figure tools, which are the speed lines and focus lines, otherwise known in Clip Studio paint as, stream line and Saturated Line.
In chapter 4, I'll go through some applications and ways to use these tools in your illustrations. And how to make the most out of Clip Studio Paint's Figure tools.
And as a bonus, I'll break down how I used the figure tools in image in the thumbnail.
Let's get started.
Chapter 1 The Basic Default Direct Draw Tools:
Direct Draw Tools
The direct draw tools fall into four categories, lasso fill, continuous curve, unit curve, or figure. And the rest of the tools are just variations of these. I thought I'd mention this because this is all related to some advanced techniques later which will super-charge how you use your figure tools!!
I'll go over the default ones first though, they are basically all you need more or less.
Straight Line
As the name of the tool suggests, it's used to draw straight lines.
This tool is actually the unit curve tool but only allows you to draw angled lines.
To use it, simply drag your cursor from the startpoint of the line you wish to make to the end point.
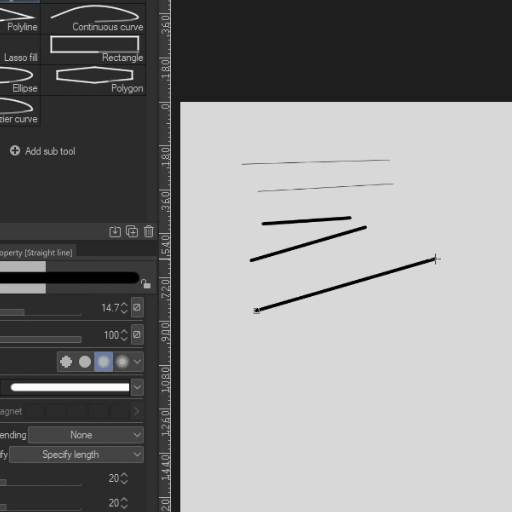
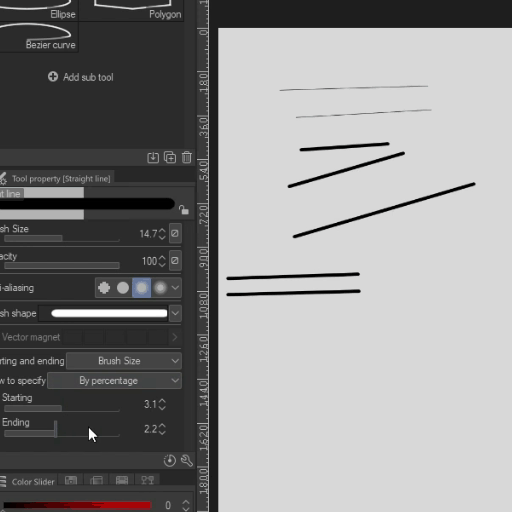
You can change how the line behaves from the start to end, the shape of the brush, and a whole lot more.
The starting and ending options lets you specify how the line changes its behavior from a portion of the start and the portion of the end. This is good for tapering.
Curve
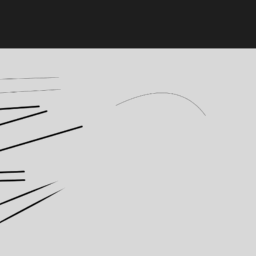
Draw it out like a straight line by tapping on the canvas to establish your origin point and lift up where you want the curve to end.
Like the line tool, you can specify how you'd like the curved line to behave from start to end, making it fade in and out, or taper off.
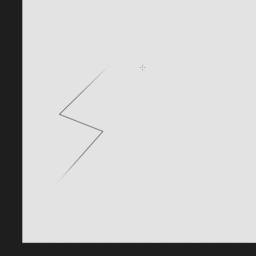
Polyline
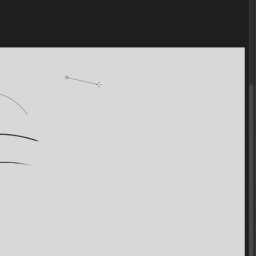
Polyline is a variation of the continuous curve that allows you to create open or closed objects with straight lines.
All you need to do is tap on places where you want to corners.
On raster layers, you can have the option to fill the spaces where the lines close off or where the start and end of the polyline intersect with the corners.
When you don't close off the polyline, you can enable the option to control how the line behaves. Similar to how you do it with the straight line and Curve tools .
Continuous Curve
As the name suggests this tool is used to create an open or closed shape composed of continuous curves.
You use this tool to draw continuous curves. And you can do so by tapping where we want the curves to pass through. Clip Studio creates splines automatically.
You finish the stroke by either pressing Enter, or by closing the shape off.
On a raster layer, you have the same fill and stroke options as the polyline, because as I've said, the polyline is basically a variation of the continuous curve.
And here's the proof. There are 4 ways to draw the continuous curve.
draw it as a polyline. tapping on where you want the corners to be.
spline mode, the default way continuous curve lets you draw curve.
- click and tap on places where you'd like the line to pass through basically and let Clip Studio Paint figure out how the curve splines through
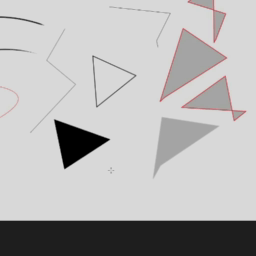
Quadratic Bezier. Good for creating rounded shapes with various corners.
tap on where you'd like to drop control points.
It's a lot less intuitive to use than spline mode
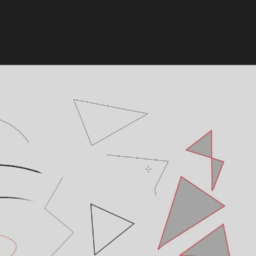
Cubic Bezier. It's like a combination of spline mode and Quadratic bezier.
click tap, then hold where you'd like the curve to go along.
while holding you can control how the curve behaves.
This allows you to sharp corners in your curves. If you only tap instead of holding, you get a sharp corner.
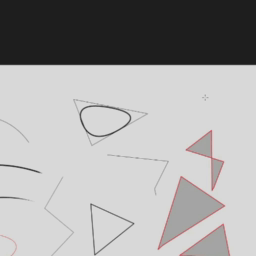
Bezier Curve
It's basically the Continous curve, but on a separate preset tool.
The Figure Tools - The Rectangle
The Rectangle is used by tapping and dragging to create the rectangle and then lifting pen where you want to other corner to sit.
The rectangle is a member of the figure subtool category, but it only allows you to draw rectangles, similarly the Ellipse tool is also a variant of the figure subtool that only allows to draw rounded shapes.
Like continuous curves, figures can fill with or without outline on Raster layers
IF you check Adjust Angle after Fixed, it will allow you to rotate your shape along the center after your initial tap, drag, and pen lift. Just drag across the canvas to rotate. This is also true for all figures.
You can also opt to draw out rounded corners or not. as well as specify how rounded you'd like the corners to be.
All the figure tools allow you to change the brush shapes, like the continuous curves and unit curves.
I'll discuss aspect types settings when I discuss the shift key modifier after this section on figures.
The Ellipse
The Ellipse let's you draw ellipses. By default it allows you to rotate it after it has been set.
Like the rectangle simply tap on where you'd like the corners you'd like the circle to touch.
Polygon Tool
The polygon tool lets you draw triangles, parallelograms, and just about any sided shape.
It operates much like the ellipse tool.
you just tap and drag on where you'd like corners to start then lift when you get the size and dimensions you'd like, then you're free to rotate the shape as you please.
You can opt to have the corners rounded.
The Shift Key Modifier.
Remember I mentioned earlier that I'd discuss aspect type when I discuss the shift key modifier?
Here's the basic gist.
Holding the shift key while using line, line, curves, and figure tools affects how it lets you draw.
Now, for the tools that let you draw closed shapes (Ellipse, rectangle, polygons), holding the shift key will let you draw "regular" shapes. Meaning all sides are equal.
- For Continuous Curve, PolyLine, Unit Curves, Straight Lines, HOLDING the SHIFT KEY will snap your cursor along 45 degree angle increments!
Going back to the Aspect Type Options. The figures allow you to FIX the ratio of the shape even when you hold the shift key. Meaning you won't be able to adjust the general ratio of the shape anymore. Unless you have a specific need for this. I suggest to just use the shift key when you want to draw out regular shapes.
For Continuous Curve, PolyLine, Unit Curves, Straight Lines, HOLDING the SHIFT KEY will snap your cursor along 45 degree angle increments!
Lasso Fill Tool.
Last but not least, I wanted to discuss the Lasso Fill tool.
As the name suggests, it's a combination of the lasso tool and the fill tool in one.
you can set how much you'd like Clip Studio Paint to stabilize your strokes with it. as well as its blending mode (which isn't recommended)
AND HERE's HOW YOU CAN SUPERCHARGE the LASSO Fill Tool's usability.
You can use the lasso fill tool as a silhouette generator by adding and subtracting solid forms.
Toggle either additive or subtractive mode by pressing the 'C' key (in the default settings).
You can use the lasso fill tool with varying opacity to achieve certain effects, along with a mask tool.
The lasso Fill tool is exclusively for use in raster layers and masks and can't be used in vector layers, unlike the other direct draw tools.
Chapter 2: Objects, Curves, and Vector Layers
So I mentioned that we can supercharge our direct draw tools! and that involves us using Objects and Vector Layers.
Normally on a raster layer, once you've committed a stroke, you can't change any of the settings anymore.
Unlike in Vector Layers, where each line/stroke can still be maniuplated as strokes/curves.
This is because each line / stroke in the vector layer is treated as a separate CURVE object!
Let me demonstrate how we work with curves.
By default all curves drawn (unless drawn as a bezier curve) is a spline curve.
Pressing control on a curve object will let you edit it! While holding control:
you can right click to add more control points, switch control points, or delete control points!
you can move the control points
or move the entire curve / stroke.
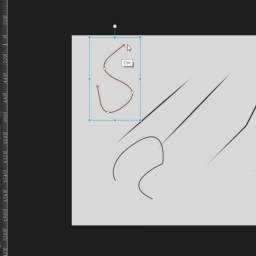
And this is the part that makes working with figures in vector layers all the more powerful, By going to Object tool, you can manipulate the existing strokes you have on your vector layer!! And this goes for shapes and figures too!!
And this means that you can also change your shapes however you'd like! Not only that, you can easily use vector erase to combine and manipulate shapes as well !
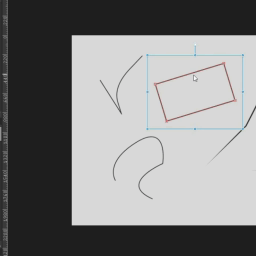
That's it for the direct draw palette. Let's move on to Stream line and Saturated lines palette next.
Chapter 3 Stream Line Palette & Saturated Line Palette
Stream Line Palette.
One of the more obscure tools here in CSP is the stream line tools. By default, I can hardly find any use for them, but once you start tweaking it and combining it with other techniques, you can get more out of them and achieve really nice effects!
Lets first start with the default Scattered StreamLine
This tool lets you draw an open or closed curve, and it will draw random horizontal lines across wherever you drew curve/figure.
By default, it creates a new speedlines layer whenever you create a stroke.
Dark Stream Line
This just like the scattered stream line, but just has thicker varying lines.
Still quite difficult to use on its own by default.
Gloom
This projects vertical lines from an arbitrary point down to where you draw your curve.
You can readily use this to draw gloom lines on your manga characters.
Rain
Very similar to Gloom, you can draw wildly varying vertical short lines to where you draw your curve.
This is by far the most useful among the default tools, and lets you add a rain effect.
These four default tools can be useful on their own, but you can UNLOCK their full potential once you understand how they work. And I'll show you how!
First let's create a duplicate of the scattered stream line. And adjust all the properties without disarray and unchecking some options and let's turn on some options as well.
The Settings: -
Destination Layer - This dictates whether you'll be making additional lines in the same layer or you'll be creating a new speadlines layer each time you make a stroke. By default it creates a new speed lines layer each time you create a stroke
Make Curve.
So aside from controlling where your set of lines are drawn, you can control how the lines themselves behave, how they curve!
TO understand the rest of the settings, let's draw a curve and go to object tool and examine what each option does.
With make curve turned on, you can see this read line, which is actually the curve/line that dictates how your line is drawn!
Angle controls at which angle the lines are drawn.
- This can have some really cool effects when used in conjunction with a curved stroke
Gap of line adjust how big the gap between the line is and disarray will adjust how varied and random the gaps are
Grouping will group lines together depending on the number, and you can introduce some variance with disarray. As well as adjust the gaps between the groups
Length controls the length of your lines. Take note that when the length exceeds the curve, it will straighten out. And introducing disarray will vary you line length. You can click the arrow on the right of the disarray bar to enter a manual value of randomness.
Reference Position controls where the line is drawn with respect to the curve you drew. Your curve/line can either be the start, middle, or end of the lines.
Gap from Reference Position controls how far the lines are drawn from your curve. the higher the value the further away the lines are drawn, at random
Brush size dictates the thickness of the lines that are drawn across your curve. Again, Disarray controls the variance
You can change the shape of the brush via the brush shape.
Starting and Ending will let you control the curve behavior as it starts or ends.
you can add tapering on your lines by adding a mininimum value to the brush size and adding a start and end point value
Mode lets you control the manner of how you can manipulate this object. Personally, free transform is probably the best one here, if you're not changing the control points of the curves manually.
Combine these effects to achieve something like a slashing motion! or something that indicates form shadow, movement, and various other effects
Combine these effects to achieve something like a slashing motion! or something that indicates form shadow, movement, and various other effects
Combine these effects to achieve something like a slashing motion! or something that indicates form shadow, movement, and various other effects
But let's go through the default tools first before I explain the difference.
Scattered Saturated line lets you create emphasis.
Dark Saturated line Curve is the only unique on in this palette, it lets us draw a curve that can possibly be open, unlike the rest of the tools here that only allows us to draw shapes and ellipses.
- Dark Saturated line curve is useful for adding impact lines
- Dense Saturated Line is like Scattered Saturated Line but without grouping
Brightness can be used with a lighter value to add an effect like a bright light is coming from somewhere
Burst can be used with varying brightness to get a sort of explosion or impact effect.
Focused Lines Behavior
The main difference when it comes to focused lines and stream line, is that for focus lines, the lines all converge at one point, and projects from that point outwards or inwards.
- Like with the streamline, we can choose to either edit on existing layers or create new layers each time we make
- Unlike in the streamline, you can choose how the lines are spaced, either by the angle from the center, every how many degrees apart, or you can use the distance between each line from the curve.
Unlike in the streamline, you can choose how the lines are spaced, either by the angle from the center, every how many degrees apart, or you can use the distance between each line from the curve.
Disarray functions the same and introduces random variations.
Grouping is much the same. You can control how many lines are grouped together, as well as the gap size in between groups
- Reference position dictates how we're using the shape/curve we drew, whether it's the start, end or middle.
Reference position dictates how we're using the shape/curve we drew, whether it's the start, end or middle.
Reference position dictates how we're using the shape/curve we drew, whether it's the start, end or middle.
Uneven reference position height will control how much the gap will vary, and the Number will vary how random the variations are
Brush size will vary how thick or how large the lines drawn are
- We can also change the path of the curve by manipulating the red control curve!
We can also change the path of the curve by manipulating the red control curve!
ANd similar to strealine, we can control how the brush behaves at the start and at the end of the line using the starting and ending settings.
This concludes all the basics of the figure subtools.
Applications
While there is absolutely no substitute for good draftsmanship and developing the skill to become a good draftsman and artist, using the figure tool can help you speed up some of your workflows, especially when you want to add objects, speed lines, emphasis lines, motion blur lines, form shadows, and a number of other things.
You can easily draw straight or round objects easily with the figure tool. Easily add and subtract objects from each other using the vector objects.
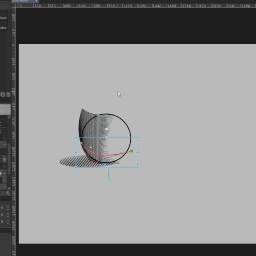
Then, using the streamline, you can easily also add form shadows on your objects to help with the forms.
Then you can also easily add motion to your illustrated work or manga panels with speed lines,
You don't need to have all the answers right away. The object subtool let's you edit the streamline layers separately non-destructively.
And when you're satisfied, you can even convert your streamline layers into vector layers for further refinement!!
Bonus! Breakdown of application in the panel.
Here you see me adding a saturated line figure then use the dark saturated line to control the flow of the lines.
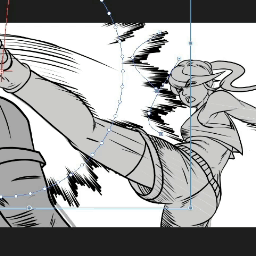
Here we see me tweak the values of the brush size to control the contrast.
For the speed lines that define her lower leg motion, I used a curved speedline with huge gaps in between.
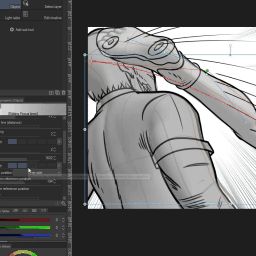
Then tweak the length of the focus lines to fit the canvas
Once drawn, you can also move the control points of your figure to adjust how your lines behave
I also used a dense saturated line on the place of impact, then tweaked the settings accordingly.
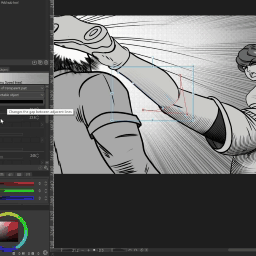
I created a very clean even subtool to create various parts of the form shadows of the girl's leg. Carefully following the contour of her leg. Then using a layer mask to erase away some unwanted areas.
I created a very clean even subtool to create various parts of the form shadows of the girl's leg. Carefully following the contour of her leg. Then using a layer mask to erase away some unwanted areas.
I also used speed lines (stream lines) with various settings and lengths to create the speed lines that mimic motion blur in the fastest moving elements.
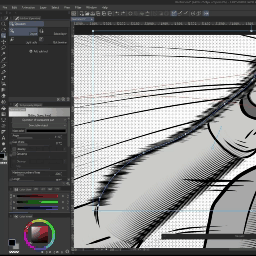
Combining lines generated using the figure tool, with existing manual linework, as well as masks, I was able to create this thumbnail panel faster than it would take if I had done it without the figure tools.


댓글