8 Clever Features I Love in Clip Studio Paint
Clip Studio Paint is full of surprising features that make our lives easier, but they're not always obvious. Here are eight tips and tricks I've found really useful, and I hope you do too!
Here’s a video with all the tips, but if you prefer a text version, you can find that below!
Tip 1: Customize the Tool Properties
When you choose a sub tool, you'll see some of its settings in the Tool Properties palette at the side of the screen.
However, the full list of settings and features available for that sub tool can be found in the Sub Tool Detail Palette, which you get to by clicking the wrench icon at the bottom right corner of Tool Properties.
Each setting has a box next to it that turns into an eyeball when you click it.
If there's a setting you use regularly, click the eyeball icon next to it. It will now appear in the Tool Properties, where you can access it quickly!
Tip 2: Convert Brightness to Opacity
Say you've scanned in a drawing on paper and you'd like to color it.
Go to Edit and choose Convert Brightness to Opacity.
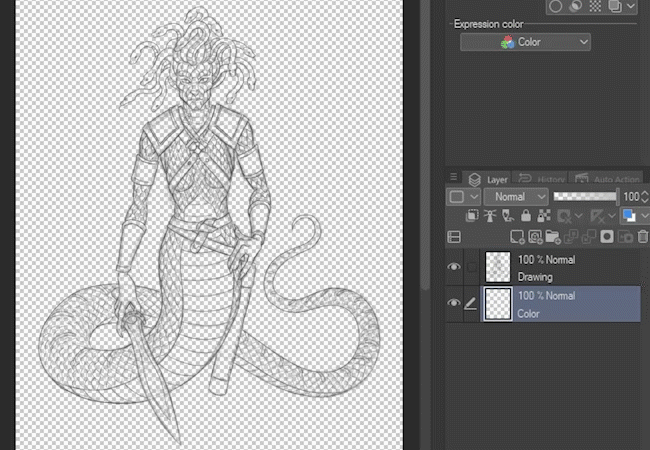
This converts the image entirely to black, with each pixel being more or less opaque based on the brightness of the original.
This leaves you with just the lines and a transparent background, which means you can create a new layer underneath and start coloring!
Tip 3: Temporarily Switch to a Tool
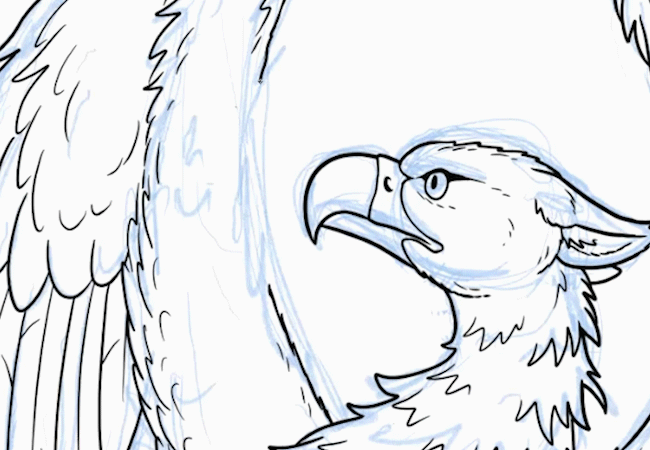
For tools that have a shortcut letter, you can click and hold the shortcut to temporarily switch to the tool. For example, holding E lets me use the eraser, and letting go switches back to my previous tool.
Important: If this doesn’t work for you, go to File -> Preferences and, under the Tools section, make sure that “Switch tool temporarily by pressing and holding shortcut key” is turned on.
Tip 4: Transform Selection Across Multiple Layers
Say you have your line art on one layer and your color on another layer.
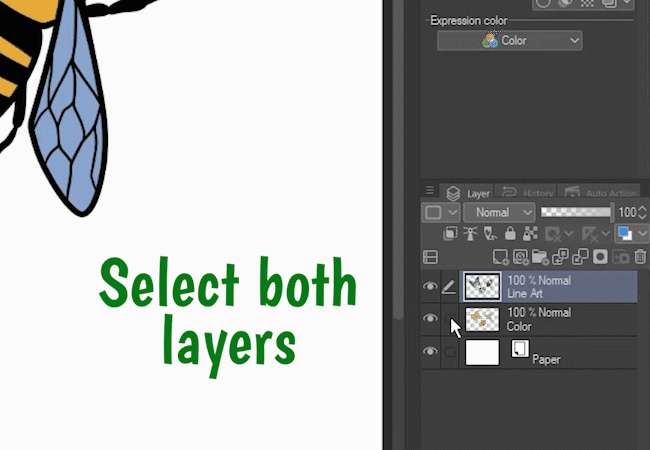
Make sure both layers are selected.
Tip: An easy way to select multiple layers is by simply putting a check mark in the box next to each layer other than the main one you have selected.
Go to the Selection Area tool and choose one of the selection sub tools. In this case, I’m using the Lasso sub tool.

Make a selection by clicking and dragging the lasso around part of the image.
Once it’s selected, enter Transform mode by pressing Ctrl-T (or Cmd-T on a Mac).
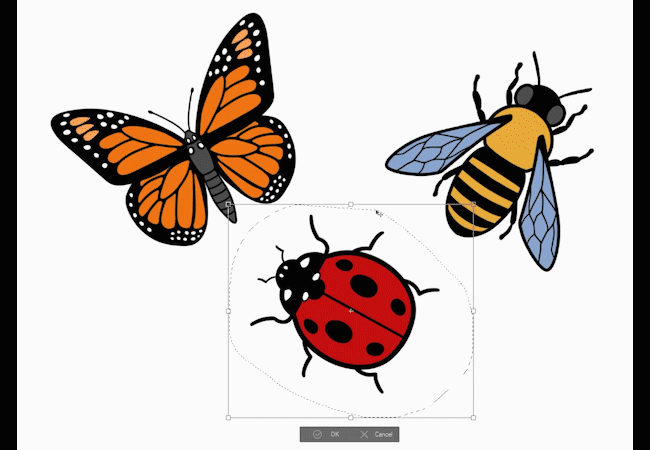
Many programs will not let you transform a selection across multiple layers at once, but in Clip Studio Paint, you can see that both my line art and color layers within that selection can be moved, resized, and rotated together!
Tip 5: Work Time
Important: This tip only works on new canvases you created in CSP version 2.1 or greater!
When you create a new canvas in Clip Studio Paint, your work time is now automatically recorded and displayed in the Information palette.
To see it, go to the Window menu and select Information.
The work time appears at the bottom of the Information palette.
It will pause if you stop actively working on this canvas for 2 minutes.
Tip 6: Lock a Sub Tool's Settings
If you like how a sub tool is set up, you can lock it using this button.
You can still change the sub tool's settings however you want, but if you choose a different tool, then choose that tool again, your settings will reset to the exact state you locked them in.
Tip 7: Move or Hide the Selection Menu (Selection Launcher)
When you make a selection, this menu, called the Selection Launcher, appears. It's got some useful shortcuts, but it can also get in the way.
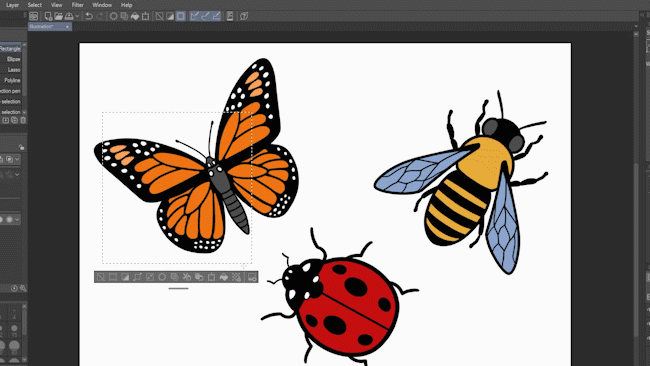
You can get it out of the way by clicking and dragging the grey bar below the Selection Launcher.
Tip: If you don’t want to see it at all, you can get rid of it entirely by going to the View menu, and deselecting Selection Launcher.
Tip 8: Tricks With Clip to Layer Below
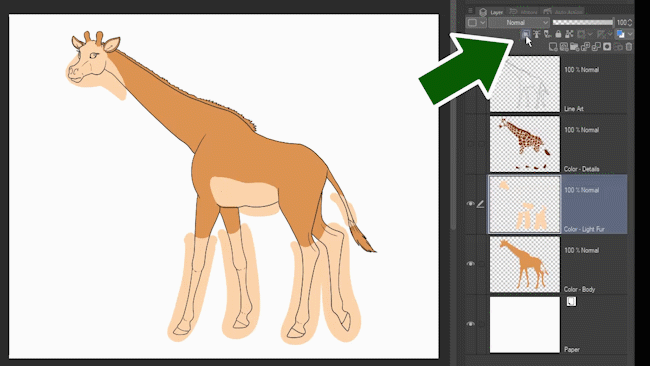
Turning on Clip to Layer Below means anything I draw on the clipped layer will only appear where the layer below it is visible.
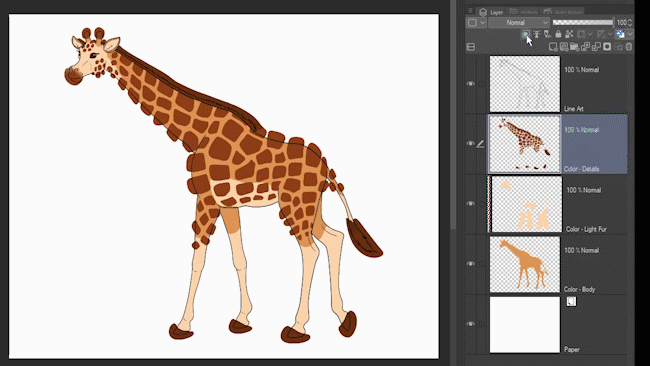
But did you know you can stack multiple clipping layers on top of each other?
When you do this, all of the layers clip to the bottom-most layer in the stack.
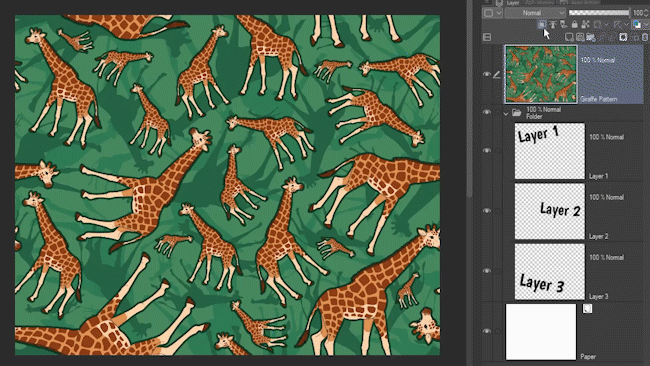
You can also clip a layer to a folder. It then treats all the layers in that folder as if they were one layer.
Tip: You can also clip an entire folder to a layer, or a folder to another folder, if you need to. It even works with animation folders. Imagine the possibilities!
Conclusion
There you have it! Eight useful features I found fun and surprising in Clip Studio Paint. Were there any you didn’t know about? I hope you learned something helpful from this set of tips!
Be sure to follow me @MsRedNebula on Twitter, Instagram, Bluesky, or Mastodon to see when I announce new tutorials. You can also follow me here on Clip Studio Tips, or subscribe to my YouTube channel.
As always, have fun making art!


댓글