
Speed painting and speed drawing are exactly what their names suggest – creating art against the clock. With this tutorial, we have to limit the time to finish a piece of work, which can range from a few minutes to a couple of hours.
Speed painting is a great way to learn painting techniques, and speed drawing is an excellent way for beginners to learn how to draw. It's a fun way to do something by experiment either way. I used to do 'speed-doodles' in-between boring meeting.
Unlike sketching or doodling, however, speed paintings or drawings are considered complete after the time is up – if you alter your work afterwards, it is no longer a speed painting/drawing. Although we think that doesn't necessarily matter, speed painting or drawing is just a good way to train yourself up to create art within limits, and consistently if you have a limited amount of time to do art on your busy days of college or working as a teacher like me. So if you want to go back later and add more details, you can choose not to tell anyone.
To help you become a master of speedy art, here are 10 top speed painting tips, many of which also apply to speed drawing. On your marks, get set, go!
The First & Crucial Step: Workspace
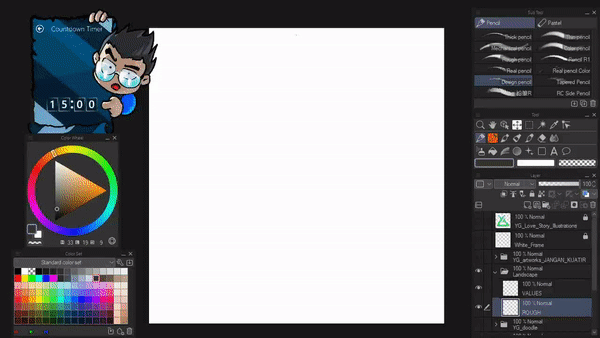
Before I start working on a speed painting session, I'd like to tidy up my working space.
You might think this is weird, kind of personal, and obviously isn't important as a starting point. And what I offer to you will be ultimately different from everyone else's point of view - including you, as an artist. But here's the actual fact, why the heck should I tidy up before doing speed-paint:
1. Zen Space = Mood Booster:
I don't want to boast about anything in particular but I, myself also a man with messy room, especially my actual working desk. As the below picture shows; I had this set-up to prepare all my speed-painting process to the level of full dedication for you, as an audience to immerse with the whole process. If I'm not enjoying solitude moment creating something myself, I will deliver nothing but a pressure and rushing artwork/tutorial - and you will gain nothing from it.
So tidying up and putting the most important things within your real working space is number one priority to create a good atmosphere, a mood setting if you say so, for yourself.
Note: I'm not a true gamer, having those gamer gears will only enhance my ability to fully enjoy myself because I am the creator of the 'game' of speed painting universe from now on.
2. Floating Workspace = Efficiency:
Tidying up your real working space will be your homework, but for the next most important thing to do; choosing the right workspace will always be our main and core subject.
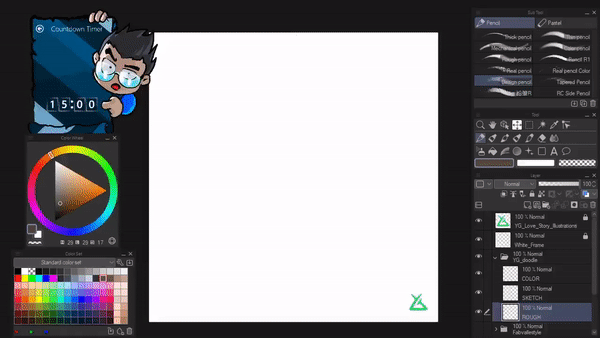
Following screenshots have been created in order to implement the best (from my version) workspace to do speed-painting. It will be very crucial for me to limit my tools when creating speedy art, because I have a tendency to get lost while drawing and recording with such a small monitor dimension (only 1280 x 800). And too many unused tools will only distract and overwhelm me in the process of creating artwork against the clock.
Lots of artists will choose either limit their brushes, canvas size, or even color choices. But for me; let's pick our best tools to work with first and gain efficiency!
[ 2.1 ] Default Workspace with Dark Grey Interface.
Note: (obviously just skip to step [ 2.2 ] if you're already know about changing user interface from light to dark).
I use the dark grey interface. Because it's ease for my eyes to work with darker user interface, especially when you're working with contrast and colorful artworks. Below is how to make your interface dark from default light grey interface.
[ 2.2 ] Workspace Option.
If you find the Main Menu, there will be a Workspace option from the Window tab, under the Canvas option (can be seen on the image above).
There's a Reset to Default option, it's important if you wish to revert back to default workspace after you've done mess it up and think it's not really suitable for you - I will show you later how am I going to 'mess up' my entire workspace.
[ 2.3 ] How to 'Mess Up' your Workspace 101.
Hold and drag your Canvas, from the image above; you can see I am holding up the Canvas and drag it outside the docking place. It will show you with the red area whenever you're making the window out of its place.
Now you're having a 'floating' canvas which is no longer dock with the other windows. You'll need to do the same 'un-docking' or separating for the Color Wheel window - hold and drag it outside.
You can choose either Color Wheel or Color Set (or any other option, for example Color Slider) to be your personal floating panel. Just do the same with hold + drag it out until you think it's good and appropriate enough for your floating workspace.
Note: you can always take it back with hold + drag to your docking panels. If you think you only need one Color panel for your speed painting.
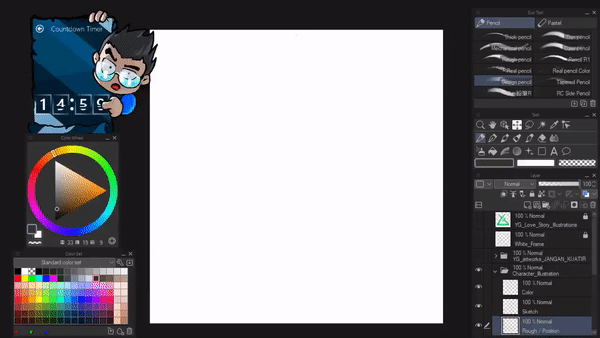
Now, I'm pulling out the Layer panel so it will be floating to make my workspace even better, please don't ask why am I doing this as it will be revealed once we arrive at section [ 2.5 ].
Same thing applies to my Sub tool panel, after I'm pulling it out and make it afloat, then with my left click mouse, I pull its corner and make the panel of my Sub tool larger with its brushes divided by two side by side (as seen on the image above).
Last but not least, the Tool panel, you'll see that after I move my Tool from left side to the right, then I change its tall position to wide, in order to do that; I'm using my left click mouse and drag its corner then you are able to drag and move each tools to your desired location within the panel.
[ 2.4 ] Tap Tab Ninja.
Tap Tab Ninja: it's not the name of an android device game, it's something you need to tap with your keyboard button (obviously besides the "Q" on your keyboard). Once you press the tab button, your floating tools will disappear except the Canvas! Don't worry, you can press tab again and those chosen hidden 'ninja-like' tools will come back in the same last position where they belong.
Now click the Maximize button from your floating canvas, and you'll have a full-screen canvas to work with and see the image below to feel a lot of space and getting ready to speed paint!
And don't forget to bring back all your hidden panels then you'll get your...
[ 2.5 ] Freedom!
To finish this part after you learn how to get 'freedom', I suggest to do the final step of registering your workspace with floating panels. In order to do so, you just need to follow these simple steps:
Window -> Workspace -> Register Workspace
Now that you're happy (or not) with all the floating panels and bigger space to draw, you might want to save its position for your future speed-painting session. And don't worry; you can always go back to default like the section [ 2.2 ].
Give the name to your workspace, as for me; I give it Speed_Painting or whatever I think it's appropriate or remarkable to be remembered. Click OK then... Let's speed-up our painting!
Time Yourself!
Deadline can inspire some exciting artwork.
I'm deciding to work on this tutorial with limited amount of time (near submission period) I know it's kind of risky and will put me in a rush state but believe it or not, my tutorial right now is the best of the best step by step guide with GIF as well and without complicate someone else to actually follow it.
Then finally I decided I would drag out my old habit to work on something so perfect with my love-hate perfectionist side and replace it with a new breakthrough habit of working with a minimum of 15 minutes artwork completion without ever getting back at it to correct or adjust anything. Your own determination to make sure it's done within the range of time is your commitment to be a successful digital art speed-painter!
So, here's my story: I started planning on the time-keeper role with some default and downloadable app to time myself using either 【 Windows Alarm & Clock 】 from my default Windows 10 app or 【 Countdown Timer 】 that can be accessed online for free.
I closed the wild idea to see what would come out with such a limited amount of time in my hand when I start to record my illustration process with the proven 15 minutes of time limit with another app. Since then I have been making surprising speed-illustrations this way from time to time until this tutorial came out.
"It might seem a little silly at first, but even a day spent experimenting with some of these methods for making quick-artworks can give you something in your library that you will keep coming back to, something that's uniquely yours and really can't be recreated within such a little amount of time you invest in your daily life."
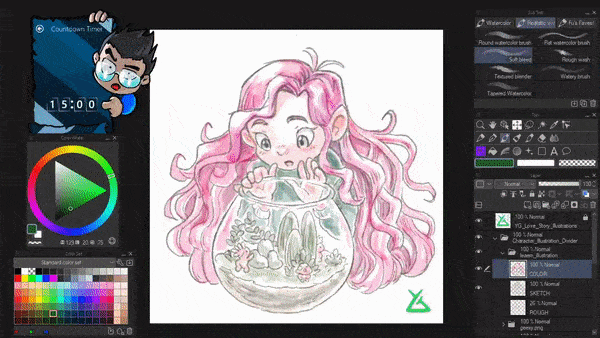
15 Minutes Pin-up Characters
A total of 15 - 30 mins speed illustrations done with marker-looking style approach.
Tools that I use mainly for this speedy illustration will be a combination of Realistic Watercolor Brush, Pen, Pencil, and Color Mixing.
【 ! ! ! 】 Important: you need to be able figure out how to design your own character first with basic, simple geometry shapes. Please take a look at my other tutorials about creating dynamic forms from constructional shapes like cubes and spheres from link below.
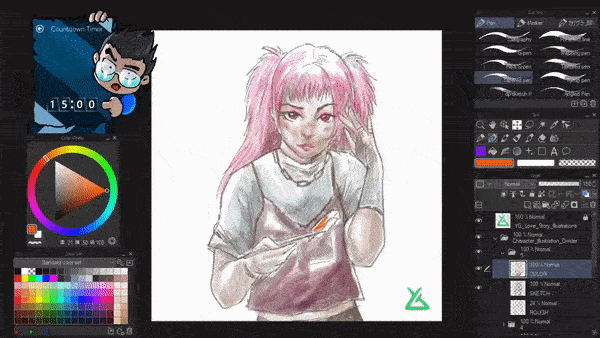
Now please take a look at my GIF below, I did a Pin-up Character of my Instagram friend, Fabio. I'm doing this as a part of my experiment working under 15 mins, timed myself and recorded it from scratch to finish. You can see the result on my Instagram below:

Step 1 : Structure.
A rough idea and simple draft with 【Design Pencil】 to apply basic shape from your character design is quiet necessary for the speed-painting process. With a new layer set to an opacity around 30 - 50% can be crucial for the next part of quick sketch.
Step 2: Quick Sketch.
A quick 3 mins sketch can be easily done by a good structural and well-balanced rough design as I mentioned before. You will need those years of practice to create a good proportion to your whole body character design, but as a pin-up bust like this - it's easier to grasp the reality of making a good design.
Pro Tips: you only need to rely and focus on the main features such as: where the eyes look and how the hair flows. BUT NEVER DO ANY DETAILS FOR EVERYTHING - That's it!
Step 3: Color Balance.
What I mention about color balance here is NOT a color adjustment. It's only the logic behind this character colorization, one of my simple rules when coloring always be like this;
Think and use COLOR CONTRAST wisely! If there is red, you need to apply green. If there is blue, you just need an orange or yellow to balance it. If there's lighter color, apply darker color surrounding it.
10 mins coloring here just to show you how quick I can go and how 'messy' it can be. But don't think it's a bad outcome, it's just a practice using Realistic Watercolor Brush sub-tools within the idea, sketch and color in the same time-frame. You'll getting better and nicer result will surely follow your next attempt just as I did with GIF below!
【 15 minutes of my original character design Gles - portrait: 】
Here's the 15 minutes breakdown:
2 mins rough or composition with 【 Design Pencil 】
7 mins sketch + shading with 【Tapered Pen 】 + 【 Design Pencil 】
6 mins color with 【 Soft Bleed 】 + 【 Rough Wash 】 + 【 Design Pencil 】
Now, I'd like to make another attempt with full-body drawn from my original character design only with 15 minutes time-frame. The more you're practicing your ability to speed paint, the more you learn something faster, nicer, and even better in the end.
【 15 minutes of my original character design Gracya - full body: 】
Here's the 15 minutes breakdown:
2 mins rough or composition with 【 Design Pencil 】
9 mins sketch + shading with 【Real Pencil 】 + 【 Design Pencil 】
4 mins color with 【 Soft Bleed 】 + 【 Design Pencil 】
And below is the screenshots of what I've been doing:
30 Minutes Pin-up Illustrations
Now it's getting more interesting as I've shown you my speedy characters pin-up only with 15 minutes, but you might think 'what if we can actually done something more than 15 mins? Probably an artwork done with 30 minutes?'
Worry not, here I am; dedicated this section to show you some illustrations from character, landscape, as well as mechanical concept art that will be done no more than half an hour.
The first 15 minutes: - Do This In Your Style Challenge:

Second 15 minutes:
I'm sure you've already notice that my style to make an artwork, with any pose or composition; I will always refer to 【 Design Pencil 】 - it has textures, good for shading technique. I'd like to deliver the possibility for you to aware about this tiny details for your artistic journey.
These were the following steps that I did for the 'do this in your style' challenge on Instagram, an experimental speed painting project based upon an original character design.
I. Rough sketch, following the original design idea took about 2 minutes. Structural pose done with only simple shapes using 【 Design Pencil 】 for quick composition.
II. Refined sketch, 【Real Pencil 】 + 【 Design Pencil 】 - this will always be my method to produce bust-up character design within a range of 10 mins time.
III. Quick coloring with 【 Soft Bleed 】 + 【 Rough Wash 】 from 【 Realistic Watercolor Brush 】 for around 12 mins. I'd like the idea of having it looks like colored pencil rather than watercolor that too soft for such an energetic character. Then adding details with 【 Tapered Pen 】 for some detailed parts like face and hair.
IV. Final adjustment around 4 mins with 【 New Correction Layer 】 and boost the color contrast using 【 Tone Curve 】 and a little brightness to balance between light and dark tones with appropriate amount of 【 Brightness/Contrast 】 - for the color itself, it depends if you wish to use 【 Color Balance 】 but I'm using 【 Hue/Saturation/Luminosity 】 to achieve reddish look.
Below is my Instagram account with the post that I made from this tutorial, feel free to see and it will be my honor if you can be my friends as well (I prefer not to say followers since it's kind of degrading someone's status.)
Here's another one I did, it's very interesting to be able create a speed illustration because you'll have an idea and a time in your hand to make an artwork from scratch to finish so you can explore your own style and develop new one in the process, as for me; it's a cartoon or children book kind of illustration style.
Below is the first 15 minutes I did with the same methods as other illustrations:
Another 15 minutes from GIF below dedicated for enhancing colors, details, as well as adding subtle colors. I'd say; I completely in love with this kind of children color pencil style.
At first I try to achieve watercolor style, but then as the time goes by; this is what makes an artwork evolve by itself into colored pencil. The more vibrant colors you put intentionally or unintentionally will change the nature of its final outcome.
Up next; I'll show you how to easily create a 30 mins landscape design. But before we jump into the speed painting techniques, if you're new to my method and would like to learn furthermore how to develop a background painting, feel free to learn from my first landscape tutorial below:
30 Minutes Landscape Illustrations
For this speed landscape illustration practice, you will need these following things to keep in your mind:
【 I 】 It's about speed + accuracy.
You only need 1 layer, or maybe 2 if you wish but then it will distract you if you create more than 2 layers. My suggestion & solution: always merge down (Combine to Layer Below) whenever you're ready after you paint something on the second layer.
By doing Combine to Layer Below like image above from Layer 2 to Layer 1, you'll have cleaner layer order. As for me, I only have a maximum of 3 layers when doing speed-illustration for characters because I need to keep it for presentation purposes (record and save as to JPG images). Rough/idea, Sketch/ink, and Color layers separately.
But as for landscape illustrations, mostly I will do a speed illustration with accuracy, it means I need to merge/combine layers in order to keep my brushes blending together perfectly only within 1 layer - unless I did otherwise because I don't need to blend anything.
First 15 minutes took mostly with 【 Real Pencil 】 and for the larger area with 【 Rough Wash 】.
【 II 】 One brush to rule them all.
I will show you some quick techniques to achieve quality images to deal with landscape painting, especially those with trees, bushes, stones, and clouds or rendering the sky.
With only 【 Rough Wash 】 from 【 Realistic Watercolor Brush 】set, you will find it's fascinating to experiment with such following painting techniques.
Pine trees:

In order to make a pine tress and other trees, you just need to control your pen pressure if you're using any graphic tablet. The more you press, the darker it will become. Every brush strokes you give will not blended together, causing the area where you paint over will be darker.
So, brush speed and control should be balance. If you wish to make tress from a far, just control your pressure lightly when brushing to make them looks very subtle or you can erase some parts with transparent color.
Bushes:

The same as trees, in order to create a bushes with only one brush; I suggest to practice with your pen pressure and control every time you decide to use 【 Rough Wash 】 with limited color pallet just as I show you with the GIF. Then after you think it's quiet enough to had the dark, mid, and light tones; you can try to play along with 【 Hue 】 to get the colors you wish.
Click link below to learn more about creating simple shapes and limited color pallet:
Stones:

In order to color a stone, you are able to use the same method with 【 Rough Wash 】 and depending on your pressure; the darker areas will be ones you pressed hard - the lighter areas will obviously because of the lighter pressure.
Adding colors will be a good option to get it looks less flat. But my suggestion for colors should be muted/dull. I choose dark olive green and also moss green.
Clouds:

Doing a cloud painting with 【 Rough Wash 】 will be pretty easy. Once again, with 3 colors choice, I prepare its light, mid, and dark tones only with the help from pen pressure. Resizing the brush will also make a great addition to some small details like the bottom of the cloud with darker color.
Then with transparent (like an eraser tool), you can make some areas appear more brighter or softer. So you don't need to change your brushes, just stick with it and do a lighter press with transparent color and you'll get the softer look of it.
Another 15 minutes dedicated for details:
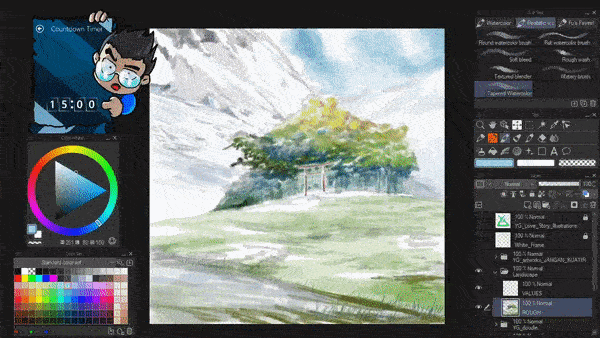
And here's the final result of 30 minutes landscape speed-painting plus the one on the right side enhanced for about 2 minutes or so, playing with color correction, hue, saturation, and curves will make your illustration stands out although it's done only with limited color pallet.
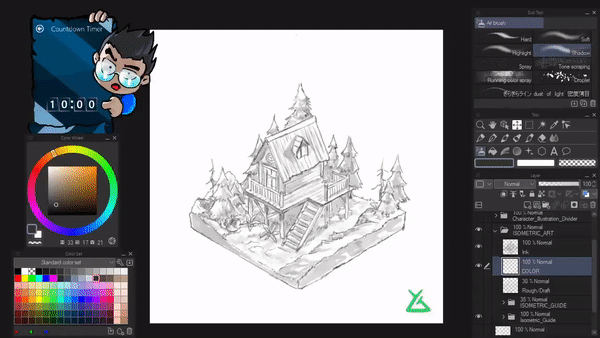
30 Minutes Isometric Tips & Tricks
These days, you can easily observe isometric illustrations often in digital products because of their simplicity and functional characteristic. Frankly, what would you choose to have more impact between a flat and an isometric image?
That's why it keeps being a trend this year too!
But we're talking about speed-painting, not creating an isometric design, right?! You might bombard me with that question. Now please do understand; my job here to tell you that you can draw impressive and complex isometric designs quickly once you learn the trick.
The “Geometric Technique” is a method preferred by many, to create astonishing isometric illustrations. Below is not my tutorial, I learn it from our fellow Clip Studio artist Steele2 with complete understanding and complex but worth to follow:
After I learnt it from Steele2, I found another way to create my version of speed isometric design without being so much focused on lot of technical stuffs (that might be overwhelming) within a short amount of time. I just want to share my finding for you, when you're facing a tight deadline.
But please keep in mind: this technique requires the knowledge and practice too - there might be wrong adjustments you'll get at first - but truth be told; I enjoy the process of trial and error only by then; I can share my first 20 minutes of creating isometric artwork below:
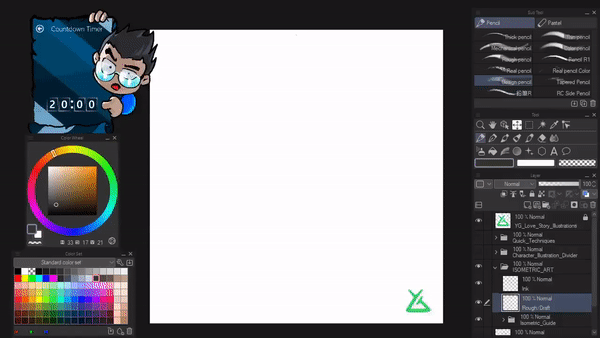
I know that I am using the GIF to show you my way of creating isometric grid / guide way too fast to follow, so here's the JPG to give you better understanding:
You need to use 【 Figure 】 tool -> Polygon that can be accessed by clicking 【 Direct Draw 】 from 【 Sub Tool 】 panel and search for Polygon.
Create several polygons inside the first one which you've already made. Using 【 CTRL + C 】 then 【 CTRL + V 】 for copy and paste, after that use transform 【 CTRL + T 】 and holding down SHIFT button when shrinking the second polygon to maintain its aspect ratio.
Do that every-time you need another polygons to create the exact and same valid guidelines where you can use them as your own isometric 'ruler'.
As always, it's better for me to give some quick shading after done inking to particular areas, especially for shadow parts with 【 Design Pencil 】 and give better visual impact - if I don't have enough time to color it or make a quick concept art for several ideas.
But I give myself another 10 minutes spare to color, as shown from GIF below:
Final Words To Live By
Definition words to live by:
A motto, aphorism, axiom, or other piece of advice that will serve one well throughout one's life if upheld or adhered to. Sometimes used humorously or sarcastically.
Now here's my motto crystallized after drawn those illustrations with a 'light-speed to the other galaxy' done exclusively to you, my digital arts friends:
"Making your priorities organized, with deadlines, as well as visual, is life-changing."
Futopia 2020.
I hope you learn something from my quick tutorial about speed-painting, honestly; it's been a while since the last time I did so much paintings (almost like creating a brand new portfolio 2020 myself) that represent my identity as a Visual Art Teacher.
Users who liked this post


Comment