- How to animate an illustration on CSP -
- HELLO -
I introduce myself:
I am Lemon, a French artist and animation student;)
IG: _lemon_night
Welcome to you in this tips on: How to animate an illustration?
It's a really fun way to make your drawings and illustrations come alive, and you will see that the animation is not that complicated as it seems: 3
Today I will show you how to make this simple gif!

- Prepare the workspace -
I work on iPad Pro, with the Ex version of Clip studio paint
First of all, we need an illustration!
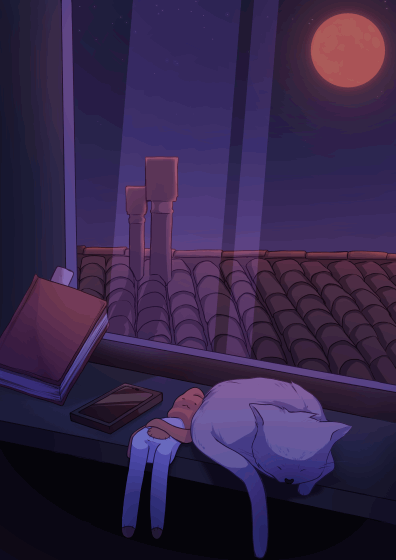
I chose this one, which I made on purpose to animate. To make it simple and accessible at all levels, you shouldn't want to make everything move, just one element is enough to make your illustration come alive: 3
Here we will focus on the cat's tail which will be the moving subject of the drawing
So we're going to separate it from the rest of the illustration so we can make it move more easily, without affecting what's underneath.
We end up with that
To be able to integrate them more easily into the animation, you must export them in png by removing all the other elements around and below the cat.
Like this :
You do the same with the rest of the illustration to end up with the two separate elements.
Then we will create our animation, to do so we will click on this button:
And we come to select Animation
So that it is in the format of our illustration we change the dimensions in that of our base image, it is here of 3508 x 4961
Then then to remove the borders that we do not need, we drop everything to zeros here
I then come to reduce the number of images per second, they are set to 30 but I prefer the 24 per second format
You click on okay and normally we end up with this:
We then import our two images from earlier
However the desktop is always made for animation so we just change it by going to "Window" then "Workspace" and I click on "Animation workspace"
I am using this Workspace uploaded to Assets, it is well built and I find it handy for beginners
You click on "OK" without changing anything then your workspace should look like this:
it is possible that yours is not exactly the same, I adapted the workspace so that it is similar to the one I use for my illustrations, I advise you to do the same, it will be simpler for you to find your way: 3
To be able to use the imported mages, just click on "Pixelize"
And you do the same with the other, but it is not necessary because only the chat will be modified here
To avoid cluttering yourself up too much with unnecessary layers, you can erase these three, they will not be used in this tutorial.
Once you have everything ready, here is what you should have:
The three layers at the top right are in the same order in the chronology at the bottom, you can give colors to the layers, it will be easier to find yourself like this
To go to the desired layers, here it will only be the cat
Then you click on this small square and choose the color of your choice
So it will be easily recognizable on your timeline
Now that the artboard is ready we can start to Animate: 3
- Animation -
In what I'm going to show you, this is a very easy way to animate, you won't need to redraw the design every time to make it move.
We will simply duplicate and move the cat's tail each time to create the movement
To do this we are already going to shorten the frame time that our first image takes
We are in 24 / s format, which means that to make one second, we need 24 images
We will therefore shorten the image time and only make it last 1 frame, like this:
This is so that the image is only visible for 1 frame then leaves room for others who will come after
Then we will duplicate this image and move it so that it is after
On the duplicate model, we will start the tail movement
To do this, go to "Quick access" and click on "Mesh transformation"
And this mesh net will appear on your image:
As we isolated our cat before, the transformation will only be done on him, because he is the only element of the layer. However the stitches are too big and you cannot move the tail without affecting the rest of the body.
We will therefore increase these two settings to the maximum
So we end up with this:
So we can move the cat's tail
And so on, we duplicate the image we just made, then we move it by a frame so that they follow each other, thus creating the movement of the cat's tail.
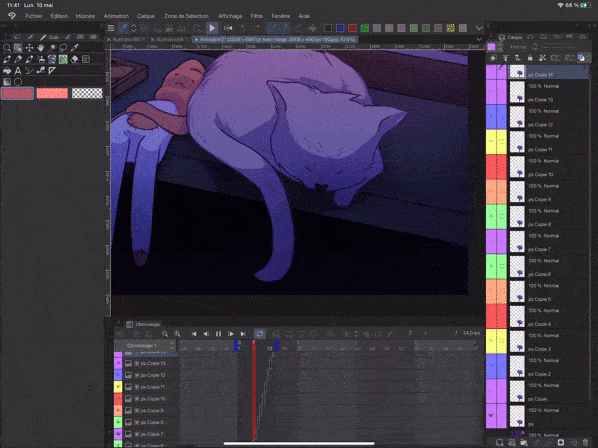
Continuing like this, we end up with this:
So we have just finished the first part of the movement, now the tail must come down to its starting point to swing to the other side.
To do this we will simply duplicate everything we have just done to reproduce the movement that goes down
We will therefore choose the last movement of the tail as the highest, and duplicate the one that comes just before, here the layer in green
I advise you to change the colors as you duplicate the layers, it is quite easy to get lost at this time but the helping hand is taken quickly
So I duplicate this layer like this
And so that this one follows the chronology, we will move it at the end of the movement of the tail, this will therefore lower the movement.
We move the frame so that it is placed after in the timeline
And so on, we reproduce the movement going down, it should give this:

We will now create the movement so that it goes up on the other side
We are simply going to reproduce the same operation as before and move the tail frame by frame to make it go up, then duplicate everything to make it go down in the same way.
I put the first part of the movement in a folder before continuing to make my layers clearer
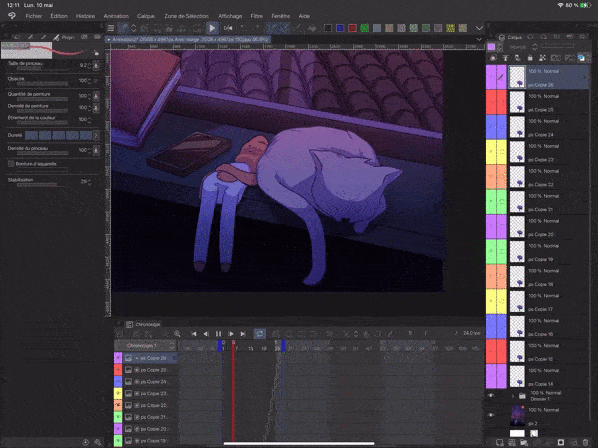
The movement now looks like this:

Once we are satisfied with the movement, we shorten the duration of the background so that it is the same duration as the movement we have just created
So we end up with this:
- Export -
Now that our animation is finished, we can export it as a gif so that the animation is looped
To do so, go to "File" then "Export animation" and click on "Animated Gif"
Rename your gif, I just chose "cat", then press "ok"
Press "ok" without touching anything, I preferred to do the animation in 8 frames per second instead of 24, the movement makes it better.
- End -
And There you go !
The entertainment is over!

It's really super cool to do and it helps make an illustration more vivid and appealing!
Hope this taught you things: 3
Big kisses: D


Comment