How to draw a cartoon background from a photo

Draw a cartoon background from a photo
Drawing a background from a photo can save you a little bit of work on line drawings and screen tones.
However, even if you capture the photo as it is, it will not be the background of the manga as it is.
In this TIPS, we will introduce how to process a photo, extract a line drawing, convert it to LT, add it, and draw a cartoon background.
Character and background photo
This time, behind this shrine maiden character, I will draw the background using these two pictures taken with my smartphone.
It is a photograph of a shrine and autumn leaves.
Import photos into Clip Studio
If you drag and drop a photo from a folder to the layer palette,
It can be read as an image material layer like this. Load the photos of the shrine and the autumn leaves.

Place a photo
I moved the image material layer with the object tool and placed the photo behind the character.
When you combine multiple photos like this into one picture,
The screen is less likely to collapse if the eye levels of the photos are as close as possible.
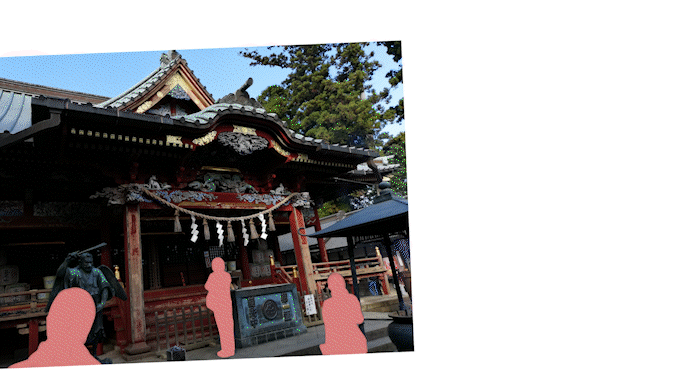
Erase the obstructive part of the photo
The sky and trees behind the shrine are in the way, so I'll erase them.
Right-click the image material layer in the layer palette and [Rasterize] to make it a normal layer.
Next, I selected the sky with the color gamut selection and erased it with the [Edit] menu [Erase], and erased the tree with an eraser.
[Preparation for line drawing extraction 01] Brighten the dark and invisible parts of the shrine with color correction
The lower part of the roof of the shrine is dark and cannot be seen well, so I will process the photo so that it can be seen.
Use [Tone Correction]-[Tone Curve] from the [Edit] menu to select [Tone Correction]-[Tone Curve].
Adjust only the left side of the curve of the graph to make it brighter so that you can see the structure in the dark.
In the graph, the horizontal axis shows the brightness of the original image, and if you catch the left side, the dark part of the original image becomes brighter. You can increase the number of points in the graph by double-clicking. Also, the points in the graph can be deleted by dragging and dropping them outside the graph.
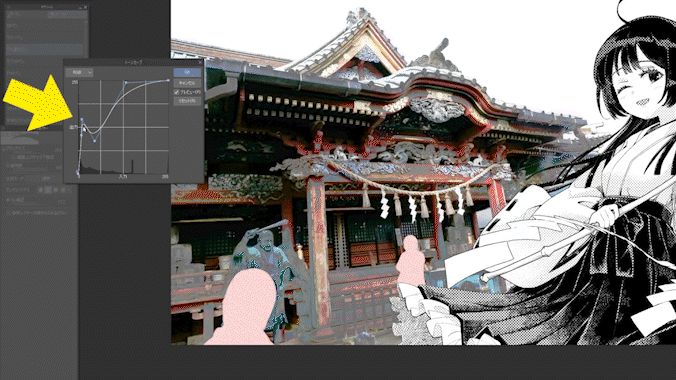
The structure under the roof of the shrine is now clearly visible.
Also, if you use the selection range, you can partially apply the color tone correction.
Readjustment is easy with the tonal correction layer. Please refer to the TIPS below.
When the tonal correction is complete, combine the tonal correction layer and the photo into one layer.
If you might re-edit it, it's a good idea to copy and keep both layers.
[Preparation for line drawing extraction 02] Reduce the number of colors
I want to extract lines from a photo and convert them to line drawings and screen tones, but if I extract lines from unprocessed photos, the line drawings will be messed up, so I will process the photos as a preparation for extraction. ..
Use [Effect]-[Illustration Style ([Artistic])] in [Filter] to reduce the number of colors in the photo.
I will skip the details and make it a simple color plane.
Set [Processing content] to [Color only] and [Color gradation number] to about [7 to 10], and adjust so that the screen looks good.
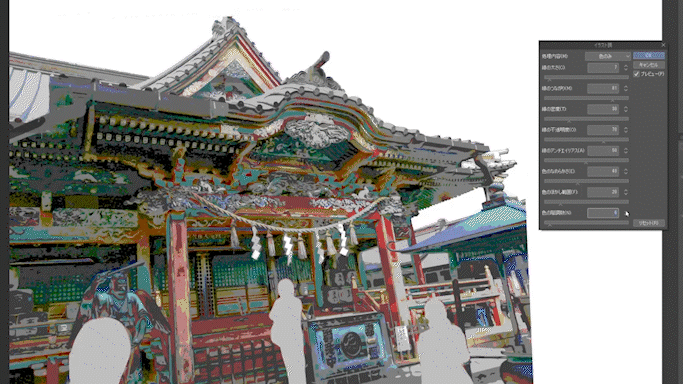
[Preparation for line drawing extraction 03] Erase the people in the photo
I will paint and erase the person in the photo from above.
Take the color from around the person with a dropper and fill it like that.
This work can be done automatically in Photoshop. It's a good idea to use Photoshop together with color correction.
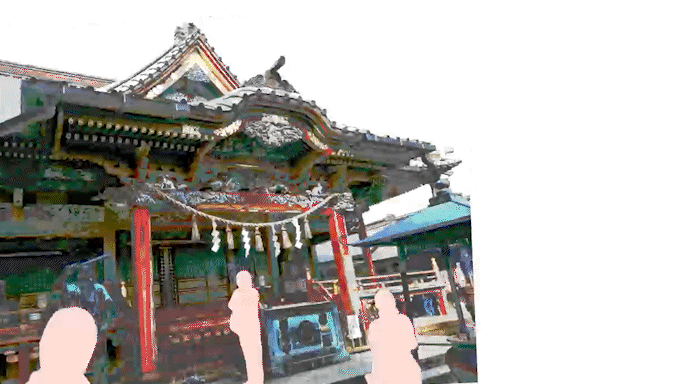
[Preparation for line drawing extraction 04] Add photos to make it easier for Clip Studio to extract line drawings.
To make it easier for Clip Studio to distinguish. I will add it so that the outline of the object becomes clear.
I used a tone curve to brighten the front and added it with a pen so that I could see the front and back.
[Shinto shrine line drawing extraction 01]
When the photo is clean to some extent, start line drawing extraction.
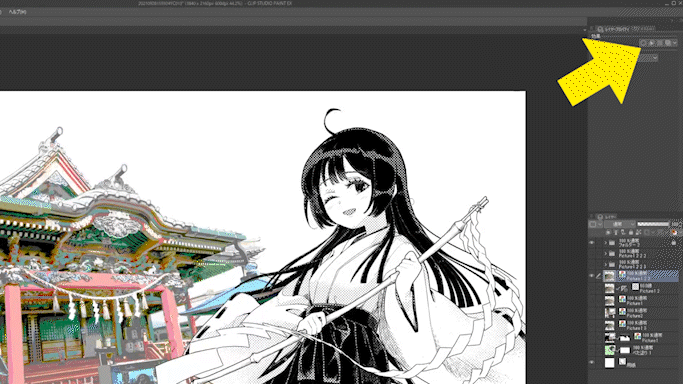
First, turn on [Line Extraction] and [Screen Tone] above the [Layer Property Palette].
[Shinto shrine line drawing extraction 02]
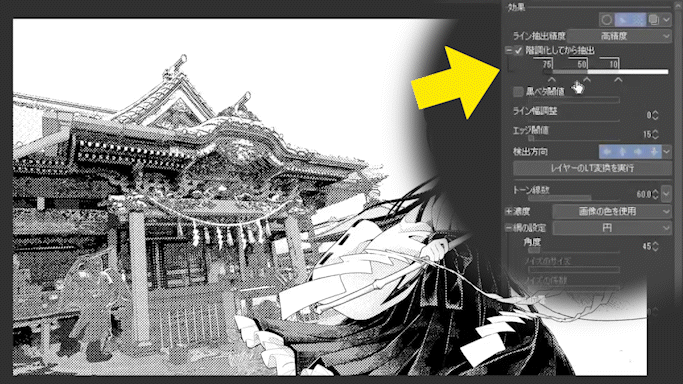
Move the [Gradation and then extract] slider to adjust the finish to your liking.
Line drawings are created where there is a difference in brightness, so adjust while being aware of where the lines are created.
After doing it to some extent, execute the LT conversion of the layer.
[Shinto shrine line drawing extraction 03]
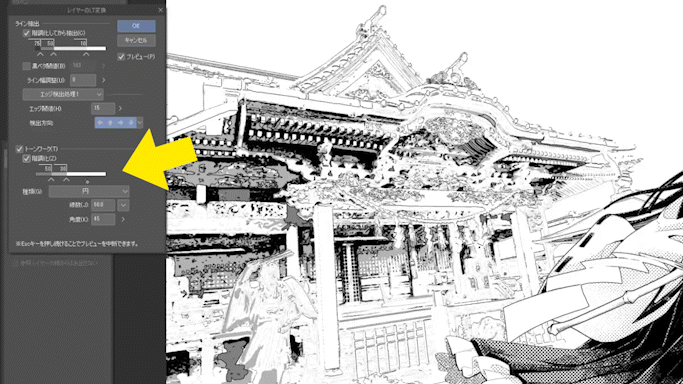
Turn on [Screen Tone Work] and [Gradation], make various adjustments to achieve the desired finish, and press OK.
[Shinto shrine line drawing extraction 04] Completed
I was able to extract the line drawing of the shrine.
[Preparation for extracting line drawings of autumn leaves 01] Tone curve
As with the shrine, adjust the autumn leaves photo so that the boundary between the leaves and the trunk becomes clear with the [Tone curve].
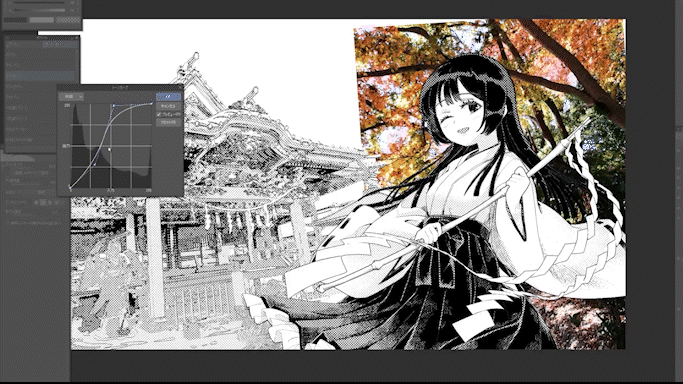
Also, the tone curve is not limited to the entire RGB.
You can also adjust the single color curve of red, green, and blue from the pull-down of the yellow arrow, so please take advantage of it.
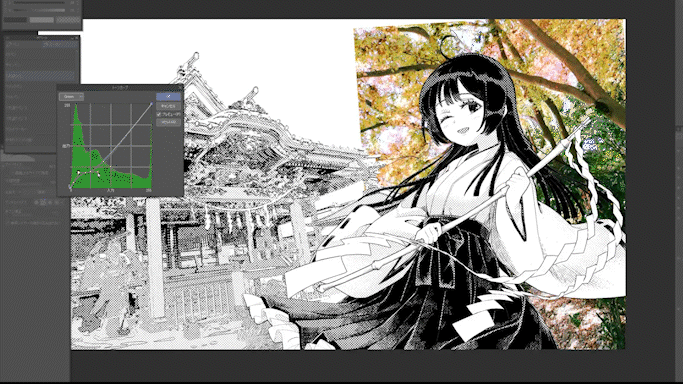
[Preparation for extracting line drawings of autumn leaves 01] Added leaves
There are not enough branches and leaves on the screen, so copy and paste or make a brush to add.
Also do [Effect]-[Illustration style ([Artistic])] of [Filter].
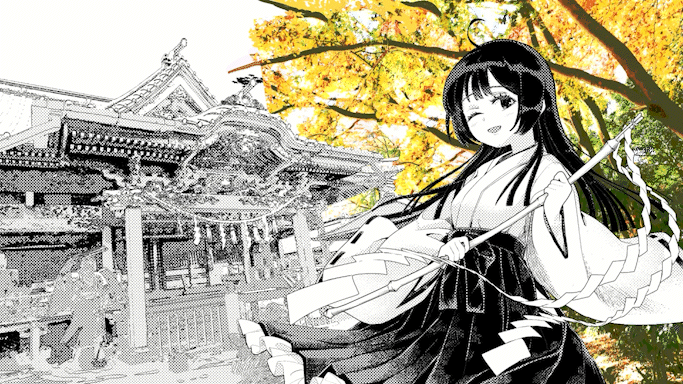
[Autumn leaves line drawing extraction]
Similar to the shrine, I performed line drawing extraction and LT conversion.
This completes the processing of the photo, and the foundation of the picture is laid.
[Finishing 01] Addition of contour line
From here, we will draw the details in the same way as the normal painting process.
Add the lines that could not be extracted by line drawing extraction.
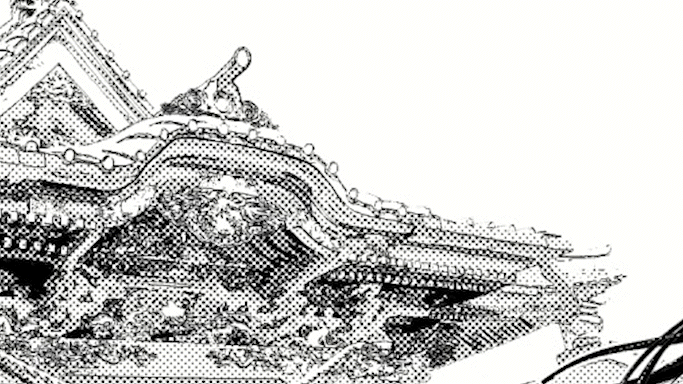
[Finishing 02] Addition of the shadow of the roof
Add the shadow of the roof to give a more three-dimensional effect.
Add shadows so that you can see the outline of the object.
The shadows in the photo are optically correct, but the shadows in the cartoons to make things easier for the reader can only be added by themselves.
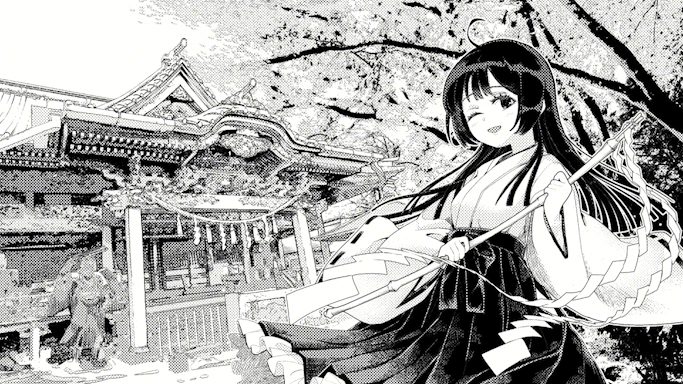
[Finishing 03] Retouching the ground and walls
If the processed photo is used as it is, the character and the pattern do not mesh with each other.
Since the background will float to the character, add such hatching to make the picture familiar.
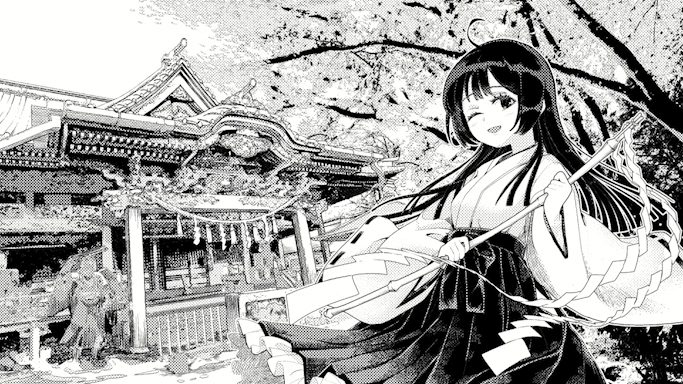
To make the character stand out, darken the place far from the character,
Make sure your eyes are on the character.
This shadow is a shadow that was not in the photo, but in manga, the shadow of a lie is often used like a spotlight on the stage for directing.
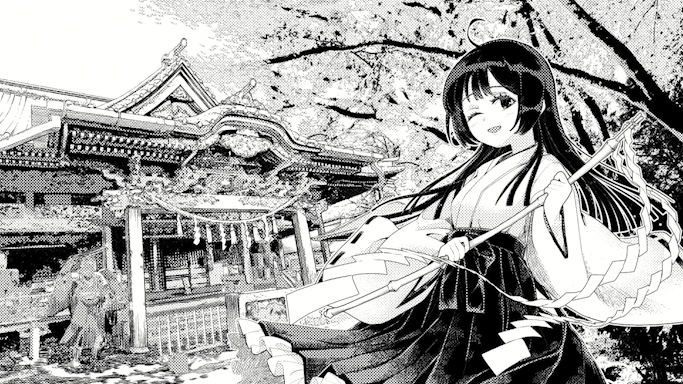
The drawing of the shrine is over.
[Finishing 04] Drawing of falling leaves and autumn leaves
Draw and add the falling leaves of autumn leaves. By placing it in front of the character, you can express the expanse of space.
Add hatching to the trunk of the tree to give it a hand-painted feel.
Also, draw a base behind the character with a hatching brush,
From above, use a brush of white autumn leaves to express pale autumn leaves.
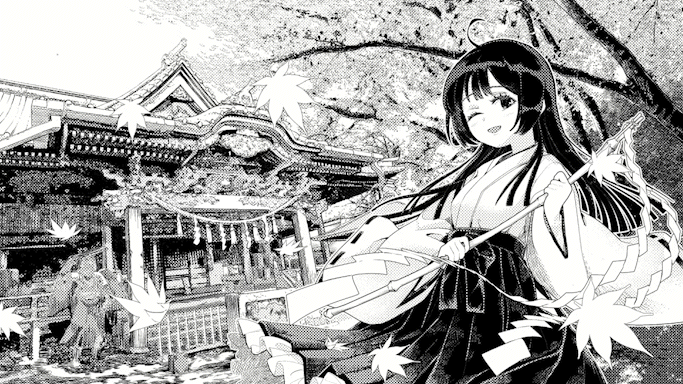
Finish!
How was this TIPS?
Drawing from photo processing is not entirely hassle-free, but line drawing and tone work can be easier.
If the processed photo is left as it is, it will give the reader an impression of omission, so I think it is better to aim for a natural picture by drawing with hatching.
I hope this TIPS will help you in drawing manga.
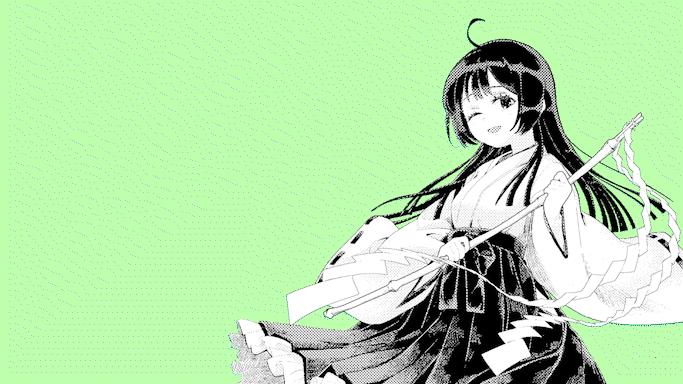
Time-lapse video of the entire process of drawing
It is a time-lapse movie of the whole process of drawing. If you want to see more details, please click here.






Comment