
Please wait a few days for subtitles in each language.
Introduction
Clip Studio was recently updated to version 3.0, which added new filters such as "Noise," "Chromatic Aberration," "Film," and "Pencil Style."
This time, I will be combining the "Noise" and "Chromatic Aberration" filters with other filters to create an electromagnetic noise effect on a character illustration.
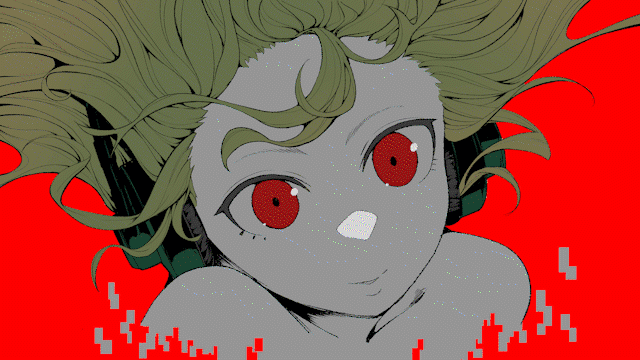
It's like a thumbnail for a music promotional video. If you want to see the process of making this character, check out Youtube.
One thing I kept in mind when drawing this character was that I would be overlaying an electromagnetic noise effect on top of it later, and I also wanted a simple, eye-catching image that would stand out as a YouTube thumbnail, so I aimed for a poster-like image that wasn't too detailed, with just line art and coloring.
1. Draw the material for the electromagnetic noise effect
I will draw the materials for the electromagnetic noise effect.
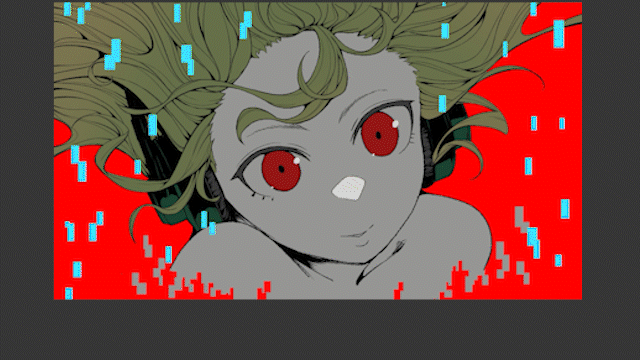
Create a new layer and use the Rectangle tool to draw colorful noise material. For now, use four colors, aiming for a digital-looking pattern. Avoid drawing too close to the face so it doesn't get obscured. Fill in everything except the face with noise to draw attention to the face.
We will now process this material using a filter.
2. Chop up the effect material with the [Wave] filter
The effect material is a bit monotonous and boring, so I want to make it more random and chaotic. So I'll use the [Wave] filter. Launch [Wave] from [Transform] in the [Filter] menu.
If you set [Wave shape] to [Square wave], it will look like this.
I was able to chop up the effect material randomly. This filter is useful when you want to add randomness to something monotonous.
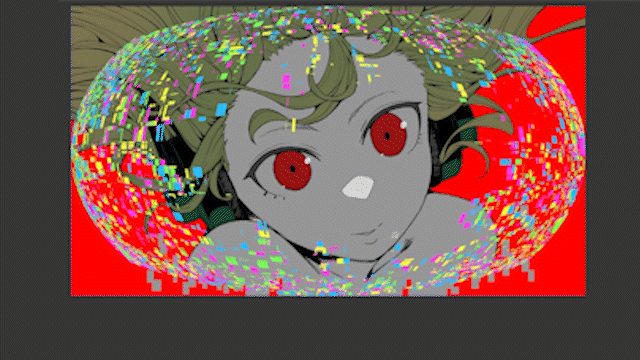
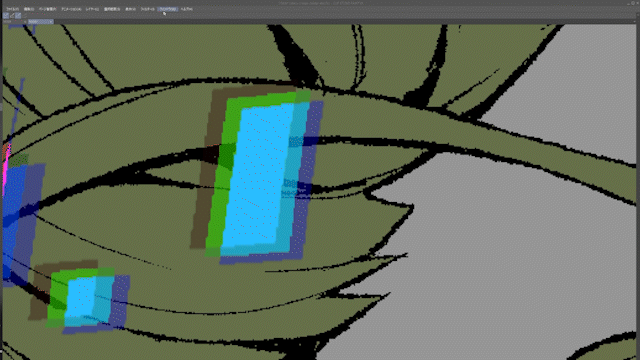
3. Place effect material in a sphere using the [Fisheye Lens] filter
Next, use the [Fisheye] filter to arrange the effect material in a sphere. Launch [Fisheye] from [Transform] in the [Filter] menu. Adjust the [Distortion] value to your liking and press [OK].
Hold down the [Alt] key and transform from the center to make a perfect circle.
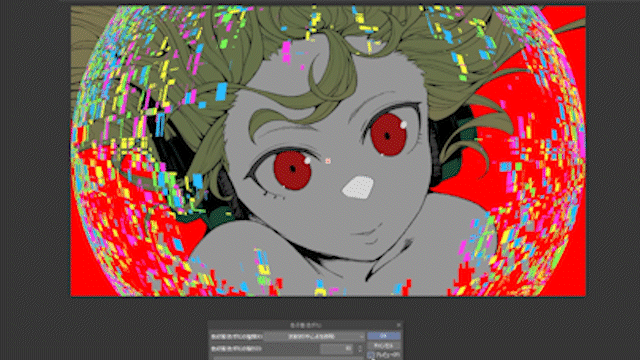
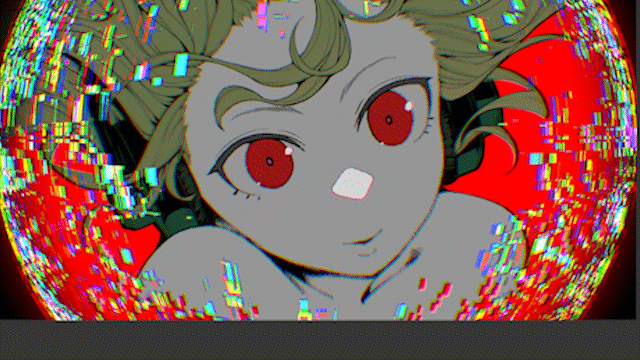
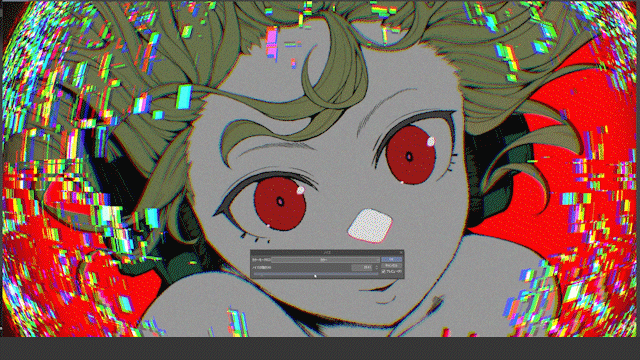
4. Processing effect materials with the [Chromatic Aberration] filter
Next is the Chromatic Aberration filter. Launch Chromatic Aberration from the Effects menu in the Filter menu.
The effect material is starting to resemble electromagnetic noise.
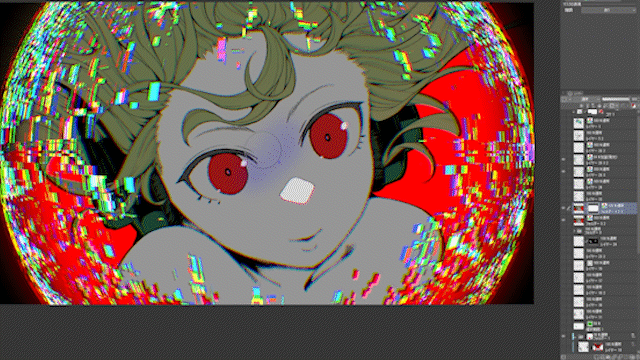
5. Processing effect materials with the [Mosaic] filter
Things to keep in mind when using the [Chromatic Aberration] filter.
The problem is that the borders of the color shift become sharp. This gives a very hard, digital, and cold impression. It may not match the purpose of the painting. In such cases, the [Mosaic] filter is useful.
From the Filter menu, select Effects and then Mosaic. A little bit of it will give you a nice softening of the color edges. This will have a big impact on the overall look of the final painting.
Remember that the [Mosaic] filter is useful for softening the edges of color aberrations.
6. Adding gradients and emitting light from effect materials
The outside of the effect would be blank, which would distract the eye, so we'll darken it with a circular gradient to draw the eye to the center.
The effect seemed a little dark, so I duplicated the effect layer and changed the blending mode to Additive (Glow).
I added a bit of color to the highlights of the eyes and nose.
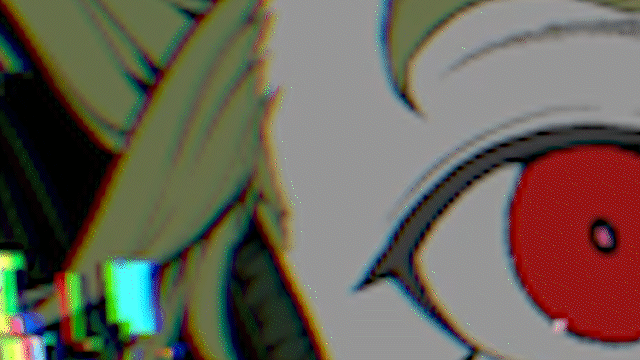
Now I'll apply a chromatic aberration filter to the person as well.
7. Apply the [Chromatic Aberration] filter to the character
Duplicate the character layer and prepare two copies. Apply a strong [Chromatic Aberration] filter to one and a weak one to the other.
Apply a layer mask to the side with the stronger Chromatic Aberration filter to hide only the area around the face.
When you want to create a difference in the strength of chromatic aberration within a single image like this, we recommend using two images and erasing the chromatic aberration partially.
8. Apply the [Mosaic] filter to the character
Next, apply a mosaic filter to the darker layer. This softens the color edges.
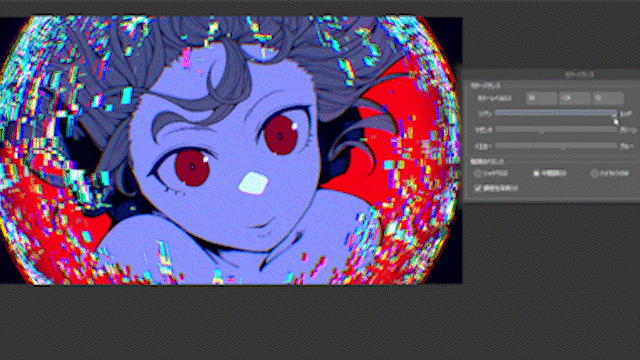
9. Apply the [Noise] filter to the character
Merge the two chromatic aberration layers of the person into one layer, then launch the Effects filter Noise. Set Color Mode to Color and adjust the Noise Intensity.
It gives a grainy effect, like an old TV.
A light application of this filter is enough to give your image an analog feel. It is a useful filter when you want to reduce the smoothness of digital images.
10. Adjust the color with the tonal correction layer [color balance]
Finally, adjust the colors with the [Color Balance] of the [Tonal Correction Layer].
This is a filter that changes the color tone according to brightness.
I adjust the color so that the entire person leans more towards cool, receding colors, while making the red of the background and eyes stand out.
Finish
done.
Conclusion
Filters are not invincible killer techniques! However, with a little ingenuity and combination, you can improve the quality of your images, so please try them out!
This time I introduced how to use filters for finishing touches, but in previous TIPS I have also introduced various ways to use them for drawing, so please refer to those as well.
Users who liked this post


Comment