
Hello Hello! I’m Jay,
I’m a professional illustrator that’s been using Clip Studio Paint for over 4 years.
And today I’m going to teach you how to speed up YOUR workflow using clip studio paint’s fill tools so you can start coloring your illustrations like a Pro!
I've also made a video walk-through of this tutorial if you prefer learning that way!
Preparing Your Illustration For Color
The first step to mastering ANY tool is understanding WHY you’re using it
you don’t want to be using a screwdriver when you could use a drill.
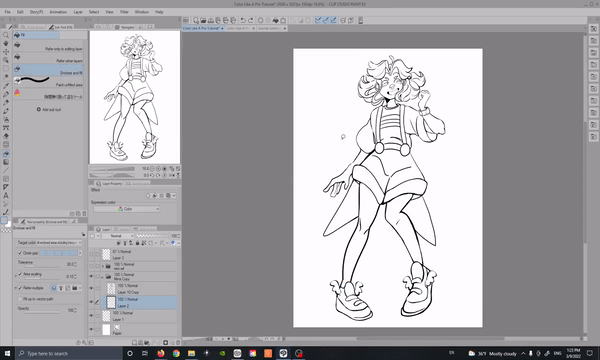
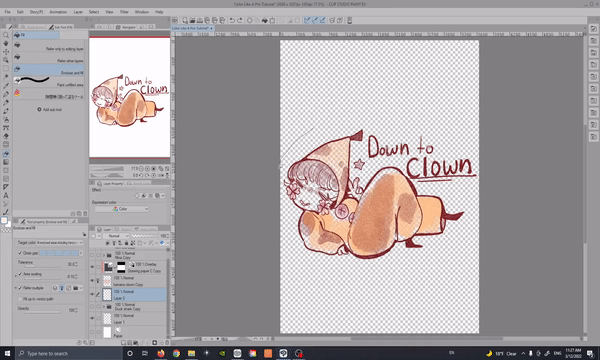
Before I get into filling my illustration with colors I'll create a base to work with.
There are two main reasons why I'm creating a base.
#1 The color of the character's shirt is white. Which means once I start using the paint bucket tool it will be hard for me to tell what areas I've actually colored in.
#2 I want to avoid colors bleeding outside my lines as I start to do my flats and shading later on.
Off the bat I notice some gaps in my line-art that will cause problems with the normal paint bucket tool. Our goal is to color in as much of the drawing as quickly as possible and avoid wasting time by clicking each individual section of the drawing to fill.
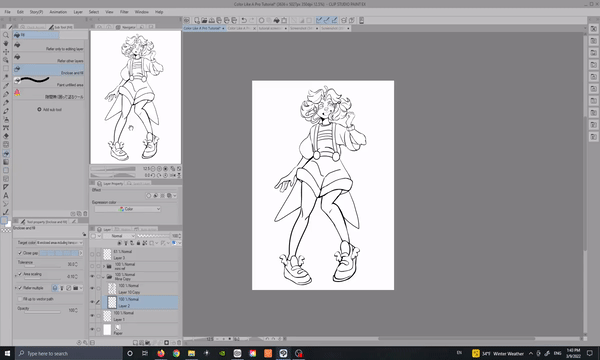
Which is why I'm so excited to show off the #1 tool that's made my workflow so much faster. The "Enclose and Fill" tool

Just like the lasso selection tool, the Enclose and fill tool is a lasso tool that fills in your line-art much faster than the normal bucket tool. There's a few things that don't quite look right.
You'll notice that the tool avoided coloring both of the hands and a good portion of the hair which is not what we're looking for.
*the space between the head and hand being filled in is to be expected I'll show you how to avoid this in a moment
If you're someone who doesn't like having to play with a bunch of settings on tools and just want something that works out of the box I highly recommend this tool. Here's a clip of this cupcake tool doing the same thing as before.
*both of these tools are being used with the default settings for comparison purposes.

You'll notice that this tool automatically fills in most of the areas that the default Enclose and fill tool didn't. The only area that it didn't color in is the top section of the hair that had too much of a gap to color in. I can always go in with my brush and fill the gap then use the tool to fill this area in.
If you want to grab this tool you can go to the asset store and type in the numbers from the content ID "1759448" Make sure you give the creator some love too
Editing The Enclose and Fill Tool
If for whatever reason this tool isn't available in the future I'll also give you some super easy settings you can use that will give you the same results.
In the Tool property menu go to the section that says "Target Color" And select the option that says "all enclosed areas including transparency"
Next go to the section that says "Close Gap" and click the last square to set it to the maximum setting.
Finally in the "area Scaling" menu section set it to -0.10 This will keep the tool from creating tool much overflow
This is the result of doing the same thing as before!
For the rest of the tutorial I'll be using the edited version of the Enclose and fill tool! However the cupcake tool works just fine.
Getting the Best Results From Enclose And Fill
Before we move on to flats. I'll show you a way to avoid overfilled areas like these so you can minimize as much clean up work as possible
If you notice that you keep getting areas like this. Don't bring out the eraser! All you have to do is go over the areas a bit more closely to the line-art. In the end you'll only have to do a little bit of clean up work by hand.
I hope this gets you excited to use this tool! You can also use it in so many ways. I left a few examples below!!
Other Ways To Use Enclose And Fill
I love using this tool for organic looking Spotted Light Effects and shading. It gives me a good base to work with and allows me to make unique looking shadows that don't look stiff and out of place
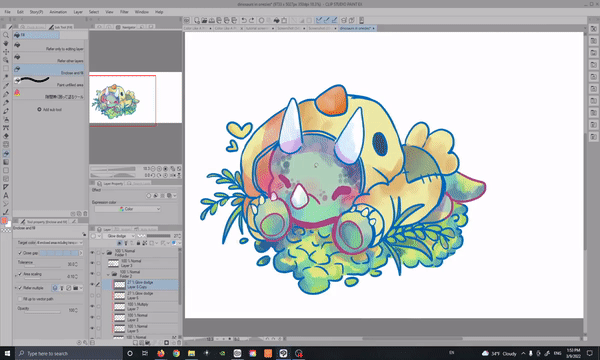
I also use this tool for quick flat Fills for all of my stickers. This is great for those pieces that need a quick background fill that I can easily adjust and change later.
Quick Tip For Your Sketches
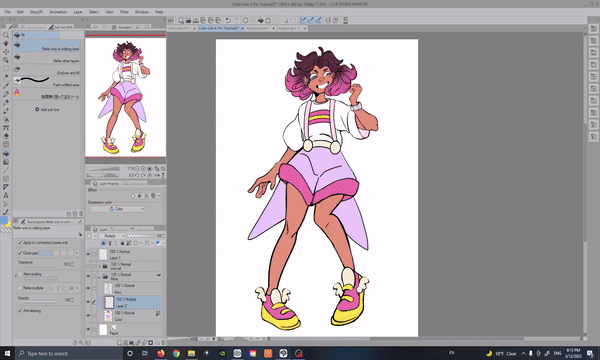
A quick tip for those who struggle to pick out colors, I highly recommend coloring in your sketches before you even start your line-art!
This will save you so much time and stress, I've noticed that many artists get overwhelmed in the coloring stage because there are just too many possibilities!! By coloring in your sketch you get to test out a bunch of different color palettes before you've decided to finalize your work.
I do this to check my composition and colors before fully committing to an illustration, it lets me see any potential mistakes or areas that might be hard to read visually.
Here's a Side by side comparison of my draft verses the final outcome
Refer to Other Layers Fill
Now that I have a good base to work with, I'll lock the transparency on my base layer. This allows me to edit the colors within the base but keeps me from coloring outside the lines.
I'm going to be coloring directly on this layer, the reason behind why I'm doing this instead of using a clipped layer above is because this
Let's say I accidentally click outside my lines at some point when using the Refer to Other Layers tool.
At first you won't see any difference, however if you look at the layer preview I've filled the whole canvas around my character. If you unclip the layer you can see exactly what happened.
Not only does this add unnecessary data to your layer, it can cause a lot of lag if you work on larger canvases like me.
There's a time and place where we can take advantage of this feature, for example I might want to create a layer with an Overlay blending mode and I want to fill everything inside my color layer. However I've NEVER used the Refer to other layers tool for this purpose.
I'll show you how to properly use clipping layers for lighting effects at the end of the tutorial.
Things To Keep In Mind When Using Transparency Lock
WARNING, it might be tempting to use the eraser tool if you make a mistake, It's second nature for us artists HOWEVER if you decide to use the eraser on a layer you've locked the transparency of, you won't be able to go over the same area until you unlock the layer and color in that section again.
In essence when you use an eraser, you've told the program to erase that section COMPLETELY, the point of using a base is to create an area that won't go outside the bounds and when you erase you're editing those bounds.
This is great if later on you find you want to get rid of a section that's gone outside your artwork. In fact I use the eraser to fix my base when necessary, it's not so great when you do it unintentionally.
Handy Feature For Refer to Other Layers Fill
You'll notice in this clip that I'm able to quickly go over my lines and fill them in because this bucket tool recognizes my line art layer so all I have to worry about is making small fills with my pen tool so the paint bucket tool fills how I want it too.
It almost looks like I've individually clicked each area but I really haven't!!
A super handy feature for the fill bucket tools is that you can click and drag across your canvas and smoothly fill in all the areas. Try it! It's super fun and handy for complex areas!
Painting Unfilled Areas Tool
You probably noticed in the last clip I went over these little gap areas with another tool.
This is the Paint unfilled areas tool, with the color you want to fill the gaps with selected you can quickly go over these little areas super quickly. This is perfect if you have lineart that has a lot of texture and you're noticing it's creating a bunch of these unfilled pixel fragments.
In the next clip I've created some larger gaps so it's easier to see this tool in action!!

Useful Settings To Be Aware Of
I rarely change my fill settings but I always have my close gap at max and I'll turn off area scaling when it overflows a section like this. Every so often I'll change my Tolerance Settings but even then I don't really change much when it comes to the default settings.
*NOTE you should turn down the close gap if the fill bucket isn't coloring in full sections that it should be. It totally depends on the drawing and what you're trying to fill. If you notice it seems to fill areas in a patchy way turn the close gap down and that should fix the problem.
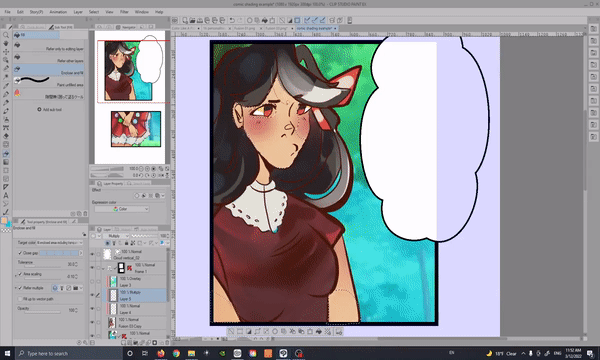
Adding Effects With Refer Only To Editing Layer
Going over our last fill tool we have the Refer only to editing layer!! I've made a new layer above my color layer and clipped it so it only affects my Illustration. I'll use the Refer Only To Editing Layer tool for quick Overlay Effects or fills that will balance all my colors together, using this tool fills the whole layer like I mentioned before but, this time it's useful for shading!!
here's a demonstration to close out this tutorial!!
Closing Thoughts
Thank you so much for reading and joining me along for this tutorial!! I hope you've learned a few new things if you're interested in my work you can find all my socials in my linktree below.
https://linktr.ee/pjayscribbles
If you enjoyed this Tutorial remember to Like and Favorite if you want to find it later. It also lets me know to make more tutorials like this in the future!
And with that, I hope to see you again soon Bye Bye!!
Users who liked this post


Comment