
This is a basic exercises in animation, the walking cycles, in this tutorial I want to show you how to use the "3D drawing figure", as a means to solve the most complex problem in this type of animation, which is the change of perspective of the different parts of the body when the point of view of the camera, is at complex angles. This technique is equivalent to the use of reference videos, used to help animators draw complex scenes.
SETTING UP YOUR CHARACTER
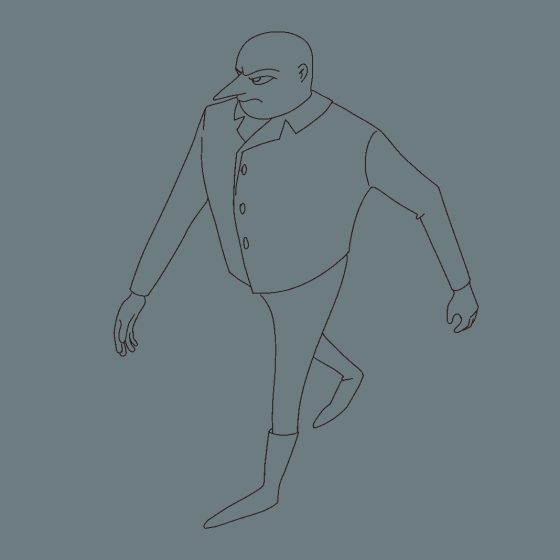
The first thing I did was to create the basic shape of the character using the “3D drawing figureVer.2 (male)”, this figure can be modified in a simple way, to do it just drag the character to the drawing area and edit. To do it, first select it using the "object tool", in the "properties tool" and “Change body shape”.
This simple interface allow you to modify the proportions of the character, the whole body or specific parts such as hand size, arm length, head size, leg or foot length, etc.
More details here:
Using this tool I create this cartoon figure.
WALKING CYCLE POSES
Place the character in the side view, them pose it in the different positions that form the walk cycle. These poses are, Contact, Down, Pass position, Up and Contact. These are the basic positions that create the illusion of movement.
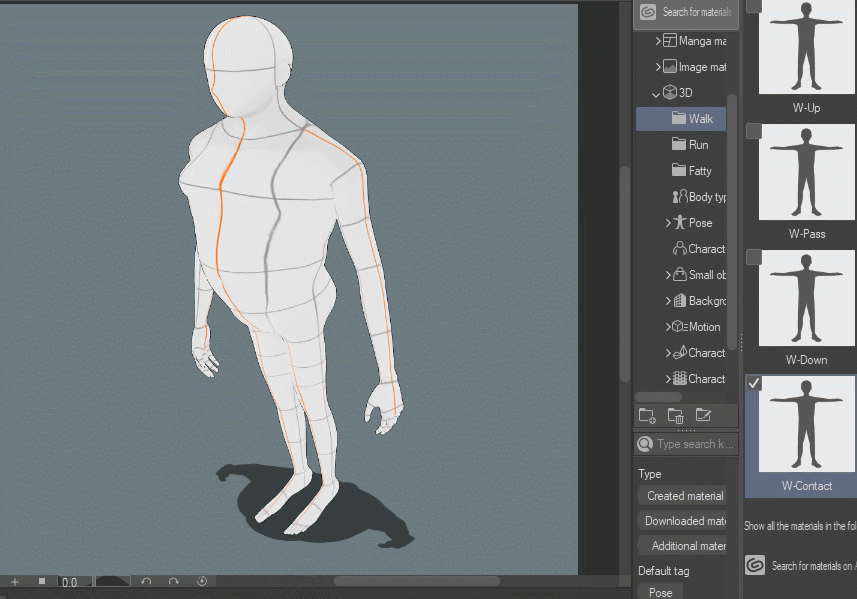
After setting up all the poses, save every position in the Assets so that they can be used in any perspective, using this method all kind of walks can be created. To save it, select "Register full body pose as material" in the widget, then select the name, if possible an image, the destination and tags to allow you to search the pose easily.
More details here:
DIFFERENT TYPES OF WALKING CYCLES
I create these animations using a similar method. The clever thing is that the data for the boy position not contain all the bones position, but just the necessary ones, this allow you to edit part of the body and them apply the walk cycle and the modify bones will not be affected.
A. Walk in 8 poses (pose affects leg, hip and forearm bones)
B. Front view
C. Modified, shoulder movement
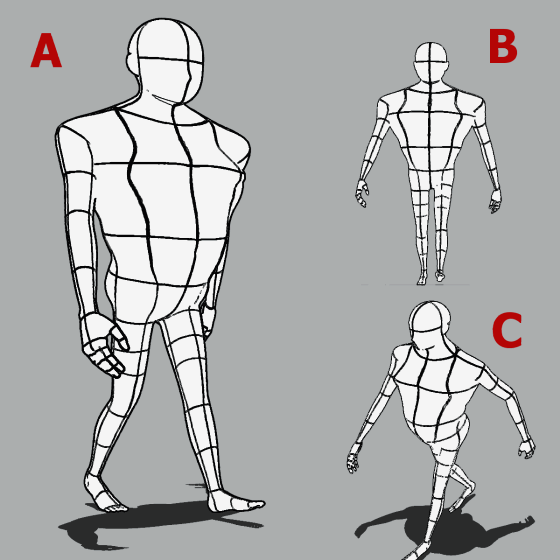
A. Walk in 12 poses (pose affects leg, hip and forearm bones)
B. Front view
C. Modified, shoulder movement, head position.
A. Walk hip, female movement 12 frames (pose affects leg, hip, abdomen, and forearm bones)
B. Front view
C. Modified, position of arms and hands
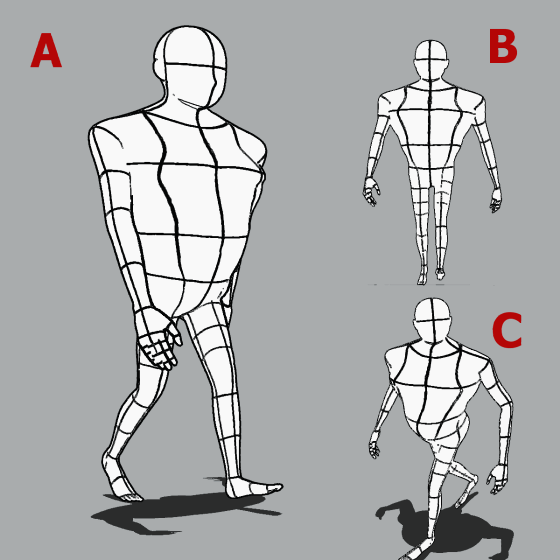
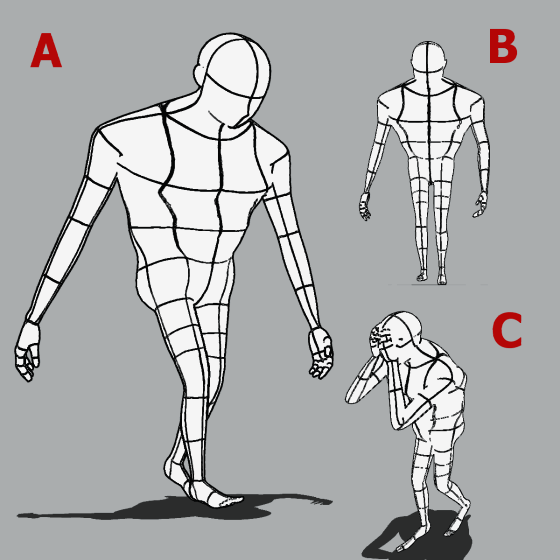
A. Sad walk of 12 poses (affects leg, hip and forearm bones)
B. Front view
C. Modified, arm position
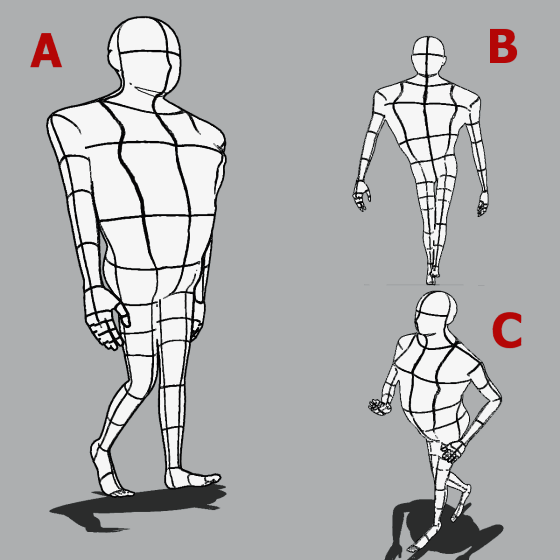
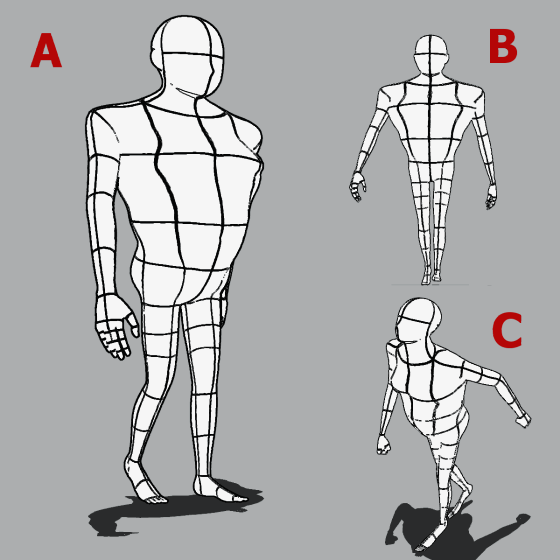
A. Slow walk of 12 poses (affects leg, hip and forearm bones)
B. Front view
C. Modified, head and hand position
If you're interested in the files to achieve those walk cycles, you can find them on my Gumroad.
CREATING THE ANIMATION OF THE WALK CYCLE
Now that we have registered the poses, we only have to position the character in the perspective we want. Then we drag every pose from your materials assets, if you don't find the pose, search for it using the tags you use for the pose.
More details here:
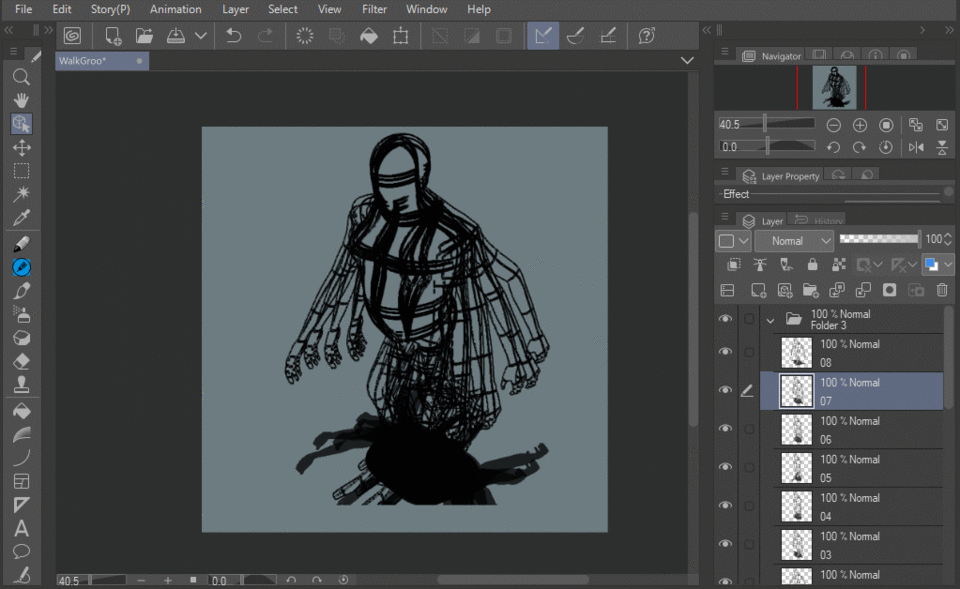
Drag the first pose to the character, if you use Clip Studio EX you can extract the lines of the 3D model with “LT conversion of layer”, by using this method you have the option to modify the rough that serves as a reference for the animation. If you have Clip Studio Pro, you can rasterize the layer or draw a rough in a new layer, this layer should be named 01. The action is repeated for all poses (in this case, Contact, Down, Pass position, Up). The pose 05 is the same pose 01 (Contact) but reflected, for that select the 3d figure and in the widget click on “Flip model pose horizontally”. If there is any doubt about this step, please watch the youtube video (Walk Cycle using Easy Animation Clip Studio Paint), it sows this step in more detail.
The process is repeated through poses 06, 07 and 08, the layers should be organized from 08 to 01 with pose 08 at the top of the layer list. To make this process faster I created an auto action that duplicates the layer, rasterizes the copied layer and transform the image to lines.
Time to create a new animation folder, if you don't see the timeline just go to Window/Timeline (x), in the Timeline create a new Timeline (A) "Frame rate" 24 fps and "Playback time" 16 frames.
Then create a new animation folder (B). Drag the layers from 08 to 01 inside this folder and in Animation/Edit track/Bach specify cels, select "Specify name of existing animation cels" and in "Number of frames" enter 2, this means that each frame will be repeated every two frames, this is called animating in two’s.
My rough animation looks like this.

If you want to learn more about the animations tools I highly recommend you to watch this video:
Now that we have the rough ready, we can create a new animation folder and in this one start sketching the character with the clothes and the features of the face.

When the sketch is finished, we can make the final line drawing. I draw this part using a vector layer, there is no difference in the final result, it's just a matter of preferences, to do this create the animation folder them created a vector layer inside, then you must go to the timeline and in the layer of the animation folder right click on the first frame and select the layer that was created. An important part of this step is to use a pen with no antialiasing to avoid problems when coloring the character.
Because I used vector layers for the animation line art, isn't possible to color over this layer, personally I think this is good because if you use the same layer of the lines art for the colors, any modification is going to be more complex, especially if you want to modify the animation. When color is applied over the same layer of lines art, the onion skin becomes useless because it will not show the lines but only the silhouette. To apply the color, create a new animation folder, use the paint bucket with the colors you need, is best if you select the option, "close gap" in the Property Tool, so if the drawing is open the filling will closed it.
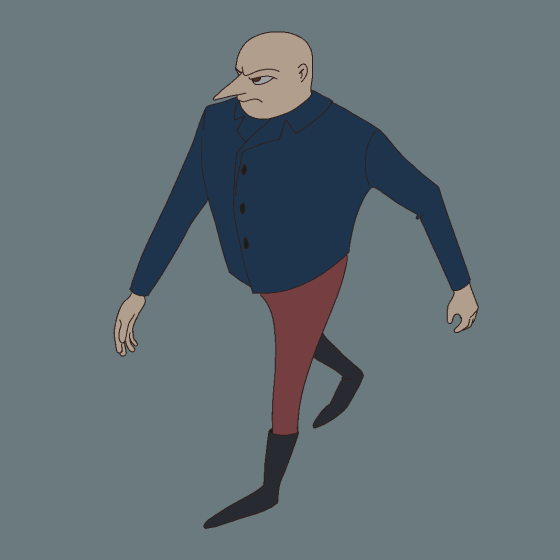
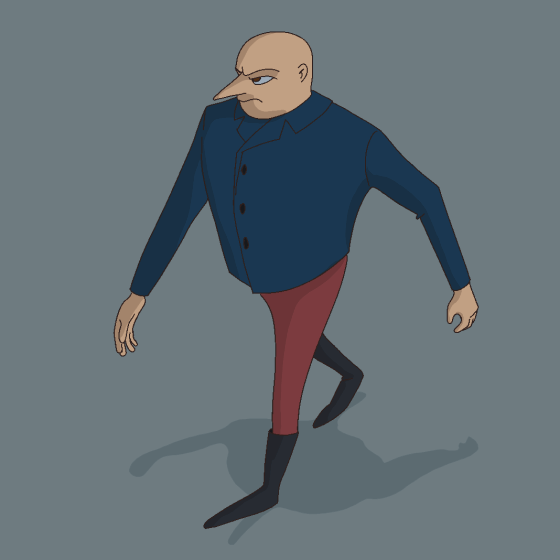
Finally, create the shadows in a different animation folder. This is the final result, it's not perfect, but I did it from start to finish in only 3 hours, not bad...

Thank you, I hope this tutorial is easy to follow, if there is any doubt please let me know.
この投稿を「いいね!」したユーザー


コメント