Simple Drawing Animation
Hello!
I’ll show you how to do a simple animation without cutting or slicing up your drawing too much. I’ll be animating most of the environment that will set up the mood of the animation without being too heavy on the animation process itself.
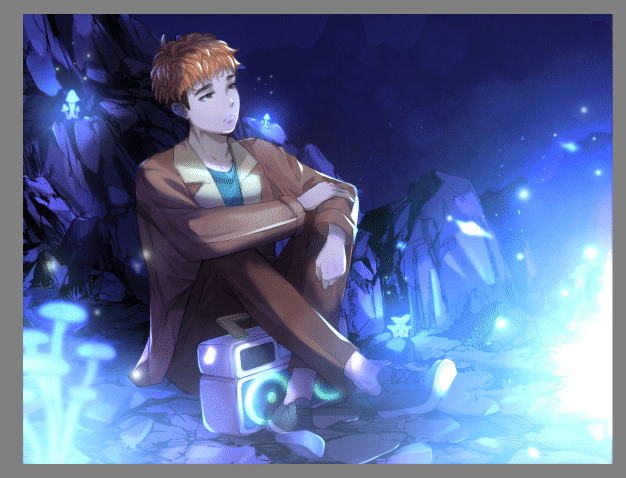
Final Image will look like this:

I will be showing how to animate Lights, Shadows and Highlights
I’ll also show a simple eye animation and some camera animation.
We will be working with KEYFRAMES and I will show you some tips and tricks on how to use them!
These animations are very easy to do and is applicable on both PRO and EX version of Clip Studio Paint
I will be using CLIP STUDIO PAINT PRO for this tutorial, your can also use EX if you have it
This will be a detailed workflow, I apologize in advance for the length
Let’s start!
PREPARATION
First, grab the drawing that you want to animate.
Now imagine or make a draft of what you want to do, on this case;
⭐ I want the mushrooms to glow and maybe release some magical spores.
⭐ I want the stereo to glow
⭐ And I want him to blink
Really simple animations! But you have to remember that light creates SHADOWS.
And so we will also need to add
⭐ Shadow animation
⭐ And maybe highlight animations
Let’s start animating!
TIMELINE
Open the drawing that you want to animate.
Then let’s go to our TIMELINE, if you can’t find your Timeline, it’s on Window > Timeline
Now click on [New Timeline]
The settings I’m using are 8 frames per second and 24 playback time
Frame rates are how many images there will be per second while Playback time determines how long the animation you want.
You can go [Playback time/Frame Rate = Seconds] so 24 playback time / 8 frame rate is 3 seconds.
The higher the frame rate, the smoother the animation will be.
REMINDER: Clip Studio Paint PRO has a maximum of 24 PLAYBACK TIME, any more that that won’t be possible. If you want a longer playback time, I recommend going with the EX version.
Let’s start animating!
>> Keyframe Animation
I will be using Keyframe Animation the most for this.
Just a quick note on what keyframe animation is:
Modern or digital keyframing is where we create a start and end point without the need of making any in between cels.
If you start a keyframe from the left and make another keyframe going to the right - you don’t need to make any in between frames. It does it for you.
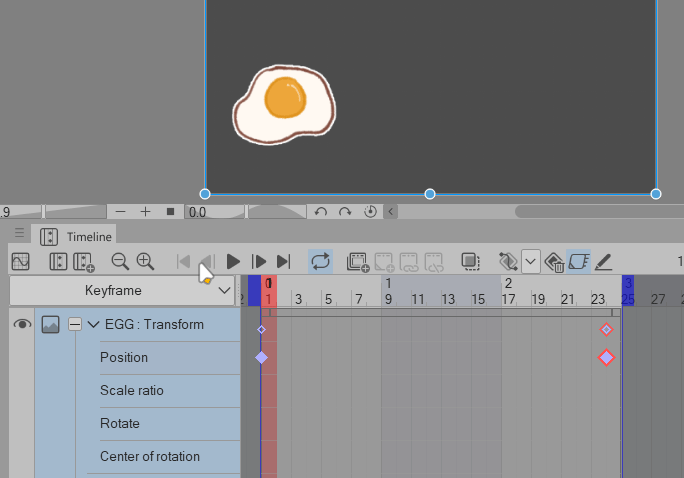
The farther the keyframes are from one another, the slower the animation will be.
The closer the keyframes are to one another, the faster the animation will be.
LIGHT ANIMATION – Smooth Interpolation
Make a [New Raster Layer] above your drawing > rename that as “Glowing Mushroom”
Now get your [Gradient] tool > [Foreground to Transparent] > Hold [ALT] on your keyboard for the Eyedropper and get the color of the LIGHT that your want.
Or get any tool that you want that can be used as a LIGHT.
Can be regular Soft Brush to a Decorative Brush
And just click and drag your Gradient tool
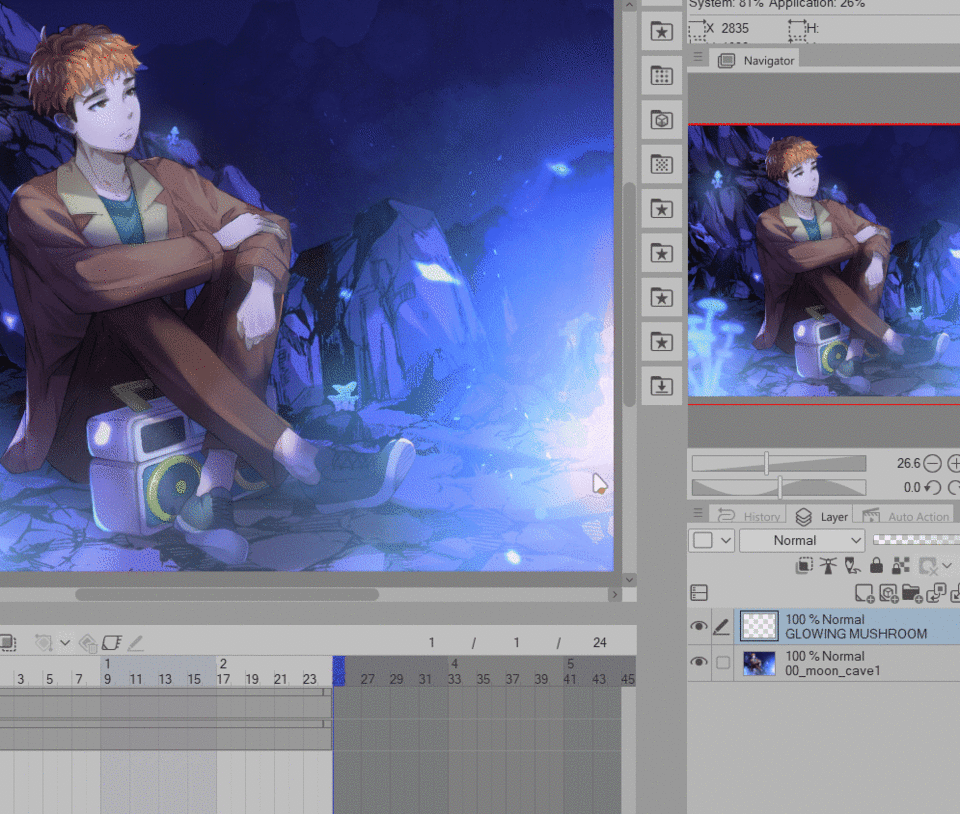
You can use whatever SHAPE of gradient you want, I’m going with [Circle]
Change your BLENDING MODE to GLOW DODGE
TIP: Color Dodge, Add, Add (Glow), Overlay, Soft Light and Hard Light works as well.
Now on your TIMELINE area, make sure you’re on the “Glowing Mushroom” layer, click on [Enable Keyframes on this layer]
TIP: You’ll know that the layer is now keyframe ready when you’re unable to paint or erase anything on the layer. Also ‘transform’ appears on the layer name.
⭐ CLICK on the + to expand, and click/select on [Opacity]
Also check on your Keyframe Interpolation, make sure you’re on Smooth Interpolation
Now at the very beginning of your timeline, Frame 1 > Right Click > [Add Keyframe]
⭐This will set the very beginning of our timeline with 100 % opacity on the Glowing Mushroom
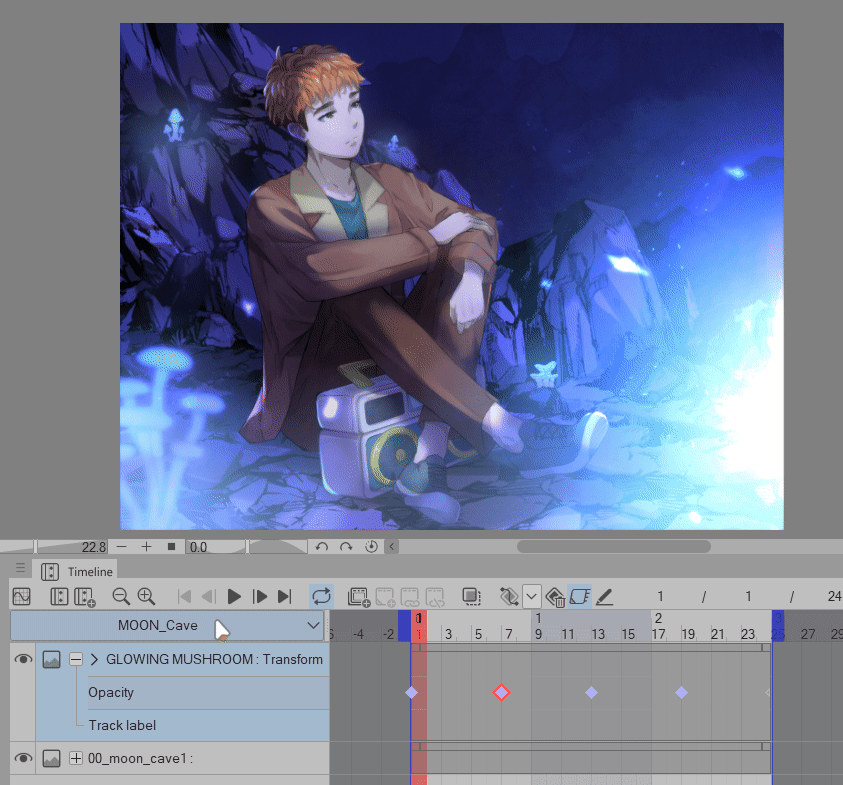
Then we move on maybe Frame 7, you can also add an Opacity Keyframe by moving the Opacity bar on the Layer tab
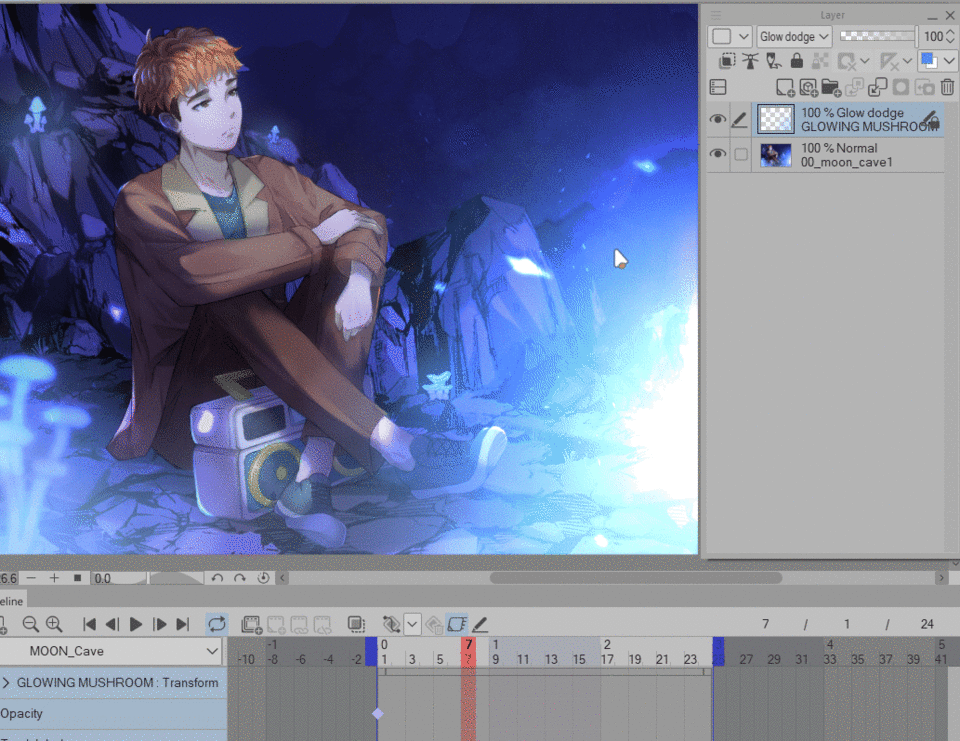
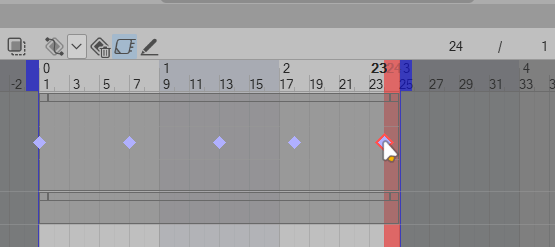
Continue adding the keyframe animations that your want, this is what I ended up with
Frame 1, 13 and 24 are 100% opacity
Frame 7 and 18 are 23% opacity
TIP: You can drag your last keyframe to the very end to make the animation seamless.
I will explain that more on “Keyframe Looping”
Now our image looks like this:
>> Keyframe looping
Usually the trick on making a looping animation is making sure that your first movement is the same as your last movement.
In this case, we’re working with keyframes so we need to make sure that our first and last keyframe are the same.
I will be mentioning ‘dragging your ending keyframes at the end of your timeline’ for quite a bit and that is to help you create a seamless or a looping animation.
See the very first keyframe in the timeline, it’s in between of the 0 and 1
It’s preferable that we also do the same to the last Keyframe if we want to make a loop
Here’s the difference when you don’t drag the last keyframe to the very end of the timeline.
It’s subtle but it stops for one frame at the end
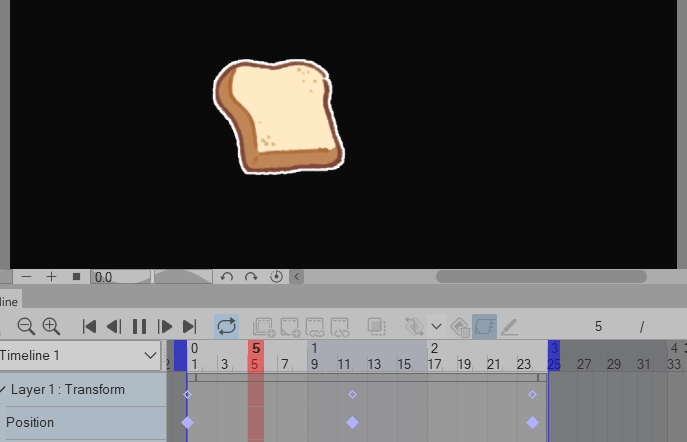
But when we drag out the very last Keyframe at the end of the timeline
It moves more smoothly, because they’re the same value
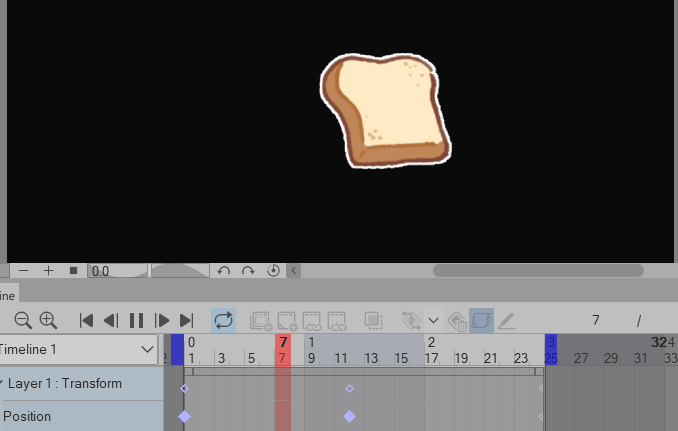
⭐ Make sure that the keyframe at Frame 1 and Frame 24 are the same values
At Frame 1, we got the end half of the first keyframe
Then at Frame 24, we got the first half of the same keyframe
When the animation goes on loop – the animation would look seamless
If you’re having a hard time grabbing the keyframe you dragged at the very end, use the GRAPH EDITOR and select the keyframe.
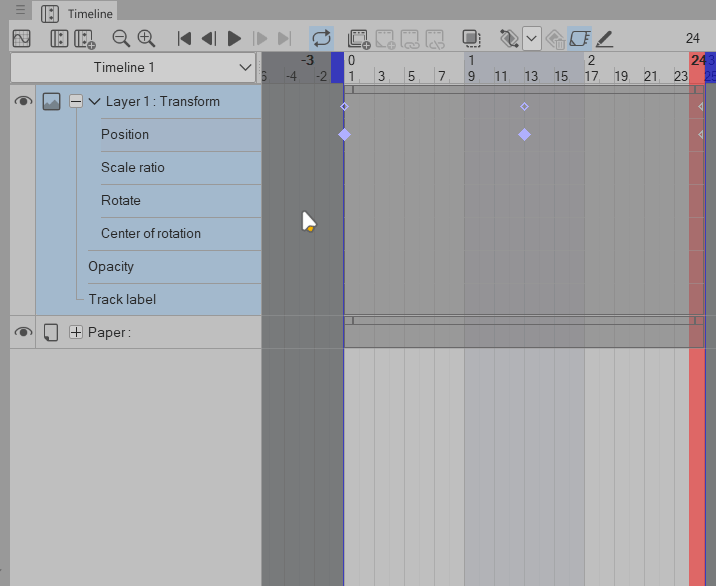
You can drag it where you want, you can delete it as well.
> Editing: Adding more effects
RECAP: This is what we last ended up with:

What about the other mushrooms??
Should you make a new layers for them as well and animate again?
NO! We can still edit this “Glowing Mushroom” layer!
But if you click just so – it won’t let you.
🚫 You cannot edit this layer because it is currently for Keyframing
If you want to draw on this layer you have to disable the [Enable keyframes on this layer].
Click the icon to disable it.
DON’T WORRY!
We just disabled the keyframing , once we enable it back again, the keyframes will appear again.
JUST REMEMBER TO NOT DELETE THE LAYER!
AND DO NOT MERGE IT TO ANY OTHER LAYER - the keyframes will disappear if you merge it with another layer
Get your [Gradient] tool or any tool you want to add more glow effects
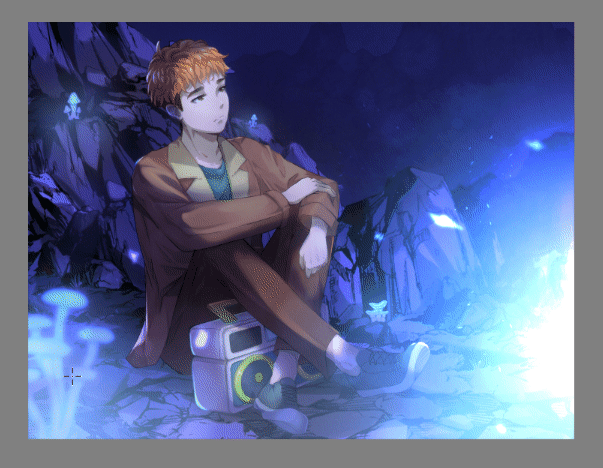
When you’re done, return to the Timeline tab > click on [Enable Keyframe on this layer]
And your keyframes are still there!
It now looks like this:
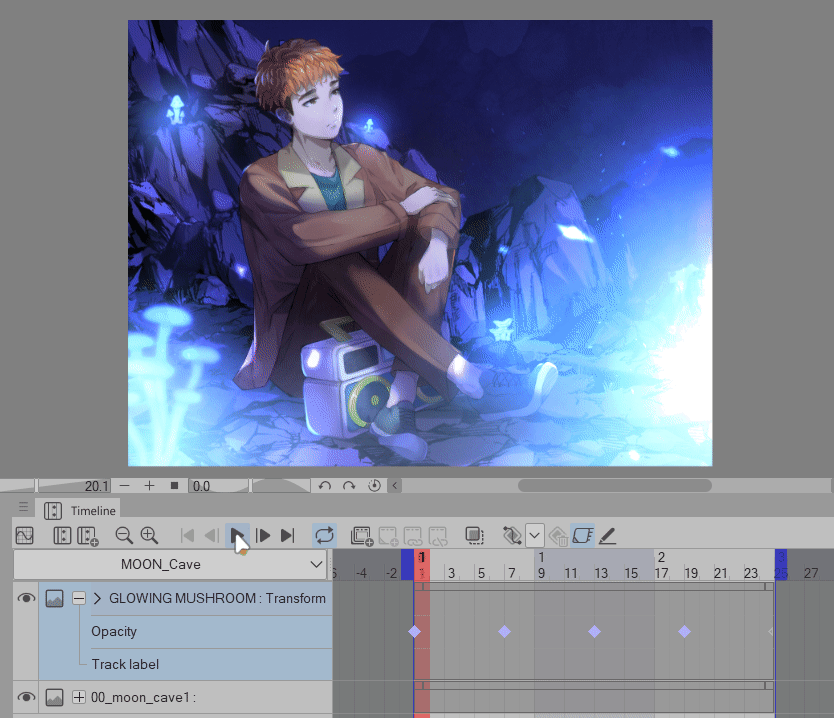
Before we go animating the rest, let’s talk about Keyframe Interpolations really quickly
>> Keyframe Interpolations
Keyframe interpolations are how your keyframes or animations move.
This is like the inbetweening when in comes to cel animations.
I will be using two keyframe interpolations for this tutorial, smooth and hold.
Here’s the difference on all interpolations:
⭐Smooth - makes smooth movement, it basically moves in a curve — so it looks like there’s flow that somehow makes it move quite faster but still smooth.
⭐Linear - makes a direct movement. It doesn’t have flow and moves at the same speed. It’s like a linear movement - straight to the point.
⭐Hold - it moves keyframe-to-keyframe. It holds the keyframe to the next keyframe and the next.
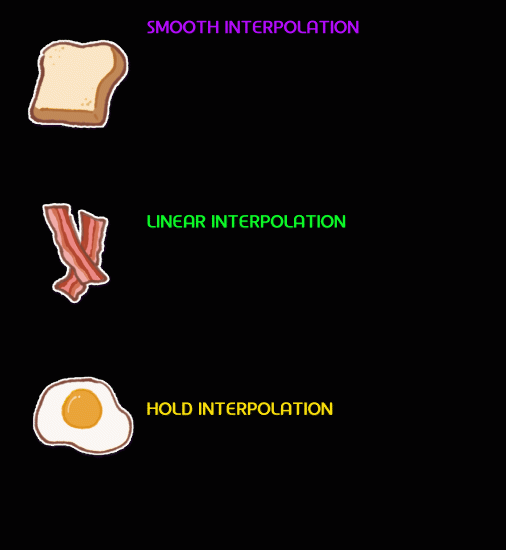
Also, your keyframes will change color depending on what Interpolation you used
Smooth is purple, Linear is green and Hold is yellow
LIGHT ANIMATION – Hold Interpolation
Let’s work on the Stereo Lights using the HOLD interpolation this time
Make a [New Raster Layer] > rename it as you wish
*I named it ‘Speaker’ – I made a mistake! It’s a boombox / stereo.
Get your brush, I used a [Soft Brush] and just put colors around the area that I want to glow
Change the Blending Mode of your layer to Add (Glow)
TIP: You can use Add, Glow Dodge, & Color Dodge if you want
Now click on [Enable Keyframes on this layer] so we can animate the stereo lights
Please change the keyframe interpolation from Smooth to Hold
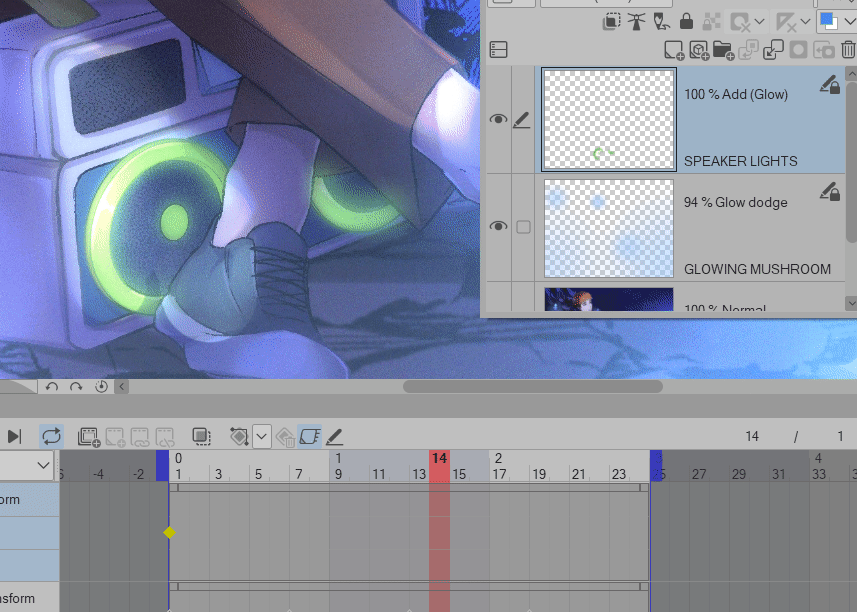
Now we will add a keyframe on FRAME 1, make sure that you’re on the OPACITY
It’s quite subtle but there’s a change in color when you click on the transformation menu
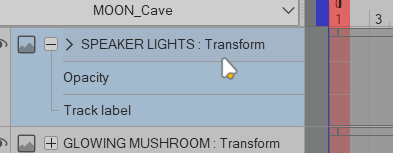
Put a keyframe at Frame 1; 100% Opacity
Then at the Frame 14, change the Opacity to 0%
Frame 15 at 100% Opacity
Frame 16 at 0% Opacity
Do it as many time as you wish
And when you play it, it looks like this
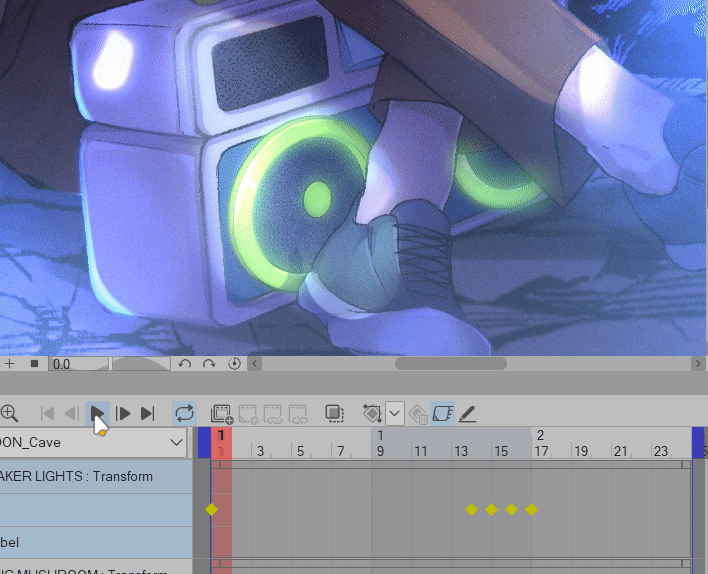
HOLD interpolations HOLDS the value of that keyframe until the next keyframe
Unlike the SMOOTH interpolation where it changes the value of the keyframe smoothly until the next keyframe
> Editing: Tonal Correction
Let’s say, you don’t like the color – usually we just go to Edit > Tonal Correction > Hue/Saturation/Luminosity but on this Keyframe layer, we can’t draw or make tonal correction on it.
If we want to do some Tonal Correction on this layer, we have to disable the [Enable Keyframe on this layer]
And then we can edit the Colors using Edit > Tonal Correction > Hue/Saturation/Luminosity
When you click on [Enable Keyframe on this Layer], the keyframes are still there.
And now it looks like this:

ANIMATING SHADOWS
Let’s animate some shadow!
This is the shadow behind the character, as the light in front of him glows, his shadow gets bigger or smaller depending on how big the light in front of him is.
Make a [New Raster Layer] under your GLOWING layers
Rename it as Shadow > Set that layer to MULTIPLY
Make the shadow overlap the character
I made it RED for this example, so that it looks visible but I changed it to grey later on
Again, make sure your Layer is on MULTIPLY Blending Mode
Next, let’s use mask. Click on [Create Layer Mask]
This will hide the area that we don’t want without deleting it completely
And just use your [Eraser] to hide the area that you don’t want the character to be affected by.
If you can’t see what you’re erasing, Right Click (the Mask Layer icon) > Show Mask Area
Continue erasing, and I ended up with this:
I masked the whole character just to be sure
To remove the Show Mask Area; Right Click (the Mask Layer icon) > Show Mask Area
That will disable it.
Now let’s start animating
Make sure you’re on the Shadow Layer, on the Timeline tab > click on [Enable Keyframe on this Layer]
Make sure to change your Keyframe interpolation back to SMOOTH
Now expand the Shadow Layer, click on the > icon
Make sure you’re on POSITION
Go to [Operation Tool] or press O on your Keyboard
Transformation points should appear on your screen
While at Frame 1, where the light is big
Click and drag the image a little bit away from the character - diagonally
Copy that keyframe and paste it to when the light is big; Frame 13 and Frame 24
Then when the light is small; Frame 7, drag the shadow downwards – diagonally.
Copy and Paste that keyframe to the other frame where the light is small; Frame 19
And when you’re done. It will look like this:
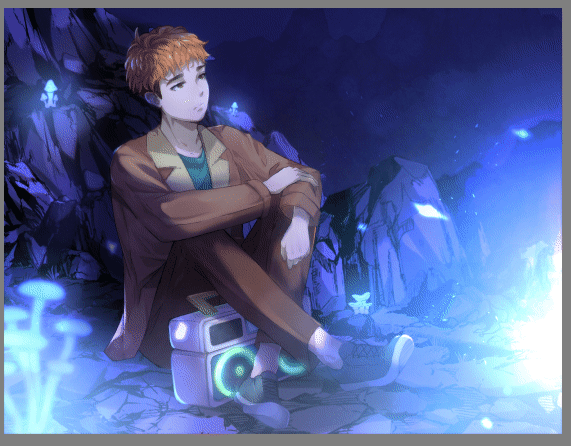
> Editing: Reworking on Mask
Look closely at the shadow – you can see that it’s overlapping the stone at the back and the character’s jaw
Same editing as last the LIGHT Animations, with the Shadow layer selected, disable the [Enable Keyframe on this Layer]
And we can rework on our mask
Another edit that I would like is to smoothen out the shadow.
Right click the mask > [Enable Mask] (or uncheck it)
Then [Alt] click on the eye icon of the layer to isolate it for awhile
I just use my Blur Brush to smoothen out the shading
Then [Alt] click again on the eye icon of the shadow layer, and shadow layer is no longer isolated
Right click the mask > click on [Enable Mask]
Then we click on [Enable Keyframes on this layer], our keyframes remained and when we played it..
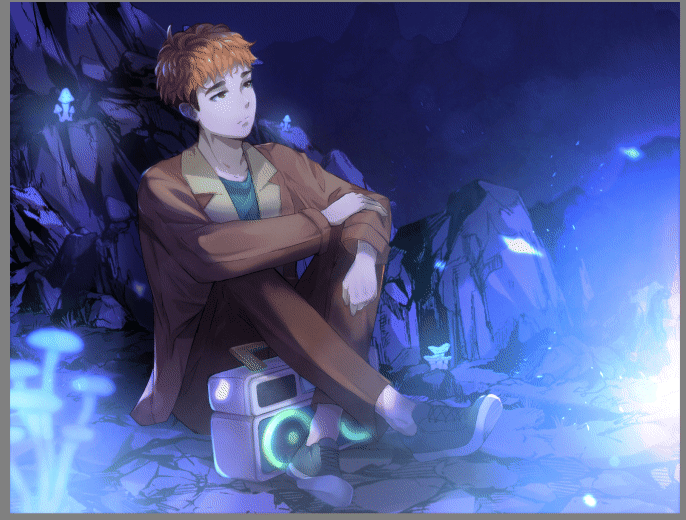
EFFECTS: Flying and fading sparkles
We will be using multiple transformation here, POSITION and OPACITY
Next let’s make some sparkles!
Make a [New Raster Layer] > named it as Sparkles > Set the Blending Mode to Add (Glow)
Now get your sparkle brush
I used this brush:
And just add some sparkles
Next, let’s animate this.
Click on [Enable Keyframes on this layer]
Make sure you’re on SMOOTH Interpolation
On Frame 1 – The light is big, add a keyframe on OPACITY – 100% Opacity
Do the same with Frame 13 and 24, where the light is big.
Then when the light is small, Frame 7 – add a keyframe on OPACITY – 0% Opacity
Do the same with Frame 19, where the light is small
And it should look like this:
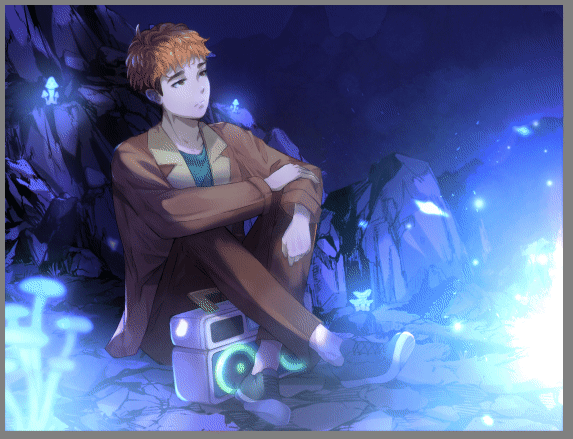
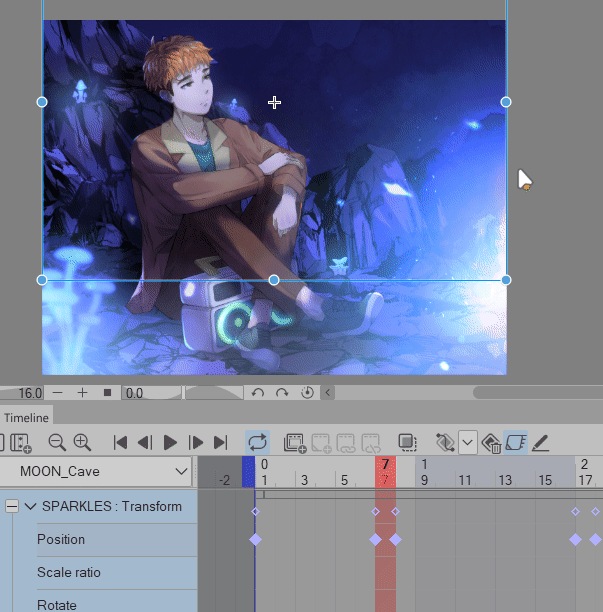
Next, let’s work on the movement, let’s make the sparkles go up
Expand the Sparkles layer by clicking on the > icon
Make sure you’re on the POSITION
On Frame 1, light is big, drag the sparkle upwards
Drag it just a little bit, imagine it like it’s the middle of the floating animation Make sure you’re on [Operation Tool] to be able to drag the Sparkle Layer
Add the same keyframe to the last frame, Frame 24 – but this time, make sure to drag the last keyframe to the end of the timeline, this will make the animation more smooth and seamless if you want to create a loop
Now when the light is low, Frame 7 – drag your sparkles upward
Remember this is also the frame where the Opacity is at 0% -- basically we’re creating an animation where it disappears as it went up
Frame 8, sparkles go down.
Copy Frame 7 and Frame 8’s keyframes and paste it to Frame 17 and Frame 18
The process and outcome looks like this:
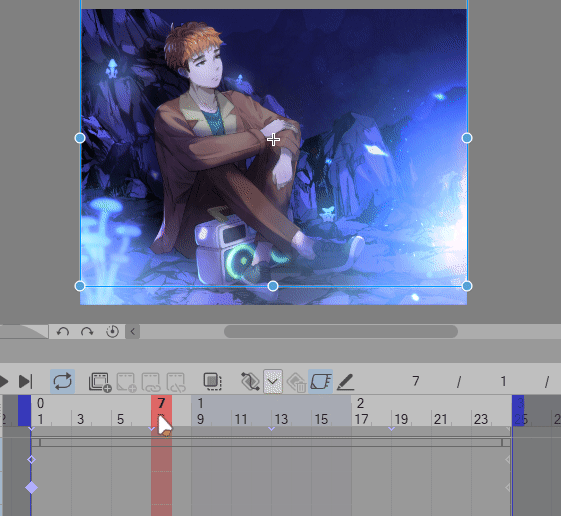
Basically what we did is Keyframe 1 and 24 are the middle of the action
Keyframe 7 and 17 are the sparkles going up
Keyframe 8 and 18 are the sparkles going back to starting position
And now the animation looks like this:
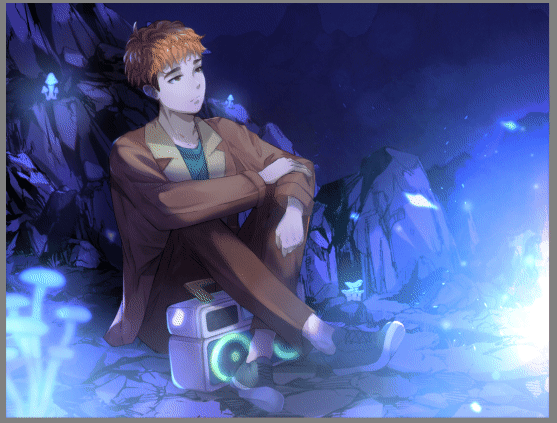
> Editing: Adding more Sparkles
This is the same as [Editing: Adding more effects]
Make sure you’re on the Sparkle layer, and disable the [Enable Keyframes on this layer]
And just add your sparkles
When you’re done, just click [Enable Keyframes on this Layer] and the keyframes are still there.
Now our animation looks like this:
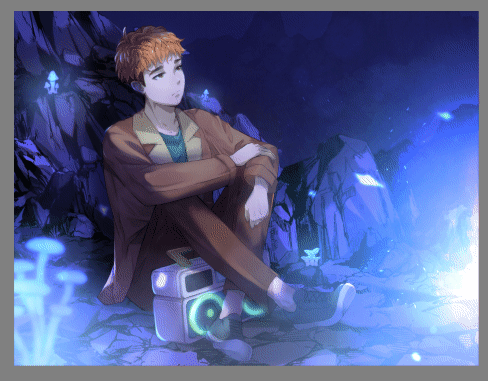
Remember that you can still go back and rework on your keyframes.
Example: You want to edit the sparkles because they’re going way too fast, too high.
Make sure POSITION is selected and you’re at the keyframe that you want to edit -- drag your sparkles however you like
> Editing: Masking some sparkles
And this is the same as the [Editing: Reworking on Mask]
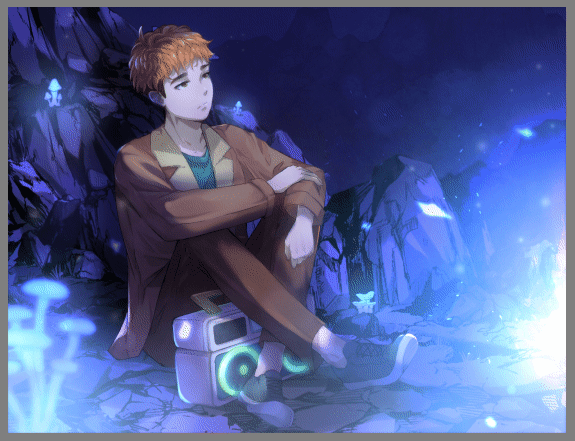
Notice how some sparkles are going way too low from the mushrooms and some are going to the character.
Rather than deleting those sparkles, let’s just mask them so they don’t appear on that area.
Disable your keyframing again, click on [Enable keyframe on this layer] so we can disable it and work on our mask
Click on [Create Layer Mask], when created > Right Click that mask > Show Mask Area
[Show Mask Area] - So that you can see what you’re erasing
And we can hide the sparkles on that area, grab your eraser and start erasing/hiding the parts that you want to have no sparkles.
When you’re done, disable the [Show Mask Area] and enable again the [Enable Keyframes on this Layer]
The keyframes remained and the mask is there
HIGHLIGHT ANIMATION
This is the highlight on the character and maybe some hard light on the background elements as well.
Make a [New Raster Layer] > rename it as HIGHLIGHTS > Set the Blending Mode to [Glow Dodge]
TIP: You can use Color Dodge, Add, or even Add (Glow)
And just get your brush and create some highlights.
I’m using a [Soft Brush] with 80-100% Opacity, changing back and forth
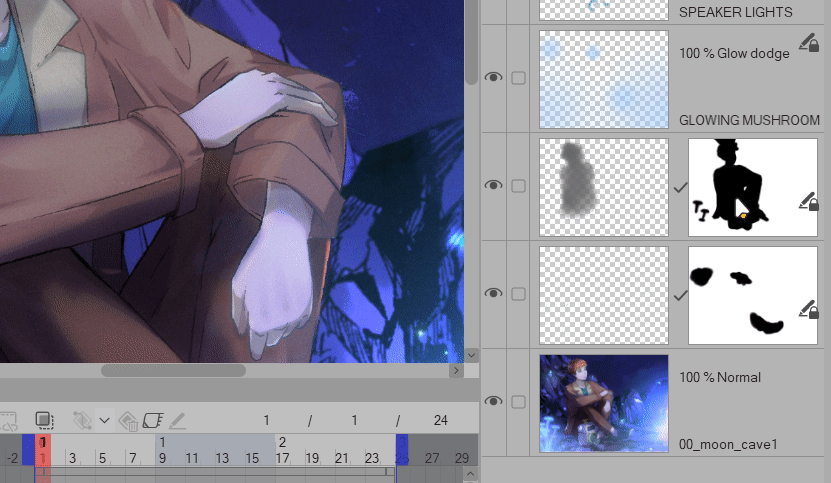
⭐ TIP: If you want a shortcut on making highlights for the character – remember that mask that we did for the SHADOW animation? We can use that.
Hold [CTRL] then click on that Mask - what happened is we selected the WHITE area, so let’s invert it to select the character.
Click on [Invert Selected Area] > and start adding your highlights
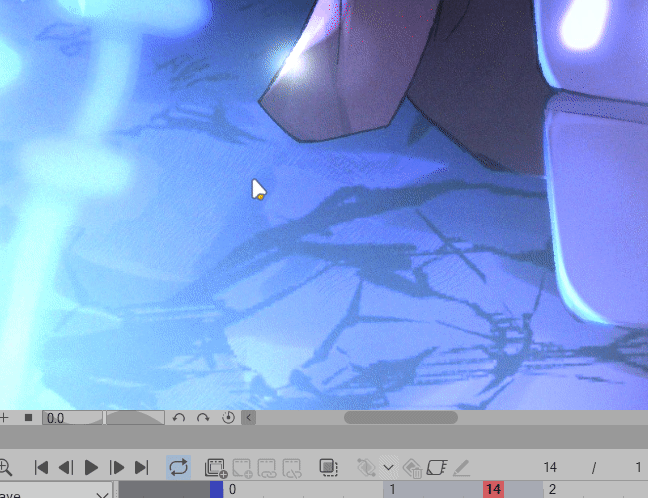
To add highlights to the environment or the rocks, I used the Lasso Tool
Make a selection using your Lasso Tool > and just use your brush to color
— soften the edges using a Blur Brush if needed
When you’re done with the highlights, let’s animate it
Click on [Enable Keyframes on this Layer]
Make sure you’re on the OPACITY – make the animations the same with the GLOWING MUSHROOMS
Frame 1, 13, 24 – 100% OPACITY
Frame 7 and 19 – 27% OPACITY (or lower)
When you’re done, the animation now looks like this:
EYE ANIMATION
For this eye animation, I’m only gonna use two images/frames for it;
⭐ EYES OPEN
⭐ EYES CLOSE
Mainly because this is a 3 seconds animation, very short and not noticeable, also my character has very small eyes.
First, I need to separate my eyes and redraw the missing areas.
I used the Lasso Tool to COPY and PASTE the eyes to another layer.
Then go back to the main illustration layer and using your brush start painting over the eye with the character’s skin tone
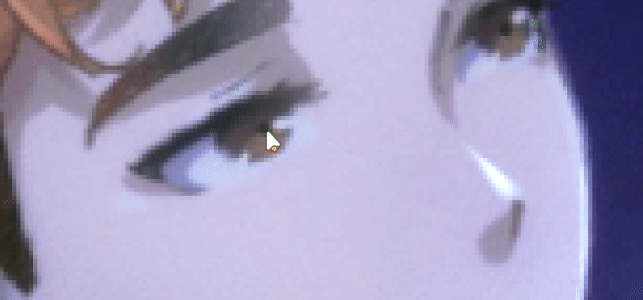
Then make a [New Raster Layer] and draw the EYE CLOSE
And now we have both Eye Open and Eye Close
Feel free to add more in between action/frames if you like.
You can use Keyframes to animate this or even Animation Cels.
Let’s try both!
> Eye Animation – Animation Cells [Copy & Paste]
Animation Cel is drawing frame by frame in order to create an animation.
Like a Flipbook animation!
We will be COPY and PASTING to cels
Make a [New Animation Folder] > rename it as EYES_ANIM_CEL
Make sure you’re at the beginning of your timeline, then click on [New Animation Cel]
An empty layer labeled as 1 will appear
Before we start copy and pasting, go to [File] > [Preferences] > [Animation]
Change your How to paste to cels — make sure it’s on Paste to selected layer
Click OK when DONE!
This will make our copy and pasting easier
To Copy - make you EYES OPEN layer visible > get your Lasso and select > CTRL C to copy
To Paste - Go to your Animation folder > Cel 1 > Paste it there
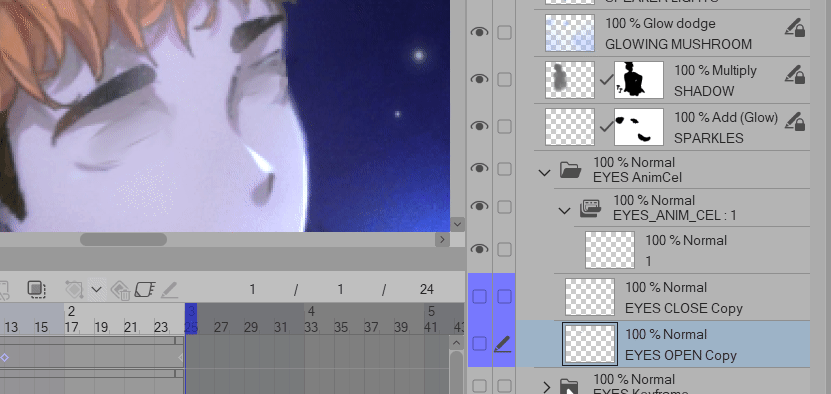
And do the same to the next cel; Eyes Close
(Make sure you’re under the Animation folder)
Select your frame > Make a [New Animation Cel] > a new Cel labeled as 2 will appear
COPY - EYES CLOSE
PASTE - to Cel 2
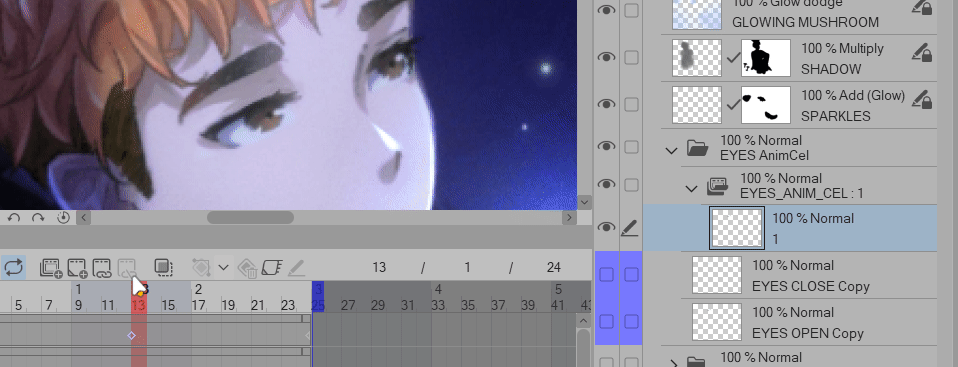
I want him to continue blinking for some more, so let’s put the same animation on the next frames.
Let’s assign these cells for the next animation
Make sure you’re at the next frame without a cel
Go to [Animation] > [Edit Track] > [Assign Multiple Cels]
For this example, this settings are okay
If you want to know what all these settings mean, I recommend checking the link below
When you click OK; a copy of cel 1 and 2 will appear
We basically assigned cel 1 and 2 to appear to the next frames
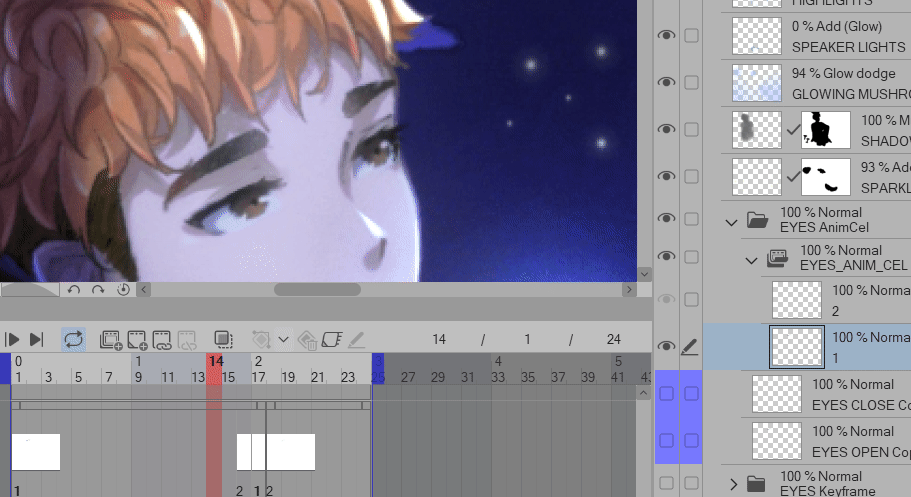
For the ending of the animation, I want his eyes open so click on [Assign cel to frame]
Select layer 1 – which is our eyes open, then click OK
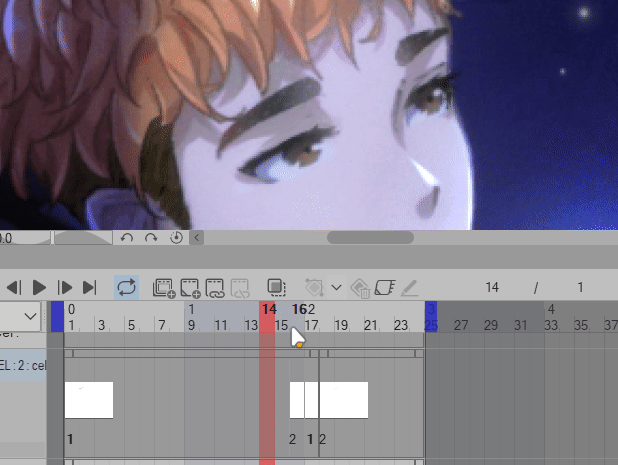
And we have our small eye animation using cels
> Eye Animation – Keyframes
If you want to use keyframes, it’s basically playing with the Opacity of the Eye Open and Eye Close layers
To keep things organized, put your Eyes Open and Eyes Close layers into a folder
Select your Eyes Open and Eyes Close layers click on [Enable Keyframes on this layer] individually.
Also, change your Keyframe Interpolation to HOLD
You can use whatever Keyframe interpolation you want, I just prefer HOLD when doing EYE animations to make sure there won’t be any changes in between frames
Select a frame that you want to start the blinking, I will go to Frame 15
Add a keyframe on both:
Eyes Close – 0% Opacity
Eyes Open - 100% Opacity
Next frame, Frame 16
Eyes Close – 100% Opacity
Eyes Open – 0% Opacity
You can repeat that as many times as you want your character to blink or just select the keyframes > Right Click > COPY > Move to the next empty frame > Right Click > Paste
Make sure you do the same with the other eye.
When you’re done, it looks like this:
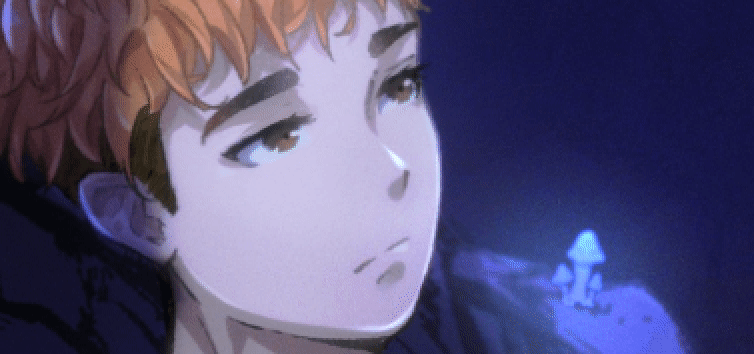
Our animation looks like this:
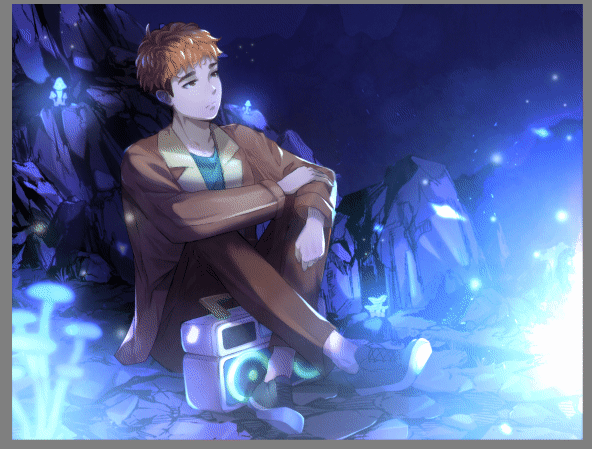
Camera Animation
This step is optional!
We will be adding a 2D camera, this is your camera!
You can zoom in and out, rotate and pan over your animation using this and we will use keyframes to manipulate it.
To add a camera go to [Animation] > [New Animation Layer] > [2D Camera Folder]
A folder will appear labeled as ‘Camera 1’ in your layers tab > put all of you layers, basically all of your animation layers up there.
You can expand your Camera transformations in the Timeline or you can use the Operation > Object Tool Property
I’m only going for something simple, like camera shake but not extreme.
On the [Scale ratio] I zoomed it in by 3 values – making it 97.0
A keyframe will appear because you changed the values, you can delete that Scale Keyframe because we won’t be animating scale
Then click on [Position] > drag out the transformation box to the bottom right end of the screen, away from my character.
A keyframe should be added once you moved the camera.
Copy that keyframe, click the keyframe and Hold [ALT] then drag to the frame that you want, I dragged it to Frame 24.
Then dragged that end keyframe to the very end of the timeline.
For the middle animation, go to Frame 13
Make sure you’re on Operation Tool > Object > Click the Transformation Box and drag it a little bit upward — diagonal from our last keyframe.
The camera movement is placed like that so that it would complement the movement of the shadow that goes up and down diagonally on the same direction
When you play it, it looks like this;
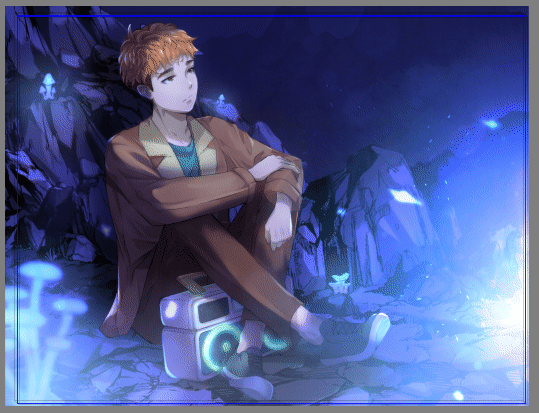
The Blue square you’re seeing is the camera’s movement.
If you want to see what the camera’s point of view looks like
Go to your [Operation Tool] > under [Object] > look in the Tool Property
Display Mode:
We’re at Show field guides by default
You can change that to Show Camera’s field of view
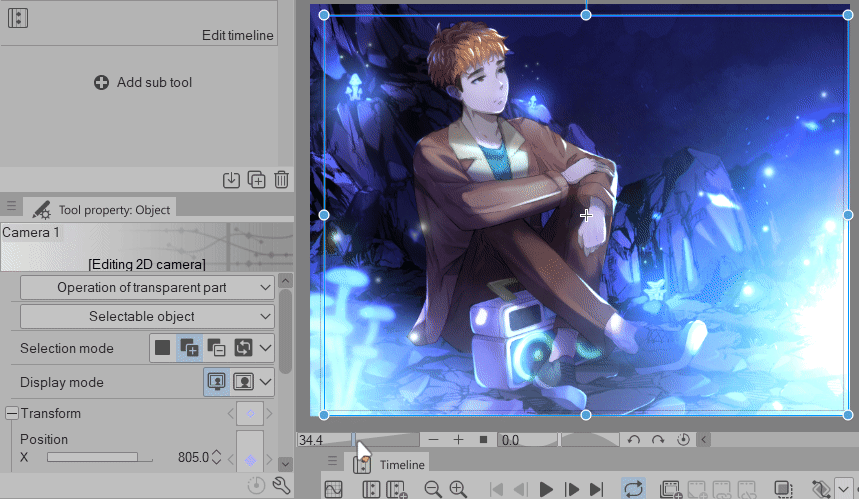
Now we see what our camera sees!
Exporting Animation
We’re finally exporting our work!
You can export this to whatever format that you want, for this example - I’m going with GIF
Go to [File] > [Export Animation] > [Animated GIF]
Fill up the export settings according to what you need or to what your timeline is.
For export option; Dithering
Dithering is the gradation of colors.
⭐ Enable Dithering, you’ll get gradient or smooth shading of colors
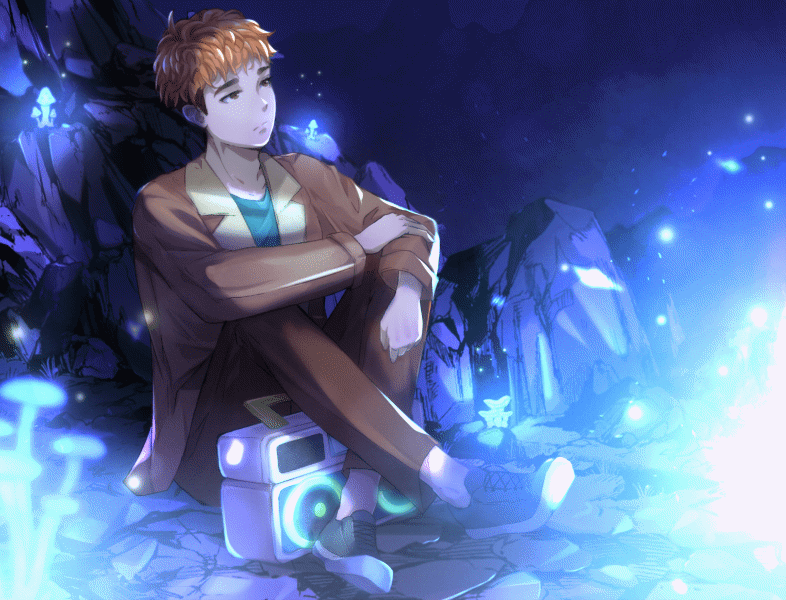
⭐ Disable Dithering, you’ll get patches of different shades of colors

End Note
Thank you for reading this far!!
The final animation looks like this:

The camera is optional, without camera looks like this:
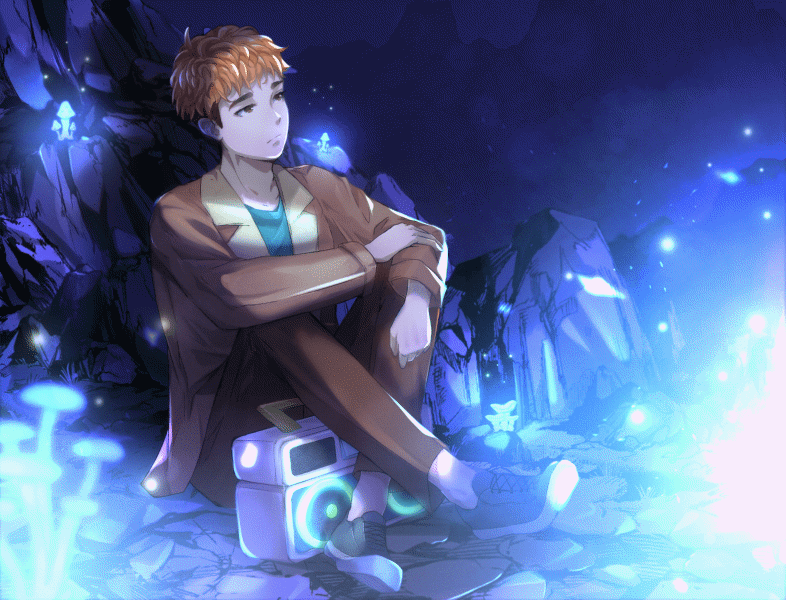
Still looks great!
Here’s another example of the same techniques
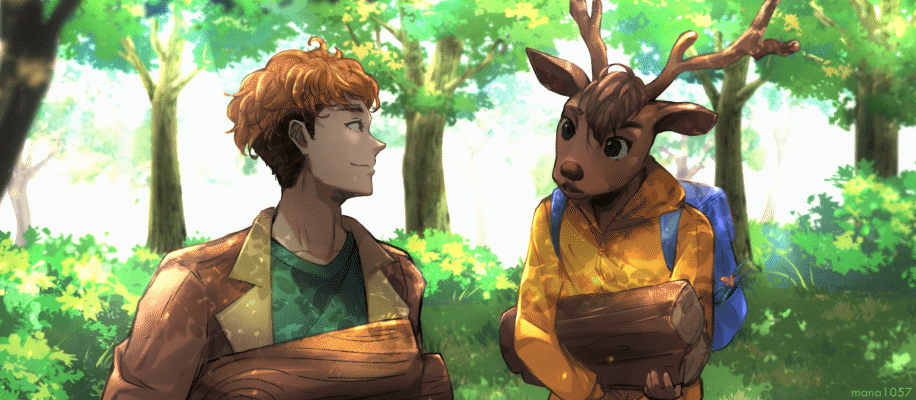
⭐Animated Light and Highlights
⭐ Some sparkles / flying dust
⭐ Shadow opacity
⭐ Eye Blinking
⭐ Camera Shake
How to do a simple falling leaves using keyframes:
[Example, 8fps 24 frames]
1. Draw your leaves in a curve - draw it like it’s in the middle of falling.
2. Click on [Enabled Keyframes on this layer]
3. Add a ROTATE and POSITION keyframe in the middle of the animation - Frame 13
——— You add that keyframe so that you already know that ‘that’ scene/position is the middle of your animation — we drew that specifically as the middle of the action.
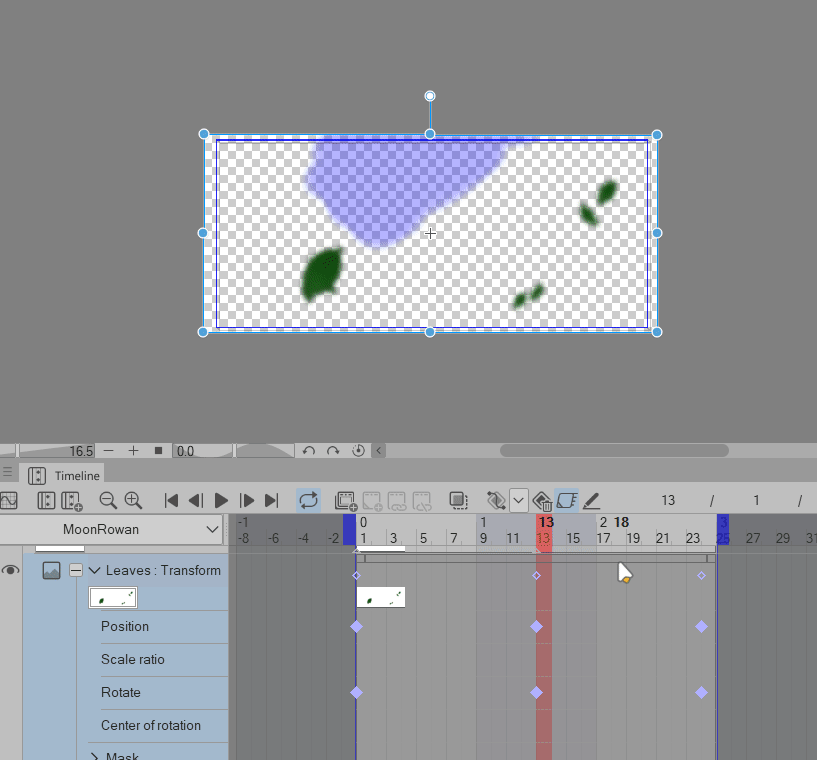
4. Go to Frame 1, Rotate and Position your leaves like it’s coming from above.
*It’s easier if you ROTATE first then adjust the POSITION after you get the rotation that you want
5. Go to Frame 24, Rotate and Position your leaves like it’s leaving the scene.
6. If some leaves are appearing from the sides and you don’t want to adjust the keyframes (because it also changes the speed of the animation), use MASK - the same thing we did with “ANIMATING SHADOWS” and “EFFECTS: Flying and fading sparkles”
And that’s how I did the leaves!
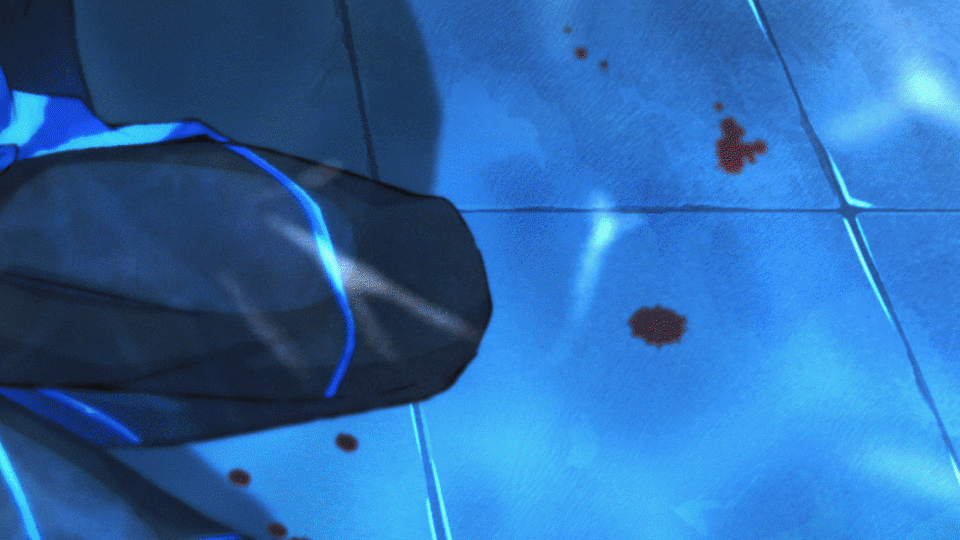
And even if you don’t animate the face, the simple animations on the environment and camera really sets the tone and emotion of the illustration.
This looks very long but it’s actually very easy!
Just playing with Opacity and dragging this and that’s.
It’s a simple animation that adds more story, more feels to your illustration.
Lights and shadows are really strong elements that you should take advantage of!
I hope this helps!
I also hopes this helps with working and editing with keyframes!
Thank you for reading!


コメント