Bouncing girl 📎

-
 MVP ◆This user has contributed greatly to the management of the community, by posting many great responses to the questions asked. Once every three months, MVPs are determined based on the points earned during that period and will be recognized accordingly.
 -
 New Valuable Player (NVP) ◆These are the next-best contributors to the community after MVPs. This is awarded to users who have not yet won an MVP award, based on the number of points they have earned.
 -
 Official Expert ◆Chosen out of all MVP awardees, who are already proof of excellence, this is a testimony of outstanding correspondence in the community. After careful screening, they are appointed by CELSYS and assume their position.Note: Formally called “Evangelists”
 -
 CELSYS official moderators ◆Moderators are official CELSYS staff members who are fluent in Japanese as well as various other languages. As moderators are not experts on software or creative work, they will not be able to directly answer your questions. However, moderators will provide communication and language support to ensure that everyone can smoothly communicate with each other.
 -
 CELSYS officialThis is the official administrator account.
I tried to make a series with interest

Add a keyframe to the bouncing ball and move it sideways
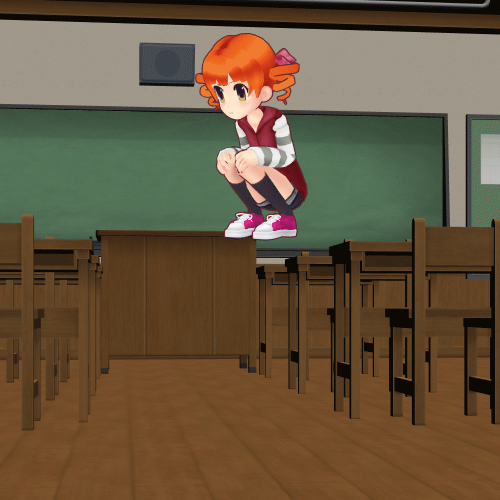
I tried this with a girl, not a ball
New illustration
First, prepare a set for animation easily
Create a new illustration
The unit is (px) and the canvas size is (width 1000, height 1000).
Other sizes are fine
Paste the 3D background "Classroom Corridor 01-Ver.2" on the canvas
Decide the angle
Paste the 3D character "Twin Drill Girl"
I pasted it in the classroom once
"Cut" from the "Edit" menu
After locking the classroom layer
Separated layers with "Paste" in the "Edit" menu
When I separated the layers, there was a shadow at the girl's feet.
I don't need it, so I'll remove this shadow
We have a set for this animation
Divide the 3D of the classroom into "foreground" and "background"
Unlock and duplicate classroom layers in the Layers palette
Hide the upper classroom layer once
Display the "Object List" hierarchy of the lower classroom layer
Hide unnecessary corridors and side walls
Finally, hide the three desks in the foreground
Display the "Object List" hierarchy of the upper classroom layer
Hide all but the three desks in the foreground
Twin drill girl
What a girl by name! ??
Make a suitable pose
Place it in a good position to bounce
I'm making it a little bigger
I made it "Image material layer" in "Convert layer" of "Layer" menu
(There is nothing wrong with it in 3D. It's just a whim.)
Adjust the size of the girl
Make the sub tool an object
Move the "center point" of the image material layer to your feet
"Enlargement ratio" (horizontal and vertical) has been increased to 80%
I created a shadow layer at my feet (it's a raster layer)
New timeline
Display the timeline palette
Click "New Timeline", the third command icon from the right
Frame rate 12
Set the playback time to (6 seconds + 1 frame)
Add keyframes to the layer
Select a girl layer
Click "Enable Layer Keyframes" on the second command icon from the right on the timeline
Select "Smooth" in "Keyframe Interpolation to Create"
Click the (0 + 7) frame on the timeline to add a keyframe
(Please refer to "Bouncing Ball" for this area)
Click on the (0 + 1) frame
Move the girl's position on the canvas up (shift)
Move straight up by holding down the (shift) key and moving
A keyframe is added to (0 + 1) on the timeline
Right-click on the keyframe and select "Copy" from the menu
Right-click on (1 + 1) on the timeline and select "Paste" from the menu
The keyframe will be pasted into the timeline
Keyframe the girl bouncing on the floor
Select (0 + 7) on the timeline
Set "Horizontal" to 100 and "Vertical" to 50 in "Magnification" of the Tool Property Palette.
Return "horizontal" of "magnification" of (0 + 6) to 80 and "vertical" to 80.
Set "horizontal" to 65 and "vertical" to 90 for "magnification" of (0 + 8).
Return "horizontal" of "magnification" of (0 + 9) to 80 and "vertical" to 80.
Function curve edit mode
Before entering "function curve edit mode"
Remove unnecessary keyframes
Hold down the (shift) key and select unnecessary "position" keyframes
Select the left and right keyframes other than (0 + 7)
After selecting, "Delete keyframe"
It's okay if you don't delete "Rotation" and "Center of rotation"
You can also select a keyframe by dragging it around the keyframe.
After selecting, "Delete keyframe"
Enter "Function curve edit mode"
Click the command icon on the far left of the timeline palette
Enter "Function curve edit mode"
Expand the timeline display with "Drag to zoom"
Select "Position" of the display item
Shows only the "Y" of the function curve
Click the Y vertex of the function curve
"Split before and after the keyframe curve"
Operate the lightened handle to make a sharp mountain
(This is also the same as a "bouncy ball")
If you can, press the "Function curve edit mode" icon to return to the original.
Floor shadow
Make the shadow on the floor the same as the "bouncy ball"
Select the floor shadow layer in the Layers palette
Press the "Enable Layer Keyframes" icon on the timeline
Select (0 + 7) on the timeline
Drag the position of the "center point" on the canvas to move it around the center of the "shadow"
Keyframes have been added to the timeline
Select (0 + 1) on the timeline
Set "Horizontal / Vertical" of "Magnification" of the Tool Property Palette to 50.
Also select (1 + 1) on the timeline
Set "Horizontal / Vertical" of "Magnification" of the Tool Property Palette to 50.
Enter "Function curve edit mode"
Display "Y" of "magnification ratio" of the function curve
Make the function curve a sharp mountain like a girl
Display the "X" of the "magnification rate" of the function curve
Make a mountain so that it overlaps with the green function curve of "Y"
Return from "Function curve edit mode"
Click (0 + 4) on the timeline
Set "Layer Opacity" to 0 in the Layers palette
(0 + 10) but set it to 0 in the same way
(It is 0 in the layer palette, but move the slider once and set it back to 0.
Keyframes will not be added as is)
Click (0 + 7)
Set "Layer Opacity" to 50 in the Layers palette
This area is also the same as the "bouncy ball"
I think the process up to this point is the same as the "bouncy ball"
Copy the girl's keyframe and paste it repeatedly for about 6 seconds
Select from (0 + 1) to (1 + 1) on the girl's timeline
Right click and select "Copy" from the menu
Right-click on (1 + 1) on the timeline and select "Paste" from the menu.
Right-click on (2 + 1) on the timeline and select "Paste" from the menu.
Right-click on (3 + 1) on the timeline and select "Paste" from the menu.
Repeat and fill up to the butt with keyframes
Do the same for the shadows on the floor
Select "Floor shadow layer" in the layer palette
Select a keyframe from (0 + 1) to (1 + 1) on the timeline
Right click and select "Copy" from the menu
Right-click (1 + 1) and select "Paste" from the menu
Repeat this until (6 + 1) fills the keyframes
I noticed here that the "opacity" was not copied
Select the "Opacity" keyframe again and copy
Repeatedly "pasted" to the end
I should have selected the whole thing first and "copied" it.
I think failure can be helpful
GIF animation so far
Repeating "bouncing" movements at the same position
This is the same as a "bouncy ball", so here is the "production!"
Put it in a layer folder and add keyframes
I'm going to put it in a layer folder to move it from right to left
You can also add keyframes to the layer folder
(It is neither an "animation folder" nor a "2D camera folder")
In the layer palette
Put "Girl's Layers" in the Layers folder
Put "Floor Shadow Layer" in the Layers folder
In the layer palette
Select the layer folder that contains the girl
Click Enable Layer Keyframes on the timeline
Set "Keyframe to be created" to "Constant velocity"
Click (0 + 1) on the timeline
Enter 1200 for the "Position" X on the Tool Properties palette
A keyframe has been added at the beginning of the timeline
Click (6 + 1) at the end of the timeline
Enter -200 for the X of Position on the Tool Properties palette
Keyframes will be added
With the layer palette as it is
Select the layer folder with the shadow of the floor
Click Enable Layer Keyframes on the timeline
It remains (6 + 1)
Enter -200 for the "Position" X on the Tool Properties palette (same number as the girl)
Keyframes will be added
Move to the top of the timeline
Click (0 + 1)
Enter 1200 for the "Position" X on the Tool Properties palette (this is also the same number as the girl)
A keyframe is added at the beginning of the timeline
Now you have an animation that moves sideways

Display the desk in the foreground and you're done
(The finished product is the animated GIF at the top of this TIPS)
It was completed, but ...
I had something I wanted to try, so I will continue as it is
(Bonus) Something afterimage animation like a multi-strobe
Duplicate the folder
In the layer palette
Duplicate the folder containing the girl and increase it to 6
Duplicate the folder with the shadow on the floor and increase it to 6
On the timeline
Shift the layers in the layer folder one frame by one frame to make a staircase.
I failed
I had to shift the layer folder as well
Decrease the layer opacity in order at the beginning of each timeline in the staggered layer folder
At first it remains 100%
Next layer folder to 80
Next to 60, Next to 40, Next to 20, Next to 10.
Change the opacity of both the girl's layer folder and the floor shadow layer folder
This was sober and troublesome
Finally
The beginning of the display range of the timeline has been deleted by one frame
I scraped (0 + 1) and left (6 + 1)
It is a completed multi-strobe-like animation

I think that if you duplicate the folder more, it will have more tails.
If you come up with something, please play
That's it
Users who liked this post


Comment