How to intuitively draw faces with difficult angles
This is a video of a lecture on drawing faces with difficult angles.
We have added subtitles for each language, so please turn on subtitles before watching.
Introduction
This time, I will introduce some tips for drawing faces with difficult angles in my own way.
You can practice on the spot without learning difficult anatomy, so please try it.
Things to be aware of before starting to draw a face 1 "One line always expresses two or more things"
Before I introduce tips for drawing faces at difficult angles, there are some things I want to keep in mind when drawing faces. It is about the meaning and function of the line.
For example, what happens when you draw a line on the canvas?

By drawing one line, two areas of red and yellow were born.

This means that when you draw one line, you are drawing two things at the same time.
A single line always represents two or more things at the same time.
When drawing a line, it is necessary to pay attention not only to one area, but also to the other area that is created when the line is drawn.
For example, when drawing the lines of the upper eyelid and the outer corner of the eye, you are drawing the side of the face that is adjacent to it at the same time.
When drawing the lines of the upper eyelid and outer corner of the eye, it is necessary to imagine the sides of the face as well.

When drawing the lower eyelid, you are also drawing the curved surface of the adjacent cheek at the same time.
When drawing the lower eyelid, it is necessary to draw while imagining the curved surface of the cheek at the same time.

In this way, it is necessary to draw lines while imagining in your head even for surfaces and solids that do not appear directly in lines.
It is very difficult.
However, this does not mean that the parts exist alone, but that they coexist and support each other with other parts. Other adjacent parts are also guideposts for drawing parts.
Things to be aware of before starting to draw a face 2 "Draw the line a little slowly"
When you draw a line like this, you need to imagine and be conscious of many things. The important thing is to draw the line slowly.
In other words, don't draw the line too quickly.
If you move the pen too quickly, your awareness and imagination for other parts will not be able to keep up with the speed at which you move the pen, and your inspiration will run out.

By matching the speed of moving the pen to the processing speed of the brain, you can draw lines while maintaining your imagination and attention.
Don't just draw lines on paper, draw in step with your brain.
Things to be aware of before starting to draw a face 3 "Keep your eyes away from the campus"
The next important thing is to take your eyes off the campus a little.

This is because if the canvas is too close to the eye, the field of vision will become narrow and you will only be able to see what you are drawing with the pen.
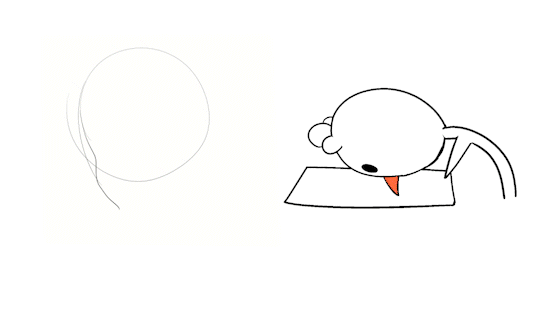
In order to draw a face well, it is important to balance it with other parts.
Keep your eyes slightly away from the canvas, keep your field of view wide, and draw while looking at the whole, so that you can draw lines while conscious of the parts that have not been drawn.

Be careful not to concentrate too much on drawing one part.
Convenient clip studio function "window division" when drawing faces
I will introduce Clip Studio's function "split window" which is convenient when drawing a face.
This is a function that allows you to draw while displaying various viewpoints at the same time.

First, click "New Window" from "Campus" in the "Window" menu of the "Menu Bar".
Next, click "Tile" from "Campus" in the "Window" menu.
Now you can see and draw a picture from two perspectives.
Each window can be enlarged or reduced separately, flipped horizontally, or rotated while drawing. It is convenient to draw while checking the balance of the face.

You can add as many windows as you like, and you can arrange them as you like by dragging the upper left tab. The window can also be moved to another monitor.

Even when enlarging the display and drawing details, it is convenient to proceed with drawing while checking the finish from a distant point of view.

3 Tips for Drawing Faces with Difficult Angles
Let's get down to business.
There are three main tips for drawing faces from difficult angles in my own way!
1. Memorize the contrast between low and high angles
2. Think backwards from the functions of the facial parts
3. Think in terms of other parts and sensations
I will explain each in detail.
1. Memorize the contrast between low and high angles
This is to forget about anatomy for a while and memorize the shape and positional relationship of each part at low angle and high angle.
If you draw auxiliary lines, it will look like a drawing and it will be difficult to draw facial expressions.
Then, I will list the characteristics of each of the low angle and high angle.
Features are shown in red for low angles and green for high angles.
For low angles, the line of the part is an upward curve.
For high angles, the line of the part is a downward curve.
A low angle will make your earlobes look bigger.
A high angle makes the earlobe look smaller.
For low angles, the top of the ear is below the eye.
For high angles, the apex of the ears is above the eyes.
For low angles, the eyes, nose, and mouth are closer to the top of the face.
For high angles, the eyes, nose, and mouth are closer to the bottom of the face.
Low angles make your cheeks and chin look wider.
A high angle makes the forehead and top of the head look wider.
For low angles, you can see the bottom of each part.
In the case of high angle, you can see the apex of each part.
If you are unsure about drawing from a low angle or a high angle, try drawing while remembering this contrast.
I added a short video to learn how to compare low and high angles in rhythm, so if you like it, please check it out. Please turn on subtitles for each language.
2. Think backwards from the functions of the facial parts
The second tip is to "think backwards from the functions of the parts of the face".
This means that when you are worried about the shape and positional relationship of facial parts, you should think back to the capabilities of the parts.
For example, when looking at the face from behind like this, should I draw the eyes? Should I not draw?
I feel like I can't see it because it's hidden by the bones of my face, but if it's just a little bit, I might be able to see it, so I'm at a loss.

I feel like I can't see it because it's hidden by the bones of my face, but if it's just a little bit, I might be able to see it, so I'm at a loss.
In such a case, it is good to bring your hand to the position of the camera. If you can see the hand through your eyes, then the camera can see your eyes as well.

This way of thinking is also useful for capturing the shape of parts.
For example, if you actually exhale strongly, you can figure out the direction of your nostrils.
Since the nose breath does not hit the upper part of the lip, you can feel that the direction of the nostrils and the upper part of the lip are almost parallel.

When you don't know the shape or orientation of your ears, think of them as antennas that pick up sound.
The ears have an antenna that is attached to the side of the face and split in the direction of the chin.
It's hard to hear sounds coming from directly behind, but you can hear sounds coming from the front and sides. This is because the ears are oriented to catch forward and sideward sounds.
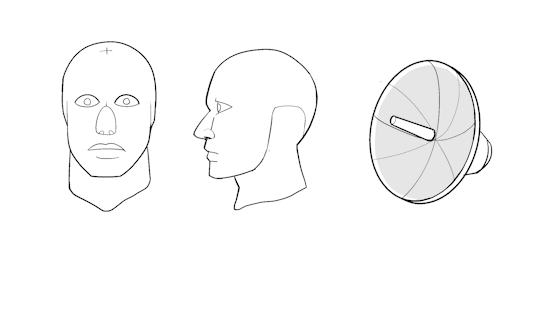
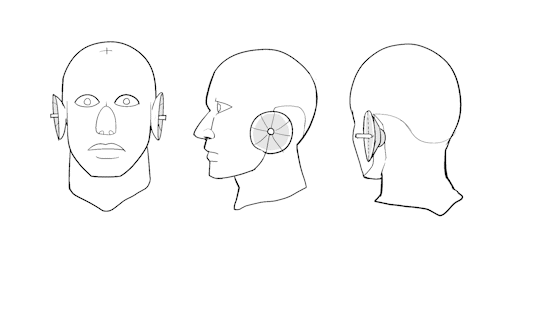
The bulge behind the antenna fits in the hollow between the jaw and the skull.
This can be used as a criterion for judging from where the back of the ear can be seen or not when viewed diagonally from behind.
3. Think in terms of other parts and sensations
The ears are not vertical, but slightly slanted on the head, but it's hard to imagine this angle. However, there is a way to intuitively grasp this angle.
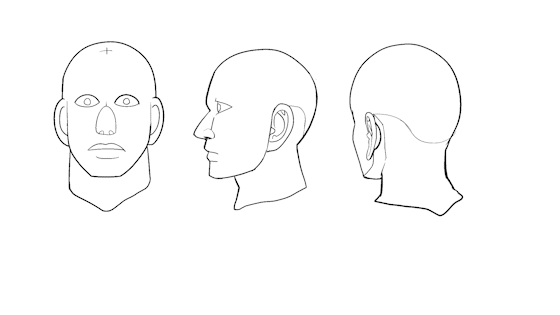
Here, let's rely on the feeling of your hand instead of a ruler. Now, please cover your ears with your hands.
The angle of the hand when covering the ear is about the same as the inclination of the ear.
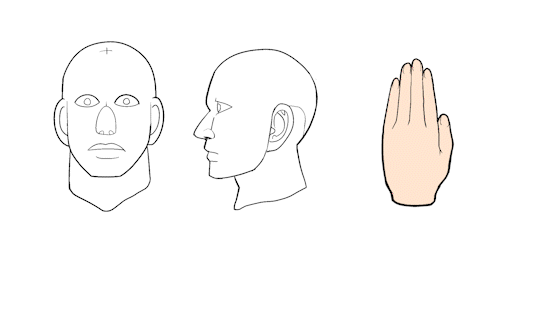
The sense of one's own hands is very useful for grasping three-dimensional objects.
In addition, for example, the length between the outer corner of the eye and the base of the ear and the width of the hand are roughly the same.
This is useful for capturing the sides of faces or the length of eyeglass handles.

The length from the chin to the hairline is roughly the same length as the palm of your hand.

However, in anime and manga drawings, the area of the cheeks and forehead of the face may be reduced to make the eyes larger, or the hands may be made larger, so be careful.
Think of it as a guide only.
Useful function for face correction 1 "Multiple selection of vector layers"
There is a convenient function for correcting the face. Vector multiple selection on a vector layer.
First, create a selection area with the lasso tool or selection pen across the lines you want to fix, and click "Select vector across selection area" on the menu bar.

Then, in this way, you will be able to transform or move only arbitrary lines collectively.
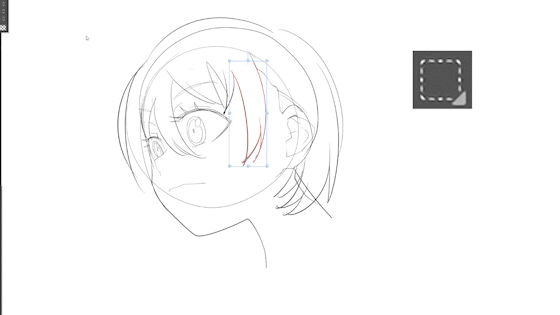
Other convenient functions of vector layers and how to register shortcuts are explained in detail in the previous video, so please take a look at that.
Useful function for face correction 2 "Liquefaction tool and its inversion method" (distortion tool)
For raster layers the liquefy tool is useful.
You can sensuously distort the place traced with the pen.

The liquefaction tool can be distorted in the opposite direction without changing the settings by holding down the Alt key while using the tool.
It is very convenient because you can switch the direction of distortion with one touch. No need to reach for tool properties to switch.
in conclusion
That's all for the lesson on how to draw faces with difficult angles.
It's just a makeshift content, so i think it's necessary to practice on your own.
However, since the face is an important part that controls human expression, I think it is better to give priority to rich emotional expression rather than three-dimensional correctness.
If you draw a lot of auxiliary lines, it will feel like a drawing, and you tend to lose the expression.


Comment