Quick weather moods.
Introduction 📢
Hello, I am Lepus Nix and I am here to share some quick tips to speed up your weather art.
At the end of this tutorial, making different types of skies, clouds and rain using tools available in Clip Studio Paint should be an easy task.
A background like this one should take about 15 minutes to make with the skills that will be shared in this tips.
A-Preparing 🛠️
Preparing the Ideas for the weather is crucial before sketching the illustration.
→1- Weather components 🌞
When thinking about the weather, the first word that comes to mind is the sky and how it can change the mood of a drawing.
The elements that, I think, defines the weather in an illustration are :
1- ☀️ The sun, and its color, or any other astral light source or ground light source ;
2- 🟦The sky, depending on the time of the day and its color ;
3- ☁️The clouds, depending on the amount ;
4- ☔ The rain, or the snow, whatever you feel might rain from above ;
5- 🌬️ The wind, if it is weak or strong and how much it affects the background and the character.
→2- Refining the idea 💭
To help refine your weather ideas, here are some pointers :
1- Define the time when your scene is taking place :
☀️ Sunrise ;
☀️ Noon ;
☀️ Late afternoon ;
🌙 Evening ;
🌙 Midnight ;
🌙 Early morning.
2- Define a general direction for the wind;
3- Choose if the clouds are placed in a static way or move actively.
💡Note: The position of the sun affects the color of the sky as it gives more yellow colors at sunrise and red at sunset.
B- Making the illustration 🖼️
→1- Laying out the sky 🎨
The color of the sky can change depending on the particles that are dominant there, and the light from the sun or any other astral light source.
⇒ Clip Studio Paint has pre-made gradients that can be used to lay out the sky using the [Gradient] tool.
⇒ It is possible to modify a gradient sub tool by duplicating it, and clicking on the [Advanced settings] in the tool property.
⇒ The colors can also be changed manually by applying the Main color to the boxes, above the gradient bar, in the tool property (Transparency can be added that way too).
💡Note: A list of premade gradients are listed there and can also be used right away.
⇒ Double click on the gradient listed to show it on the gradient bar ;
⇒ Clicking on the arrows below the gradient preview will select that color ;
⇒ Clicking anywhere else right below the gradient preview will add another arrow;
⇒ Arrows can be deleted by either sliding them away from the gradient bar or clicking on the trash can;
⇒ Be sure to click [OK] to apply the new gradient.
It is possible to change or alter the gradient using a [Correction Layer] like the [Gradient Map] or the [Hue, Saturation, Luminosity].
The Correction layers can be modified by clicking on the layer icon.
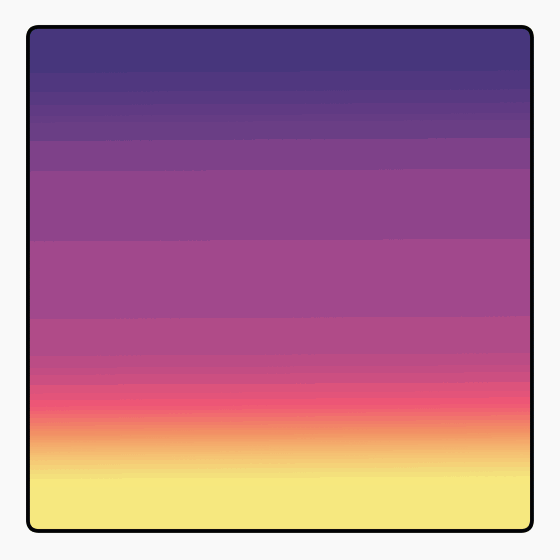
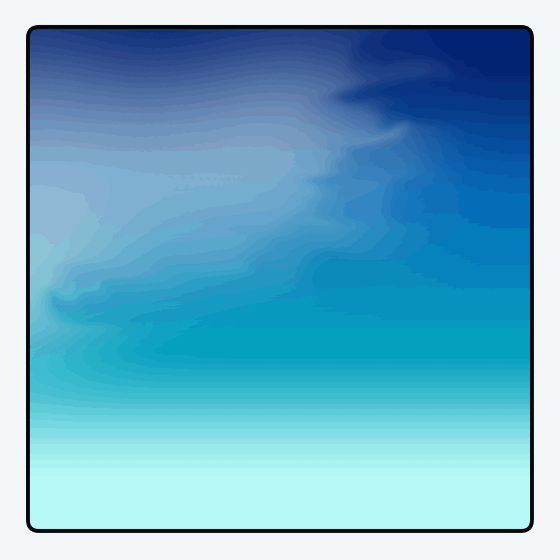
Here are some examples of sky gradients:

💡Note: Making a new raster layer with the [Hue] or [Color] blending mode can also achieve the same results as the [Hue, Saturation, Luminosity] correction layer.
⇒ The [Hue] blending mode changes the hue used to the one applied while keeping the saturation and the luminosity of the layer below;
⇒ The [Color] bending more however takes into account the hue and the saturation of the applied color.
→2- Adding the clouds ☁️
Clouds are shaped like big cotton pillows or little trails of cotton in the sky. There are many layers of clouds but to ease our drawing we will only consider 3 layers.
Basically,
⇒ Clouds on the outer layer look like transparent sheets of cottons ;
⇒ Clouds on the middle layer are like trails of cottons ;
⇒ Clouds on the inner layer are the biggest ones, sometimes towering to the outer layer.
Using the [Soft] airbrush, it is easy to lay out the clouds. They can be improved by :
i ⇒ Using the same air brush with the transparent color to improve the shapes or add transparency ;
ii ⇒ Using the [Finger Tip] tool to add some details to the edges ;
iii ⇒ Using the [Liquify] tool to alter the shape ;
iv ⇒ Using the [Textured Blender] brush to add more texture to the edges and shadows.
Here is a process on adding clouds.

💡Note:
⇒ The texture applied by the [Textured Blender] can be changed for different results ;
⇒ Clouds can take some colors from the sun at different periods of the day ;
⇒ Clouds are often shaded with a desaturated blue color as they are made of water ;
⇒ At sunrise and sunset, the shadow on the clouds are often on the side or above since the bottom will receive most of the sun’s light ;
⇒ When using the [Finger Tip] tool, from the edge, do a gentle in and out movement, sometimes circular.
⭐ Tip: For clouds with more edges, the [Tapered Pen] or the [Textured Pen] at a higher size can do the trick.
To change the color of the clouds, a [Gradient Map] correction layer can be used.
⇒ Clip the layer to the corresponding cloud layer/group so that it doesn’t affect anything else ;
⇒ For another effect, change the blending mode of the [Gradient Map] correction layer to [Overlay].
→3- Making the rain ☔
Anything can rain from your illustration, it could be regular droplets of water, snow, ashes, rocks, etc…
→3-i- Using the Droplet airbrush 💦
To illustrate the rain, we are going to use the [Droplet] air brush.
⇒ Spray the amount of particles you need on a new layer ;
⭐Tip: It is possible to adjust the amount of particles and their sizes.
⇒ Go to [Filter]; [Blur]; [Motion Blur] then, adjust the angle, the intensity and the direction.
Direct the rain towards the ground, following the gravity but slightly angled because of the wind.
💡Note:
⇒ The [Droplet] air brush can by itself, express the snow or ashes as those fall slowly to the ground.
⇒ For rocks and more solid objects, as they are closer to the viewer’s eyes, adding a blur effect to show movement can do the trick.
The direction of the motion blur is set to either go toward the center of the angle when [Forward] or the other way when [Backward].
⭐Tip: It is possible to add more variety by using another layer blurred at a slightly different angle. And as the rain gets gradually closer to the viewer’s eyes, for accuracy, make the falling objects more distinguishable.
→3-ii- Using the Rain sub tool 🌧️
Another method to do the rain is to use the [Rain] sub tool.
The [Rain] sub tool is in the [Stream line] tab inside the [Figure] tool.
To use it,
⇒ Place a starting point by clicking on the canvas and drag the line to the ending point and apply by double clicking. Clicking only once at the ending point will allow the line to go further to another control point ;
⇒ By holding [Ctrl] or using the [Object] operation sub tool, the rain can be modified further.
⇒ Moving the 🟩 square endings of the blue horizontal line will reduce or increase the amount of rain lines. (The increase is capped to 200 lines, but this can be changed in the [Sub tool detail]-->[Drawing Interval]-->[Maximum number of lines].) ;
⇒ Moving the 🟥 red vertical line will change the direction of the lines ;
⇒ Moving the blue line with a 🟢round ending will reduce the gap between the lines as it gets closer to the red line.
⭐Tip: The [Object] operation sub tool can change the color of the lines, their size, etc…
C- Adjusting the illustration 🎨
→1- Adding more effects ⚡
More effects can be added by adding details like particles, sparkles or leaves swaying in the wind.
⇒ Fog can be achieved by using the [Soft] airbrush at a lower opacity depending on how thick it is.
⇒ Lightning can be achieved by following this process:
a- Draw a thick jaggy line as the body of the lightning. It is way more jaggy at its starting point then gets straighter as it reaches ;
b- Draw narrower lines on the sides of the body. They don’t need to be as long as the body ;
c- Use the [Border Effect] tool to add an outer color and adjust the Thickness to your liking ;
d- Improve the lines by using the [Liquify] tool if necessary.
→2- Tuning the colors 🧡
The color of the sky can affect the mood of the rest of the illustration.
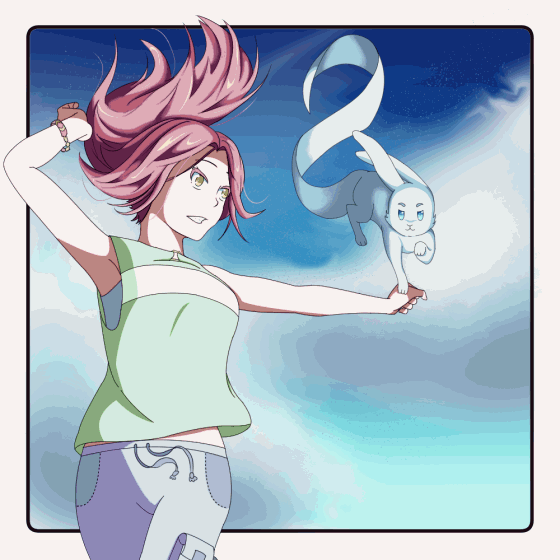
⇒ Adding a tint of the sky color on the character can improve its mood. The [Soft Light] blending and the [Overlay] mode can achieve that. It is possible to reduce the strength of the color by reducing the opacity.
⇒ Feel free to also try the |Hard Light] and other blending modes to achieve the effect you want.
Here is an example.

⭐Tip: To apply the [Soft Light] or [Overlay] effect, you can either make a new layer and pick the color yourself or use a gradient map.
D- Color mood ✍️
The layer blending mode used here can be used in many ways to give different moods to your work.
Adding a layer with the color :
⇒🟧 Orange or 🟨yellow, can convey warmth or optimism ;
⇒ 🟥 Red can convey love or Urgency ;
⇒ 🟪 Purple and 🟦Blue can convey sadness or mystery ;
⇒ 🟩 Green can convey harmony and Health.
There are many official assets in the Clip Studio asset store that can be used in making the sky, pair them with the knowledge you have acquired here and the weather will have no more secrets for you.
Thank you, and congratulations 🥇 on reading this far. I hope this will help you convey a large range of weather and moods in your art.


Kommentar