
Introduction
A recent update to Clip Studio added the Liquify tool.
It seems that this tool can also be used on monochrome layers, so I thought it could be used for manga, so I tried drawing an explosion.
This time it's more like a diary than a lecture, but I'll introduce the process.
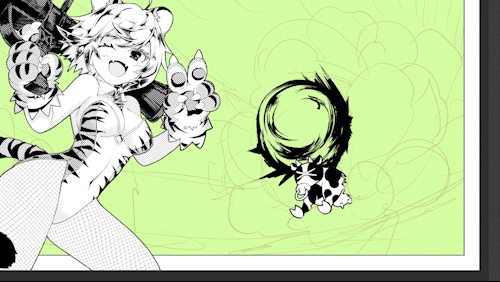
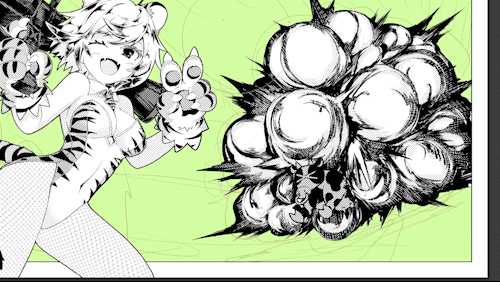
1. Rough sketch of settings and explosions
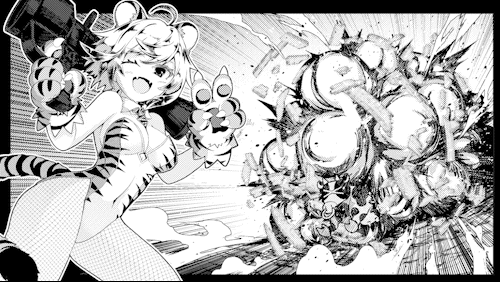
It is a rough sketch of the tiger girl in the foreground bombing the cow in the back. I will draw an explosion on this.
The state of a large explosion is easy to understand if you think of it as a collection of many small explosions.
If you compare a small explosion to a cream puff, you can think of a large explosion as if a lot of small cream puffs were gushing out of the center.
The rough sketch was drawn with such an image.
It feels like a croquembouche.
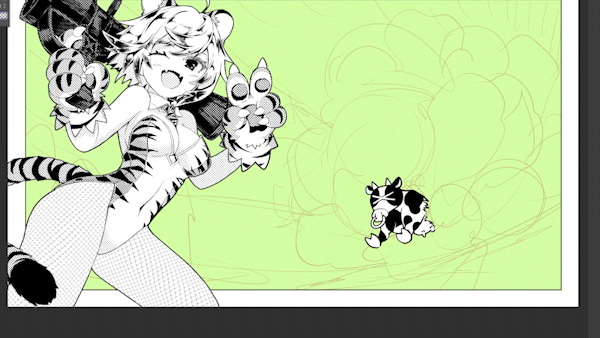
Seen from the side, it looks like a dome.
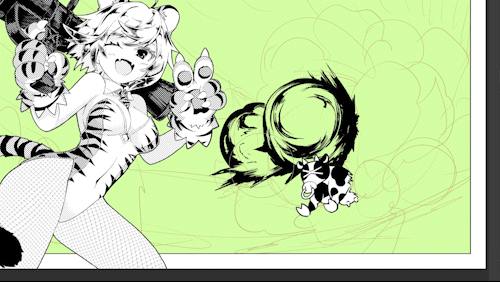
2. Draw an explosion
Let's draw one explosion.
With a solid shape and the touch of a pen, I will draw a dome-like explosive flame.

The trick to drawing an explosion is to draw soot on the surface of the light bulb.
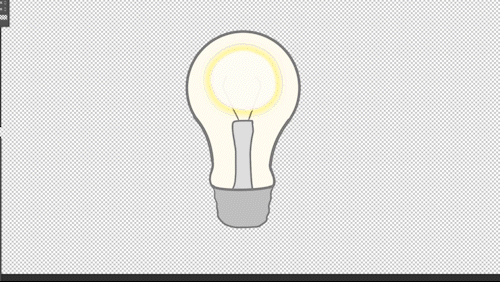
If the soot is thin, draw it with a pen touch to make the smoke move, and if it is not a sharp movement, it will be nice to draw a muffled part.
Where nothing is drawn, it looks like light is leaking from the inside.
You can think of it as leaving white where it is shining.
This is just one example, and each person has their own way of drawing an explosion. Let's find a drawing method that suits your design.
3. Location and settings of [Liquify tool]
The Liquify tool is next to the Color Mixer, which has a Fingertip or Blur.
If you set [Distort] to [Expand], you will be able to transform it into a bulging feeling.
The check at the bottom is slow, so remove it.
If the movement is still heavy, it is better to reduce the brush size or use it with a mouse click instead of a pen tablet that senses pen pressure.
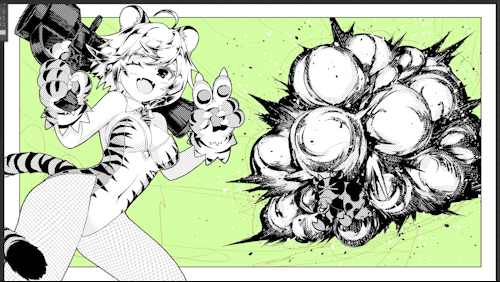
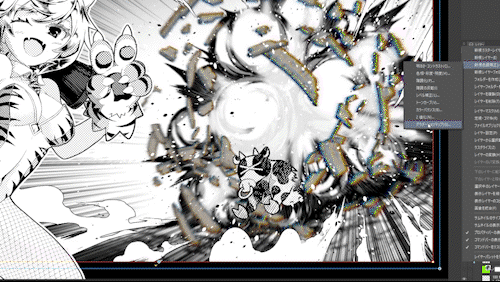
4. Make the explosion three-dimensional with [Liquify tool].
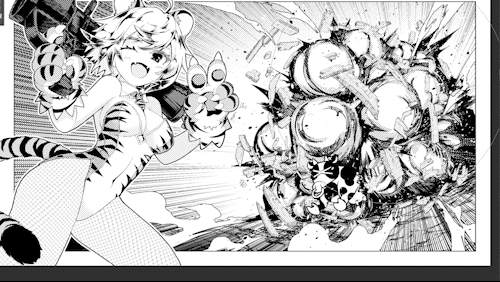
When I use the [Liquify tool] for the previous explosion, it looks like this!

Since the explosion can be inflated in a three-dimensional manner, you can easily adjust the explosion so that the explosion spreads three-dimensionally.
Rather than doing nothing, the hardness of the explosion is removed and you can feel that it is moving.
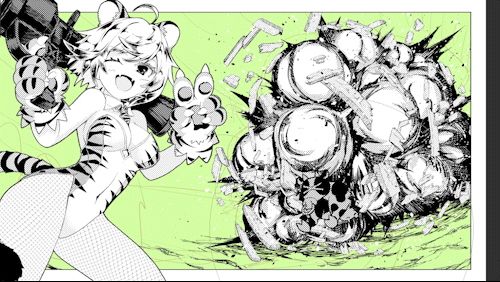
5. Draw more and more explosions
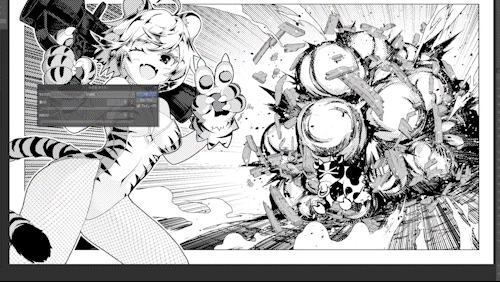
I will draw all the remaining explosions by dividing them into several layers.
Draw an explosion and distort it.
Also, draw one explosion and distort it.
This was repeated many times to complete the explosion.
Put white and put a tone between solid and white,
Looking at the balance of the entire explosion, I reduced the size a little and added a little thorn of momentum.
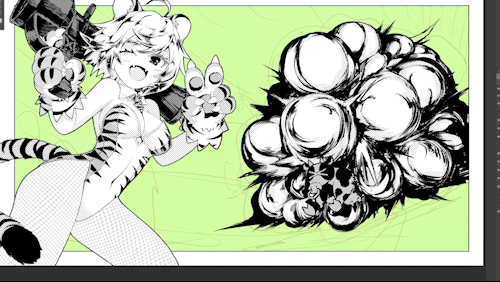
Since black is a little strong, draw a line of momentum with white tone to weaken black and strengthen the momentum of the explosion.
Finally, add dust with a splash brush and the explosion is almost complete!
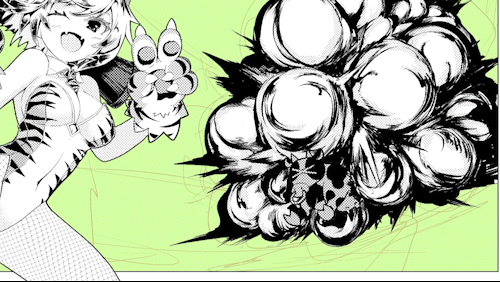
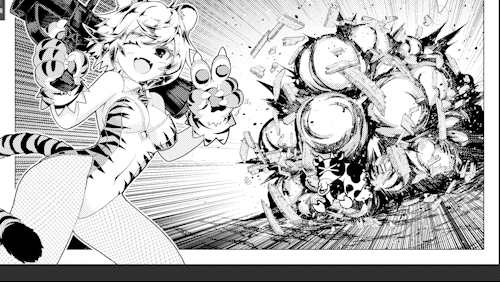
6. Draw rubble and use [Liquify tool] to blend it into the screen.
We will further decorate this explosion with rubble to make it look like it.
Scatter the rubble with a rubble brush.
If you distort this with the [Liquify tool], you can make it feel like the rubble is blown off three-dimensionally by an explosion.

Adjust the overall size and the position of the rubble a little, and add shadows to the rubble or add too much distortion.
To finish, I put a tone on the shadow created by the luminescence of the explosion on the rubble, and I was able to draw the rubble.
7. Draw a concentrated line with the ground
I drew the ground by hand once, and then used the [Liquify tool] to blend it into the screen like a fisheye lens.
This tool also seems to be useful for drawing the background.
Next, put a concentrated line toward the center of the explosion,
I added a gradation to the background to make it brighter due to the explosion.
8. Adjust the bordered smoke with the [Liquify tool].
It seems that the [Liquify tool] can be used even in the layer where [Border] is turned on in [Boundary effect].
Next, I drew a white smoke effect with a bordered silhouette so that I could feel the blast and space.
With the [Liquify tool], you can fine-tune the shape of the smoke like this.
See previous tips for border techniques. With the advent of [Liquify tool], it seems to be more applicable.
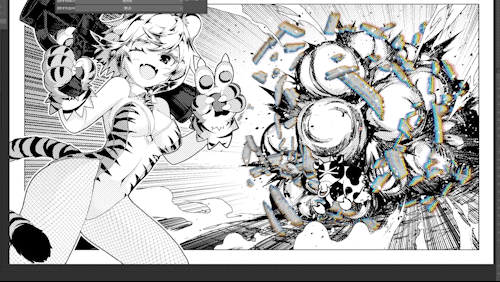
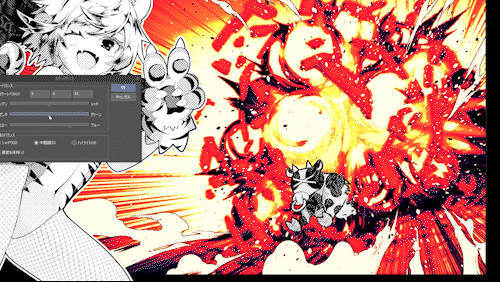
9. Draw motion blur with the [Chromatic Aberration] filter
A new Chromatic Aberration filter has recently been added to the plugin store.
This filter is originally a filter for creating color shift, but I would like to use it instead of motion blur because it can obtain lines like vibration blur.
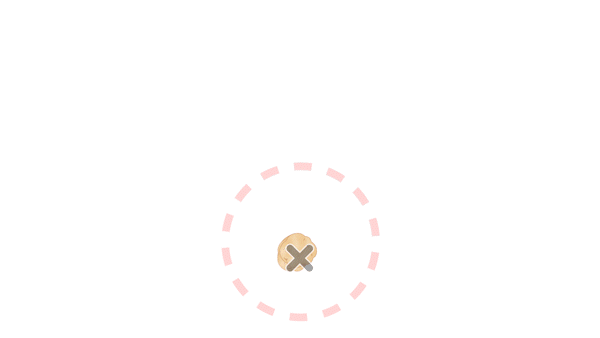
Try copying a layer of rubble, untoning it, combining it into a single color layer, and then applying the Chromatic Aberration filter. Align the center of the filter [red cross] with the center of the explosion.
In addition, use [Radiation Blur] in the [Blur] filter to blur and tone.
I was able to make it feel like motion blur. This seems to be useful for expressing shock!
10. Adjust the entire explosion with the distortion tool
The whole explosion felt a little stiff, so I inflated it with the [Liquify tool].
It's easy to get caught up in the details and lose track of the overall movement and shape balance, but with this tool you can easily adjust the entire effect later, so you can focus on drawing the details. can.
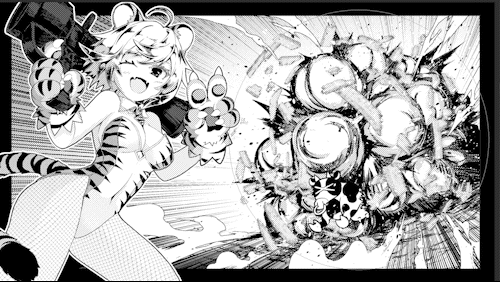
11. Add the light emission of the explosion
Finally, I don't feel like it's emitting light, so I draw light in white tones.
The radiant blur of the filter makes it feel like it is emitting light, and the explosion is complete!
12. Colorization of the explosion
Let's color the explosion for the final bonus.
As a preliminary preparation, remove the tone and multiply it by gray, and combine all the layers into one. In addition, familiarize with Gaussian blur and radiant blur.
I made a [Gradient Map] from [New Tone Correction Layer] in the [Layer] menu, selected a set of my favorite sunset from the gradation set, and adjusted the highlights a little white.
[Gradient map] is a color tone correction layer that assigns colors according to brightness, and is one of the methods to add color to monochrome pictures.
To finish, adjust the color tone with the color balance of the color tone correction layer,
In addition, the chromatic aberration filter creates a motion blur-like effect throughout.
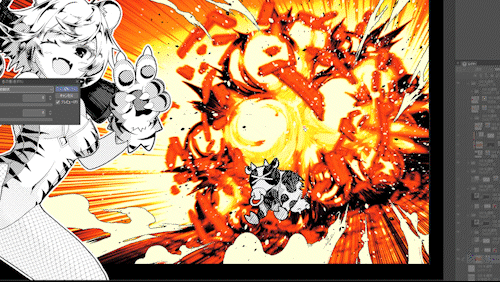
Use the [Contrast] filter to increase the brightness and darkness.
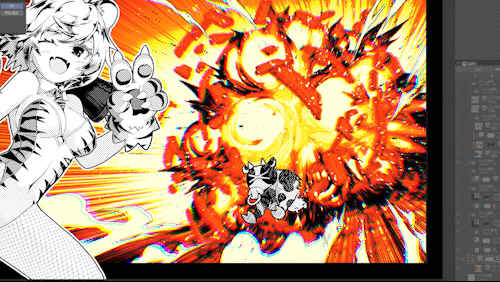
Change the color of the rubble a little and you're done!
That's how to draw an explosion with the new Distortion Tool.
If you don't want to hand-paint an explosion, look for a brush for the explosion and try the [Liquify tool]!
How to use as a bonus character
[Liquify tool] was useful not only for effects but also for drawing other characters.
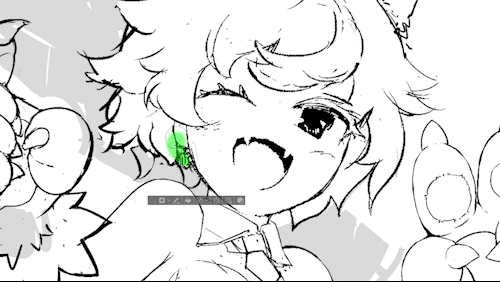
It was also useful when adjusting rough sketches
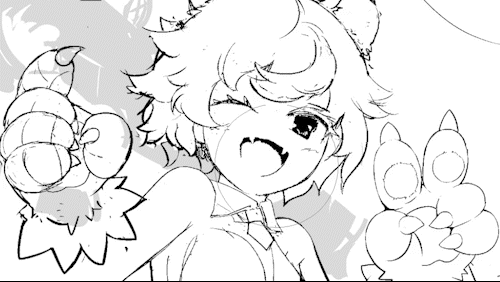
By enclosing it in the selection range, it was possible to use it partially.
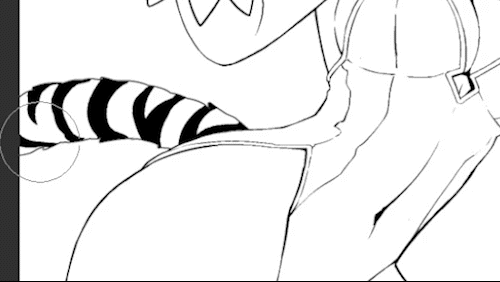
Adjust the pattern of the tiger on the tail,
It was also convenient to use for adjusting fishnet tights.
I'm sure there are many other ways to use it.
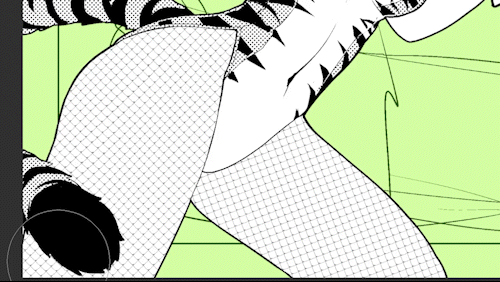
However, in actual manga, the tone of these fishnet tights and clothing patterns is often left as it is without being deformed along the solid. Unless the pattern or texture tone is very close to the camera in the scene of the show, it is strangely easier to see the entire screen of the manga if you leave it flat without deforming it. It is thought that this is because the screen of a manga is a deformed art that composes a three-dimensional effect with lines and planes, and deformation that matches the actual three-dimensional shape contradicts this property.
This tool is useful, but it's a good idea to keep in mind that there are some options you don't use for the sake of screen visibility.
At the end
I tried all the ways I came up with.
It's a tool that has just been added, so I think there are still many hidden uses. I hope everyone will try various things with the intention of finding a good way to use it.
Users who liked this post


Comment